
Building A Spoken Digit Recognition Model With Edge Impulse

Made by shakhizat / Artificial intelligence / Robotics / Voice / IoT
About the project
In this article, I'll show how to train a custom machine learning model with Edge Impulse and deploy it to the Arduino Nano 33 BLE Sense.
Project info
Difficulty: Difficult
Platforms: Edge Impulse
Estimated time: 3 hours
License: GNU General Public License, version 3 or later (GPL3+)
Items used in this project

Story
One of the most exciting features of artificial intelligence (AI) is NLP(Natural Language Processing). It is one of the most researched and studied topics of today’s generation, it helps to make machines capable of handling human language in the form of speech as well as text.
In this step, you are going to use your audio classification model for the Spoken Digit Recognition System. It recognizes nine spoken English digits (from one to nine) in a speech and silence environment condition. I will show you how you can use Edge Impulse to achieve this. Edge Impulse is Software as a Service (SaaS) web platform that allows developers to deploy powerful ML models to edge devices without possessing deep knowledge of programming or AI, ML concepts.
Here is a sneak peek of what's about to happen:
- Collecting images for training
- Upload dataset to Edge Impulse to train the model.
- Feature Extraction
- Training of the model
- Export the model to be analyzed by netron.app
- Deploy to Arduino Nano 33 BLE Sense board
- Real-time data evaluation and testing
Let’s get started!
Create and Train the Model in Edge ImpulseEdge Impulse is a web-based tool that helps us quickly and easily create AI models that can then be used in all kinds of projects. We can create Machine Learning models in a few simple steps and users can build custom image classifiers with nothing more than a web browser.
As with any deep learning task, the first most important task is to prepare the dataset. We will use the images from Google’s TensorFlow Datasets, publicly available online. The Speech Commands dataset that we are using for this tutorial is stored in wave files that are all one second or less.
The dataset can be downloaded as follows.
http://download.tensorflow.org/data/speech_commands_v0.01.tar.gzGo to Edge Impulse platform, enter your credentials at Login (or create an account), and start a new project.
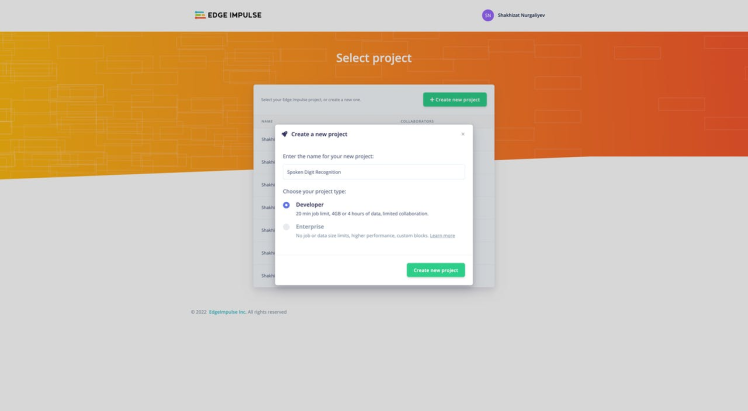
You can select either an image, sound, or pose project. Let’s select an Audio project.Click Go to the uploader button.
And upload files. We will be adding the dataset to the respective classes. You can drag-drop the files.
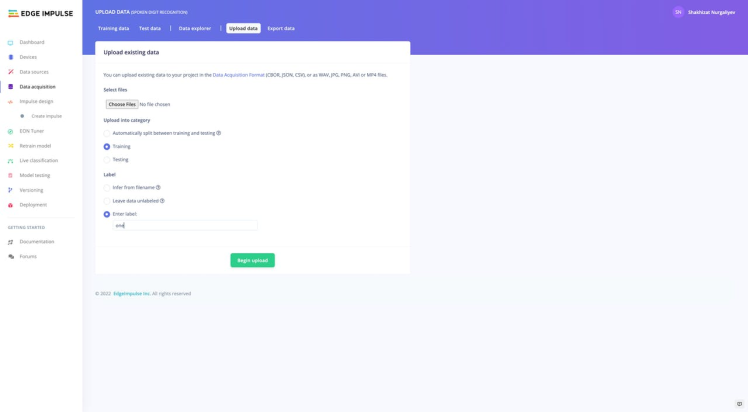
The data set has 10 classes. There are: eight, five, four, nine, one, seven, silence, six, three, two. You’ll always need a background noise class called silence, to detect when no noise is happening at all.
It would look something like this:
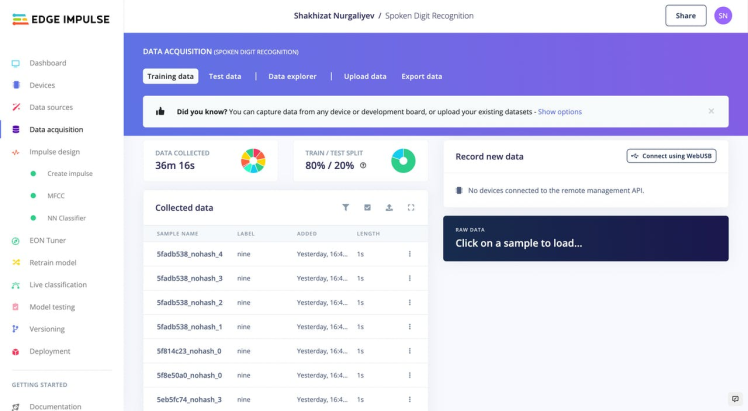
In my case, I uploaded 300 audio samples for each class. We should collect enough samples for each of our classes. So, in total, around 3000 audio samples were taken to train the model.
After uploading the images for each classes we will be moving on to the splitting process. Any machine learning training procedure involves first splitting the data randomly into two sets. You can do it using the Perform train/test split functionality available in the Edge Impulse. Navigate to Dashboard section and select Perform train/test split.This will automatically split your data between a training class (80%) and a testing class (20%).
Once you have set up all of your classes and are happy with your datasets, it is time to train the model. Navigate to Impulse Design on the left navigation menu.

Select Add a processing block and add Audio (MFCC). MFCC stands for Mel Frequency Cepstral Coefficients. So, it will try to convert audio into some kind of features based on time and frequency characteristics that will help us to do classification. Then select Add learning block and add Classification (Keras). Click Save Impulse
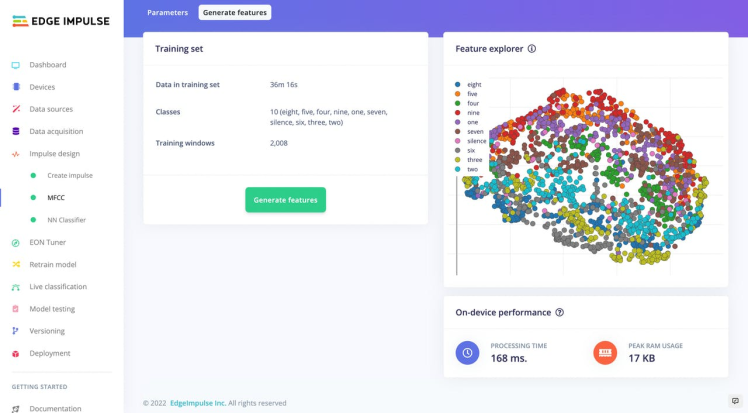
Then navigate to MFCC. Feature extraction is the process of discovering a value or a group of values that can be used to identify entities like objects, character, person, etc. MFCC is often used for speech recognition tasks.
Click Save parameters and finally press Generate Features.
Next, click on NN Classifier on the navigation menu. We will train a model for 500 epochs and learning rate as 0.0005. Click the Start training button. Training the model can take a while. While training is in progress, you'll see a progress bar. Training should take around 10 minutes or less using the 500 epochs.
When the training process completes you should have a result like the picture shown below:
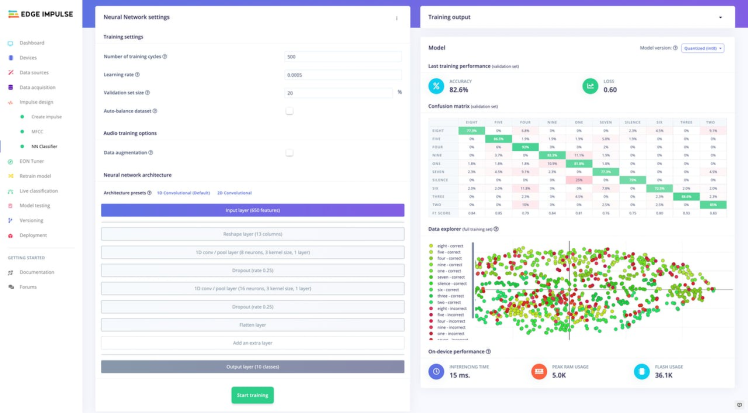
Train data was passed through the first 1D-convolutional layer. One-dimensional vector is easy to use for classification purposes, and thereby it was used to flatten the data. The dropout layer was used to reduce the chance of overfitting.
We get a validation accuracy of 82.6%. Increasing the number of training epochs can potentially increase this accuracy score.
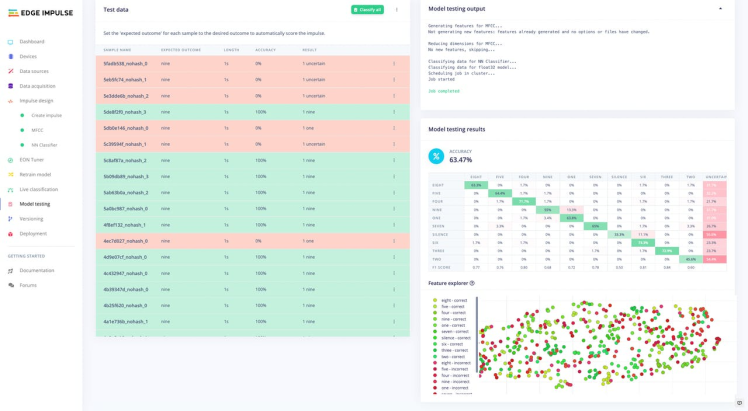
After the training is complete, you can test the model with live data. Navigate to Model Testing and click Classify all.
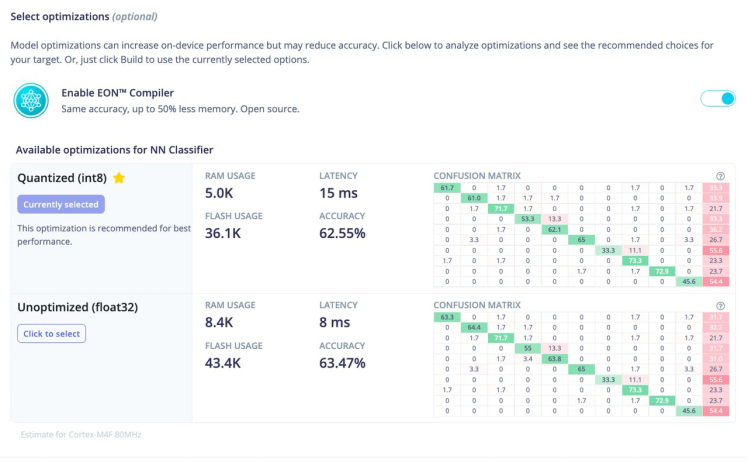
Finally, the final Quantized model file(int8) is around 7KB in size. This quantized model is expected to take around 15ms in inference time, using 5.0Kb in RAM and 36.1Kb in ROM.
Inspecting the model using Netron(optional)It is always interesting to take a look at a model architecture as well as its input and output formats and shapes. To do this, use the Netron web application.
Edge Impulse also allows for the model to be exported as a tensorflow lite model that will run on the Arduino Nano 33 BLE Sense board. Navigate to Dashboard section and select the format you want to export to from the list below.
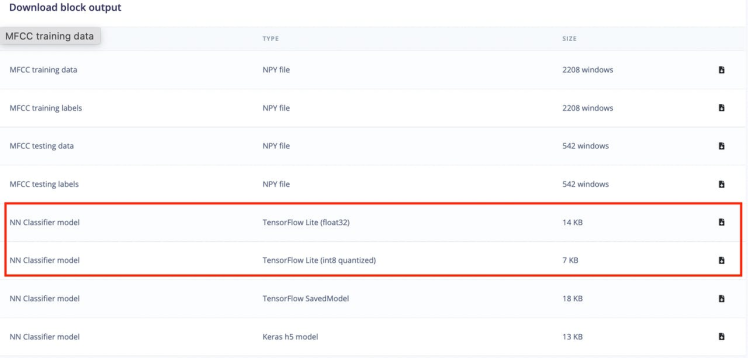
And, as you know, Edge Impulse tool based on TensorFlow Lite open-source software library. Because a model might have millions of parameters, the 75% size reduction from 32 bit float to 8 bit integers alone makes it worthwhile. However, the quantization process can reduce the performance of the model, as going from a 32-bit floating point to a 8-bit integer representation means a loss in precision.
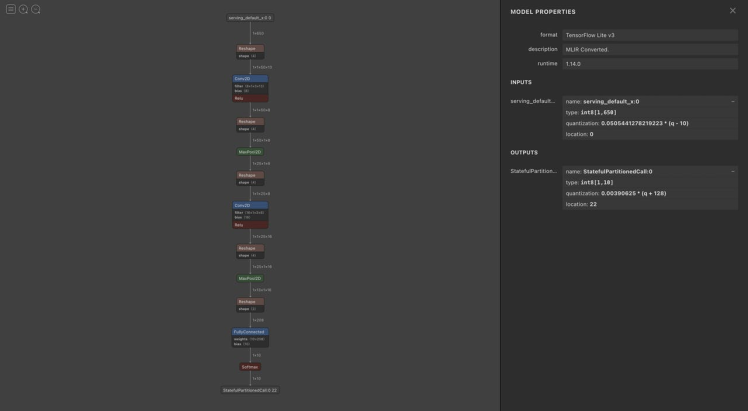
Click serving_default_x:0: we observe that the input is of type int8 and of size [1, 650]. Now let's look at the outputs: we have 10 classes, so we see that the output shape is [1, 10].
Once you are satisfied, deploy the model to use it in an application.
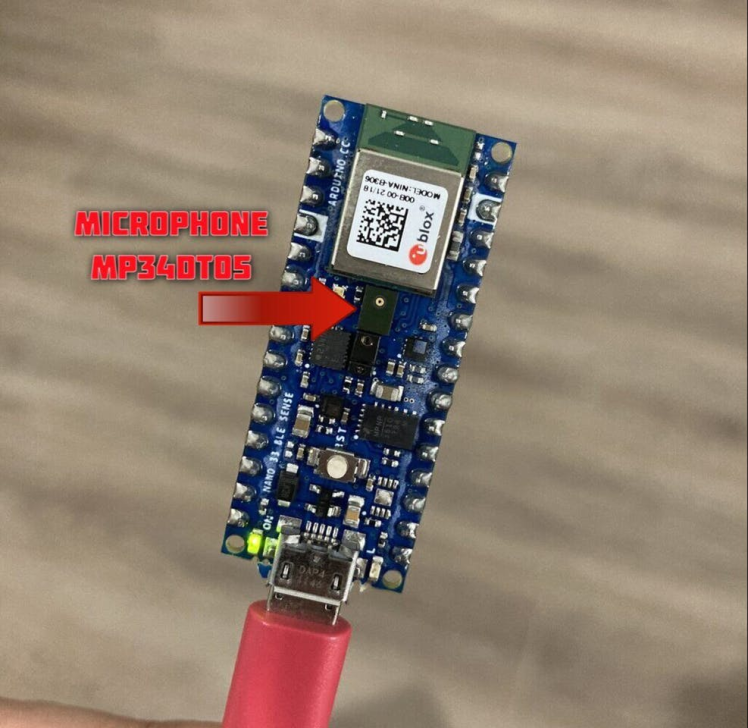
Deploying the Trained Model to Arduino Nano 33 BLENow it is time to download the library and import it into the Arduino IDE. Our edge device for this project is an Arduino Nano 33 BLE Sense board.
Go to the Deployment tab of the Edge Impulse. Click your edge devices type of firmware. In my case it is Arduino Library.

Make sure that EON Compiler option is enabled. It significantly helps to reduce the flash memory usage and run faster on your neural network in 25-55% less RAM.
At the bottom of the section, press the button Build. A zip file will be automatically downloaded to your computer, your browser should have saved a file called ei-️spoken-digit-recognition-arduino.zip. Unzip it.

Now, we want to perform real-time inference on the Arduino Nano 33 BLE Sense board so that it will respond to spoken words as they occur. It's microphone always listening, which converts every second of audio to the mel frequency cepstral coefficients (MFCCs).
Start the Arduino IDE. Then, File > Open > select the nano_ble33_sense_microphone.ino file you want to open. Connect Arduino board using a USB Cable. Select the Arduino Board and Port. Upload ino file to Arduino
Arduino example generated by Edge Impulse captures audio from the Arduino Nano 33's microphone and then attempts to detect the keywords spoken. I slightly modified code by increasing the delay time from 2 seconds to 5.
Open the Arduino Serial Monitor. Set the baud rate to 115200. If everything goes correctly, you should see the following:
Starting inferencing in 5 seconds...
Recording...
Recording done
Predictions (DSP: 203 ms., Classification: 5 ms., Anomaly: 0 ms.):
    eight: 0.00000
    five: 0.00000
    four: 0.00000
    nine: 0.00000
    one: 0.00000
    seven: 0.00000
    silence: 0.99609
    six: 0.00000
    three: 0.00000
    two: 0.00000
Credits
Related products

Leave your feedback...