
Build An Fm Radio Player With Meadow

Made by jorgedevs
About the project
Learn how to make an FM radio with a TEA5767 radio module, push buttons and a I2C OLED display, all using Meadow. Foundation.
Project info
Difficulty: Easy
Platforms: Microsoft, SparkFun, Meadow, Wilderness Labs
Estimated time: 1 hour
License: Apache License 2.0 (Apache-2.0)
Items used in this project
Hardware components


View all
Story
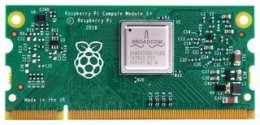
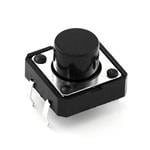
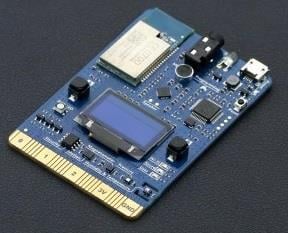
Lets build a full functioning FM radio player using a TEA5767 FM radio module, and an intuitive UI using push buttons to change stations and an OLED display to see the station you're listening to. Most of the components needed to build this project is included in the Wilderness Labs Meadow F7 w/Hack Kit Pro.
Both the radio module and the display uses an I2C bus protocol that helps you connect these peripherals with only 2 pins on the Meadow board. You can read more about I2C here. We'll be making a Meadow Application project that runs full.NET, and we'll use Meadow.Foundation to simplify the logic to control all the peripherals.
Meadow.Foundation Is a platform for quickly and easily building connected things using.NET on Meadow. Created by Wilderness Labs, It's completely open source and maintained by the Wilderness Labs community.
If you're new working with Meadow, I suggest you go to the Getting Started w/ Meadow by Controlling the Onboard RGB LEDproject to properly set up your development environment.
Step 1 - Assemble the circuitConnect your radio player like the following circuit. Since both the display and the radio module use I2C, make sure you connect them appropriately in the CLK (D08) and SDA (D07) pins:
RadioPlayer project circuit

RadioPlayer project circuit
Step 2 - Create a Meadow Application projectCreate a new Meadow Application project in Visual Studio 2019 for Windows or macOS and name it RadioPlayer.
Step 3 - Add the required NuGet packagesWindows
Right-click on the RadioPlayer project and click Manage NuGet Packages. Search and install the following packages to our project:
macOS
Alt-click on the RadioPlayer project in the Solution Explorer, and click Add => Add Nuget Package to open the NuGet Package window. Search for the following packages and add them to the project:
Step 4 - Write the code for RadioPlayerIn the MeadowApp main class, copy the following code below:
using System;using System.Collections.Generic;using System.Threading;using Meadow;using Meadow.Devices;using Meadow.Foundation.Audio.Radio;using Meadow.Foundation.Displays;using Meadow.Foundation.Graphics;using Meadow.Foundation.Sensors.Buttons;using Meadow.Hardware;namespace RadioPlayer{ public class MeadowApp : App<F7Micro, AnalogReadApp> { List<float> stations; int currentStation = 0; TEA5767 radio; SSD1306 display; GraphicsLibrary graphics; PushButton btnNext; PushButton btnPrevious; public MeadowApp() { InitializePeripherals(); stations = new List<float>(); stations.Add(94.5f); stations.Add(95.3f); stations.Add(96.9f); stations.Add(102.7f); stations.Add(103.5f); stations.Add(104.3f); stations.Add(105.7f); DisplayText("Radio Player"); Thread.Sleep(1000); radio.SelectFrequency(stations[currentStation]); DisplayText($"<- FM {stations[currentStation]} ->"); } void InitializePeripherals() { Console.WriteLine("Creating Outputs..."); var i2CBus = Device.CreateI2cBus(); radio = new TEA5767(i2CBus); display = new SSD1306(i2CBus, 60, SSD1306.DisplayType.OLED128x32); graphics = new GraphicsLibrary(display); graphics.Rotation = GraphicsLibrary.RotationType._180Degrees; btnNext = new PushButton( Device.CreateDigitalInputPort( Device.Pins.D03, InterruptMode.EdgeBoth, ResistorMode.Disabled)); btnNext.Clicked += BtnNextClicked; btnPrevious = new PushButton( Device.CreateDigitalInputPort( Device.Pins.D04, InterruptMode.EdgeBoth, ResistorMode.Disabled)); btnPrevious.Clicked += BtnPreviousClicked; } void BtnNextClicked(object sender, EventArgs e) { if (currentStation < stations.Count-1) { DisplayText(" >>>> ", 0); currentStation++; radio.SelectFrequency(stations[currentStation]); DisplayText($"<- FM {stations[currentStation]} ->"); } } void BtnPreviousClicked(object sender, EventArgs e) { if (currentStation > 0) { DisplayText(" <<<< ", 0); currentStation--; radio.SelectFrequency(stations[currentStation]); DisplayText($"<- FM {stations[currentStation]} ->"); } } void DisplayText(string text, int x = 12) { graphics.Clear(); graphics.CurrentFont = new Font8x12(); graphics.DrawRectangle(0, 0, 128, 32); graphics.DrawText(x, 12, text); graphics.Show(); } }}From the MeadowApp's constructor, we first call InitializePeripherals(), where the display, FM radio module and push buttons are all initialized and configured. After that, we populate a list of known local radio stations that we'll be able to cycle back and forth using the push buttons.
In the push button event handlers BtnNextClicked and BtnPreviousClicked, notice one is used to go to the next station on the list and the other to go to the previous station, and both call the DisplayText() method which has all the logic to draw the UI on the I2C display.
Click the Run button in Visual Studio. It should look like to the following GIF:
RadioPlayer project running

RadioPlayer project running
Check out Meadow.Foundation!This project is only the tip of the iceberg in terms of the extensive exciting things you can do with Meadow.Foundation.
It comes with a huge peripheral driver library with drivers for the most common sensors and peripherals.
- It comes with a huge peripheral driver library with drivers for the most common sensors and peripherals.
- The peripheral drivers encapsulate the core logic and expose a simple, clean, modern API.
- This project is backed by a growing community that is constantly working on building cool connected things and are always excited to help new-comers and discuss new projects.
Schematics, diagrams and documents
Code
Credits
Related products


Leave your feedback...