
Bathroom Ventilation Controlled By Raspberry Pico

Made by tarman34 / Home Automation / Sensors
About the project
Automated control of bathroom's ventilation fan using RPi Pico based on light sensor and DHT11 temperature/humidity sensor.
Project info
Difficulty: Moderate
Platforms: Raspberry Pi
Estimated time: 3 days
License: GNU General Public License, version 3 or later (GPL3+)
Items used in this project
Hardware components


View all
Story
Warning: This project works with high AC voltage, if you decide to follow this project, only on your own risk!
Situation:
Bathroom situated in the middle of a flat. There are no windows so the only possible way to ventilate this room is by the fan situated in the maintenance room next to bathroom which sucks in all the humid air from bathroom out of the house. This fan has its own switch for manual controlling.
Problem:
It is hard for me and also family members to not forget to turn on/off the fan everytime after getting shower to ventilate the room, so many times the bathroom stays humid for a long time, or, on the other hand, fan is running long unnecessarily.
Idea:
To automate switching of the fan and its running time somehow to prevent all above problems. As I´m using Raspberry Pi 4 and Zero for my other home projects, using the RPi was the best solution for me. For this projects I chose the RPi Pico for its minimalism and low power consumption.
Raspberry should control the fan upon the following parameters/states:
- Presence of someone in bathroom by light sensor
- Humidity value
- The fan should start after someone leaves the bathroom and humidity is above limit
How should it work?
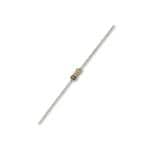
As I didn’t want to change the existing electrical installation much I had to find another way how to check if somebody is in the bathroom or somebody leaves it. As the bathroom has no windows the only available light there is the switchable lamp, so I got an idea that I can check if the light is on/off by light sensor. As I didn’t have any I decided to create it out of the garden lamp’s photovoltaic cell.
The whole cycle should look like this (Pseudo code):
- Checks for the light on – in 3 min cycles (sufficient to “catch” someone getting a shower)
- Then starts measuring of humidity – in 1 min cycles only when the light is on
- After swithing the light off:
- If humidity has risen above the limit - starts the fan for a given time – 15 minutes
- If humidity stays the same – nothing happen
- Then returns into main cycle
The cycle above ensures that the fan will start only when nobody is in the bathroom (after leaving) and humidity is above the limit.
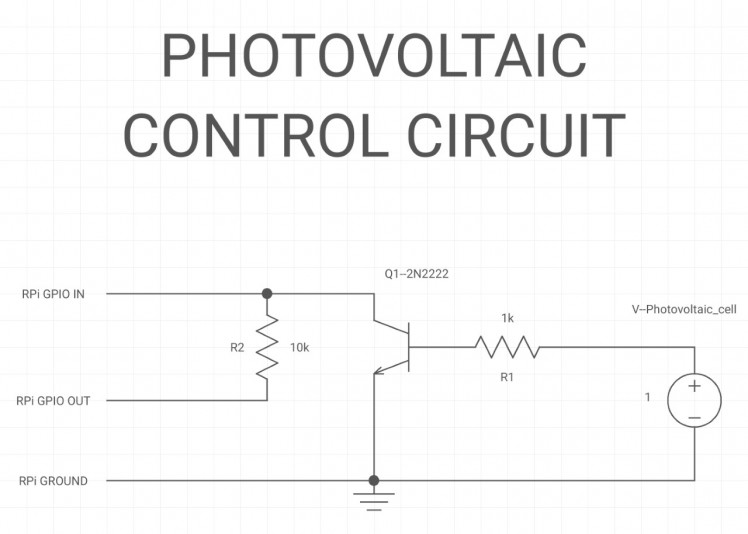
How the light sensor works:
Simple Photovoltaic cell generates voltage upon the amount of light it is exposed to. When the light is off it gives only about 0.1 – 0.2V and when the light is switched on it generates about 0.8 – 0.9V which is sufficient to open the transistor 2N2222 and pull down the GPIO circuit controlled by Pico.
DHT11 Temperature/Humidity sensor connection:
This sensor is simply connected to Pico with 10k Ohm pull down resistor as follows:

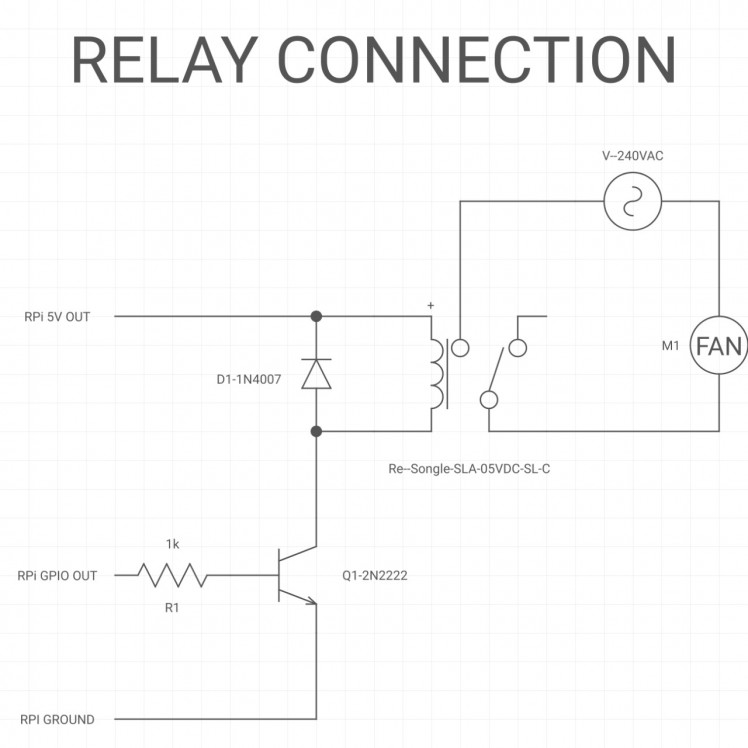
Relay board connection:
This connection is tested from my previous projects and works fine.
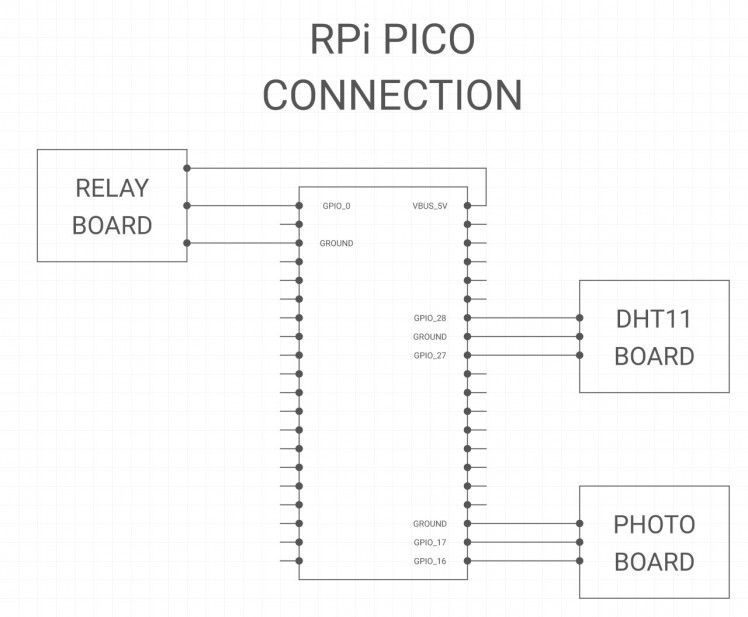
Raspberry Pi Pico connection:
Connection of all modules as follows:
Installation:
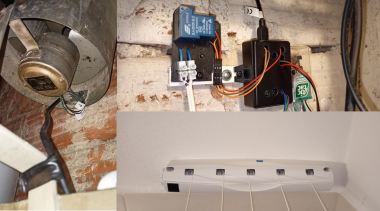
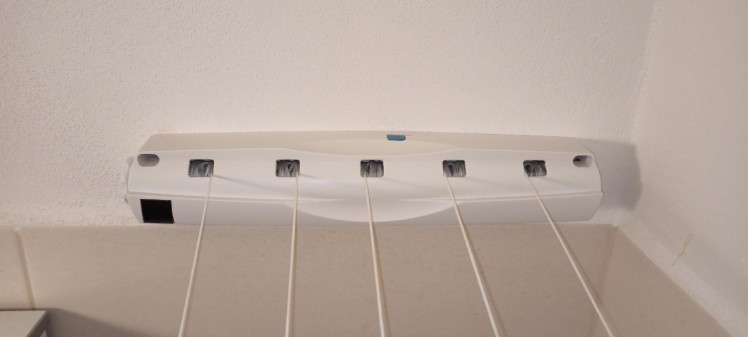
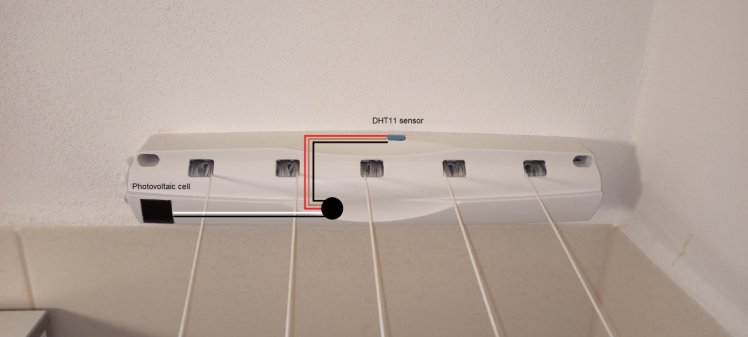
Bathroom – Photovoltaic cell and DHT11 sensor installed into hanger for towels. I cut holes for both and I think this installation is not disturbing and barely visible. Details in photo. Wiring is hidden inside of the hanger and the hole into maintenance room is drilled under it.
Wiring diagram:
Maintenance room – Fan, RPi Pico, light sensor board and relay board are situated here, secured from humidity in bathroom. Installation is not so professional but working well. Details in photo.

Programming:
The code is written in Micropython uploaded into Pico from RPi 4 via Thonny IDE. It is very simple cycle as described earlier.
To be noticed:
RPi PICO is sleeping for the 99% of time. I chose longer intervals to get better power consumption and also all GPIO outputs are deactivated most of time. The light sensor circuit same as DHT11 sensor are powered only for the time of measuring, then disconnect again for sleeping.
As I found, most prefer to power supply the DHT11 with 5V output but it is sufficient and working fine for me to supply it with 3.3V GPIO pin, which is also easier for me to control. No more transistors are needed to control power out.
The same way the light sensor board is supplied, directly from 3.3V GPIO pin. This output is checked with another GPIO pin set as INPUT. If the light is switched on, transistor opens and ground the GPIO output through resistor, so there is not voltage on GPIO INPUT pin. (WARNING! I prefer to use this resistor and/or internal pull up/down resistors as without these you can shortcut and destroy your RPi)
DHT library:
As Micropython doesn’t include the DHT11 library, you need to upload your own into PICO. I found DHT library working fine here:
https://how2electronics.com/interfacing-dht11-temperature-humidity-sensor-with-raspberry-pi-pico/
Thanks to Alex Newton
Code
Credits
Related products


Leave your feedback...