

Arduino All In One Die!

Made by build-anything / 3D Printing / Displays
About the project
With this all in one electric Arduino die you can change the range of the die (1 to 3-21) and the amount of the dice to calculate (1-6). You can charge it, change all the settings with one button, and shake to roll the dice!
Project info
Difficulty: Moderate
Estimated time: 3 hours
License: Creative Commons Attribution-NonCommercial CC BY-NC version 4.0 or later (CC BY-NC 4+)
Items used in this project
Hardware components


Hand tools and fabrication machines
Story
Introduction
A few years ago I made a very simple, clunky and not at all elegant Arduino die. A while ago I thought it would be interesting to revisit this idea with all the new things I've learned, I was able to add settings to change the range (1 to 3-21) and amount of dice (1-6) to calculate!
I'll explain in detail how to make it in this article but if you're interested or just want to support me you can check out my 7min tutorial video or my channel (all photos in this article are from the video).
Tutorial
Step 1:
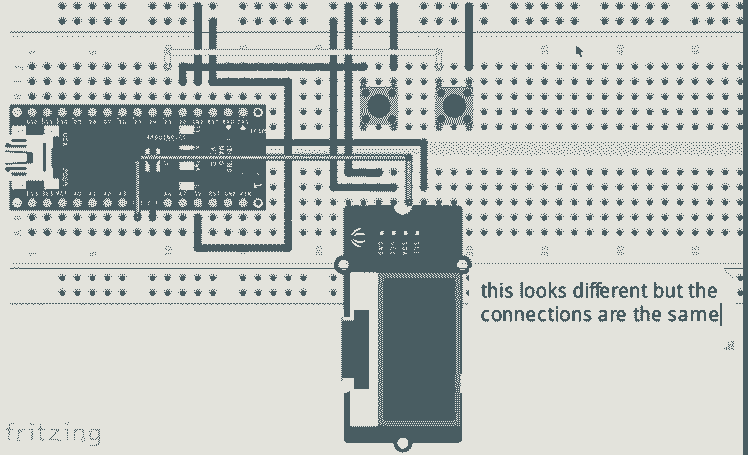
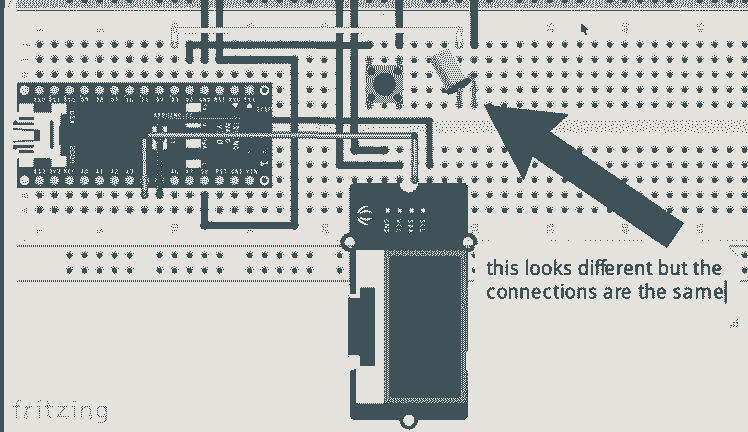
Start by assembling the circuit on a breadboard as shown in image 1 and here:
Step 2:
Now download the adafruit GFX and SSD1306 libraries from the library manager then upload the code and see if it works. If it does, great! If not it's a quick fix: go into the Adafruit_SSD1306.h and open it with the Notepad software on Windows (or the equivalent on Linux). Uncomment
//#define SSD1306_128_64
and comment
#define SSD1306_128_32.
Now upload it and it should work.
Step 3:
Test it, if it works you should be able to open the menu by long pressing the button connected to d2 and roll the die by clicking the button connected to d3.
Step 4:
3D print the case, you can download my models or you can design your own in Blender (my tutorial). Then finish the edges of with a precision knive and some sandpaper.

Step 5:
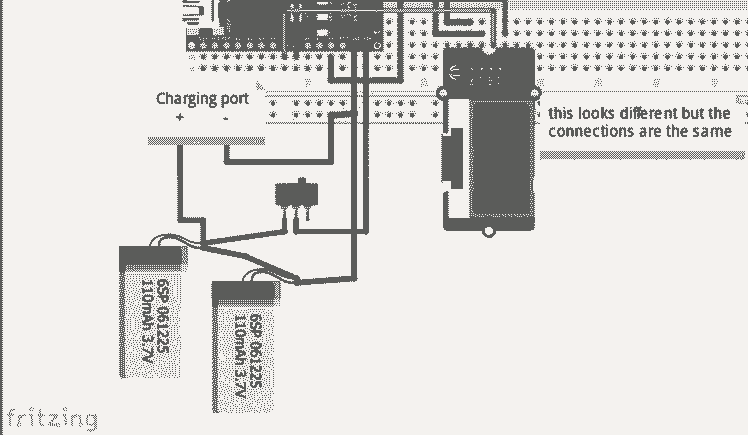
Solder the circuit from before together but replace the button connected to d3 with the tilt switch. Connect two wires to arduino vin and gnd as shown in image 2 and here:
Step 6:
Start gluing everything inside the case with some hot glue. I'd recommend starting with the display since it's at the bottom, then the button and arduino nano itself.

Step 7:
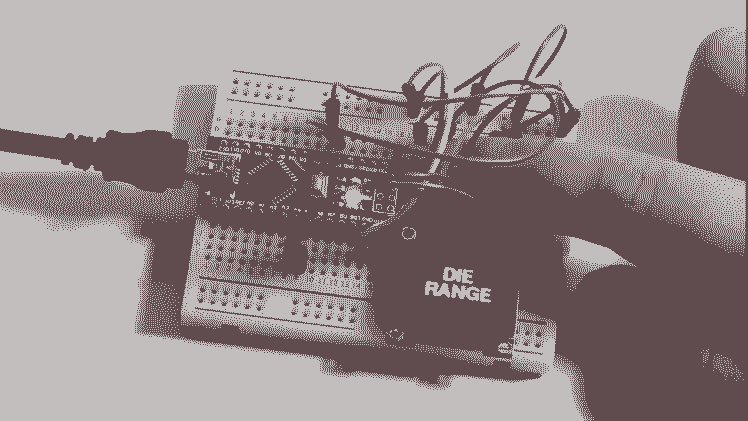
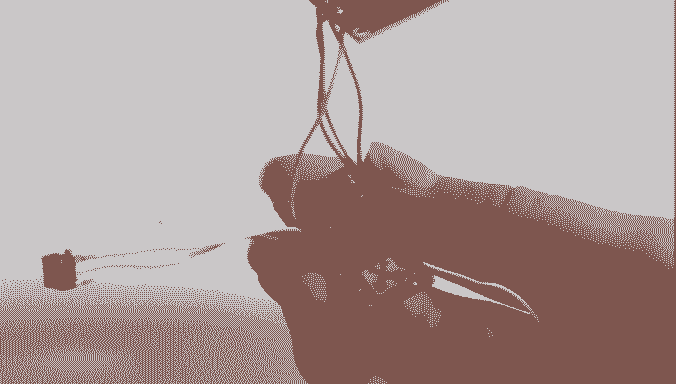
Glue the switch and DC jack to the case, and solder them to the arduino nano and lithium ion battery as shown (image 3 and here). I had to get this project done in time, so I connected two 3.7V batteries together (one 7-12V battery would be better).

Step 8:
Put the battery inside the case. If there's too much room just use some cardboard or something so it doesn't move around. Then use hot glue to glue the lid to the case (never put hot glue on the batteries!).
You've just made yourself a brand new all in one arduino based die!


Thanks & Conclusion
Thank you for reading! If you want to support me you can check out the video tutorial and subscribe if you want to. But most importantly, have fun!
Schematics, diagrams and documents
CAD, enclosures and custom parts
Code
Credits
build-anything
Hello! I love building stuff, I've been doing it for about 5 years now (even though I'm 14). If you're interested in what I make check out my page and my youtube channel!
Related products


Leave your feedback...