
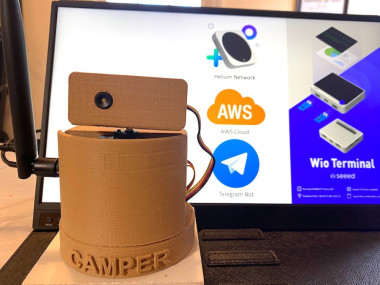
Ai Thermal Camera For Safe Camping (seeed+helium+aws) (v2)

Made by MITHUNDOTDAS / Artificial intelligence / Sensors / IoT
About the project
TinyML model running Wio Terminal can identify if animal or human is approaching even in the dark, sends data to Helium LoRa network to AWS.
Project info
Difficulty: Moderate
Platforms: Amazon Web Services, Seeed Studio, Edge Impulse, Helium
Estimated time: 2 days
License: GNU General Public License, version 3 or later (GPL3+)
Items used in this project
Hardware components

Story
This is version 2 of my previous project AI powered thermal camera for safe camping.
In the previous project, I used Wifi connection to send tinyML inference data to AWS IoT. As you can imagine, this device is meant for camping, away from your home wifi network, LoRa makes more sense instead of wifi connectivity. In this project, I am using Helium network which is the most popular choice these days due to broader network coverage and it's growing rapidly.
I am going to use same Edge Impulse model. If you are interested in tinyML part, please checkout my previous project. Here, I am going to explain how to hook up with helium and integrate helium with AWS.
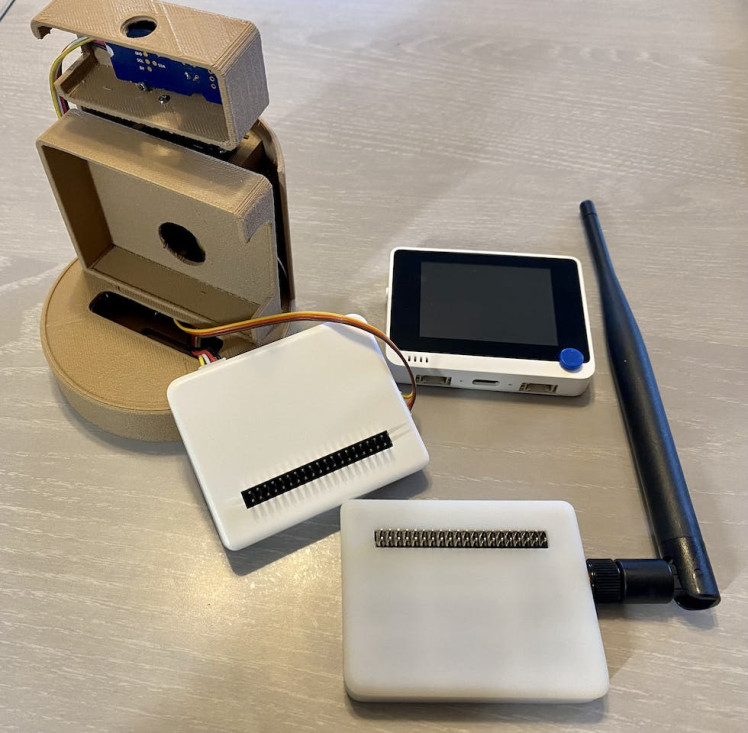
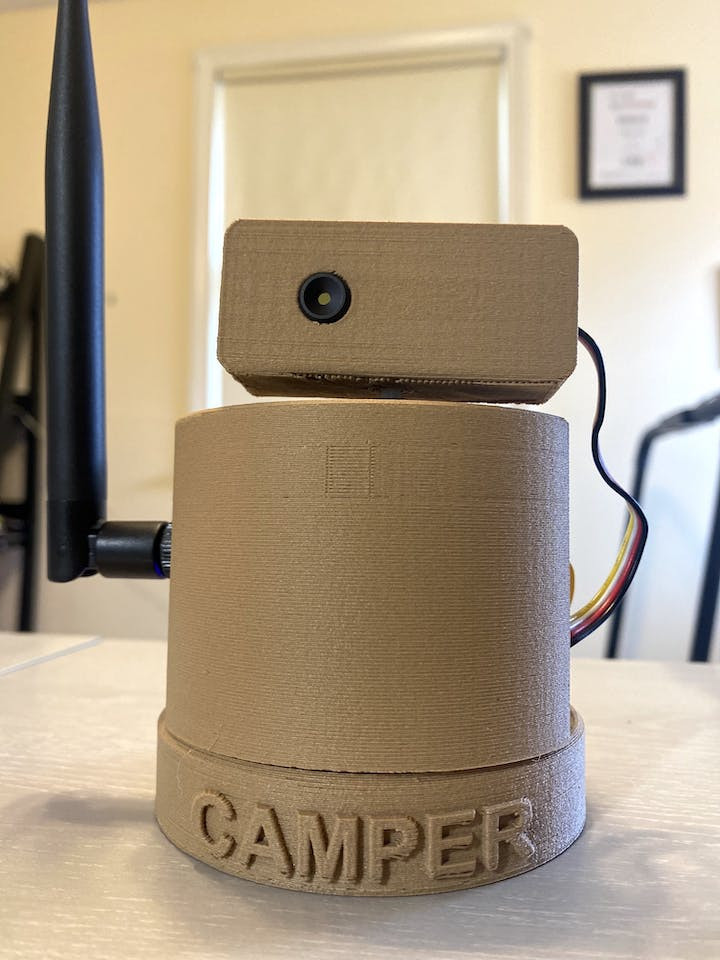
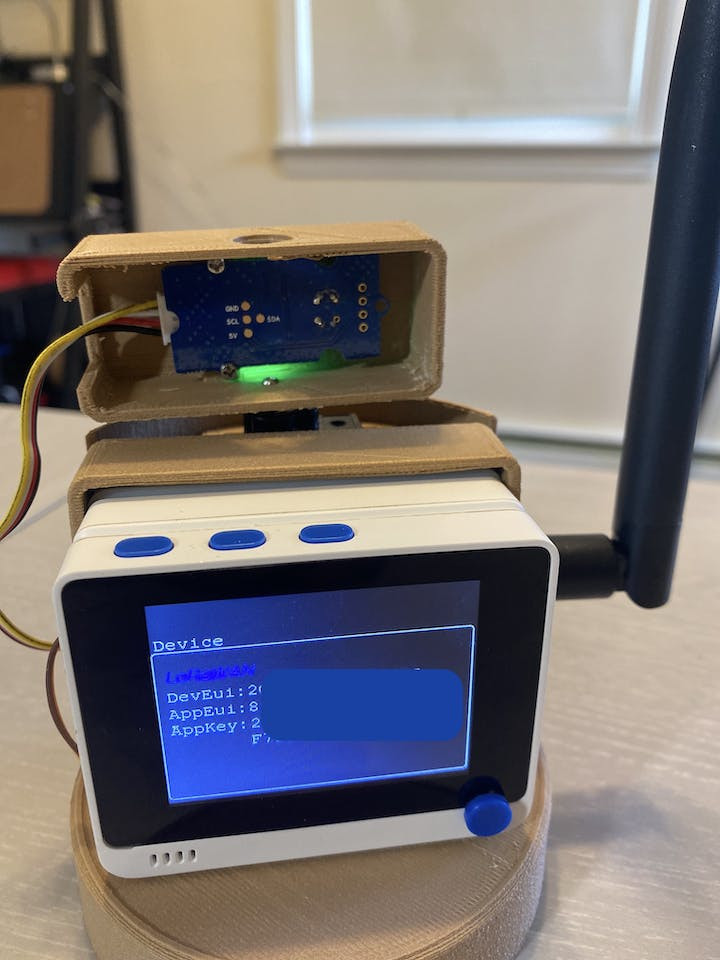
Required hardwares needed for this project are listed above. Connect the LoRa antenna with chassis, connect thermal camera to I2C port of battery chassis, connect servo motor to digital pin 0 of battery chassis. Then stack battery chassis on top of LoRa chassis and wio terminal on top of battery chassis.
Then upload the sketch WIO_Camper_Inference_lora.ino to Wio-Terminal.
LoRaWanBefore you go further, you need to understand some basics and may need to modify above code accordingly. LoRaWAN is a low-power, wide area networking protocol built on top of theLoRa radio modulation technique. It wirelessly connects devices to the internet and manages communication between end-node devices and network gateways. Each country has specific frequency bands and data rates (DR). Depending on DR, max payload size varies. In my program I am using US915 with DR 0 which gives me maximum payload size of 11 bytes. Ideally DR 2 works with helium but I could not get it working with wio chassis, so stuck with DR0 but it's alright as my payload size is 10 bytes.
E5_Module_Cmd_t E5_Module_Cmd[] ={
{"+AT: OK", 1000, "ATrn"},
{"+ID: AppEui", 1000, "AT+IDrn"},
{"+MODE", 1000, "AT+MODE=LWOTAArn"},
{"+DR", 1000, "AT+DR=US915rn"},
//{"+RATE", 1000, "AT+DR=0rn"},
{"CH", 1000, "AT+CH=NUM,8-15rn"},
{"+KEY: APPKEY", 1000, "AT+KEY=APPKEY,"2B7E151628AED2A6ABF7158809CF4F3C"rn"},
{"+CLASS", 1000, "AT+CLASS=Arn"},
{"+ADR", 1000, "AT+ADR=OFFrn"},
{"+PORT", 1000, "AT+PORT=2rn"},
//{"+LW", 1000, "AT+LW=LENrn"},
{"Done", 10000, "AT+JOINrn"},
{"Done", 30000, ""},
};
If you are outside of North America, you need to change frequency band, channels and port. Refer to this link for detail.
Register Device With HeliumYou need to create an account with helium console to register your device. You also need DC ( data credits to send data ). Once you are in console, navigate to devices page and add new device.
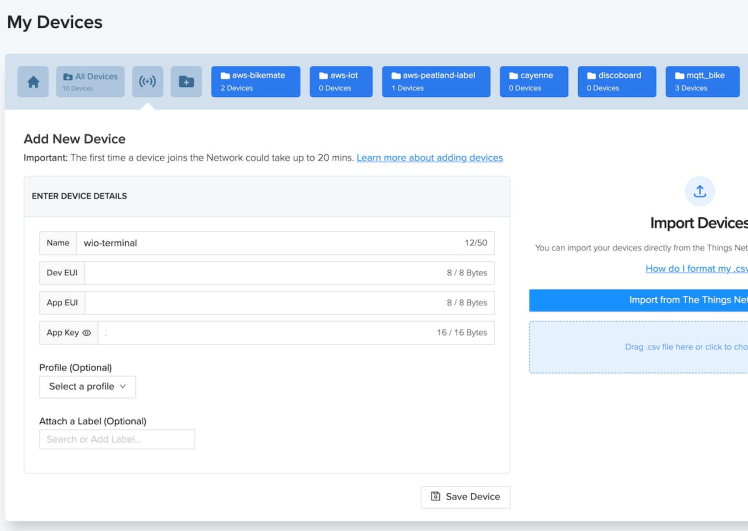
You need Dev EUI, App EUI & App Key. On wio terminal, slide the blue button to left and hold until the device info shows up. Enter this information on helium device. If your wio terminal is still connected to Arduino IDE, this information will be printed on serial console, so you can copy/paste from there. Follow this link for detail instruction. After you register your device, you need to create a label.
Next, you need to create a function. Navigate to Functions page, enter a name and choose "custom script". Then paste below javascript code and save.
function Decoder(bytes, port, uplink_info) {
var label = bytes[0];
var score = bytes[1];
var latitude = (bytes[5] | (bytes[4]<<8) | (bytes[3]<<16) | (bytes[2]<<24)) /10000;
var logitude = (bytes[9] | (bytes[8]<<8) | (bytes[7]<<16) | (bytes[6]<<24)) /10000;
var decoded = {
label: label,
score: score,
latitude: latitude,
logitude: logitude
}
return decoded;
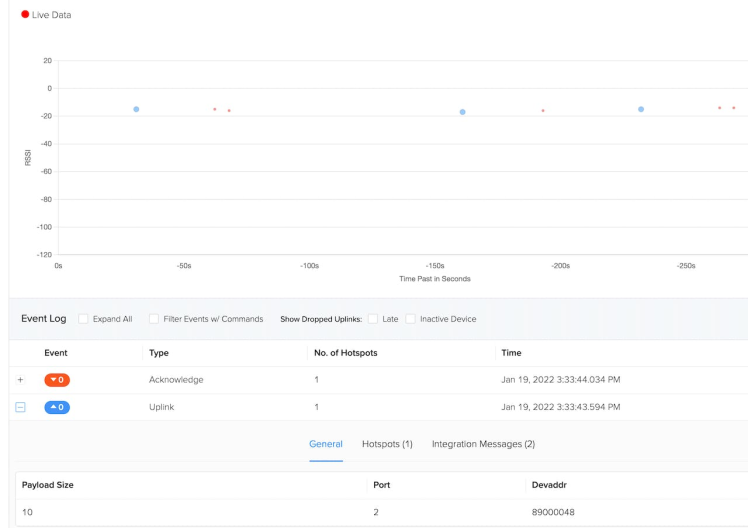
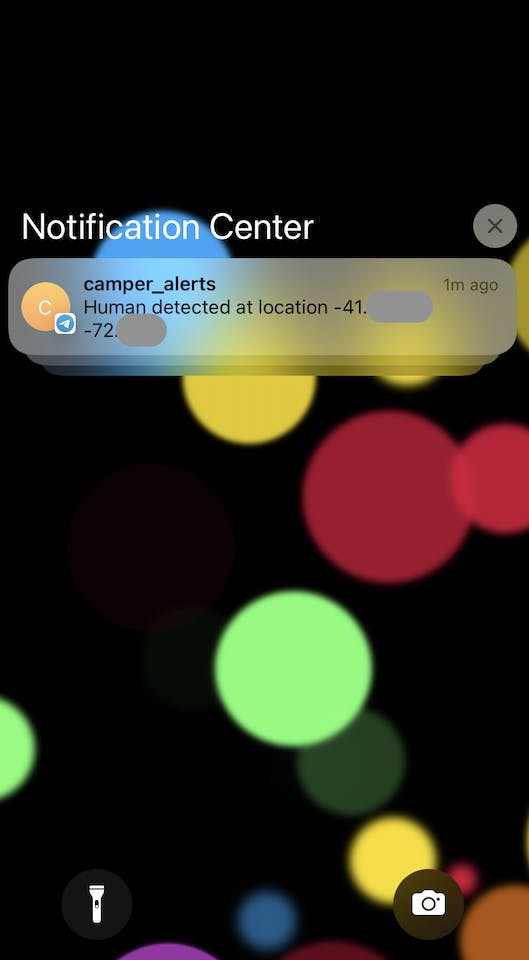
}At this point, you should see data coming from your device on helium live data section like below. Note that, payload size is 10 byte. Any data packet up to 24 bytes will consume 1 DC.
Follow this link from official helium website to integrate AWS IoT.
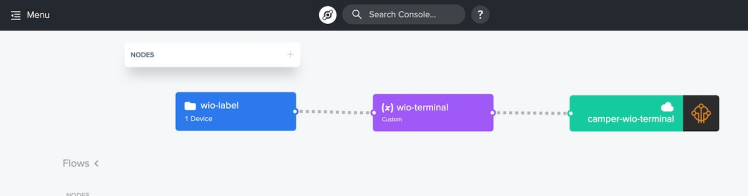
Once integration is done, navigate to Flows page on helium console and create your workflow as above. This basically connects your device label to aws integration and apply the custom script to decrypt base 64 encoded string.
Now you need to create a lambda function. You can find the lambda code in my repo under lambda folder. For easy deployment, I have deploy.sh which will deploy the python code from command line. You need to have aws cli configured before you can run. I am assuming you have basic knowledge of aws and not going through steps of configuration. Notice, you need to have Telegram bot access token and chat id.
Follow this project to setup telegram bot and obtain bot token & chat id.
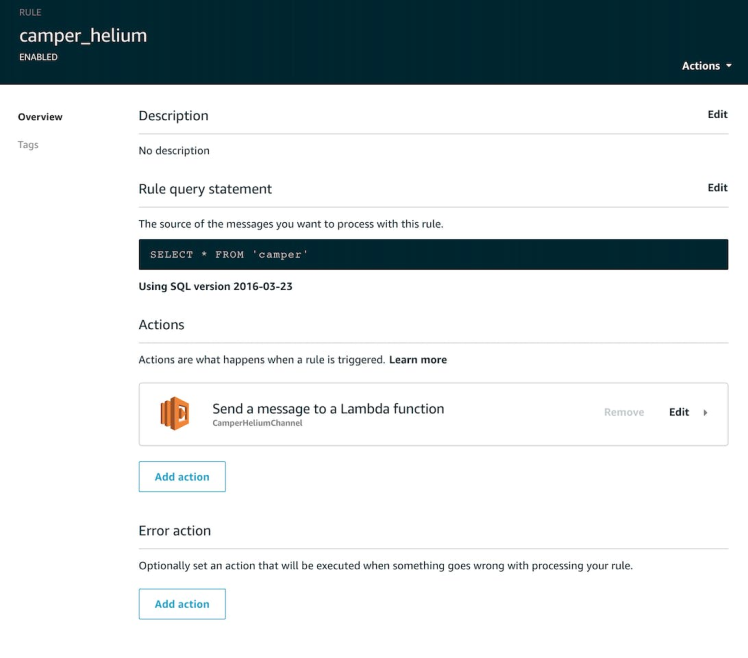
Once your lambda is deployed, go to AWS IoT Core and create a rule. Use the topic name you used on helium console and under actions, select the lambda function you just deployed.
That's it !!!
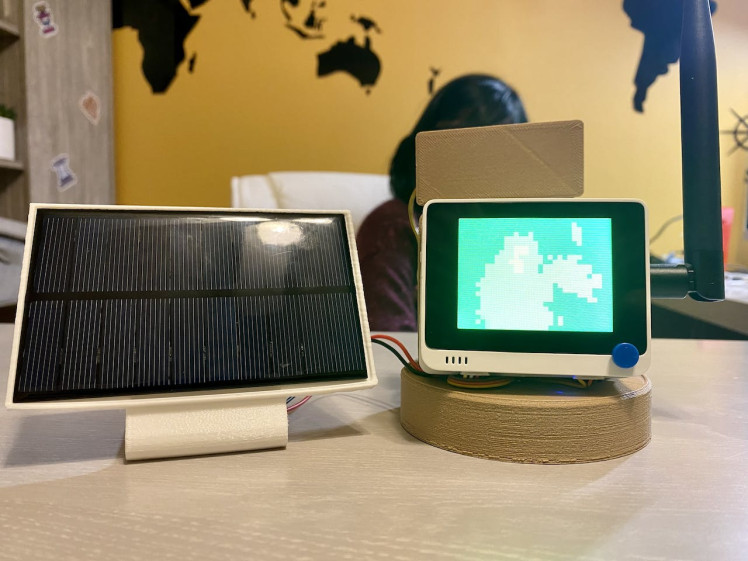
Now place the thermal camera in front of human or animal and you will get notification on your phone along with GPS location.
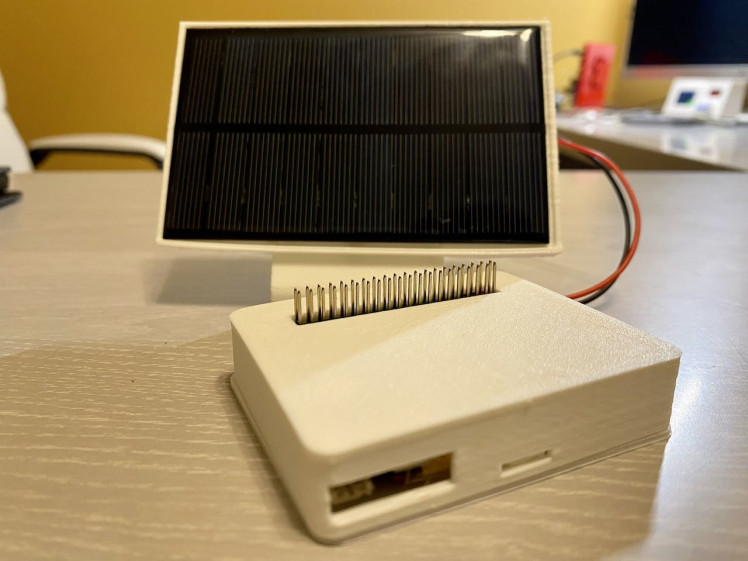
Now 3d print the case and go camping :)
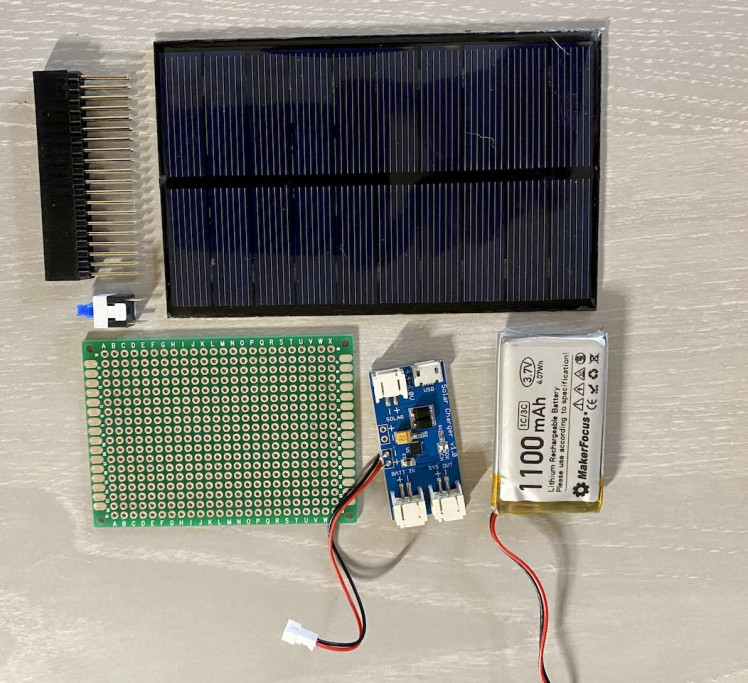
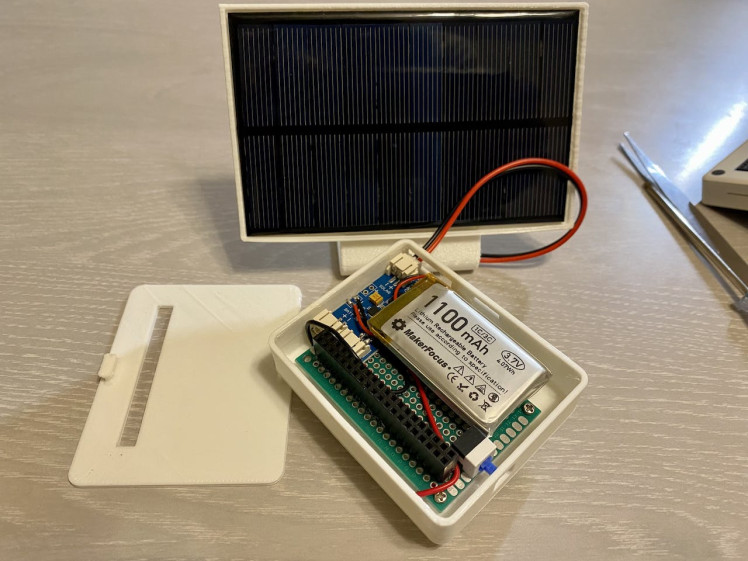
To improve the project further, I have designed a solar chassis for the wio terminal. It has 1100 mAh battery with a 110m by 69m 5V, 250 mA solar panel.
Leave your feedback...