
Ai Powered Thermal Camera For Safe Camping

Made by MITHUNDOTDAS / Artificial intelligence / Sensors / IoT
About the project
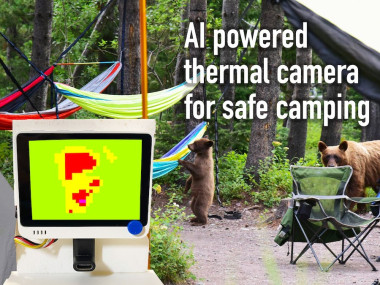
TinyML model running Wio Terminal can identify if animal or human is approaching even in the dark and alert campers.
Project info
Difficulty: Moderate
Platforms: Amazon Web Services, Seeed Studio, Edge Impulse
Estimated time: 1 day
License: GNU General Public License, version 3 or later (GPL3+)
Items used in this project

Story
I like camping but I am not a "camping enthusiast", I usually camp once or twice a year with my family. But there are numbers of camping enthusiast who goes to deep forest. While camping in deep forest is very adventurous, there is threat of wild animals such as bear, coyote etc. There are devices to track wild animals using camera and but problem is, camera does not work in the dark. And in most cases, wild animals attack campers in the night.
How Can We Solve?We need a device which can work in the dark and alert campers when any wild animal approaches. We cannot use regular camera for this. We need something which can work without light such as thermal camera.
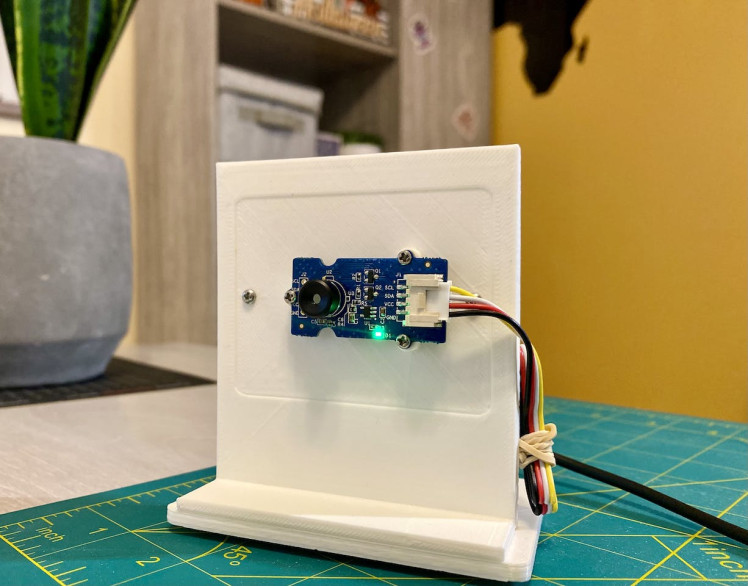
The Solution Is CamperIntroducing camper which is equipped with Grove MLX90640 IR thermal camera and Seeed's Wio Terminal. A tinyML model running on Wio terminal predicts if there is any animal or human approaching. If detected, data is sent to AWS IoT topic.
I have build the ML model using Edge Impulse Studio. As of writing this project ( Nov 2021), EI does not support thermal camera feed for data collection out of the box, so data collected from Wio terminal and forwarded to Edge Impulse to build the model. Data collection process was inspired by Naveen's project on hackster.
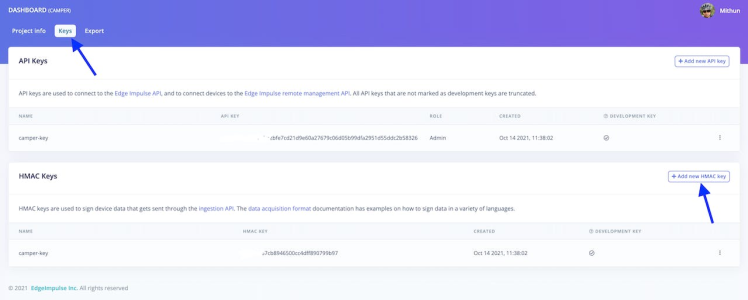
Create EI ProjectHead over to your EI account and create a new project. Navigate to "Keys" tab and add new HMAC key. Copy the key somewhere, you will need this later.
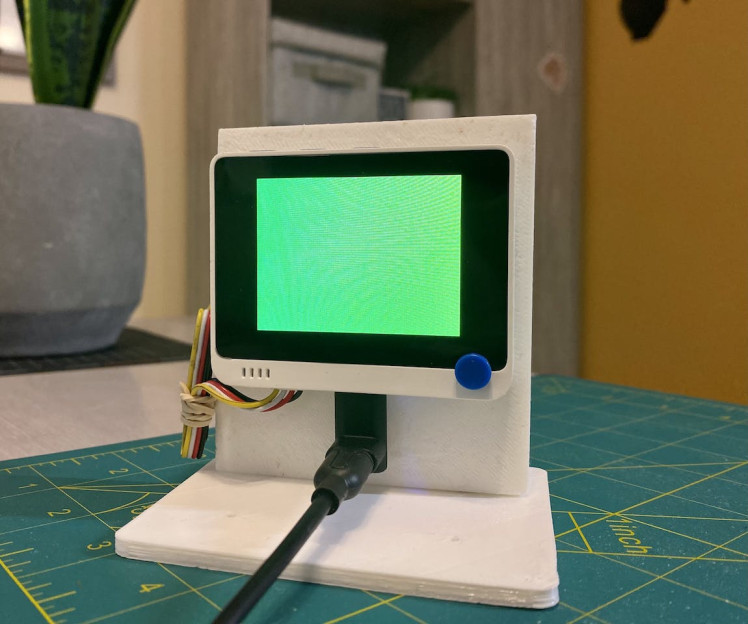
The IR thermal camera carries a 32x24 array of thermal sensors (MLX90640), it can detect the temperature of objects from feet away with the accuracy of ±1.5℃. In order to obtain the thermal image easily, the I2C protocol is used to get the low-resolution image from the camera. Data will be an array of 32x24 which is 768 temperature values. MLX90640 is connected to Wio terminal over I2C port and I have inserted SD card to capture readings in CSV file. The 3 buttons on the Wio Terminal are used to label the 3 classes
A - Animal , B- Human , C - Background
User the program WIO_Camper_Data_Collector.ino to collect data. Upload this program and start collecting data.
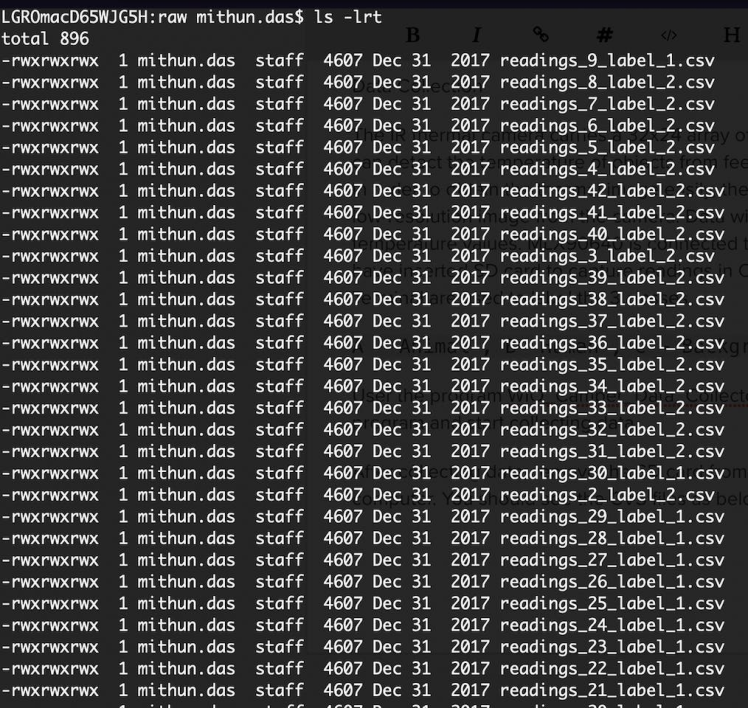
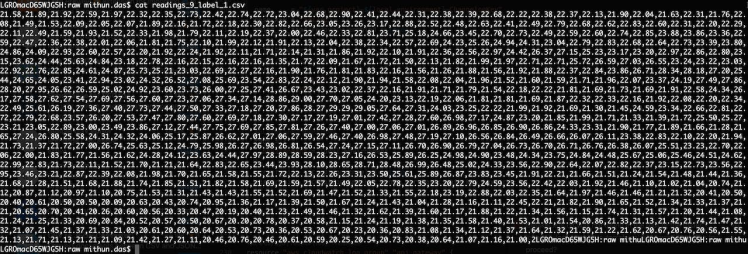
After collecting data, remove the SD card from Wio Terminal and insert to your computer. You should see the CVS files as below.
Each file has 768 values separated by comma.
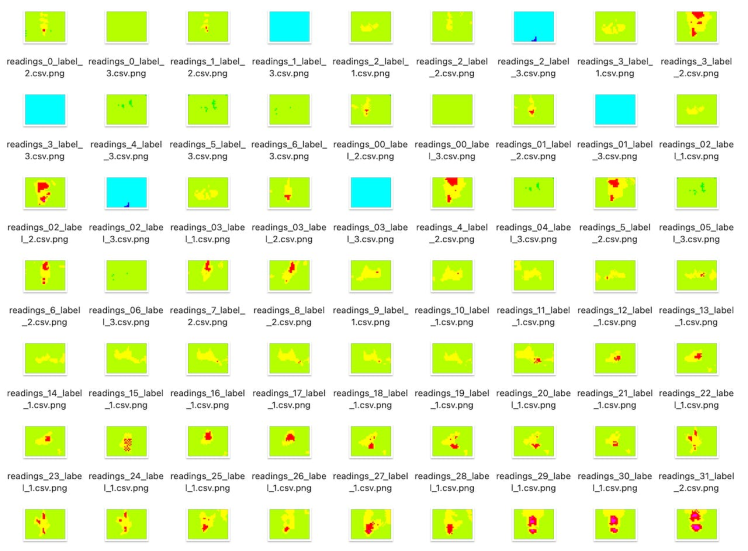
Copy all the files to the directory called raw under the folder data. Then run the program imager.py which will create visual presentation of the data under /data/visual folder.
python3 imager.pyThis step is optional. It helps you to visual the csv data in image format but has nothing to do with training the model.
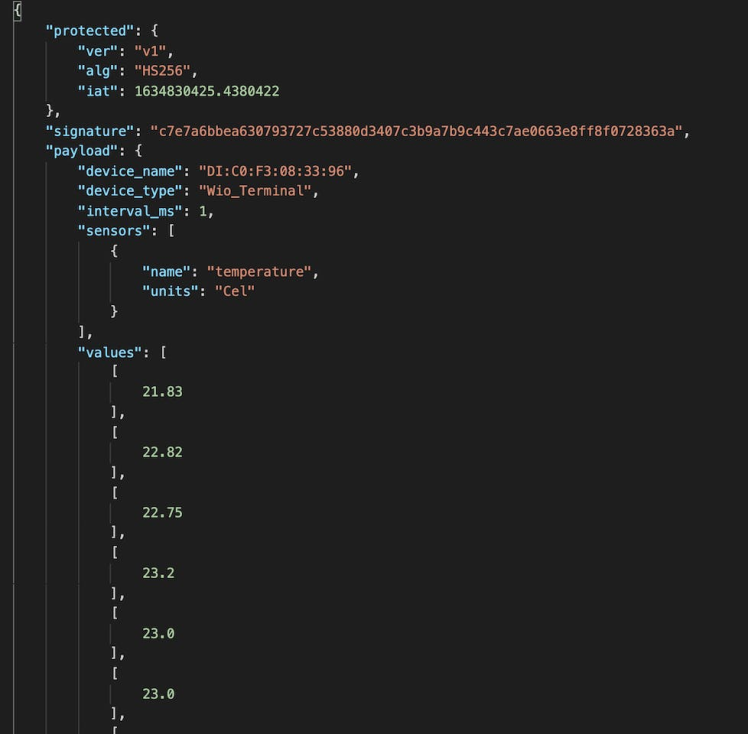
This is really interesting part. Edge Impulse data forwarder supports only time series raw data. But thermal camera data is non-time series. Instead it's an array of 32x24 which 768 discrete values. We will consider this as single channel 768 time series data with interval of 1 microsecond. Below image will help you visualize what I am talking about.
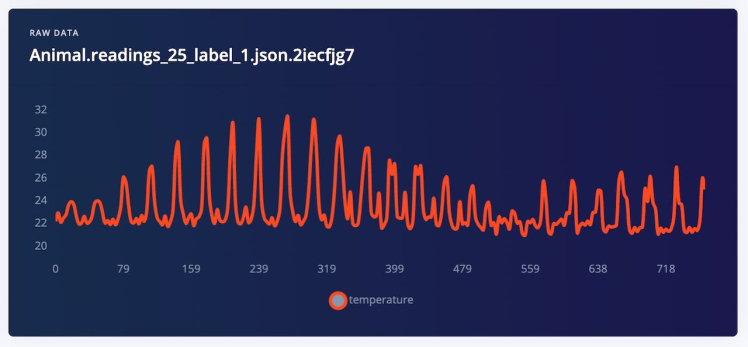
You will notice one image ( 768 values) are represented as a time series data with interval of 1ms. Now you know how we want our data to be formatted before we upload to Edge Impulse. So let's do it.
Open data-formatter.py and paste your HMAC key you obtained earlier. Then run the program.
python3 data-formatter.pyThis program will create a json file for each of cvs files and store them under /data/formatted_data folder. You can see below that values are represented as time series data with interval of 1s. Only sensor data channel is temperature.
As you have data prepared, we will use Edge Impulse CLI to upload the data. You need to have CLI installed. Follow this tutorial to setup CLI.
CD into formatted_data folder and execute below command.
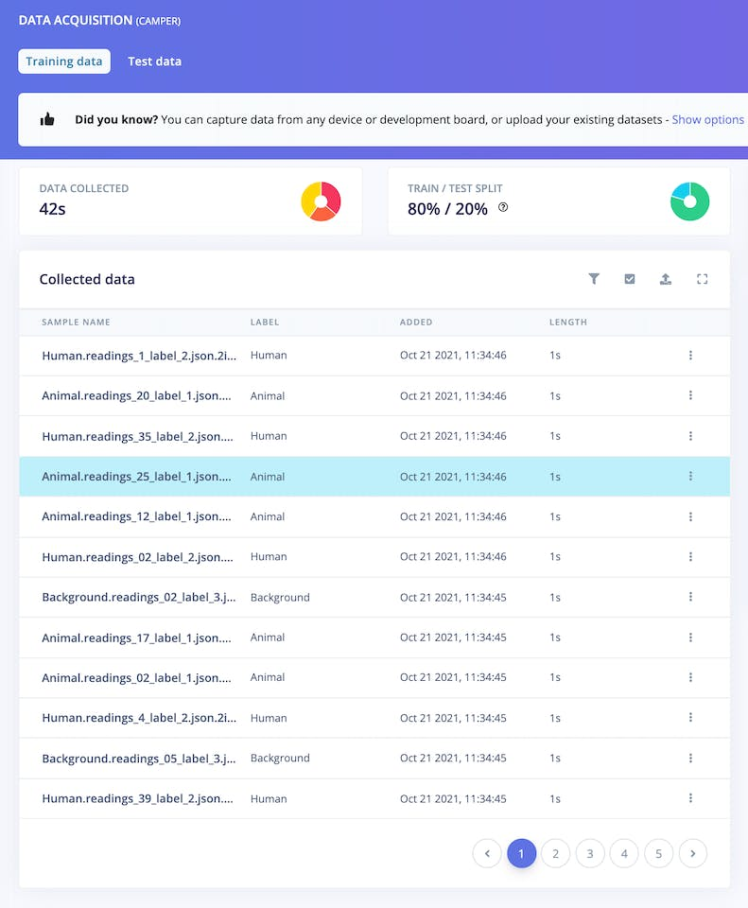
edge-impulse-uploader --category split *.jsonThis should upload all the json data to your Edge Impulse project under "Data acquisition" page.
Build The Model
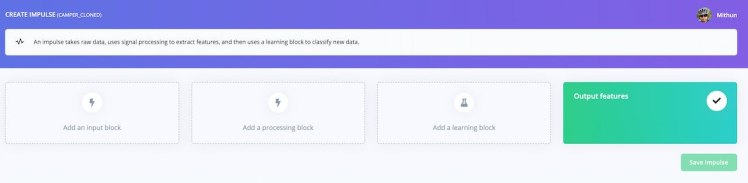
As we have data collected, let's build and train our model. Navigate to "Create impulse" page.
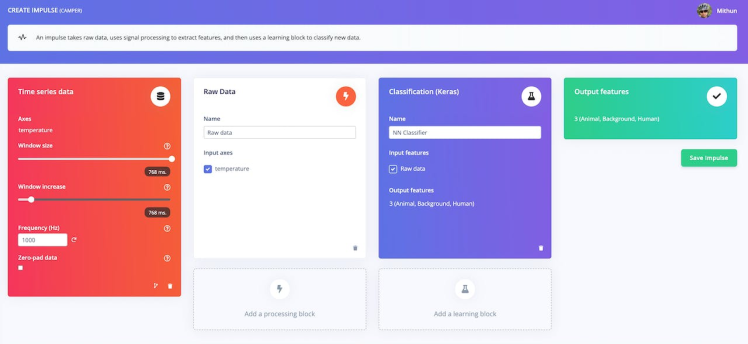
Click on "Add an input block", choose "Time series data". Set both window size and window increase size as 768ms. Remember our json data has 768 values with 1ms interval?
Next, click on "Add a processing block", choose "Raw data".
Then, click on "Add a learning block", choose Classification (Keras) and save the impulse.
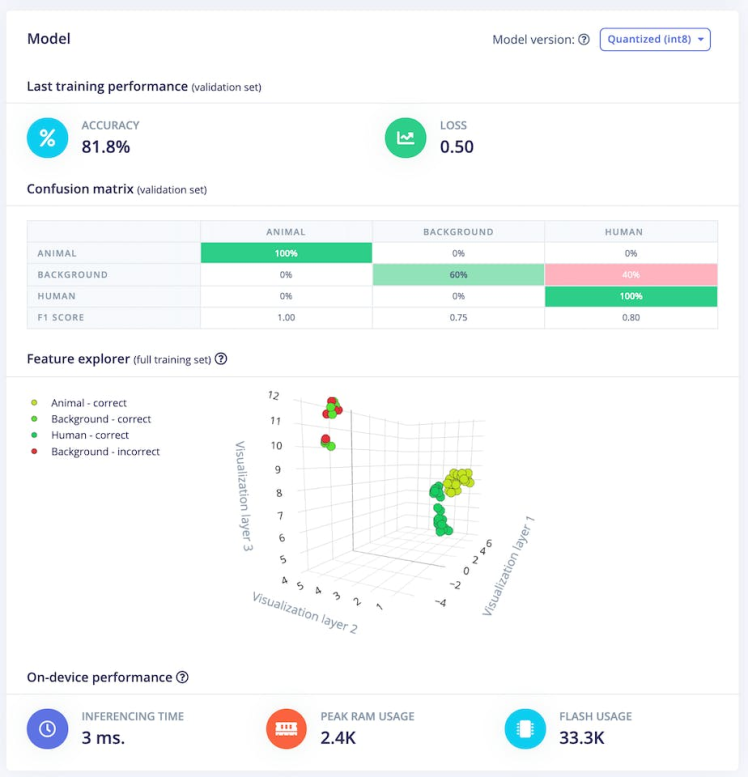
Navigate to "Raw data" page, keep defaults and move to "NN Classifier", adjust training cycle and learning rate. Try not to overfit the model. If your model does not perform well, try to collect more data and retrain.
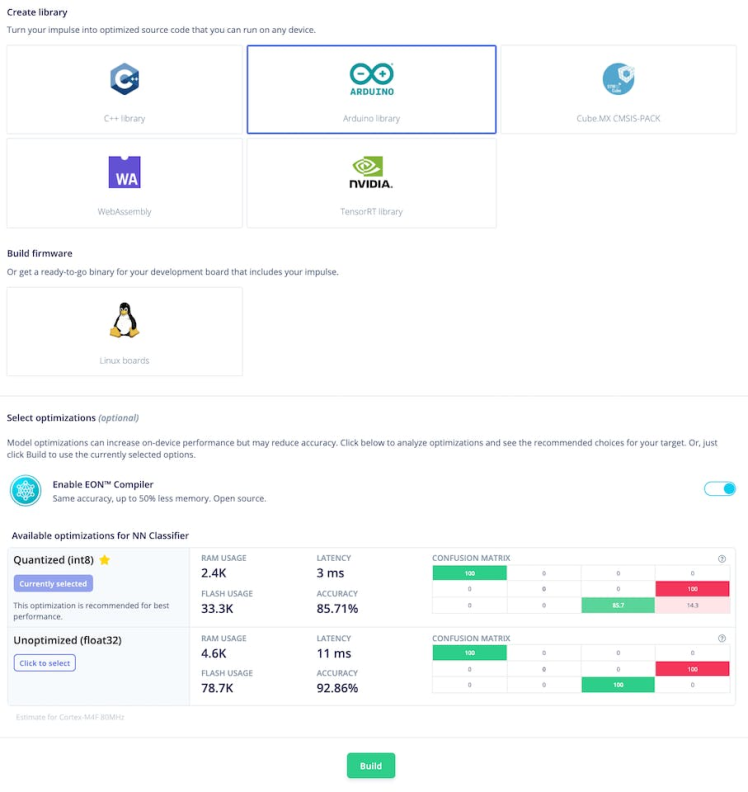
Navigate to "Deployment" page, choose "Arduino" and build. This will download the library as zip file. Import this library into Arduino IDE. I assume your project name is "camper" and your arduino library file should be camper_inferencing.h
In phase-1 of this project, I am sending data to AWS IoT using WiFi connection. To make Wio terminal connect to wifi, you need to update the device firmware. Process is very simple. Follow this instructions.
To connect to AWS, you need to create a "Thing" and connect to the "Thing" using certificates. Seeed studio has written a utility python program which will create all the resources for you. Follow this. I have another project where I explained AWS setup. You may refer this project.
create_thing.py will output the certificate and private key on terminal. Copy them and paste in cogfig.h file.
#ifndef _CONFIG_H_
#define _CONFIG_H_

// TODO ADD YOUR CONFIGURATION HERE
// WiFi and MQTT configuration
static auto constexpr WIFI_SSID = "";
static auto constexpr WIFI_PASSWORD = "";

// DHCP client id
static auto constexpr CLIENT_ID = "CLIENTID";
// hostname of your MQTT ATS endpoint
static auto constexpr HOST_ADDRESS = "xxxxxxx-ats.iot.us-east-1.amazonaws.com";

static auto constexpr TOPIC_NAME = "camper";
static auto constexpr ALERT_TOPIC_NAME = "camper_alerts";

// "AWS root CA1 and CA2 (RSA)", see
// https://docs.aws.amazon.com/iot/latest/developerguide/managing-device-certs.html#server-authentication

static auto constexpr aws_root_ca_pem = "CA_Root_Certificate";

// certificate and private key for the thing. See README.md for details
// and use the create_thing.py script to create certificate and key.
// "The certificate for this thing"
auto constexpr certificate_pem_crt = "";
auto constexpr private_pem_key= "";
#endif
You also need to enter your wifi credential and AWS IoT host address. After making the change, upload WIO_Camper_Inference.ino program to wio terminal.
Device will send data every minute to AWS IoT topic also device will buzz when animal or human detected.

I tested this with my pet as I don't see animals often outside but I have plan to test this in zoo sometime :)

As data is in AWS, you can do some much from here. Like sending the data to dynamodb, run some analytics, use Amazon Pinpoint to send push notification to mobile, send text message to your phone.
Phase 2As you can imagine, depending on wifi is not a good solution here as the device will outside of your home wifi mostly. I have few plans
- Instead of wio terminal sending data directly to AWS, I can build a mobile app which will connect to Wio terminal over bluetooth and send data to mobile app. Mobile app will then send data to AWS using cognito. I have done similar thing in my buddy project.
- I can entirely remove the dependency of wifi or cellular connection and send data to LoRa network ( TTN or Helium ) directly from the device. TTN or Helium will then delegate the message to AWS IoT. I have done similar project before. You may checkout Save the peatlands or VFence project.
This project is also published on PCBWay.
Code
Credits
Related products


Leave your feedback...