
Add A Real Clock Calendar To Your Arduino

Made by Rob_Long / Home Automation / Notifications / Productivity / Retro Tech
About the project
Use of the MikroElektronika Click Shield for Arduino and a RTC Click Board based on PC8583
Project info
Difficulty: Easy
Platforms: Arduino, Atmel, MikroElektronika
Estimated time: 1 hour
License: Creative Commons Attribution CC BY version 4.0 or later (CC BY 4+)
Items used in this project


Story
The Arduino UNO doesn’t have a 'Real Time Clock' (RTC) module, which keeps time even when the power is off, or the battery removed.
So in this project we will show you how to add a RTC Click shield from Mikroelektronika, without the use of iron solder or breadboard.
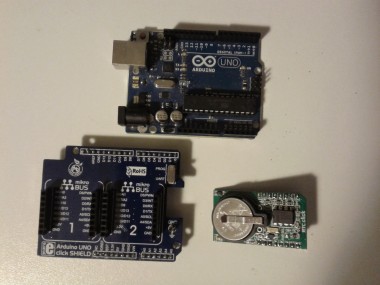
This is possible using a Click Shield for Arduino UNO ( MIKROE 1581 ) from Mikroelektronika and a RTC Click Board based on PC8583 , that I've bought from Elabos
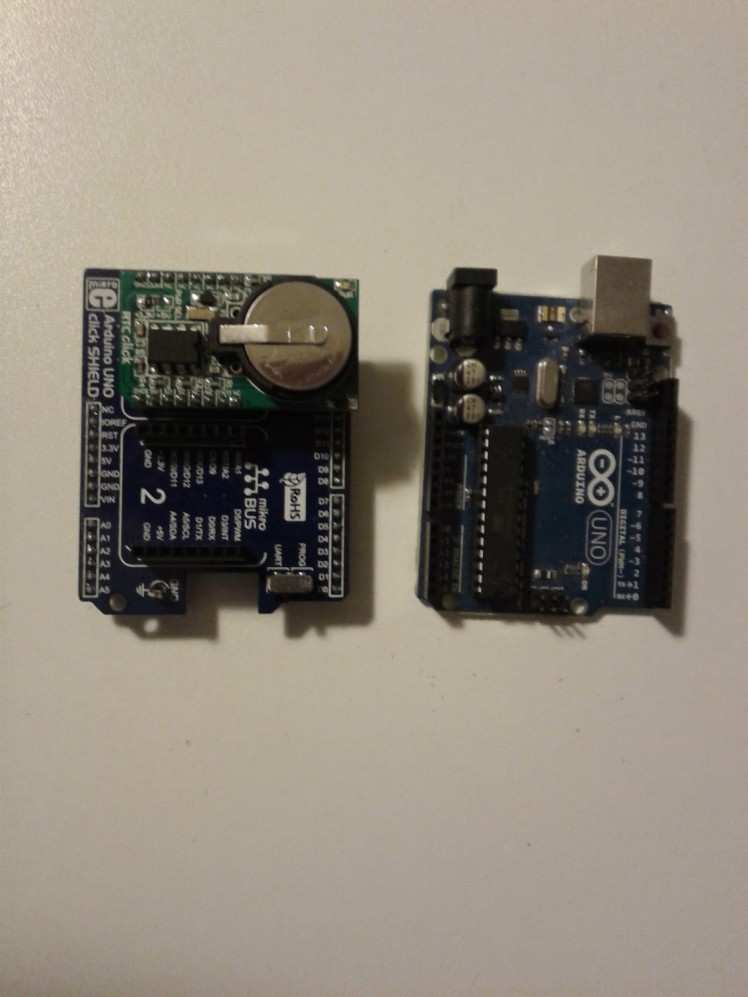
We just need to insert the two Click boards as per below images.

The Mikroe Click shield for Arduino let’s permit to interface not one, but two Click shields.
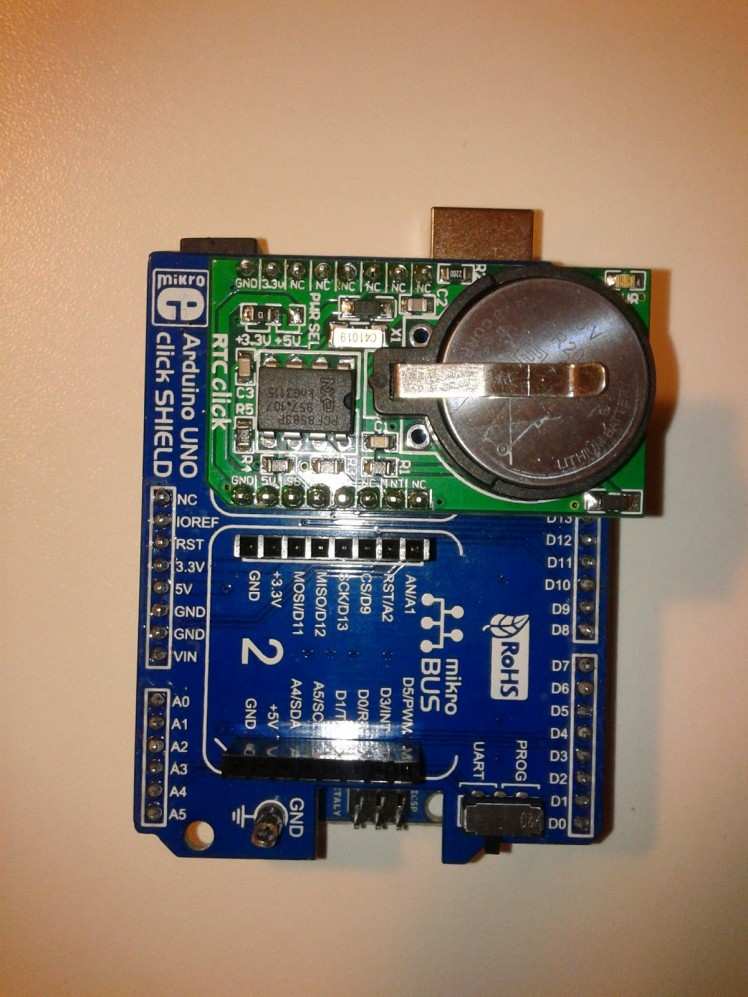 The RTC Click shield uses a very popular Real Time Clock PCF8583 from NXP ( ex Philips ) . On the web, there are a lot of open source libraries for Arduino, based on the PCF8583 .
I have used the following :
https://github.com/edebill/PCF8583
Not sure if it is the best, but it worked well on my test.
You just need to :
download the library “PCF8583-master” from github
unzip the compressed .zip file
copy the unzip files on the Arduino “library” directory ( take care – depending your Arduino IDE version , you should remove the “-“ character from the library name “PCF8583-master”. The newest versions don’t accept this char on the library’s name.
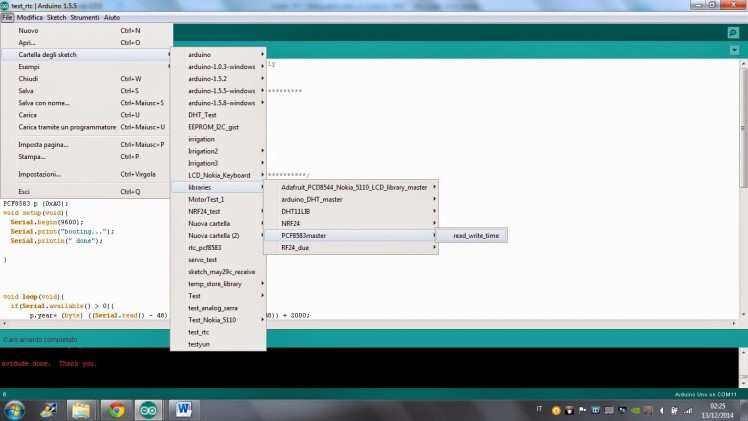
launch the “Arduino” IDE
upload the example file “ read_write_time.ino” ( from the library “PCF8583master” )
 Compile & upload the sketch
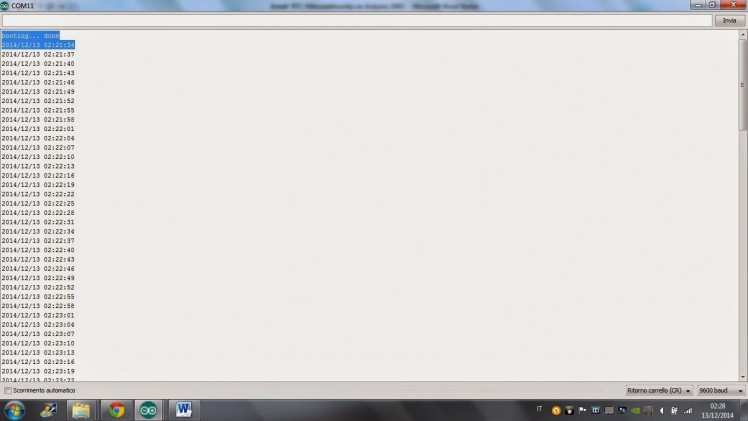
Open the serial monitor on the Arduino IDE
On the first time, you could see a wrong date-time
Write on the top bar the date-time to set on the following form “YYMMddhhmmss;”
Send to Arduino
That's all! – you can now see the correct date-time
Try to switch off the UNO board and then switch on, to see if the date-time has been kept
Arduino UNO non ha un modulo per mantenere orario e data , un modulo RTC, che conserva l'orario anche in mancanza di alimentazione .
Qui di seguito, vedremo come aggiungere una integrato Real Time Clock Calendar senza aver bisogno di saldatore oppure breadboard.
Questo è possibile utilizzando una RTC Click Shield basata sul PC8583 e una Click Shield per Arduino UNO ( MIKROE 1581 ) di Mikroelektronika , acquistate sul sito di Elabos
Le due schede vanno inserite come da foto allegate.
La Click Shield per Arduino UNO permette di collegare due Click Shields , non una sola .

La Click shield RTC utilizza il chip PC8583 di NXP ( ex Philips ) . Vi sono varie librerie open source basate sul PC8583, tutte a disposizione nel eb.
Ho utilizzato la seguente : https://github.com/edebill/PCF8583
Potrebbe non essere la migliore, ma ha funzionato bene nel mio caso.
I passi da seguire sono :
- scaricare la libreria “PCF8583-master” da github
- scompattare il file zip
- copiare i file scompattati nel folder delle librerie Arduino ( attenzione - in base alla versione dell'IDE di Arduino , è probabile sia necessario rimuovere il carattere "-" dal nome della libreria “PCF8583-master”. Le versioni dell'IDE più recenti non accettano questo carattere nel nome della libreria.
- lanciare la IDE di Arduino
- caricare il file di esempio “ read_write_time.ino” ( dalla libreria “PCF8583master” )
- compilare e caricare sulla board Arduino lo sketch
- aprire il serial monitor nell'IDE di Arduino
- la prima volta si vedrà una data e un orario sbagliato
- scrivere nella barra comando la data e l'orario da settare nel seguente formato “YYMMddhhmmss;” e premer Enter
Ora si dovrebbe vedere la data e l'orario corretto

Spegnere e riaccendere la UNO per controllare che l'orario venga mantenuto
Code
Credits
Related products


Leave your feedback...