
Project info
Items used in this project

Story
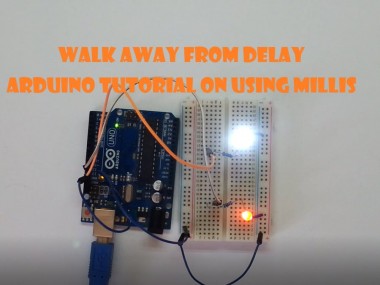
This video was inspired from questions I sow on-line. on how to blink 2 LED in different rates.
If we wanted to blink a led every 1000 millis and the second one every 500 millis, we could still use delay, like this, as you can see I split the 1000 millis delay of the first LED into 500 millis blink of the second dealy.
byte LED2 = 12;
void setup() {
 pinMode(LED_BUILTIN, OUTPUT);
 pinMode(LED2, OUTPUT);
}
void loop() {
 digitalWrite(LED_BUILTIN, HIGH);
 digitalWrite(LED2, HIGH);
 delay(500);
 digitalWrite(LED2, LOW);
 delay(500);
 digitalWrite(LED_BUILTIN, LOW);
 digitalWrite(LED2, HIGH);
 delay(500);
 digitalWrite(LED2, LOW);
 delay(500);
}
But what will happen if we wanted to blink the faster one in 300 millis instead of the 500 millis.Here is where the use of delay makes it very complicated to not possible.
So what to do? Stop using delay!
We even got an example for it in the Arduino IDE and its called blinkwithoutdelay.
I duplicate the logic of the first LED to a second one and set the desired delay.
So try it as well, and walk away from delay.I will say one finale thing, the code I shared is far from being perfect, and I thought of changing it but, since this video is aimed at people that are new to arduino, I voted against it.
Schematics, diagrams and documents
Code
Credits
Related products


Leave your feedback...