
Taking The Raspberry Pi Inky Phat To The Next Level
About the project
Combine a Raspberry Pi Zero W, Pimoroni Inky pHat and Buton Shim to create a cool small portable, wearable, low power computer with e-paper display.
Project info
Difficulty: Moderate
Platforms: Raspberry Pi, Pimoroni
Estimated time: 2 hours
License: GNU General Public License, version 3 or later (GPL3+)
Items used in this project
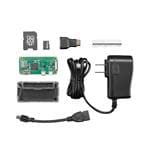
Hardware components

Story
Ever since I saw the Pimoroni Inky pHat being used as a dynamic name badge at conferences I have promised myself I would get one. Well, the day has come and, combining it with a Raspberry Pi Zero W and the rather excellent Pimoroni Button Shim, I’ve created a low power, portable, multi-use device that is my favourite Raspberry Pi project to date.
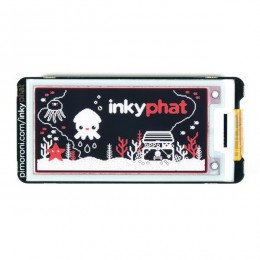
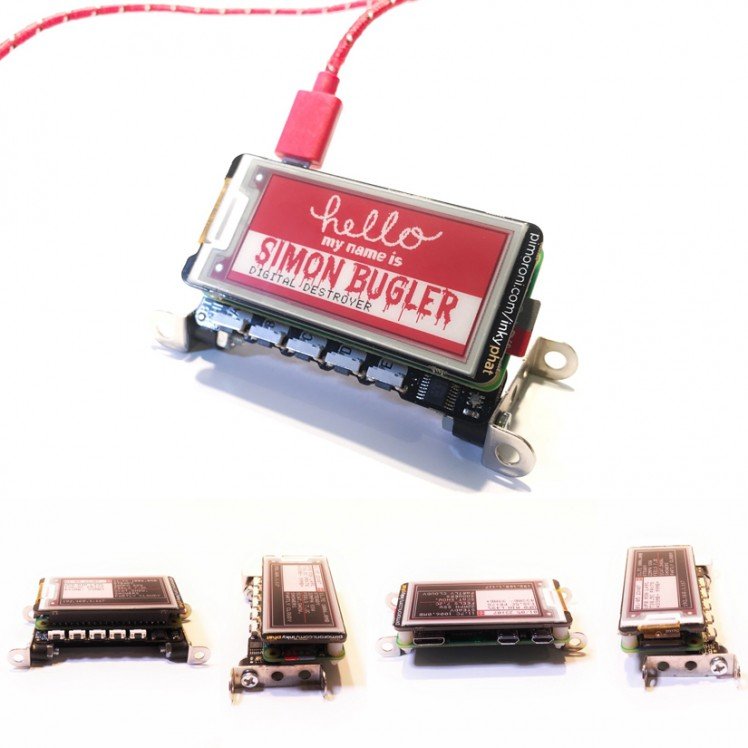
The Pimoroni Inky pHat is a a low-energy, red/black/white electronic paper (ePaper/eInk/EPD) display for your Raspberry Pi. It has 212x104 pixels, three-colour display and is ideal for showing simple graphics and crisply-rendered text. It's literally like paper, it's readable in sunlight and almost perfectly preserved when no power is present. It has a nostalgic 8-bit quality due to the relatively small number of pixels you have to play with and the limited palette of three colours, but these have inspired creativity in me that only these limitations can do.
The Inky pHat comes ready assembled, absolutely nothing to do except press it gently but firmly onto your Pis header and run the single line installer provided by the pirates of Pimoroni. https://github.com/pimoroni/inky-phat
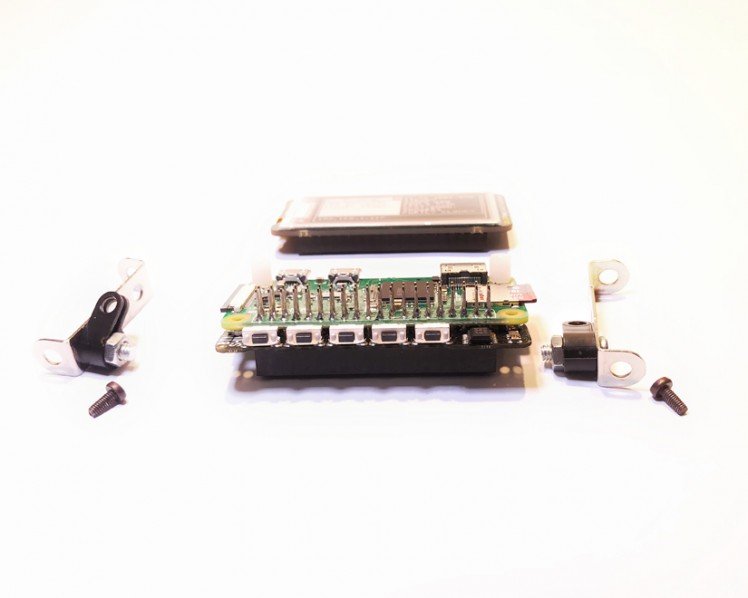
However, I want to go one step further than this, so at the same time I purchased the Button Shim. This tiny and thin package includes five edge-mounted buttons and an RGB pixel LED. It simply requires soldering onto the Pi, or hat/pHat. The shim part of its name refers to the thinness of the PCB, allowing it to be sandwiched or inserted where a normal PCB just wouldn’t fit.

I chose the Raspberry Pi Zero W for this project because of the low cost, low power consumption and the absolutely necessary WiFi. I selected my current favourite header arrangement of an extra tall 11mm female stacking header. This structured with the Pi Zero gives excellent flexibility, allowing you to mix and match pHats and Hats with your Pi, and gives access to the pins in a safe socketed manner from underneath.
Hardware
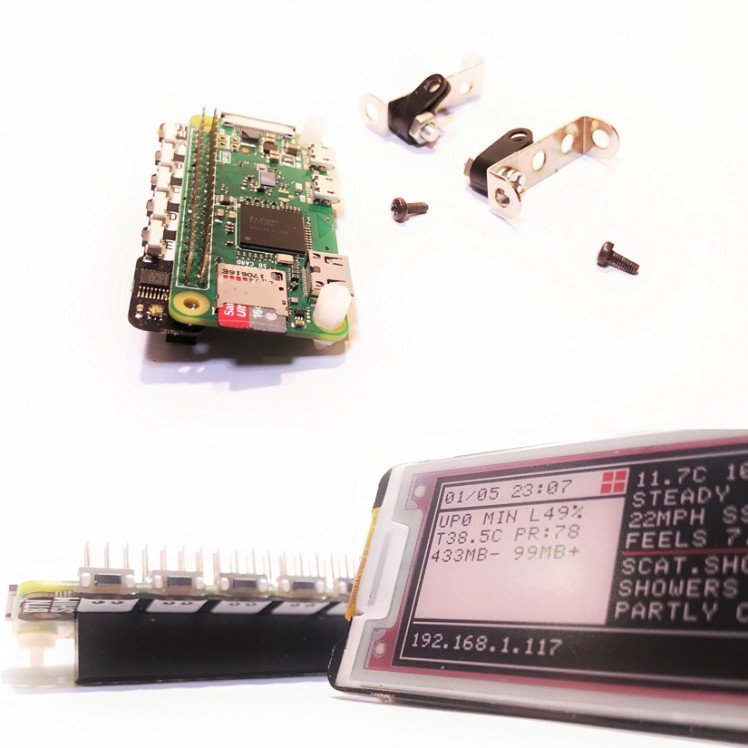
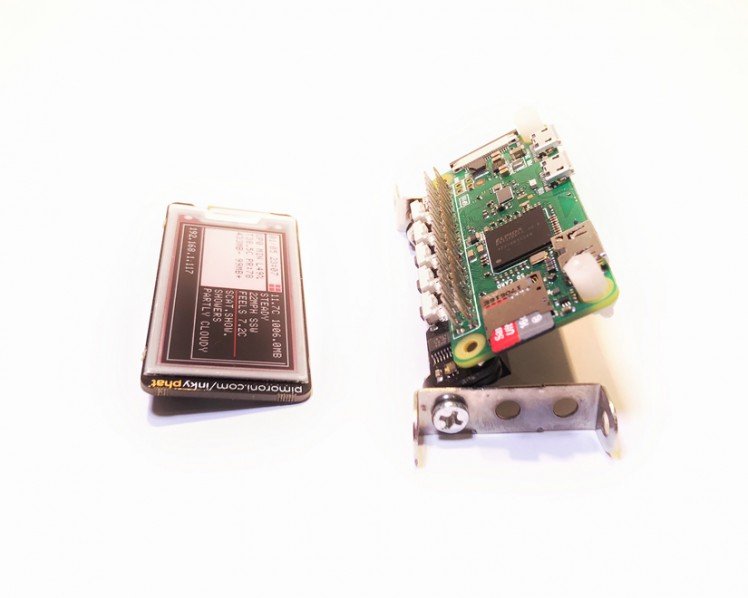
I decided to solder the Button Shim under the Pi Zero – in between the extra tall header. The Inkyphat has quite a low profile header on it, and this setup creates a nice compact and versatile configuration.
A tip when soldering boards to the Raspberry Pi Zero to get a neat low profile is to join them together first with nuts and bolts – 2.5mm for the Pi – then solder and remove.
I created a good desktop stand with a couple of cable wall ties and two pieces of Meccano I had in my toolbox. It worked well and I will certainly be using it again in the future.
Software
When starting a new project, my preferred start is with a clean install of the latest Raspbian release https://www.raspberrypi.org/downloads/raspbian/, this time on an 8GB microSD card. I highly recommend writing the card with Etcher https://etcher.io/. Etcher is super easy and a quick tip is you don’t need to unzip the image you download - etcher does it all. Once the card is finished in Etcher, I open the ‘boot’ partition and add a wpa-supplicant.conf file with my wifi network details in and an empty .txt file named SSH. This enables the Pi to log on to the wifi and enable an SSH connection using the default user (Pi) and password (raspberry). I can then login and start installing within seconds.
Pimoroni products are brilliant for their one line installers, not to mention their excellent tutorials https://learn.pimoroni.com/ and forum based support. The install information can be found here https://github.com/pimoroni/inky-phat and the button shim here https://github.com/pimoroni/button-shim. Detailed documents for the python libraries that you get with the Pimoroni installs can be found for the Inky phat http://docs.pimoroni.com/inkyphat/ and here for the button shim http://docs.pimoroni.com/buttonshim/ .
Once installed you will have a directory named Pimoroni in your home directory, which will include directories for all the Pimoroni products you have installed, and inside those directories, you will find example python scripts. You can start playing with your new creation within minutes which is why I’m such a Pimoroni fan! The importance of being up and running quickly should never be taken for granted.
The button shim comes with three examples. Keyboard.py emulates button presses to keyboard presses. Volume.py shows how the buttons can be used to control audio playback and Rainbow.py shows simple button presses with functions and LED status changes. Rainbow.py was the basis for my main.py script.
The inky phat comes with a wider selection of example scripts, including the name badge, various calendar scripts, QR codes, text and logo scripts, plenty to learn the full potential. The weather.py script is the one I adapted for my info.py script.
My first task was to have a play with the included name badge example and try out some new fonts. Having seen the red ink on the display, I instantly wanted some blood dripping horror font which wasn’t difficult to find on http://www.dafont.com. Installing new fonts is as simple as dropping them into a directory and linking to them see http://docs.pimoroni.com/inkyphat/#fonts for more info. The included text.py example file is great for testing out new fonts on the screen and displaying them in various sizes. Getting the font size correct is the secret to making them look good on the screen.
Once I’d chosen some fonts, I moved onto displaying images and using them as backgrounds. Creating the images is challenging on two fronts. The first is the low resolution of the screen. Getting the graphics to look good with low resolution is an art form that I need a lot more practice at. Having said that, it's quite nostalgic and took me back to the drawing programs I had on my Spectrum in the 1990’s. The second challenge is the way in which the files need to be saved and this took a few attempts to get correct in Photoshop. They need to be PNG-8 images, 212x104 pixels, and in indexed colour mode with a palette of just three colours – white, black, and red – in exactly that order.
The button shim has five buttons and an RGB status led. I intended to have five different functions or screens, the first of which I wanted to alter the included weather.py example that came with the inky phat. This was gathering data from a Yahoo weather API (https://developer.yahoo.com/weather/documentation.html). I also wanted to display the time and date, some system information and the IP address so I could find it on the network.
I started with designing the background in photoshop and decided on a split screen, white on the left and black on the right. I looked up the Yahoo API and have displayed the weather on the right, including more information than the original example. Top left I display the time and date, under that I have system information, up-time and number of processes running, CPU temperature, processes running, followed by RAM usage. At the very bottom of the screen, I output the IP address that I can use to connect to the Pi with SSH. I called this script info.py.
Info.py code analysis
9 Functions
- Shorten Text
- Degrees to cardinal
- Get IP Address
- Get Up Stats
- Get process count
- Get Temperature
- Get RAM
- Encode
- Get Weather
Script
The script basically runs the functions and prints the output to the screen.
I then started on main.py. This python script is the one that is started up as a process to run continuously. It is based upon the example file included with the button shim. The button shim library does some very clever heavy lifting of running functions in different threads when the buttons are pressed.
main.py code analysis
- 5 functions
- Flash LED
- Button Flash
- Run Process
- Print to Screen
- Wait for internet connection
Script
- Defines what the buttons do
- A - run qrcode example
- B - display Twitter feed
- C - runs info.py
- D - displays an image
- E - runs name badge
- Defines the press and hold button functionality
- A - restarts main.py service
- B - reboots pi
- C - shutdown pi
My preferred way to run a python script is on startup and to keep it running by using daemontools. daemontools is a collection of tools for managing services on your Pi. This can be a python script. The service is started automatically and it gets restarted if it dies. Setting up a new service is easy, all it needs is a directory with a run script. See a great cheatsheet here http://samliu.github.io/2017/01/10/daemontools-cheatsheet.htm and more in depth details here http://cr.yp.to/daemontools.html
The inky phat is an epaper display and as these are typically used in low power applications, I wanted to test the battery life. I had a full fat version of Raspbian Stretch installed on the SD card, so the Pi Zero was not power optimised at all. Even so, I set the info.py to refresh its data and the screen every 10 minutes and plugged it into a 4000 mAh USB battery. The great thing about the epaper design is that when it did run out of power, it would preserve the screen, easily enabling me to read the uptime. The results were rather impressive, lasting almost exactly 18 hours.
I have enjoyed playing with the inky phat. There is something strangely satisfying about the data you programmed being displayed and preserved on the screen after the Pi has been powered down. And the possibilities are endless. I have lots of ideas to develop further screen apps including:
- Develop further Twitter feed display
- Add the Pimoroni Enviro pHat and display and or tweet sensor information
- Add the Pimoroni Speaker pHat and make a tiny internet radio
- Scoreboard world cup display
- Planet Weather display
- Astronomic position display
- Satellite photo/data display
- Plane location display
Code
Credits

Related products


Leave your feedback...