
Sparkpad

Made by sparkglug / Productivity
About the project
Sparkpad is a reconfigurable control surface - primarily aimed at Streamers - with customisable keys and engraving options
Project info
Difficulty: Moderate
Platforms: Arduino, PlatformIO
Estimated time: 1 hour
License: GNU General Public License, version 3 or later (GPL3+)
Items used in this project

Hand tools and fabrication machines
Story
Background
For an affiliate Twitch streamer, the name of the game is keeping viewers engaged with their content. More often than not this goes beyond simply playing a game and providing some interesting commentary. Responding to chat messages, adjusting audio levels, and handling scene transitions - these are all part of a streamers bread and butter. Juggling these tasks effectively creates an engaging viewer experience.
Streamers have several tools at their disposal. The biggest of these is Twitch itself, which distributes the content via it’s online platform, and provides the interface for viewer interaction. Audio/visual tasks are handled by software such as OBS, which is installed locally on the streamer’s PC or laptop.
Streamdecks
While a standard mouse and keyboard are sufficient to use most types of software, there are instances when more specialised hardware can improve user workflow. Two good examples of this are DJ software and CAD software: DJs use rotary controls (jogwheels and potentiometers) to precisely synchronise tracks and adjust the mix, and mechanical designers use 6D mice to easily manipulate parts and assemblies. These tools improve the interface between the user and software by providing more tactile control over some or all of it’s features.
This is the same basic concept behind a Streamdeck, which improves the interface between a streamer and their software tools. The streaming tasks described earlier - responding to chat, adjusting audio, and handling transitions - are all tasks that can be performed with a normal mouse and keyboard, but a Streamdeck compartmentalises all these functions and improves usability as a result.
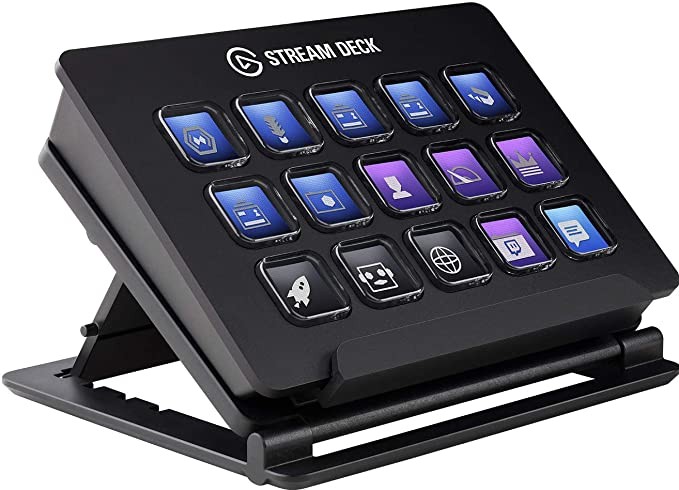
One of the major players in the Streamdeck market is Elgato, who offer 3 hardware streamdecks - in mini, regular (shown below) and XL flavours - and an app based streamdeck for mobile.
![]() The first prototype
The first prototype
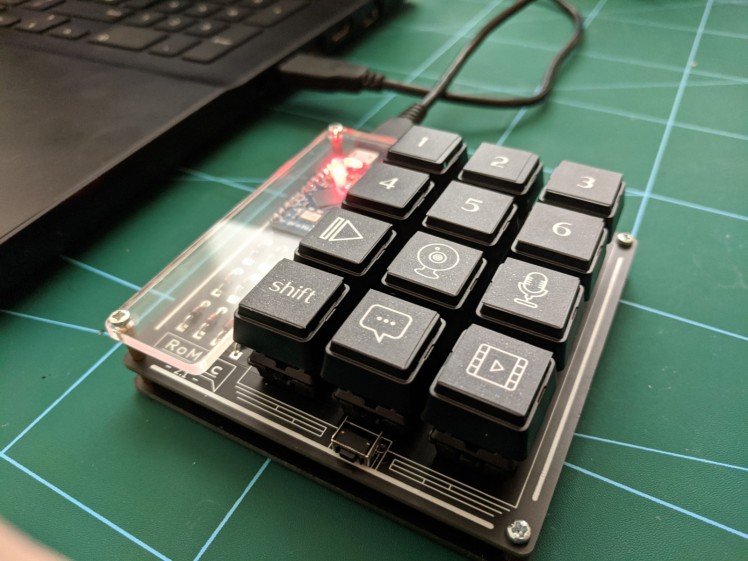
After some browsing on mechboards - a UK based supplier of mechanical keyboards - I discovered the RoMac. The RoMac is a 12 key macro pad (a macro pad is a miniature keyboard with keys tailored for a particular workflow) made from only a handful of components - 2 PCBs, 12 ‘Cherry MX’ style switches, 12 diodes, some fasteners and an Arduino Pro Micro. It is sold as a kit which you assemble yourself using a soldering iron and screwdriver. I purchased a kit and the parts were with me within matter of days.

Unfortunately I quickly realised the switches I bought were not of the correct type. As the RoMac does not have a switch panel, the switches needed two additional mounting pegs to provide lateral support. The switches I bought were lacking these pegs. Nevertheless, I soldered the switches on - doing my best to keep them aligned - and the end result wasn’t too bad. Since this was only a prototype I wasn’t too concerned with the keys being a bit wobbly.
Key caps
I also bought some relegenderable key caps along with the RoMac. These are blank key caps with a transparent cover, allowing you to use your own custom cap designs printed on paper or vinyl. I imported a template from the store page into my preferred vector graphics software - Inkscape - and made a set of custom caps. As a veteran streamer, my friend James was instrumental in helping me decide which icons to use for each cap. To save time I used icons from The Noun Project, which is a great resource for anyone designing user interfaces.
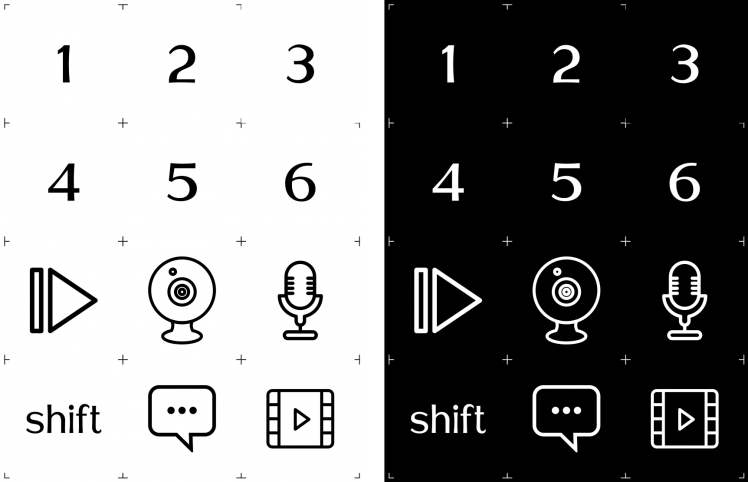
To complement the aesthetics of the RoMac, I chose a ‘dark mode’ colour scheme for the keys. I initially thought this would be expensive to print, but my local print-shop had no qualms printing the design on vinyl. I cut out each symbol using a scalpel and stuck them onto the key caps to complete the build.
Firmware
The Arduino Pro Micro sold with the RoMac had QMK based firmware pre-installed on it. QMK is an open source project maintained by the custom keyboard community, and has a few key components including an online Configurator. I used the Configurator to map the RoMac’s keys to function keys F13 - F24. I chose these keys as they are not found on most keyboards, which simplified hotkey assignment later on.
Initial tests
I posted the assembled RoMac to James, and he was able to start using it straight away thanks to it’s plug and play nature. James uses OBS for his streams, but as all streaming software shares the same core functionality, the RoMac could be used across all of them in a similar manner. Hotkeys can be used to trigger events in the software (mute, unmute, scene transitions etc), and it’s just a simple case of assigning these to keys on our RoMac (F13 - F24). And that’s pretty much it.
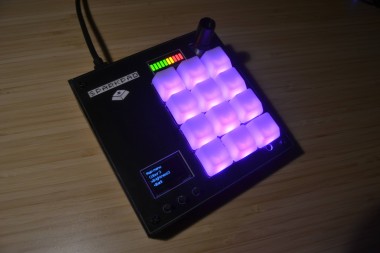
The birth of Sparkpad
We took what we learned from building and testing the RoMac and used it to develop our own Streamdeck - Sparkpad!
PCB
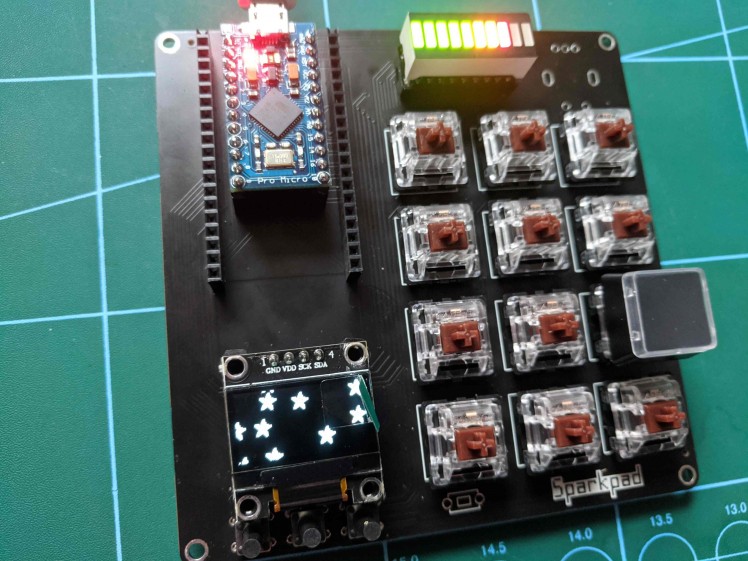
When designing the PCB for Sparkpad, we decided to add an OLED screen, RGB LEDs, LED bar graph and an encoder due to feedback we received while testing the first prototype. We also added support for an ESP32 alongside the Arduino Pro Micro, to open up some new development pathways. The new PCB's were built quickly thanks to JLCPCB's speedy assembly service.
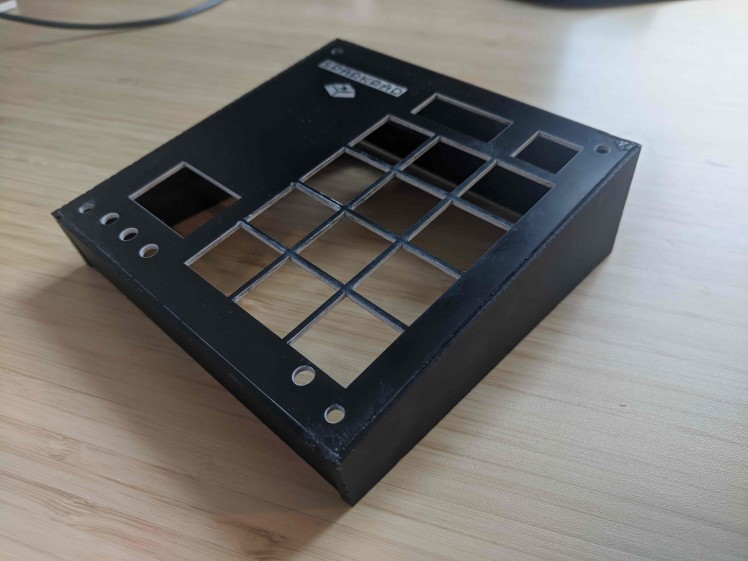
Case
We went through a few design iterations while coming up with a case for Sparkpad. Initially the plan was to stick with the minimalistic look employed by the RoMac, but eventually we decided a more 'filled out' look was needed to appeal to a wider audience. Thanks to easy access to a laser cutter, building prototypes was a doddle.
The first prototype consisted of a single acrylic sheet with sides bent down.
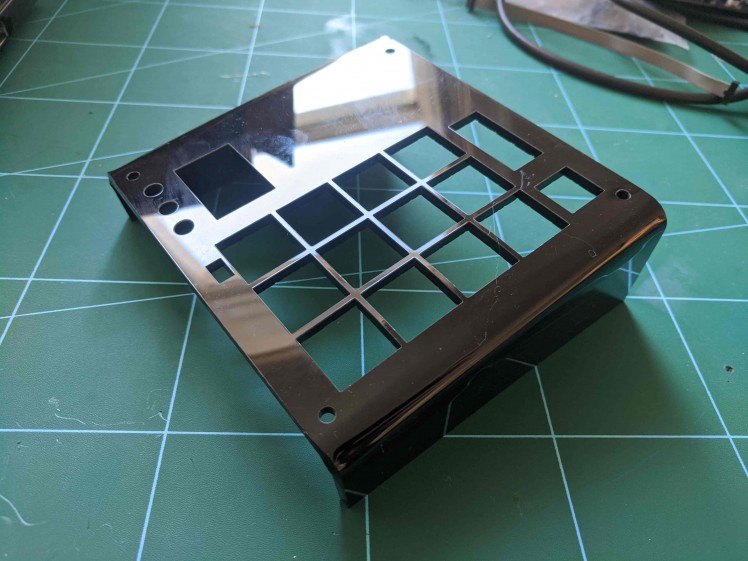
The next prototype utilised flat acrylic sections which slotted together with finger joints. The whole thing was glued internally to provide additional support.
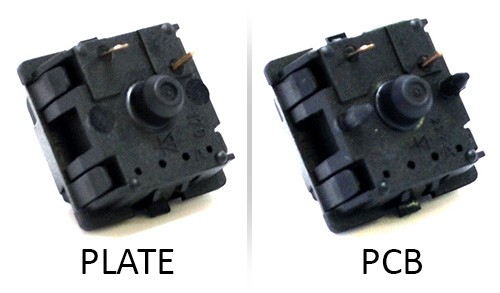
Our final chosen design utilised a different material for the top plate to facilitate engraving, and a matt finish all over to create a uniform look.
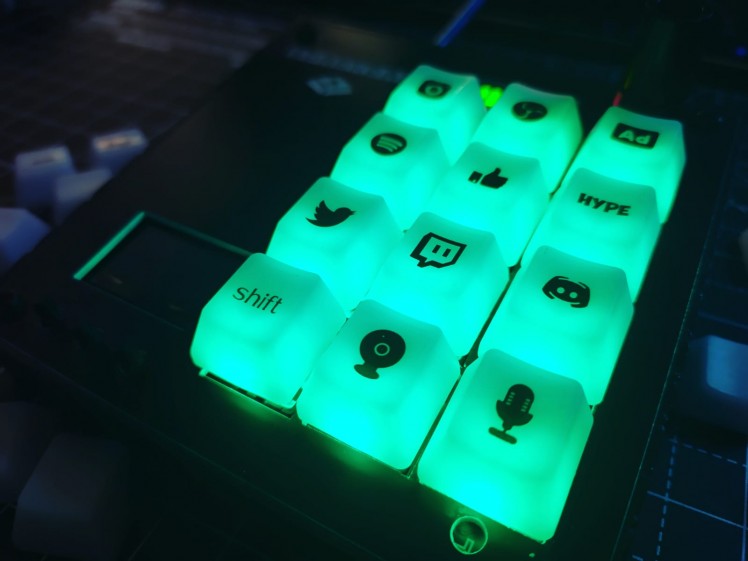
Key caps
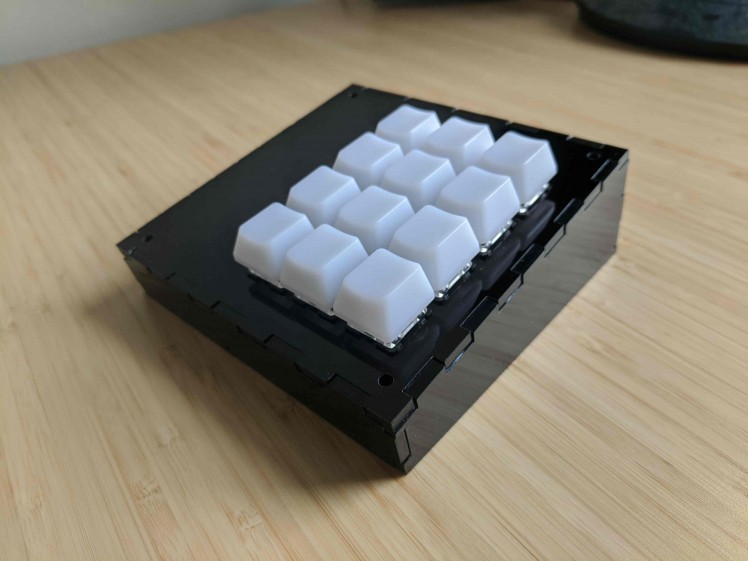
Due to the LED lighting present in the new PCB, the dark mode keys used on the RoMac needed to be scrapped. We opted for milky keys with clear vinyl stickers to let through as much light as possible while still allowing the function of each key to be clearly distinguishable.
Firmware
After much deliberation, I made the switch from QMK to Arduino as I found the development environment a bit more user friendly. We are hoping that the community can develop some cool uses for Sparkpad in both a streaming context, and in other use cases as well!
Building your own
To get help assembling your own DIY Sparkpad, you can watch a live build on our Twitch channel. We will also be uploading a complete build to Youtube in the not too distant future. You can also join our Discord to get help from our existing community of builders and streamers, and contribute to the discussion around new Sparkpad features.
Code
Credits
Related products


Leave your feedback...