
Smart Response Xe Tiny Basic Port

Made by Subsystems / Displays / Kids & Family / Retro Tech
About the project
This is a port of the popular Arduino Basic interpreter Tiny Basic Plus for the SMART Response XE handheld computer
Project info
Difficulty: Moderate
Platforms: Arduino
Estimated time: 2 hours
License: GNU General Public License, version 3 or later (GPL3+)
Items used in this project
Hardware components

Software apps and online services
Story
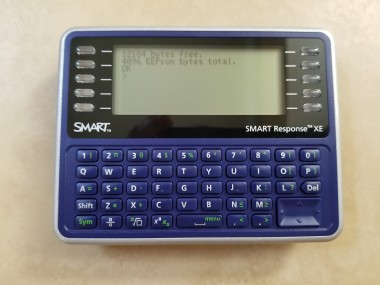
My love of retro computing has sent me on the journey to have a small handheld device that runs a BASIC interpreter. I was so happy to run across the SMART Response XE!
This was a popular classroom device that allowed teachers to setup lessons, quizzes, whatever into a program and then the students would use these devices to interact with the curriculum. The advent of wide spread cell phone use has made these devices obsolete. However, they are rugged, excellent on battery life, and best of all, COMES WITH AN ARDUINO PROCESSOR!!!
Yes, this humble device includes the Atmel ATmega128RFA1 processor with 128k RAM, 4k EEPROM, and external 1Mbit memory chip. It also includes an RF transceiver, but unfortunately, doesn’t use a common BLE or Zigbee interface.
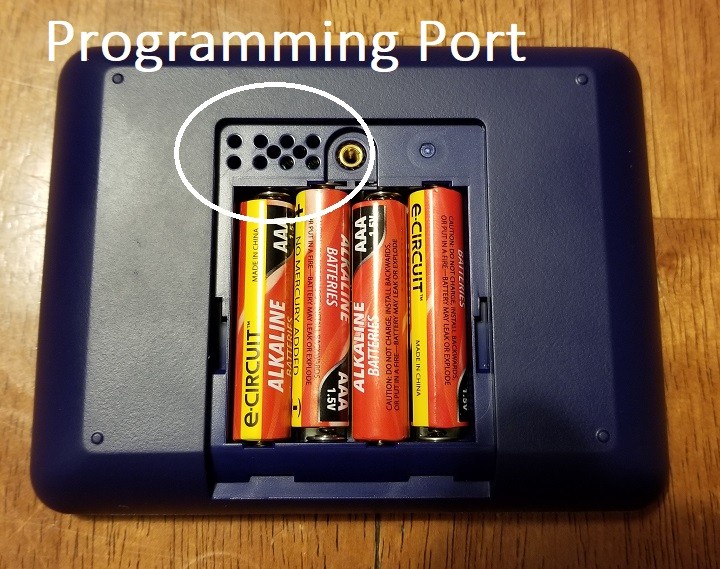
In the battery compartment there are interestingly placed holes. When you crack one of these open, you will find programming pads that align with the holes allowing the units to be programmed without removing the case. This is good, because these units were meant for the classroom and are really hard to open.
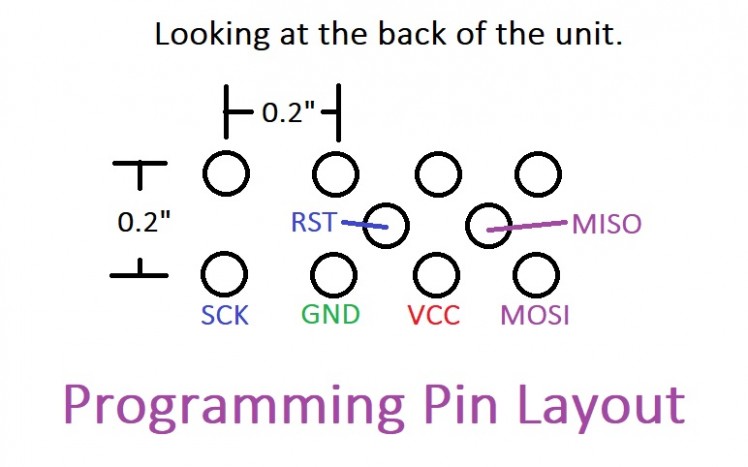
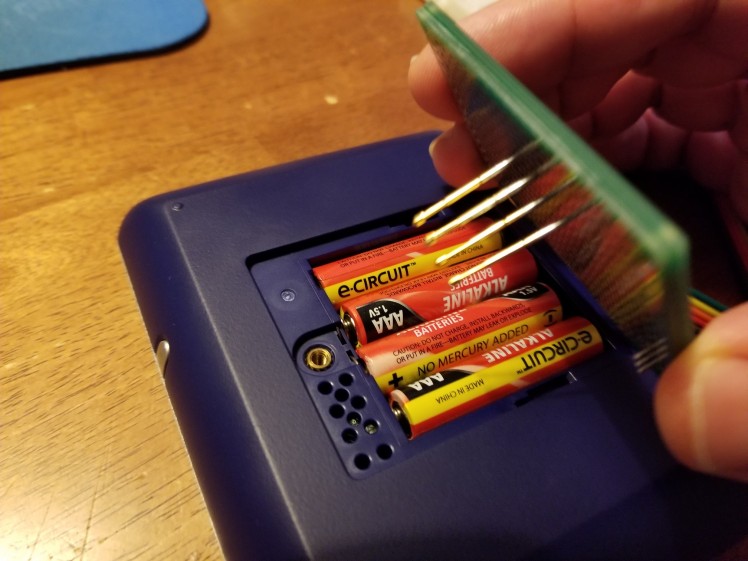
You can construct a programming adapter by using a prototype board and some pogo pins to line up with the holes in the back of the unit. The photos shows the position of the JTAG programming pads. You can then insert the pogo pins in the associated holes and connect to a JTAG programmer. I used two protoboards sandwiched together which allowed the pogo pins to stay relatively vertical. I also soldered one end of wire to each pin and the other had a male header pin connector. I then used a solderless breadboard to connect each wire to the corresponding programming connection. The connections are as follows:
And a sample of what my programmer looks like:
The CODE:
I was thrilled to discover that Larry Bank had crafted an Arduino library for interfacing with the keyboard, screen, and external memory.
SmartResponseXE Arduino Library
Then there is the awesome BASIC interpreter available called Tiny Basic Plus. The code was based off of the Tiny Basic Interpreter by Gordon Brandly for the 68000 computer. It was modified for Arduino by Mike Field, Scott Lawrence, and others and made available to the community. There are some great projects out there that use it with a PS/2 keyboard and an oled display. I have made these in the past. But when I saw the SMART Response XE I knew my destiny.
The code preserves all of the original commands from Tiny Basic and adds or modifies the following:
LIST: The list command will list the program by page. Click any key to continue paging through. If you want to list to the end, press the space bar.
BYE: Bye will shut down the computer and display, and put the processor to sleep. In this state it consumes very little power. To wake it up, press the power button on the top of the unit.
BATT: The Batt command will return the battery voltage in millivolts.
WAIT: This command waits for a key to be pressed to continue program execution.
MSAVE: This will save the current program into external memory. You must follow the command with the data slot you want to use. There are 10 slots labeled 0 through 9. To save the program to memory slot 5, use the command MSAVE5.
MLOAD: Retrieves the program from memory. If you want to load the program in slot 5, use the command MLOAD5.
Del: The delete key is in the most logical place for the Enter key. In the library, Larry Bank mapped this key to Enter and I think it is the right answer. I tried using the navigation pad right pad for enter and it never felt right. Use the Del key for Enter. Deletion is now mapped to the navigation pad left pad.
Also, I don’t check for invalid keys (like the 10 function keys) so they will just put garbage on the display.
**** WARNING ABOUT DELETE ****
Because I opted to use the hardware functions of the display and not keep a display buffer, delete has some issues. If you are on a fresh line, you can delete the prompt and keep going. I can’t really check for this without adding some complexity to the code so I just leave it as a warning. Also, if your line of code carries over to the next line, you can delete things on that line, but if you go further, it will not reset to the previous line. Use it with caution. If you make a spelling error or the keyboard gives you a double letter, you can easily backspace with delete to correct it. But be aware of the limitations.
I have posted the code to GitHub. It includes the original copyrights in the modified code so you can review them. The authors were generous enough to allow us to use and share the code.
**** NOTE ON THE BOARD LIBRARY ****
I have seen a few people comment that the files won't compile in Arduino (lots of errors). I recently changed out my hard drive and went to a fresh install of files. When I went to compile the code again I got a bunch of errors. I decided to reload the board file (provided by Sparkfun. Instead of downloading the package from Sparkfun's site, I added their repository address in Preferences and selected the 128rf board in board manager and everything compiled again. The instructions to do this are located here:
I hope you are able to get your hands on one of these devices and program it. I have had a lot of fun just getting back to simple basic programming. If you do, below is a quick program for a slot machine that you can try out.
I have a few of these and will program them and put them for sale in my Tindie store in case you want one but don’t have the ability to program the unit.
Thanks, and let me know if you build one.
******** SLOTS PROGRAM *********
5 M=100
10 CLS
20 PRINT "Slots"
30 PRINT
40 PRINT "$", M
50 PRINT "Enter bet"
60 INPUT B
63 IF B=0 END
65 IF B>M GOTO 50
70 X=RND(8)
72 Y=RND(8)
74 Z=RND(8)
80 CLS
90 PRINT "Spinning..."
100 DELAY(2000)
110 PRINT
120 PRINT X, " ", Y, " ", Z
122 DELAY (2000)
125 T=0
130 IF X=Y T=B*2
132 IF X=Z T=T+B*2
134 IF Y=Z T=T+B*2
140 IF T=0 M=M-B
145 M=M+T
150 CLS
152 IF M=0 GOTO 170
155 GOTO 40
170 PRINT "No money left"
180 END
Code
Credits
Related products


Leave your feedback...