
Raspberry Pi Robotic Arm - Mycobot With Graphic Coding Cases
Made by Elephant Robotics / Robotics
About the project
How to move a collaborative robotic arm?
Project info
Difficulty: Easy
Platforms: Raspberry Pi, Elephant Robotics
Estimated time: 1 hour
License: GNU General Public License, version 3 or later (GPL3+)
Items used in this project

Story
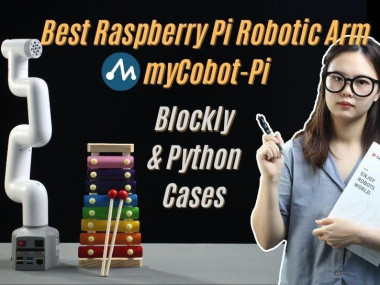
Best Raspberry Pi Robotic Arm - myCobot-Pi with Blockly and Python Cases.
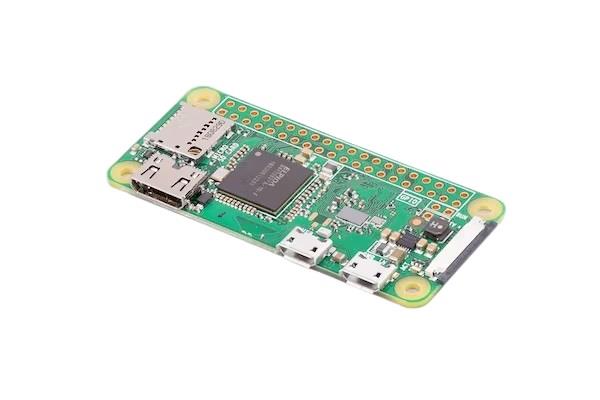
Background:What does Pi stand for?Raspberry Pi is a single-board microcomputer created by Cambridge engineers and computer scientists. When first released on 29th February 2012, it was initially designed for educational purposes. Students and tech enthusiasts of all ages use it to enhance programming skills and understanding of hardware. Over the past 10 years, the Raspberry Pi has powered a wide variety of projects and commercial applications. This credit-card-sized device has now become the world's third best-selling computer, creating a market worth over $1 billion.
The possibilities are virtually limitless with this small and powerful computer. Common applications for the Raspberry Pi include building desktop PCs, DIY game consoles, a media centre connected to a TV, and more. With technological advancements in the Raspberry Pi ecosystem and the continuous transformation of industrial robot control systems into automation, the need for flexible monitoring, control, and operation of devices is on the rise. Makers with programming knowledge utilize a Raspberry Pi to create a product prototype or start a robotics project on Kickstarter.
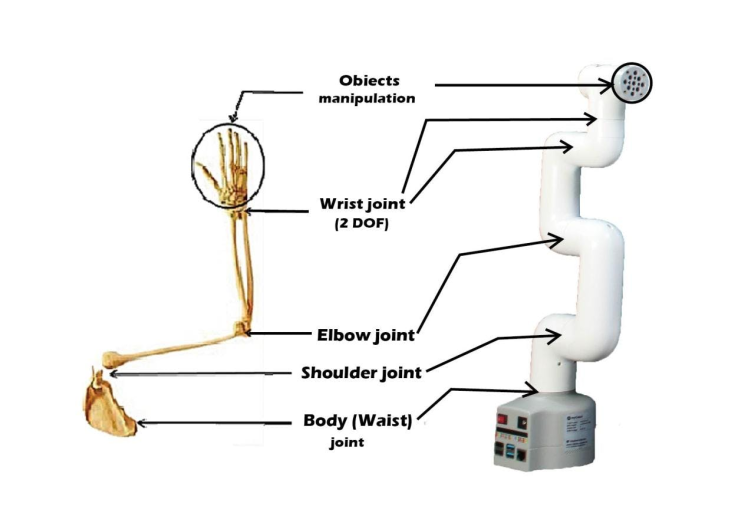
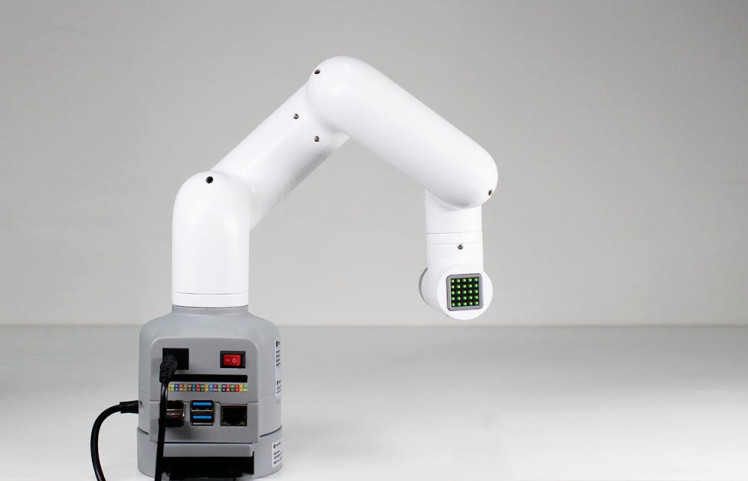
What is 6-DOF robotic arm?Among these applications, myCobot-Pi 280 was introduced by Elephant Robotics, which aims to bring more possibilities with cobots and robotic arms to the world. The Robotic arm has been widely used in research, development, and teaching. It's a serial manipulator with the joints allowing rotation. A typical robotic arm geometry consists of the waist, shoulders, elbows, and wrists, corresponding to the human arm joints. And each joint has its Degree of Freedom (DOF). The arm is fully-actuated with each DOF achieved by a precise servo motor. Also, with the help of end effectors, a robotic arm can be flexible in object manipulation. According to experiments and testing, a 6-DOF robotic can reach any 3D position within its working range. It is suitable for robotics learners and developers to start with. That's why we choose myCobot-Pi 280 here for demonstration.
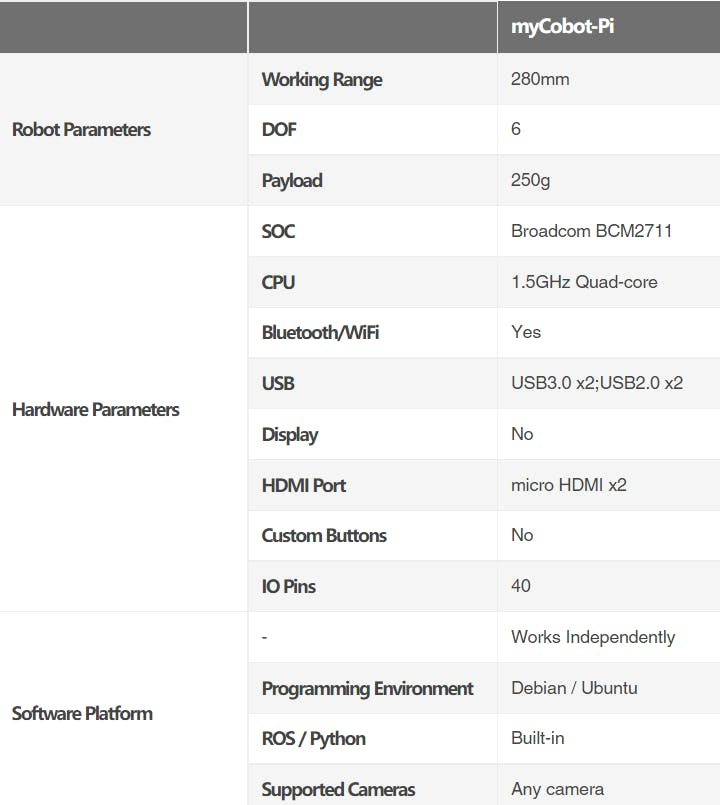
As for myCobot-Pi 280, it is a typical 6-DOF collaborative robotic arm powered by Raspberry Pi 4B with a 1.5GHz 4 core CPU, running on Debian/Ubuntu platform. Built-in ROS and Blockly visual programming enable myCobot-Pi to operate with relatively high scalability. It is regarded as the most affordable portable processor.
Case study and tutorialWhat is myCobot-PiHere we're going to closely look at two cases that even beginners can start to customize the myCobot-Pi easily. By doing so, you can have a deeper understanding of how a robotic arm moves.
We're going to use myCobot-Pi 280 to demonstrate here. First, let's look at its specification.
So, it has unlimited potential with the Raspberry Pi ecosystem.
As for today, we're going to demonstrate how we can move myCobot-Pi using Myblockly and python.
Now we have myCobot-Pi all settled down and fixed using a base to make sure it does not fall. Plug the charger and switch on the button and you will see the display screen in on in green colour. And connect to an extra display screen can you will see all necessary software is installed. This UI will help us a lot.
What is MyBlockly ?In terms of the software platform, we here choose Blockly and Python to demonstrate.
With Myblockly, our free desktop application uses blocks to create your robotic programs. Based on Blockly (similar to Scratch), our visual programming interface allows you to quickly and easily create robotic programs without any prior programming knowledge. You can also use RoboFlow, our software for industrial robots.
Blockly is a puzzle-style programming software based on the python environment and the pymycobot dependent library, which allows users to program and control myCobot in a building block-like method. It is especially suitable for beginners to learn programming and enhance programming thinking. Blockly also provides a python display interface, which converts the Blockly program built by the user into a python to help them learn python syntax.
For example, in Myblockly, the Sleep function

corresponds to
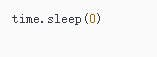
in python. It means the arm will keep still for 0 seconds until next operation.
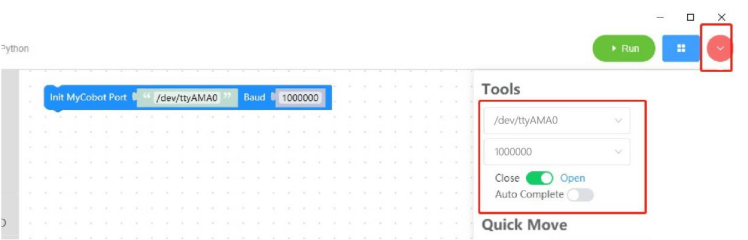
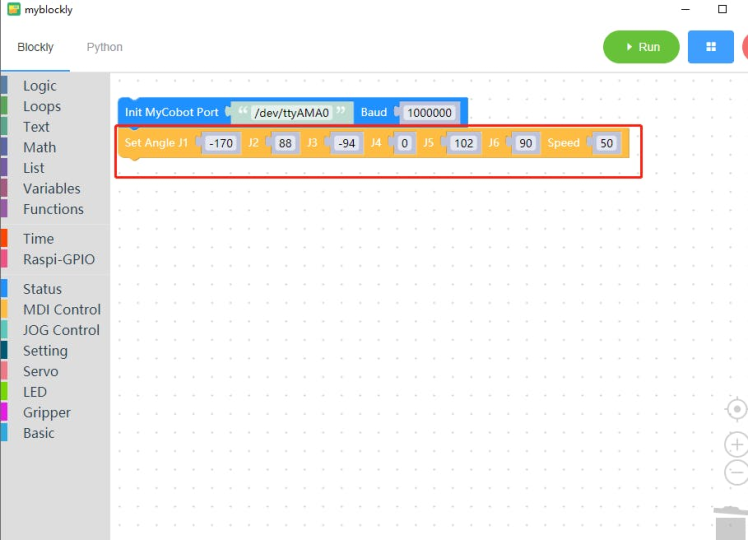
First, we shall connect myCobot to MyBlockly. Click the red button and expand the Tools view, choose the port and set the Baud rate to 1000000.
To motivate and move myCobot-Pi, we are going to learn the Angel and Coordinates model.
1. Angle
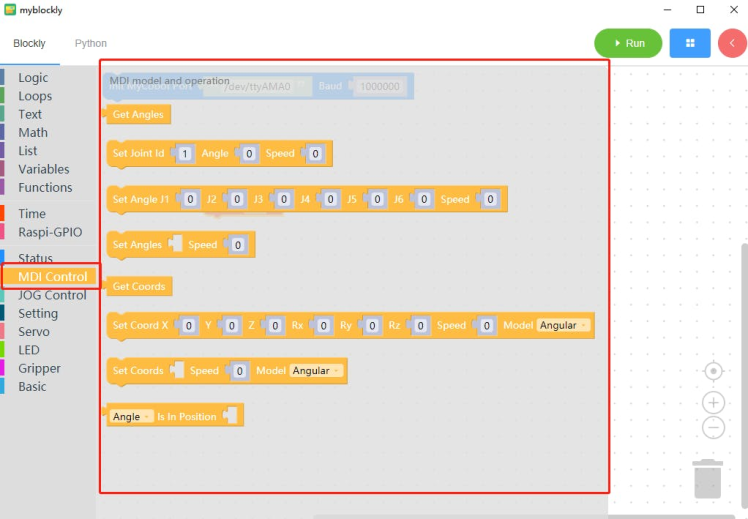

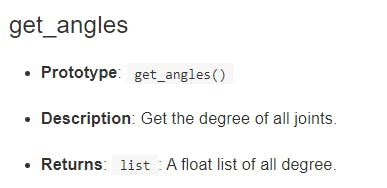
This function can get the current angle of each joint of the robot arm.

This function enables a certain joint to move towards a set angle with a set speed.
Note: the Joints from bottom to top are respectively J1 to J6.

This function enables multiple joints to move towards set angles together with a set speed.
2. Coordinate:

This function can get the current coordinates of the robot arm (x, y, z, rx, ry, rz)

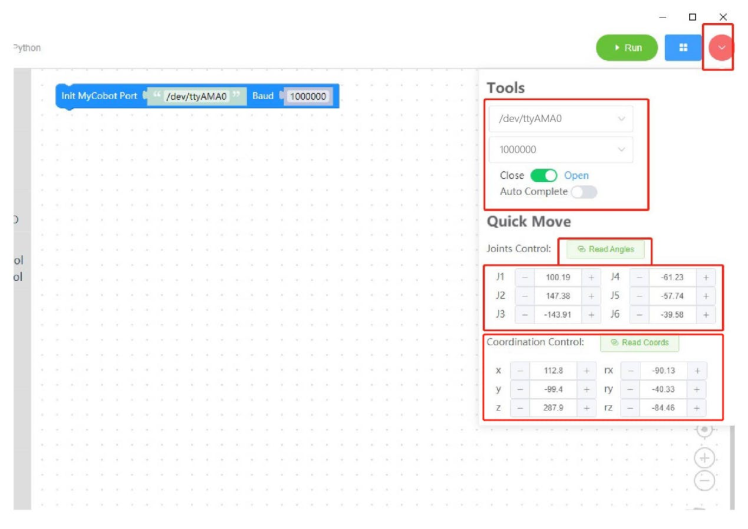
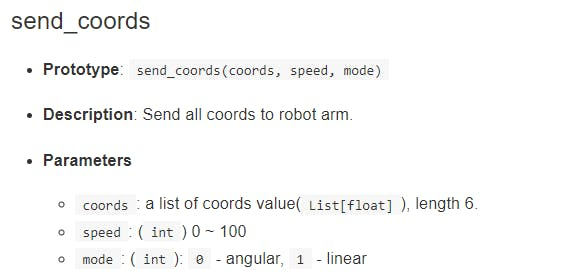
This function enables the manipulator to move to the set coordinates with a set speed to reach the specified coordinates.
The mode can be adjusted to linear and non-linear (angular).
Linear: Intelligently plan the route, allowing the end (6th axis) of the robotic arm moves to the specified point in a straight line.
Angular: randomly plan the route as long as the end (6th axis) of the robotic arm moves to the specified point with the specified attitude.
Now we know how to make a robotic arm move, we want to make it move to several angles or coordinates in order. We need to look at the Time model.
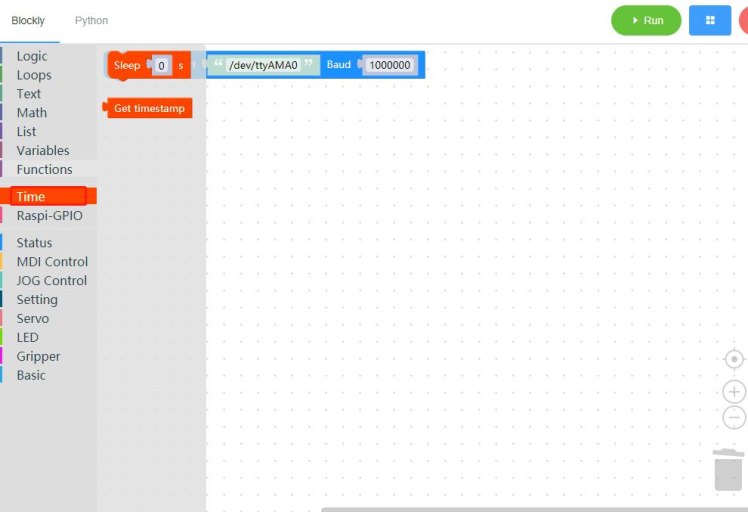

This function keeps the arm still for a set time second until next order arrives.
Cases demonstration:Now let’s get our hands dirty and make some fun applications.
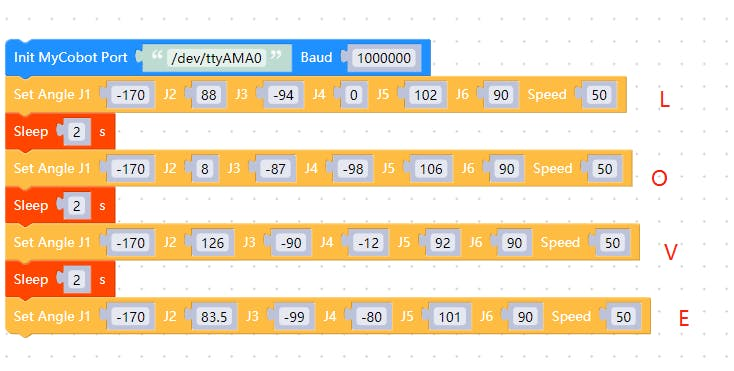
Case 1: Illustration of the robotic arm in ‘L’ ‘O’ ‘V’ ‘E’ poses of “LOVE”I will demonstrate how to get the coordinates of the L, O, V, E poses and the set angles one by one, and then debug and run the program.
Step 1:get the current angles and coordinates.
Method 1: rotate the robotic arm to shape the L pose, and then use the Get Angles or Get Coords functions to get the current angles and coordinates.
(1) Get Angles

(2) Get Coords

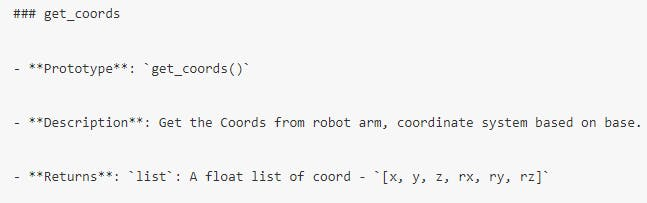
Here is the angle values after running the Get Angles function.
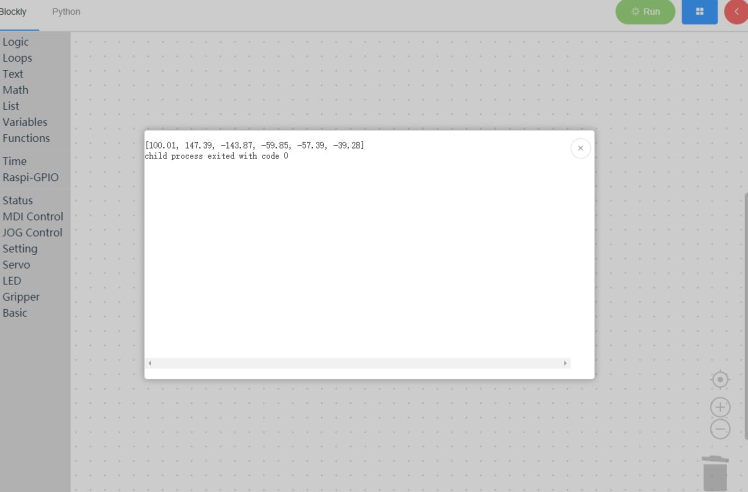
Method 2: read the parameters on the right of the screen in Myblockly and record them.
Step2: Once we have the angles or coordinates, we will usethe Set Angle / Set Coord function to move the arm. fill in the parameters in the left fields.


In python, mode parameter 0 corresponds to angular mode, and 1 is the linear mode.
Step3: Repeat steps 1 and step2 to get the angles/coordinates of ‘O’ ’V’ ’E’ poses.
Step4: Set interval time. For each pose, we shall wait for 2 seconds to show the next pose. Here we will use the Sleep function.
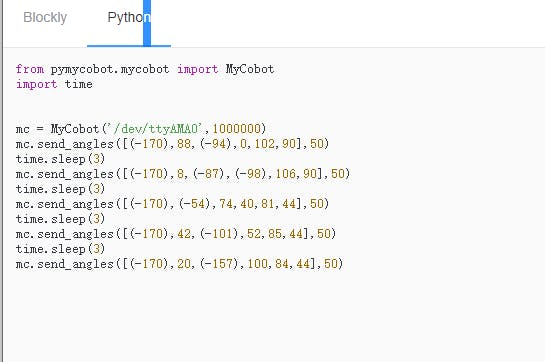
The corresponding python program is shown here.
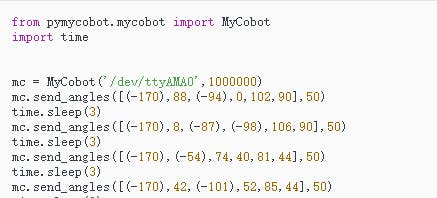
Step5: Run the program and arm is illustrate the poses.
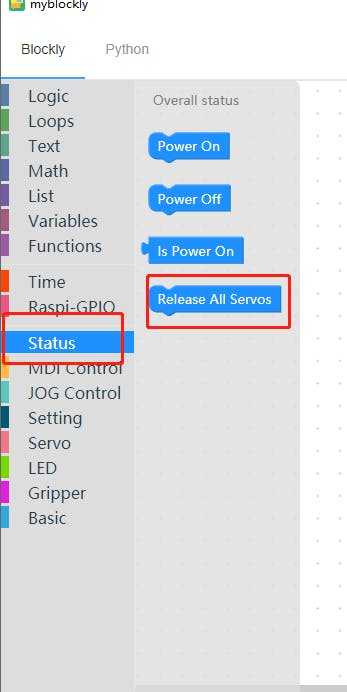
Debug: If the arm cannot be adjusted. We can release all the joints using Release All Servosfunction in Status Model.
Customization:Other poses can also be customized.
Layout the letters/shapes you want to show. And repeat the steps above.
Here I chose " LUCKY " to modify the numerical implementation in python.
Playing the xylophone is to use the coordinate control movement to realize the action of hitting the xylophone. Adjusting the speed to control the strength of the hitting, and moving the wooden stick to produce different timbres.
Preparation:Here we have a percussion instrument xylophone, and tie a drum stick to the end of the robotic arm and secure it.
Program:The instruments are all fixed, so we need to get the angle/coordinates of the robotic arm to make some adjustments to achieve this movement. The specific operation module is similar to that of the previous case.
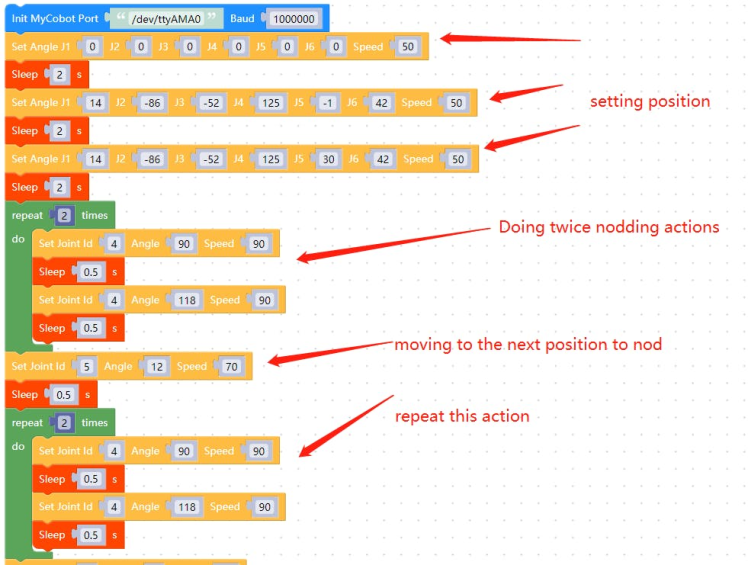
Here we will come across a new function called Repeat, which saves a lot of time to write repetitive syntax.
Step1: Get the current angles and coordinates and set the arm to a certain position
This is almost the same as the previous case.
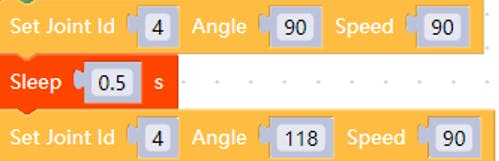
To beat the instrument, we only need to adjust the angle of Joint 4. And to move to another metal bar to produce a different timbre, we only need to adjust the angle of Joint 5.
For example, as for myCobot-Pi in this case, the initial angle of joint 4 is 90. When we change it to 118, the stick can hit the instrument to produce a sound.
Step2: Repeat the hitting actions.
Here we will use the repeat function. The only parameter here is how many times we want to repeat the action. Here we set it to 2.
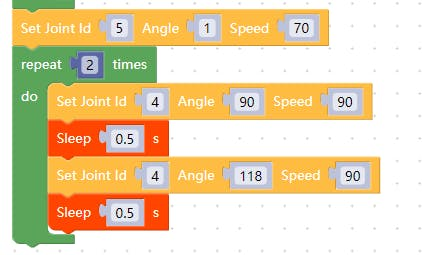
Note: the Set Angle function should be inside the Repeat function.
Step3:Move to another metal bar.
If we want to produce another timbre then we’re supposed to move the Joint 5. This can be achieved by adjusting the angle of Joint 5 using the Set Angle function as well.

Step 4: Run the program.
Here we are going to make some real noise.
Its python version is shown below,
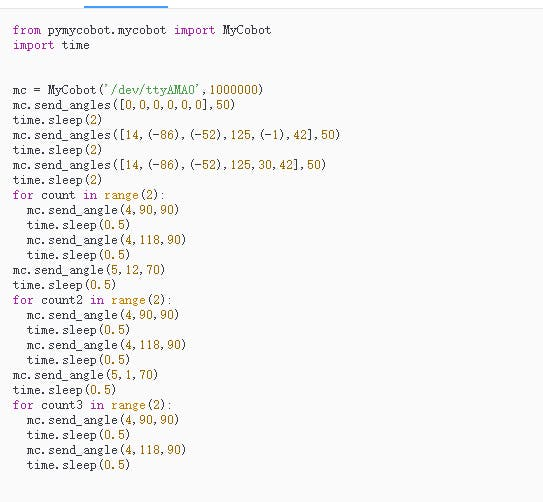
Normally, we have 2 functions to move myCobot-Pi, one isthe Set Anglefunction, and another one is the Set Coords function. And customers can use these functions to move the joint to specific coordinates or angles with a specific speed. We can either implement it using python or MyBlockly, which is easy to use.
Why not come and start to customize your unique myCobot-Pi.
You can also check out the video for detailed demonstration.
Credits
Elephant Robotics
Elephant Robotics is a technology firm specializing in the design and production of robotics, development and applications of operating system and intelligent manufacturing services in industry, commerce, education, scientific research, home and etc.
Related products


Leave your feedback...