

Psoc 4: Wireless Programming

Made by electrouser805 / Communication / Productivity
About the project
Instead of programming CY8CKIT-049-42xx PSoC 4 through USB, program it wirelessly via Bluetooth-UART link with HC-05 module.
Project info
Items used in this project
Hardware components


Story
Intro
The CY8CKIT-049 is a 4$ prototyping kit with PSoC chip from Cypress Semiconductor based on ARM M0 MCU. It has following features :
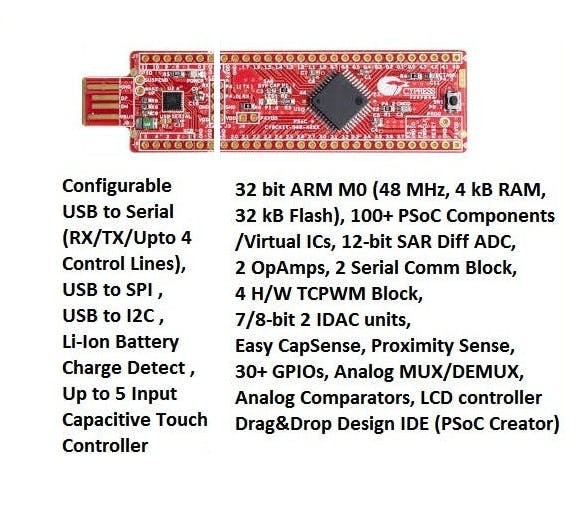 CY8CKIT-049
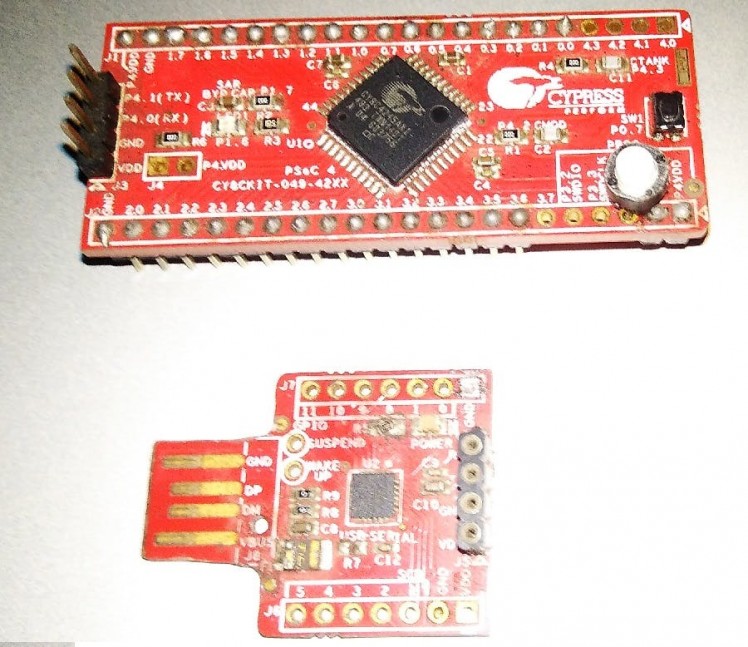
The first part of the kit is an USB-UART module which serves as a programmer. The Second part has CY8C4248AXI-083 PSoC chip (ARM M0 MCU), which comes with UART Bootloader allowing it to be programmed over UART protocol.
Problem with Prototyping
The problems I faces while programming this kit in some of my old projects are :
- Dodgy connection on USB Port during programming
- Limited power for External Circuits
- Heavy project hardware hanging from PC USB
- Plug and unplug again and again to reprogram
I was annoyed and stopped using these kits for a while.
Solution to the Problem
The Solution is very simple:
- Add a reset button for power cycle before bootlodable programming
- Replace the USB-UART module with HC-05 Bluetooth Module
Step 1: Snap your CY8CKIT-049 and add a Reset Button
Snap the kit and solder necessary male/female pin header -
 Snapped, header soldered and Reset Button added
Solder the reset button
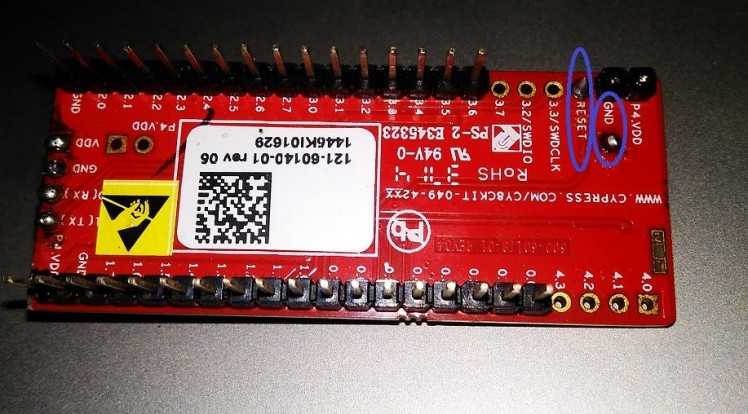 Push switch between Reset and Gnd pin
Step 2: Use the USB-UART to Change HC-05's Baud to 115200
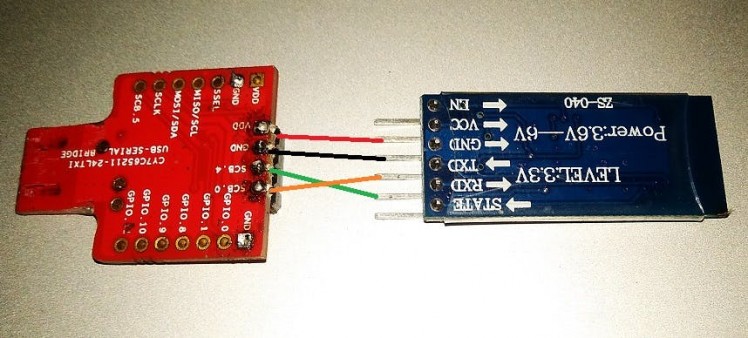
- Connect the HC-05 to USB-UART module of the kit according to following diagram:-
 Changing Baud of HC-05
- Connect to PC with a UART module in AT command mode while holdiing the 'key' button on HC-05 module
- A new port should appear as follows
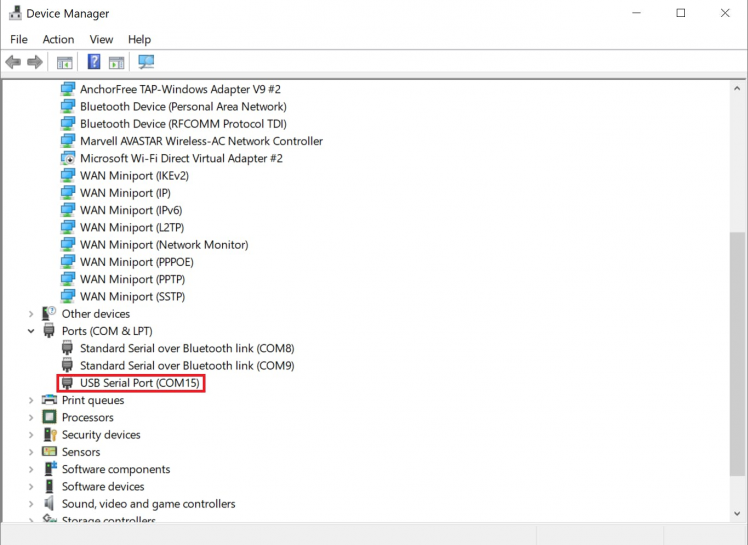
Open Arduino IDE >> tools >> Port and select the new USB serial port. Next Open serial monitor and select 38400 ( which is AT command mode baud )
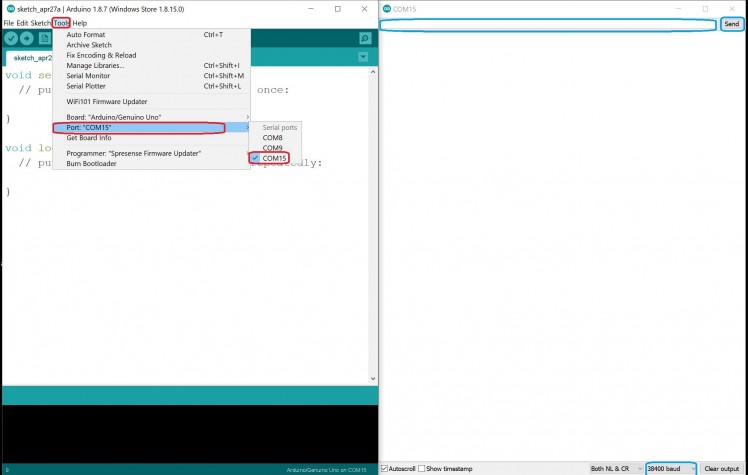
Now apply following AT commands in the Arduino serial monitor one line at a time and press send
AT
AT+UART = 115200,0,0
AT+RESET
This will change the baud rate of HC-05 to 115200, which is required for programming the main part of the PSoC kit .
Step 3: Pair HC-05 to PC and Find the Port
Go to Windows Bluetooth option and pair HC-05, new virtual com port will be installed after successful pairing.
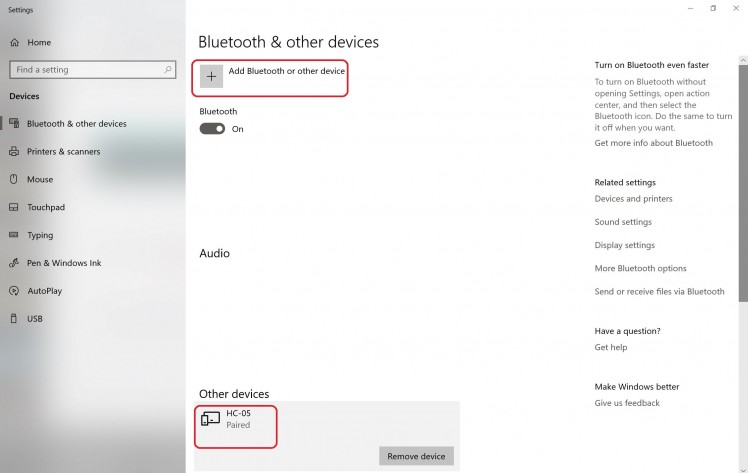 Adding HC-05 to Windows PC
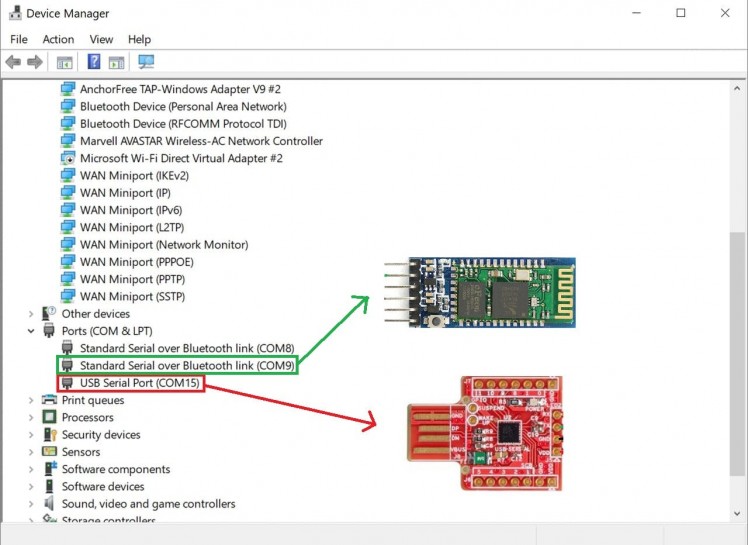 We will use the green one
Step 4: Connect HC-05 to PSoC
Now connect the HC-05 to the main part of the CY8CKIT-049 which has the mcu. See Schematic below for details.
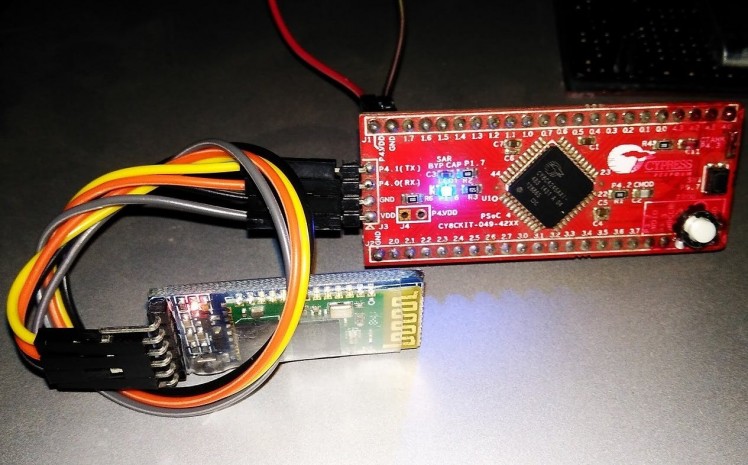 Connection between PSoC4 and HC-05
Step 5: Program over Bluetooth with PSoC Creator
- Open "PSoC Creator (4.2)" and compile the example "Bootloadable Blink LED" program.
- Press & hold the Bootloadable button, press the reset button, release both button to enter programming mode.
- Then go to Tools >> Bootloadable Host >> Select the Bluetooth Serial Port with Baud 115200.
- Next click the upload to program wirelessly.
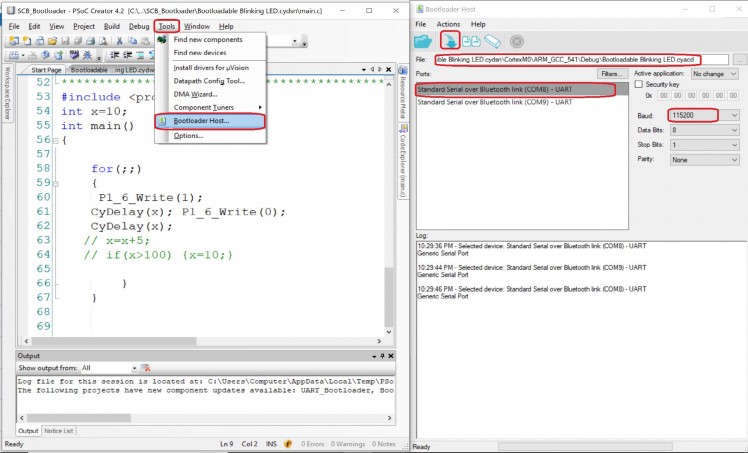 Uploading over Bluetooth

Leave your feedback...