
Measure Angles Easily With Mpu6050 And Esp32: Part 1

Made by mahmood-m-shilleh
About the project
Learn how to easily get angles using is2dev library with the MPU6050 in the Arduino Framework
Project info
Difficulty: Easy
Platforms: Microsoft, PlatformIO
Estimated time: 1 hour
License: GNU Lesser General Public License version 3 or later (LGPL3+)
Items used in this project

Story
Using the MPU6050 to find angles can be a tricky business, requiring sophisticated forms of sensor fusion and offset calculation. Many tutorials online demonstrate how to calculate the angle with simple sets of formulas, which frustratingly do not work in practice, as you may have found out. There is a convenient library i2cdevlib that utilizes sensor fusion and does the heavy work for us to give us accurate orientation values in both static and dynamic sensor applications. We will walk through how to set that up in this tutorial using PlatformIO IDE extension in VSCode with the Arduino framework. By the end of it, you will have code that provides accurate sensor values without needing to understand the complicated theory of sensor fusion algorithms.
Before reading the remainder, be sure to subscribe and support the channel if you have not!
Subscribe:
Support:
https://www.buymeacoffee.com/mmshilleh
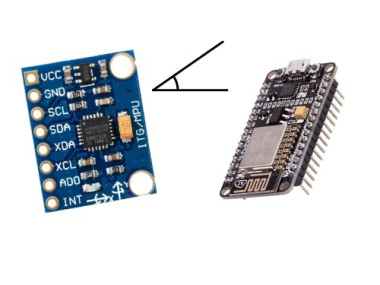
Step 1-) Setup Physical Connection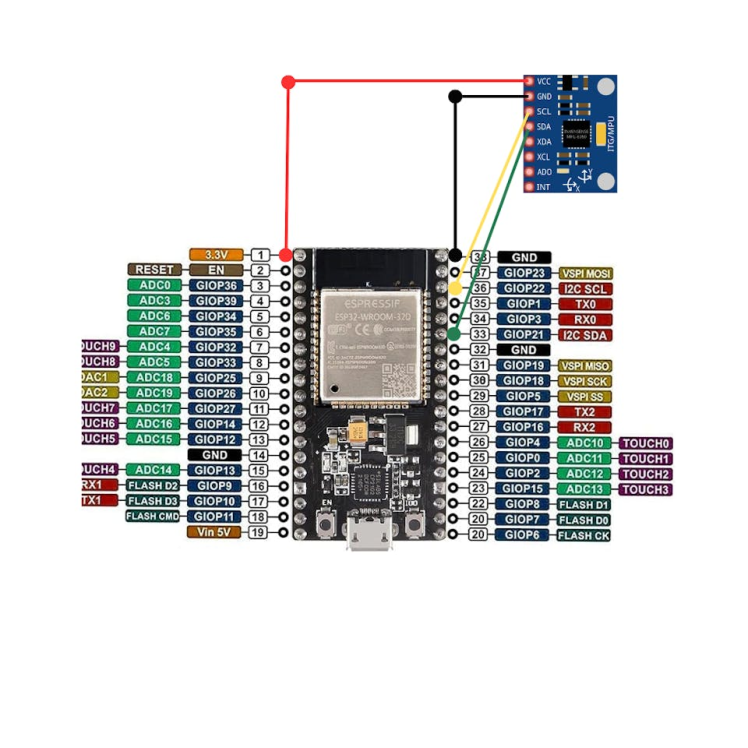
Set up your connection as shown in the diagram with 4 jumper wires. You can buy the ESP32 and the MPU6050 with the links below; they come pre-soldered which allows you to save time and money.
Step 2-) VSCode Project SetupWe use PlatformIO to set up our project in this tutorial (the same steps can be followed with Arduino IDE essentially). PlatformIO is a user-friendly and extensible integrated development environment with a set of professional development instruments, providing modern and powerful features to speed up yet simplify the creation and delivery of embedded products. In my opinion, it is much more easy to work with and visually appealing than Arduino IDE, also you can utilize all of the great extensions in VSCode, particularly GH CoPilot which some people find essential these days.
You can get started with PlatformIO by downloading the extension, more details here, and in the Youtube video above.
Once you have the extension you can set up a new project as shown here; select the name and board, in this case ESP32 Dev Module is the board. Of course, make sure your device is plugged into the computer so that VSCode can find the device.

Once you have that you want to download the zipfile of the repository that contains the code here.
https://github.com/jrowberg/i2cdevlib/tree/master
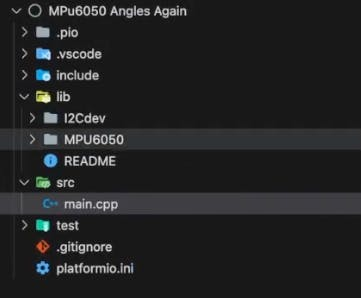
Unzip the contents and move both the Arduino/MPu6050 and Arduino/I2Cdev code into your lib directory in PlatformIO. We do not need all of the source code in the repo, in fact, most of it does not pertain to our use case! Our project structure should look as follows:
Now that we have the library in the needed directory we can go ahead and copy one of their examples and do some slight modification… very convenient of them to include this.
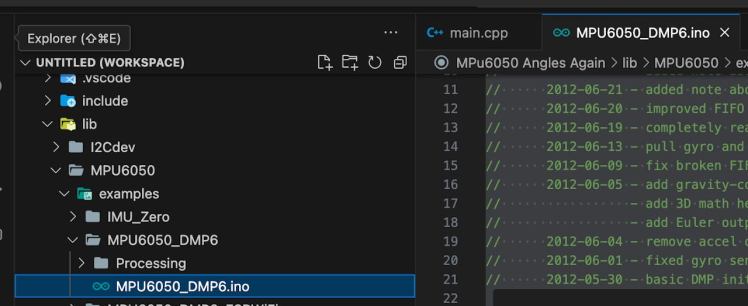
Simply copy the contents from the MPU6050_DMP6.ino into your main.cpp file in the src folder of your project. Change the default baud rate to 9600 and upload the code to the board. You should be prompted to enter any key to proceed with DMP. The first time you run the code you will need to replace the offsets it gives you shown below. Subtracting the offsets is needed to have more accurate angle values, all sensors come with some inherent bias and need to be calibrated. Thankfully the library does that for us we just need to substitute the offsets into the code accordingly. In my case, it gave me the offsets shown below:

If you are interested in the simple theory and math behind calculating offsets for the MPU6050, you can watch this past tutorial:
I substitute the offsets as (this section is already in the code you just ned to replace the numbers):
// supply your own gyro offsets here, scaled for min sensitivity
    mpu.setXGyroOffset(11);
    mpu.setYGyroOffset(-51);
    mpu.setZGyroOffset(-19);
    mpu.setZAccelOffset(2048); // 1688 factory default for my test chip
We can now rerun the code to get more accurate angle values. The angle values will display as ypr (yaw, pitch, and roll), you can add a delay as needed. It is best to calibrate the sensor on a tabletop utilizing a breadboard or calibration block so the accelerometer stays as flat as possible. All angles will be relative to the initial position, so keep that in mind, and they should be about 0 at the beginning until you start to move your sensor.
Once you have that, you have successfully utilized the i2cdev library to get accurate angle measurements for your application. The specifics of how the library utilizes sensor fusion to get accurate results are beyond the scope of this video. There are engineers dedicating their lives to sensor calibration and fusion, so do not be discouraged if you do not understand the underlying processes, there is a lot of theory involved to get accurate results.
Note that the library has some shortcomings, but compared to the rest of the techniques on the internet this is a great way to satisfy many application needs while keeping it simple and not having to understand the math involved with angle measurement. I leave it up to the reader to further indulge in the topic if he/she is interested!
ConclusionHope you stay tuned for part 2 where we will show how to utilize a graphic representation using processing and the code to allow you to visualize the MPU6050 angles in free space. It will be pretty cool and allow you to verify the results that you retrieved in this part. Let me know if you have any questions I will try my best to answer them! Preferably, you can comment on Youtube so everyone can see our discussion. Once again do not forget to subscribe and like the video, we are approaching 1, 000 subscribers soon, and would be happy to have you along the journey! Thanks for reading ;)
Credits
mahmood-m-shilleh
Mechanical and Software Engineering Background. University at Buffalo 2019 Texas A&M 2021 I make data pipelines for my day job. Outside of work, I participate in online communities regarding Full Stack Engineering, Microelectronics, and more. You can find more details about me on my Youtube Channel. https://www.youtube.com/@mmshilleh Feel free to reach out!
Related products


Leave your feedback...