
Meadow Rover Part 1: Motor Control

Made by jorgedevs
About the project
Learn how to make your first rover with Meadow using a SN754410NE motor controller, and a few LEDs to indicate which direction it moves.
Project info
Difficulty: Easy
Platforms: Microsoft, Meadow, Wilderness Labs
Estimated time: 1 hour
License: MIT license (MIT)
Items used in this project
Hardware components


Story
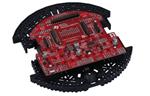
In this project we're going to learn how easy is to build your first rover using a few LEDs, a couple of motors and a SN754410N chip to control them. Everything you need to build this project is included in the Wilderness Labs Meadow F7 w/Hack Kit Pro. We'll see how easy is to program these peripherals using Meadow.Foundation.
Meadow.Foundationa platform for quickly and easily building connected things using.NET on Meadow. Created by Wilderness Labs, it's completely open source and maintained by the Wilderness Labs community.
If you're new working with Meadow, I suggest you go to the Getting Started w/ Meadow by Controlling the Onboard RGB LEDproject to properly set up your development environment.
Step 1 - Assemble the circuitWire all the components as shown in the Fritzing diagram below:
Circuit diagram

Circuit diagram
Notice that we have 4 AA batteries connected to the Power and Ground rails on the breadboard. The motors would draw too much power for Meadow to handle it, which is important to have an external power supply.
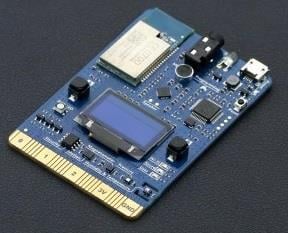
To power Meadow externally, you can use a its battery charging onboard circuit. Connect any standard 3.7V LiPo/LiIon battery, and you can charge it while the board is connected via the USB connector. You can check Powering the Meadow F7 Micro to read more.
Step 2 - Create a Meadow Application projectCreate a new Meadow Application project in Visual Studio 2019 for Windows or macOS and name it LedCar.
Step 3 - Write the code for LedCarIt is a good practice to create a Controller class for every peripheral involved to make the project scalable and maintainable. These Controller classes abstracts all the peripheral's logic so the main program logic will remain cleaner and easier to understand.
Add CarController class
Add a CarController class with the following code:
public class CarController{ float SPEED = 0.75f; HBridgeMotor motorLeft; HBridgeMotor motorRight; public CarController(HBridgeMotor motorLeft, HBridgeMotor motorRight) { this.motorLeft = motorLeft; this.motorRight = motorRight; } public void Stop() { motorLeft.Speed = 0f; motorRight.Speed = 0f; } public void TurnLeft() { motorLeft.Speed = SPEED; motorRight.Speed = -SPEED; } public void TurnRight() { motorLeft.Speed = -SPEED; motorRight.Speed = SPEED; } public void MoveForward() { motorLeft.Speed = -SPEED; motorRight.Speed = -SPEED; } public void MoveBackward() { motorLeft.Speed = SPEED; motorRight.Speed = SPEED; }}This controller is a simple driver for the car, encapsulating the logic to control the motors. Rather than changing the speed of the individual motors every time we want the car to go to any direction, we can simply create four methods (MoveForward, MoveBackwards, TurnLeft, TurnRight) and one method to stop (Stop).
MeadowApp Class
For the main MeadowApp class, copy the following code:
public class MeadowApp : App<F7Micro, MeadowApp>{ PwmLed up, down, left, right; CarController carController; public MeadowApp() { Initialize(); TestCar(); } protected void Initialize() { up = new PwmLed(Device, Device.Pins.D13, TypicalForwardVoltage.Red); down = new PwmLed(Device, Device.Pins.D10, TypicalForwardVoltage.Red); left = new PwmLed(Device, Device.Pins.D11, TypicalForwardVoltage.Red); right = new PwmLed(Device, Device.Pins.D12, TypicalForwardVoltage.Red); up.IsOn = down.IsOn = left.IsOn = right.IsOn = false; var motorLeft = new HBridgeMotor ( a1Pin: Device.CreatePwmPort(Device.Pins.D05), a2Pin: Device.CreatePwmPort(Device.Pins.D06), enablePin: Device.CreateDigitalOutputPort(Device.Pins.D07) ); var motorRight = new HBridgeMotor ( a1Pin: Device.CreatePwmPort(Device.Pins.D02), a2Pin: Device.CreatePwmPort(Device.Pins.D03), enablePin: Device.CreateDigitalOutputPort(Device.Pins.D04) ); carController = new CarController(motorLeft, motorRight); } protected void TestCar() { Console.WriteLine("TestCar()..."); while (true) { up.IsOn = true; carController.MoveForward(); Thread.Sleep(1000); up.IsOn = false; carController.Stop(); Thread.Sleep(500); down.IsOn = true; carController.MoveBackward(); Thread.Sleep(1000); down.IsOn = false; carController.Stop(); Thread.Sleep(500); left.IsOn = true; carController.TurnLeft(); Thread.Sleep(1000); left.IsOn = false; carController.Stop(); Thread.Sleep(500); right.IsOn = true; carController.TurnRight(); Thread.Sleep(1000); right.IsOn = false; carController.Stop(); Thread.Sleep(500); } }}In MeadowApp's Constructor, notice it will only call two methods: Initialize and TestCar.
In the Initialize method, you can see how all the four LEDs are initialized as PwmLed (which we'll use to turn them on and off depending the direction the car is going), two HBridgeMotor objects (one for each motor), and are passed to a new CarController object.
In the TestCar method, the App enters an infinite while loop, and it will call the CarController's methods to move on each direction for one second and stop for half a second in between.
Click the Run button in Visual Studio. It should look like to the following GIF:
LedCar project running...

LedCar project running...
Check out Meadow.Foundation!This project is only the tip of the iceberg in terms of the extensive exciting things you can do with Meadow.Foundation.
- It comes with a huge peripheral driver library with drivers for the most common sensors and peripherals.
- The peripheral drivers encapsulate the core logic and expose a simple, clean, modern API.
- This project is backed by a growing community that is constantly working on building cool connected things and are always excited to help new-comers and discuss new projects.
Schematics, diagrams and documents
Code
Credits
Related products


Leave your feedback...