
Iot Cloud Access With Micro:bit Over Ble For Remote Sensing

Made by electrouser805 / IoT
About the project
Program BBC Micro:bit with mbed OS and remotely send data to cloud by utilizing BLE to smartphone/PC IoT cloud gateway.
Project info
Difficulty: Easy
Platforms: Android, Arm Mbed, micro:bit
Estimated time: 6 hours
License: Apache License 2.0 (Apache-2.0)
Items used in this project
Hardware components


View all

Story
Introduction
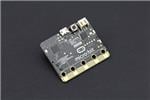
BBC micro:bit is essentially an nRF51822 development board with lots of goodies. It has BLE (Bluetooth Low Energy ) feature which enables IoT capabilities. Although the board is mainly focused for kids to learn programming on GUI Block Editor environment, professional developers and hardcore hobbyists can program this board on Mbed platform as an nRF development board to utilize the free development apps/services from Nordic Semiconductor. There are program examples on Mbed too. In this project, an UART-BLE based IoT solution for BBC micro:bit will be developed utilizing these services.
Connection Topology
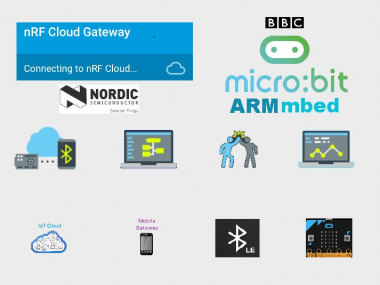
Following diagram explains the connectivity of Micro:bit to the Internet.
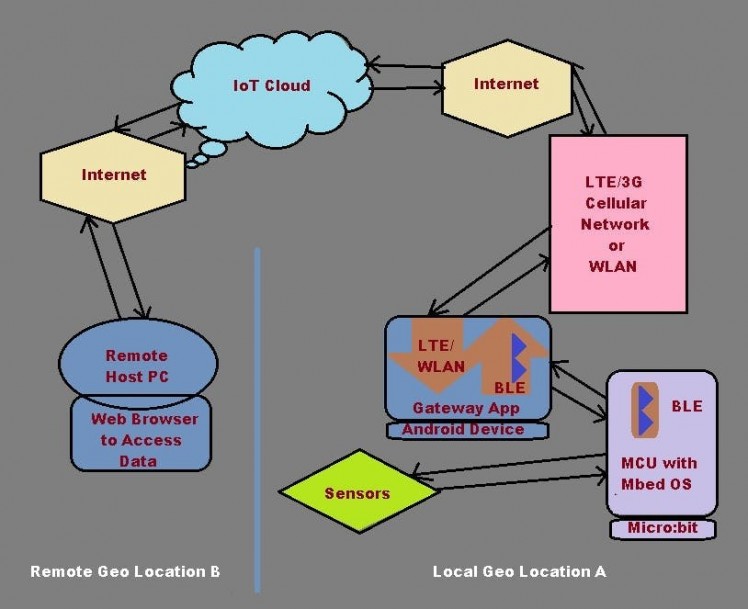 Connectivity
- Micro:bit sends UART data over BLE to an Android device running Gateway App. This app ports data over Wifi/LTE network to the Internet.
- Then the data goes to the nRF IoT Cloud service.
- From the other side user can access the Cloud to fetch data through appropriate credentials. The same credentials (login ID/password ) must be applied to the Gageway App.
- Gateway app acts as a bridge since BLE devices can't directly access internet.
Step 1: Creating Accounts on nRF Cloud and Mbed
Go to https://os.mbed.com/account/signup and create a free account or login with existing account.
 mbed
mbed
Go to https://nrfcloud.com and create an account.
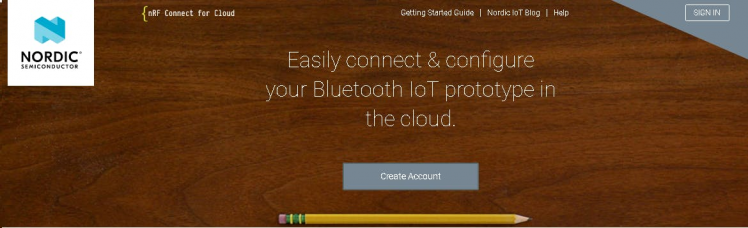 nrfcloud
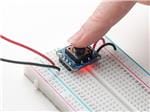
Step 2: Preparing the Hardware
A 4x6 cm Protoboard is soldered with the micro:bit to pin out the I/O pins. This protoboad will protect the chips on the board and allow space for additional circuits.
; ;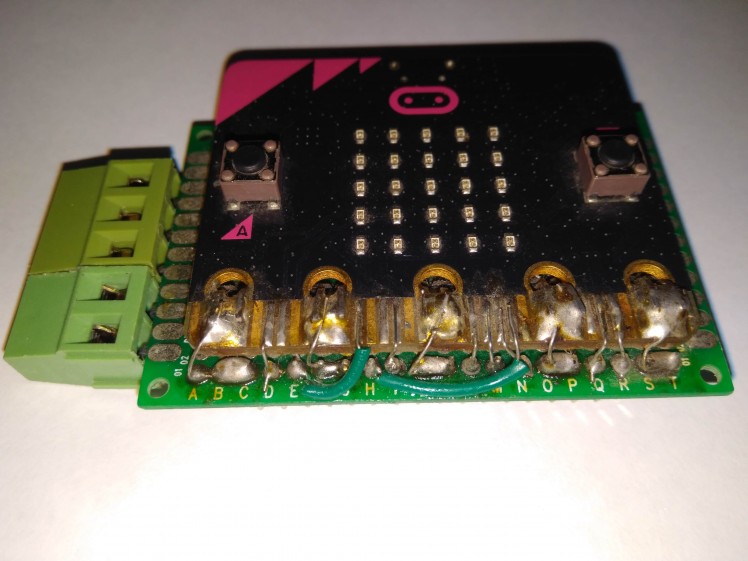 1 / 2 • Green Protoboard connection
For this project, a lead acid battery which is used in an existing automotive or renewable energy solution will be monitored remotely. That is why a 22k+100K voltage divider network is soldered on a protoboard on the back of the micro:bit.
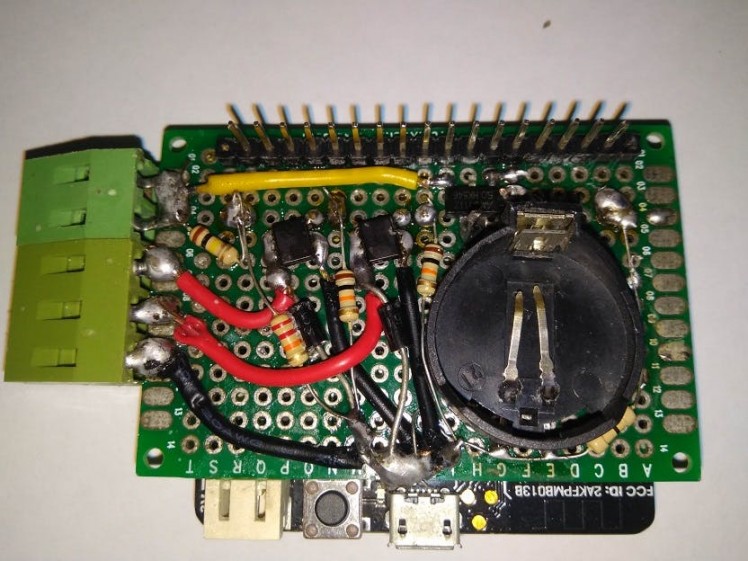 Voltage Divider for ADC and MOSFET for Load Control
The CR2032 holder will allow portable power option. 2 N-Ch MOSFETs are also installed for Load control.
Finally, the Lead Acid battery is connected to the microbit to monitor its voltage remotely.
; ;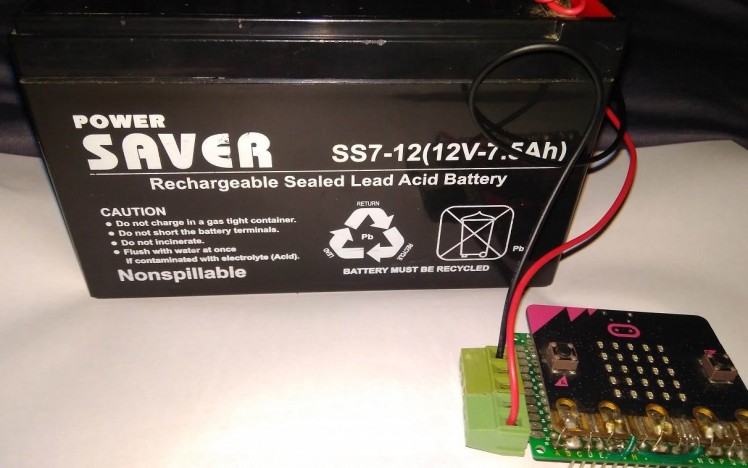 1 / 2 • Battery voltage monitoring from Cloud
Step 3: Programming the Code
Login to mbed account and go to https://os.mbed.com/platforms/ to select BBC Micro:bit as platform.
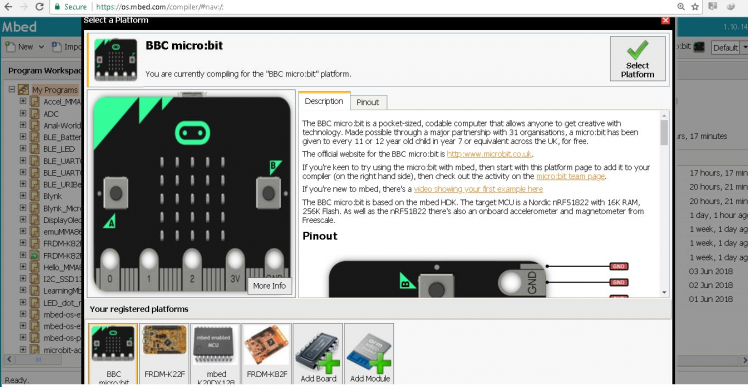 platform selection
Go to following link and Import to Mbed Compiler
If everything is done properly, Mbed should appear like this on web browser :-
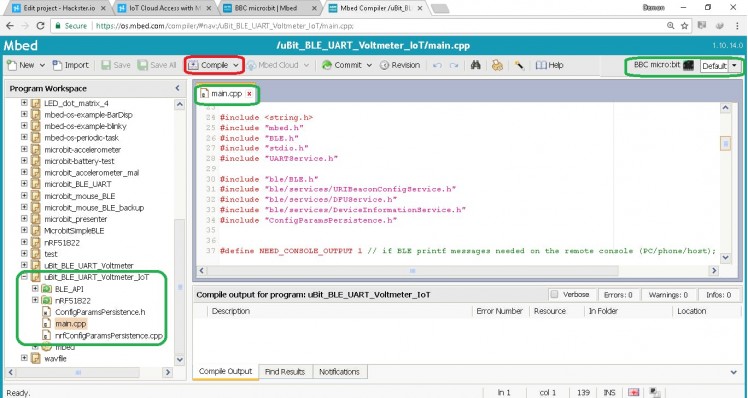 mbed compiler
- Board Setting : BBC micro:bit (default)
- Click "Compile" to compile the code and generate hex file
Warning : Do not update "BLE_API" and "NRF51822" folders
Code Tips 1 :
ticker.attach(periodicCallback, 5);
Ticker is a thing in MBED that calls a function periodically, here it will call "periodicCallback" every 5 seconds, which means data will be send every 5 seconds to the cloud. If you wish to send data every 1 minute or 60 seconds
write this line :
ticker.attach(periodicCallback, 60);
Code Tips 2:
while (true) {
        ble.waitForEvent();
        val = ain.read_u16();
/// bla bla your code
}
Inside the while(true) {} loop with in int main(void){} is the place to write your program code.
Following BLE API must be kept running for BLE to work continuously.
ble.waitForEvent();
The following code fetch ADC data and keep it on val variable.
val = ain.read_u16();
Code Tips 3:
The blePrintf() API sends UART data over BLE. It only accepts String or char array. Therefore, before sending Numerical value, it must be converted to String
void periodicCallback(void)
{
    blePrintf("BATT VOlT: ");
    blePrintf(result);
    blePrintf("rn");
}
Useful Code Examples with MBED
See details here: https://os.mbed.com/docs/latest/reference/drivers.html
Writing a DigitalPin :
#include "mbed.h"
DigitalOut pin1 (P0_2); // big hole 1
int main()
{    while(1)
     {    pin1 = 1;    //same as digitalWrite (D7, HIGH);
          wait (0.5);  //same as delay(500)
          pin1 = 0;    //same as digitalWrite (D7, LOW);
          wait (0.5);  //same as delay(500);
     }
}
Reading a Digital Pin :
#include "mbed.h"
 DigitalIn buttonA (P0_17); // On Board Push Switch A
int main()
{
  int sw_state = 0;
  while(1)
     {    sw_state = buttonA.read(); // same as x = digotalRead(3)
          if (sw_state)
           {
             // do something
           }
           else
           {
             // do something else
            }
     }
}
Step 4: Flashing hex on Micro:bit
Connect micro:bit to PC with an USB cable and copy the hex file to micro:bit.
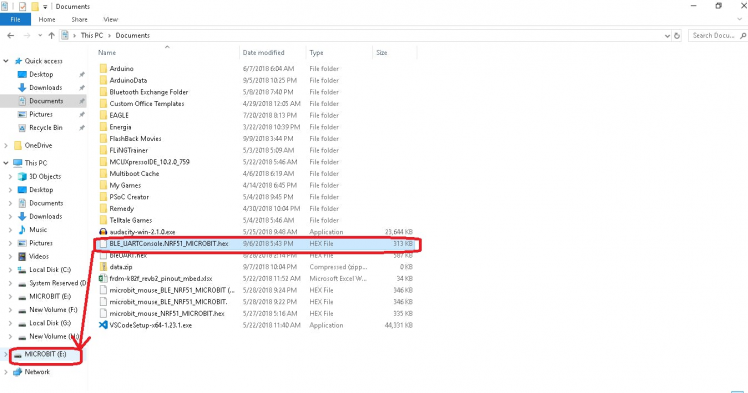 Flashing Microbit
Step 5: Installing nRF Cloud Gateway
- Go to Google Play store and Install nRF Gateway app.
- Turn on Bluetooth on the android device and run the app
- Login with previously created ID and Password for nRF cloud account.
- Keep the micro:bit nearby (with in 10 meters)
Step 6: Establish Connection to the Cloud
To establish the connection login from both the app and the remote terminal is required. This way both sides are connected to the cloud and exchange data.
Following videos demonstrate the connection and data exchange : -
Android App Gateway NRF Cloud AccessApp Links
Code References
- stackoverflow.com/questions/23191203/convert-float-to-string-without-sprintf/23191607#23191607
- https://os.mbed.com/teams/Bluetooth-Low-Energy/code/BLE_URIBeacon/?platform=Nordic-nRF51-DK
- https://os.mbed.com/teams/Bluetooth-Low-Energy/wiki/UART-access-over-BLE
- https://os.mbed.com/users/suntopbd/code/uBit_BLE_UART_Voltmeter_IoT
- https://docs.mbed.com/docs/ble-intros/en/latest/Introduction/BLE_API/
Additional Notes
- nRF Cloud is free for developers but the message limit is 1 Million per account
- Android device must have BLE (Bluetooth 4+)
- Micro:bit Mbed library is compatible with nRF51822 Mbed library which means 5x5 matrix display, accelerometer, magnetometer, etc. might work directly with associated API and device libraries (workaround required)
- Pin mapping as follows: (second column alias to be used in Mbed)
///////////////// pin table /////////////////////////
/////////////////////////////////////////////////////
// edge.pin    nrf51822pin    functions      note  //
/////////////////////////////////////////////////////
//  P2           P0_1        ADC/PWM/DIO      2    //
//  P1           P0_2        ADC/PWM/DIO      1    //
//  P0           P0_3        ADC/PWM/DIO      0    //
//  P16          P0_16           DIO               //
//  P5           P0_17       Button A/DI    pullup //
//  P11          P0_26       Button B/DI    pullup //
//  P20          P0_30       I2C SDA/DIO    pullup //
//  P19          P0_0        I2C SCL/DIO    pullup //
//  P15          P0_21       SPI MOS/DIO           //
//  P14          P0_22       SPI MIS/DIO           //
//  P13          P0_23       SPI SCK/DIO           //
/////////////////////////////////////////////////////
//                  LED Matrix pins                //
//  ROW 1  P0_13   ROW 2  P0_14   ROW 3  P0_15     //
//  COL 1  P0_4    COL 2  P0_5    COL 3  P0_6      //
//  COL 4  P0_7    COL 5  P0_8    COL 3  P0_9      //
//  COL 7  P0_10   COL 8  P0_11   COL 9  P0_12     //
/////////////////////////////////////////////////////
/////////// See uBit to nrf51822 Schematic for detailed pinout //////////////////////
// https://github.com/bbcmicrobit/hardware/blob/master/SCH_BBC-Microbit_V1.3B.pdf  //
/////////////////////////////////////////////////////////////////////////////////////
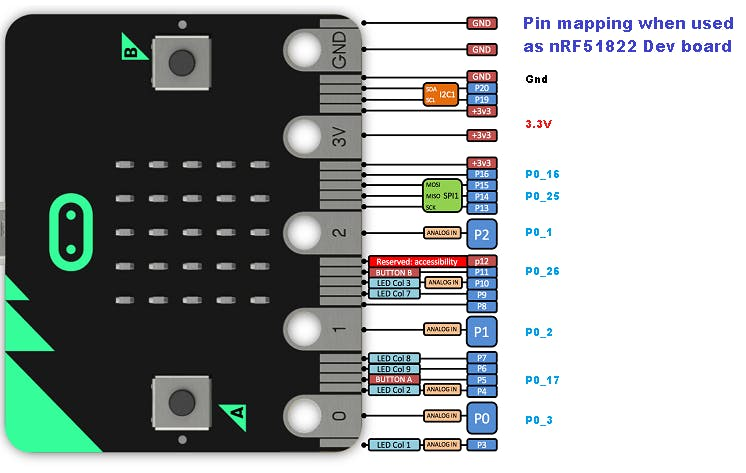 nRF51822 pin mapping on Mbed for microbit
Additional Pin Mapping
If you need to use all the available pins check this schematic of Microbit for other pins aliases to nRF51822 .
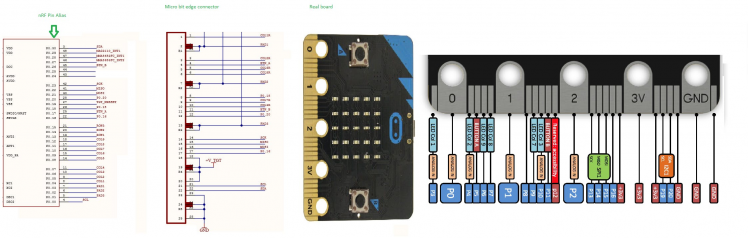 Pin Map lookup chart
source: uBit Schematic
Disclaimer
There is no intention of copyright infringement. This project is for non commercial and educational purpose. Any code, logo, image, video used here for illustration which is not my original work belongs to respective parties/owners.
Schematics, diagrams and documents
Code
Credits
Related products


Leave your feedback...