
How To Connect Mpu6050 To Arduino Uno

Made by mahmood-m-shilleh
About the project
Learn how to start getting acceleration and rotation rate readings from the MPU6050 with the Arduino Uno
Project info
Difficulty: Easy
Platforms: Arduino
Estimated time: 1 hour
License: GNU General Public License, version 3 or later (GPL3+)
Items used in this project
Hardware components

Story
The MPU6050 is a commonly used sensor module that integrates a 3-axis accelerometer, a 3-axis gyroscope, and a temperature sensor in a single compact package. It is useful for beginners because it is relatively easy to use and provides accurate measurements of orientation, motion, and tilt angles. The MPU6050 can be interfaced with microcontrollers like Arduino, Raspberry Pi, and others using I2C communication protocol, making it ideal for hobby projects such as robot control, gaming, and quadcopter stabilization. Overall, the MPU6050 is a versatile sensor that can provide valuable data for a wide range of applications.
In this tutorial, I demonstrate how to connect it with the Arduino Uno and start getting readings. Thankfully with a series of libraries, it is relatively easy to do.
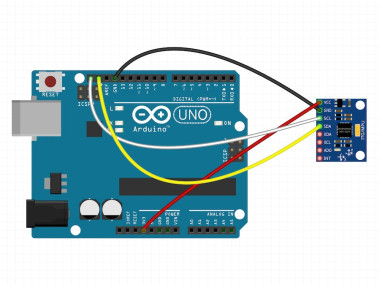
Step 1-) Physical Connection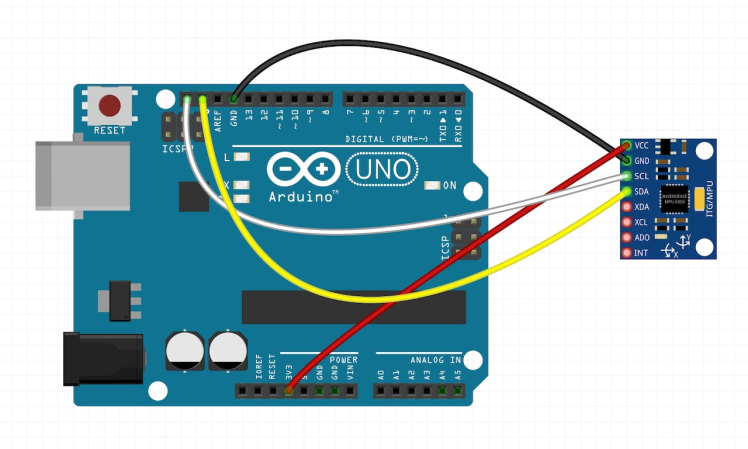
The connection is very simple. You only need four jumper wires exactly as shown in the diagram, these are the most popular pins when using the MPU6050. They are described as follows:
- GND (Ground): This pin is connected to the ground of the circuit. It is used as the reference point for all other signals.
- VCC (Voltage Supply): This pin is connected to the power supply of the circuit. It typically requires a 3.3V or 5V DC voltage to operate.
- SCL (Serial Clock): This pin is used to synchronize the data transfer between the MPU6050 and the microcontroller. It is the clock signal for I2C communication.
- SDA (Serial Data): This pin is used to transfer data between the MPU6050 and the microcontroller. It is the data signal for I2C communication.
The MPU6050 has four additional pins that are less commonly used (not needed in this tutorial:
- XDA (Auxiliary Serial Data): This pin is an additional data line for I2C communication. It can be used for connecting multiple I2C devices in a chain.
- XCL (Auxiliary Serial Clock): This pin is an additional clock line for I2C communication. It can also be used for connecting multiple I2C devices in a chain.
- ADO (Address Select): This pin is used to select the I2C address of the MPU6050. It can be connected to VCC or GND to change the default address of the device.
- INT (Interrupt): This pin is used to generate an interrupt signal when specific events occur, such as motion detection or data ready. The microcontroller can be programmed to respond to these interrupts and take appropriate actions.
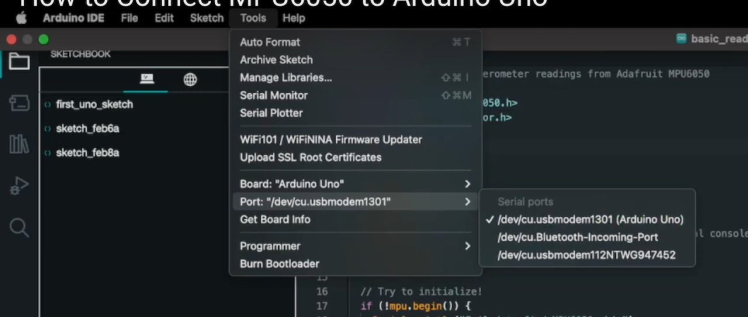
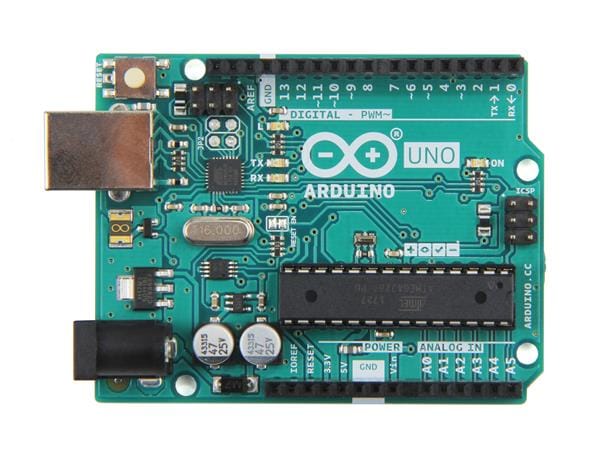
For the sake of this tutorial, I assume you already know how to connect to the Arduino UNO in the Arduino IDE, and of course, you have the Arduino IDE installed.
- Connect to the board as follows (in the diagram), by going to the Tools tab and selecting the correct Board and Port.
- Install the Adafruit MPU6050 library with all corresponding dependencies
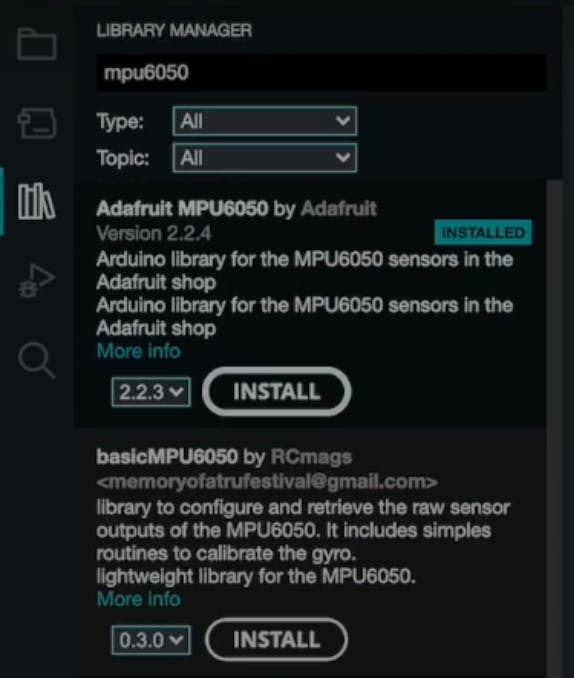
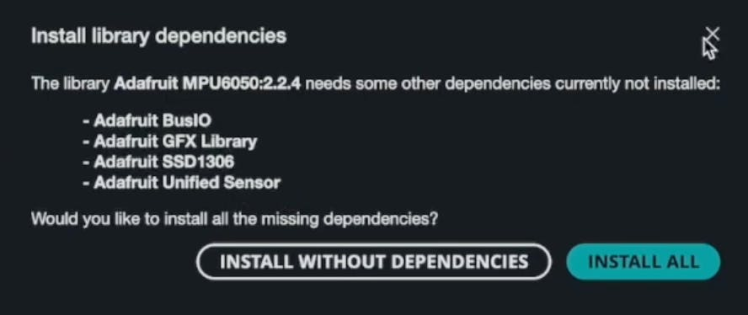
You can find the library manager on the left side of the Arduino IDE.
- The code is easy, thankfully the library itself comes with a full-fledged example. Go to the File tab and go to Examples, scroll to Adafruit MPU6050
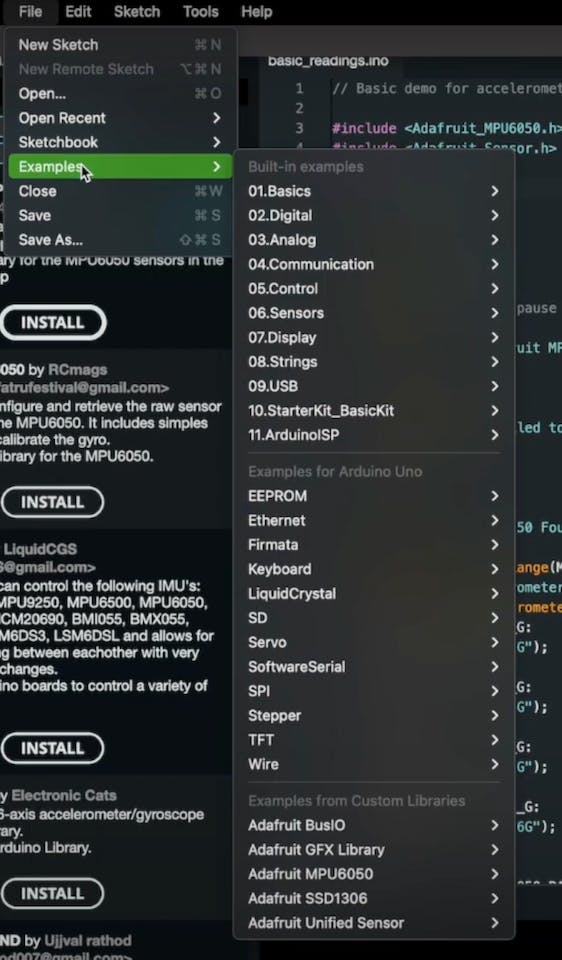
Select the basic_readings.ino and upload it to Arduino with the upload button.
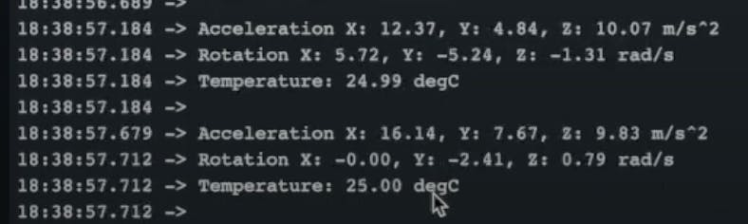
If you did everything correctly you will get readings as follows:
Congrats, you did a good job if you made it this far. If you lacked some context in this tutorial you can watch the video on Youtube. If you simply enjoyed these simple tutorials please like, comment, and subscribe to the channel!
Credits
mahmood-m-shilleh
Mechanical and Software Engineering Background. University at Buffalo 2019 Texas A&M 2021 I make data pipelines for my day job. Outside of work, I participate in online communities regarding Full Stack Engineering, Microelectronics, and more. You can find more details about me on my Youtube Channel. https://www.youtube.com/@mmshilleh Feel free to reach out!
Related products


Leave your feedback...