
Home Theater Pc Ambient Light System With Udoo X86
About the project
This detailed tutorial will show you how easily is to create a smart home theater PC ambient light system with UDOO X86.
Project info
Difficulty: Moderate
Platforms: UDOO
Estimated time: 3 hours
License: GNU General Public License, version 3 or later (GPL3+)
Items used in this project
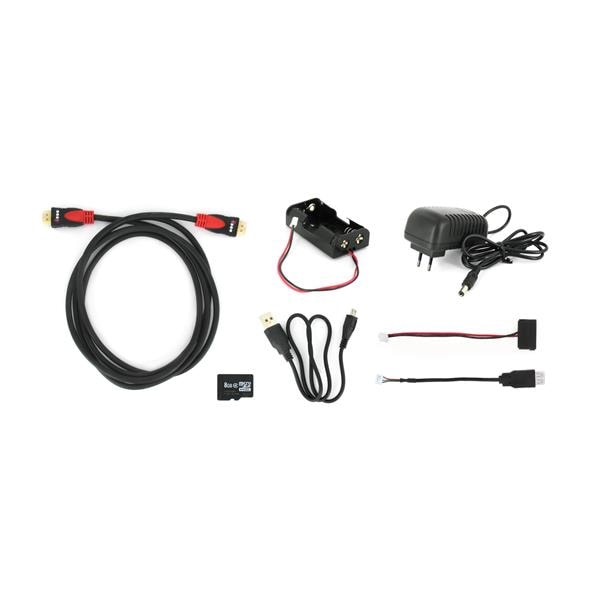
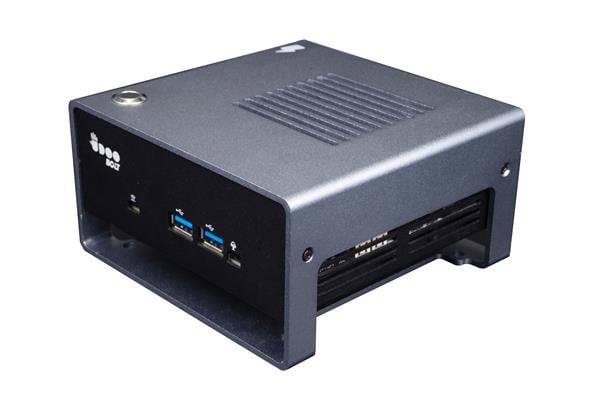
Hardware components
Hand tools and fabrication machines

|
XBMC Boblight Add-on | x 1 | |
|
|
Boblightd | x 1 | |
|
|
BoblightConfigTool | x 1 | |
|
|
Soldering iron (generic) | x 1 | |
|
|
Wire Cutters | x 1 | |
|
|
Scissors | x 1 | |
|
|
Screwdriver | x 1 | |
|
|
Drill | x 1 | |
|
|
A Frame to hold the LED Strip | x 1 |
View all
Story
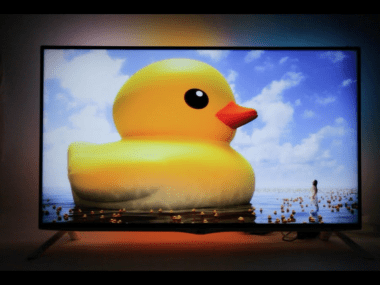
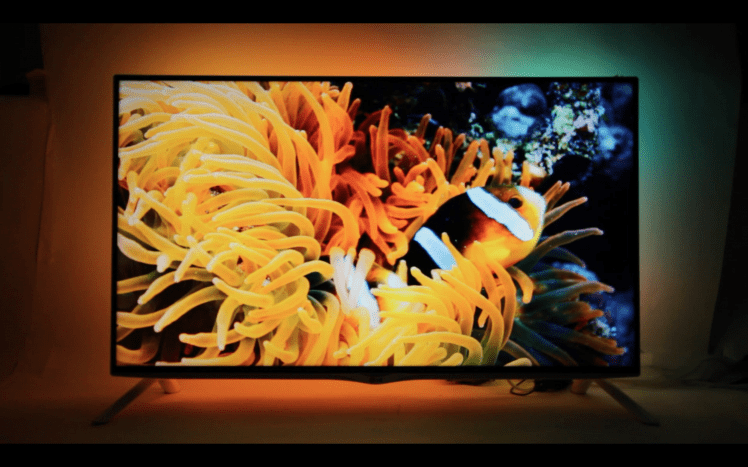
These days, TV series are so cool that it's a pity not to enhance the experience with an Ambient Light System.
This detailed tutorial will show you how easy it is to create a smart home lighting system with a UDOO X86, similar to the one invented by Philips called Ambilight (without buying a TV Philips and without violating the copyright).
BobLight
BobLight is a set of open source software tools that can be used to analyse the colours of the content, convert them in signals, transmit those signals to a LED strip placed around the screen and project the colours i see on TV, to the surrounding walls. And the best news is that you run everything on Kodi, a popular Open Source Software used to manage your media centre or Home theatre PC available for Windows, MacOS, Linux, Apple TV, Android. For this specific guide, we used Windows OS.
How does BobLight work?
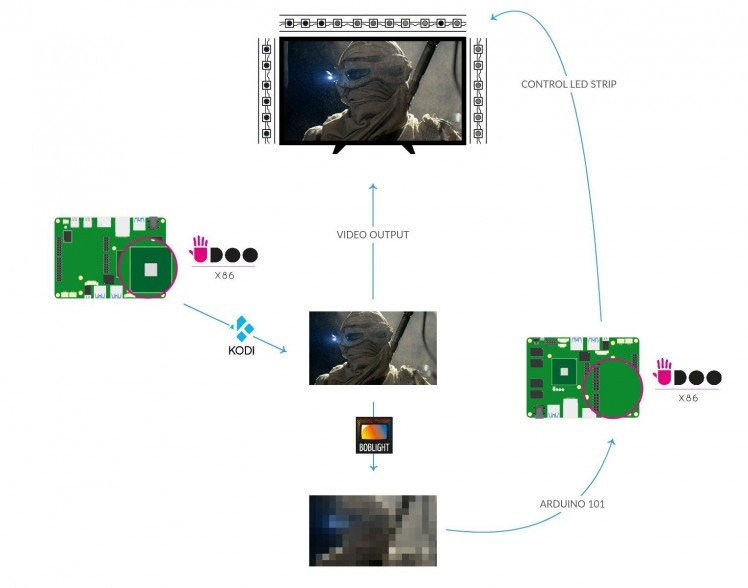
A video is played on your TV using Kodi.
BobLight uses a Kodi extension called “XBMC Boblight”. It converts in real-time the image displayed on the screen, in a very low-resolution image and analyses it.
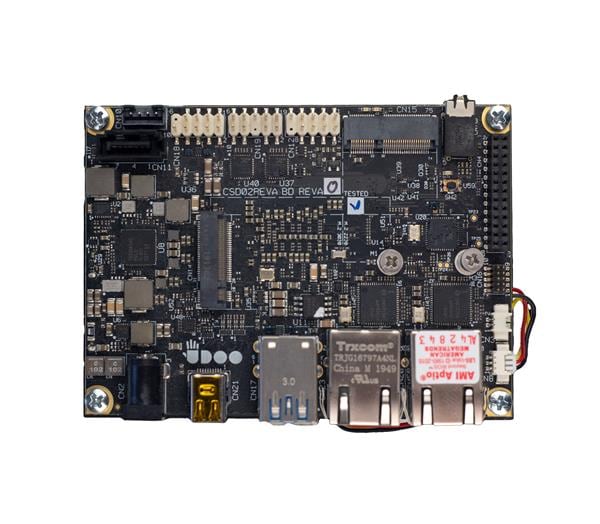
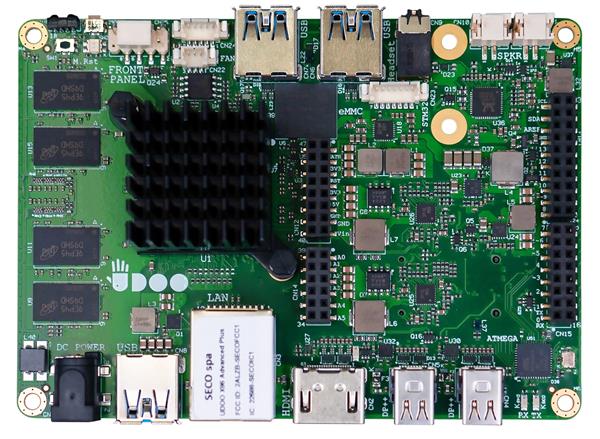
Using a daemon (a program that runs in the background) called “boblightd” the data is sent from the internal USB to the Arduino 101 compatible part of UDOO X86 which uses this information to control the colour of the LED strip.
Windows recognises this internal USB connection as serial port “COM” (usually as COM3), just like when you connect an Arduino 101 with your computer via USB.
To double check the port you can open the “Device Manager” window.
Make sure that Kodi and UDOO X86 have the same BaudRate.
A prefix is also sent to be sure that the Arduino 101 mounted on UDOO X86 knows when to start projecting the
colors behind the TV. The same prefix string must be defined in the BobLight config file and in your Arduino sketch.Step 1: the Frame
Let’s start with the frame.
The LED strip can be affixed directly to the back of the TV with some tape, but if you want a more elegant and professional solution, we suggest to create a frame where to fix the LED strip. Believe us, in this way the final result will be way more better.
To define the correct size of the frame, you need to consider:
- LED brightness (the more bright are the LED, the less you’ll need to cover the whole area);
- The resolution you want to obtain (the more LED you use, the higher the resolution will be);
- The distance between the wall and your TV;
- Your TV design.
Keep in mind that the whole system may heat up, so the frame and the glue you’re going to apply must hold the hot temperature. For this reason, we suggest to use double-sided tape. For the frame, we recommend using aluminium.
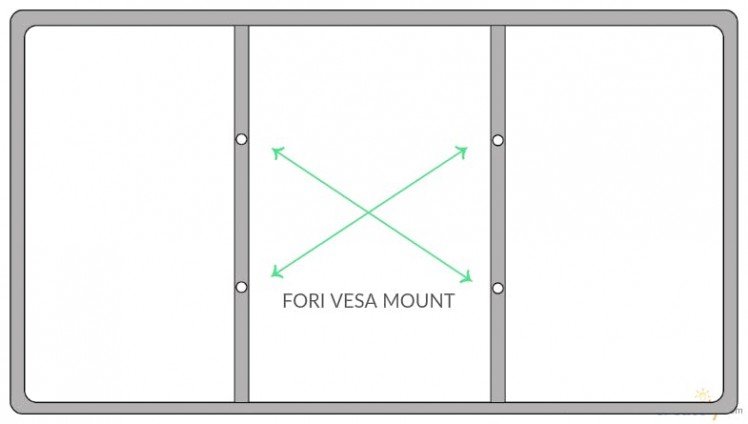
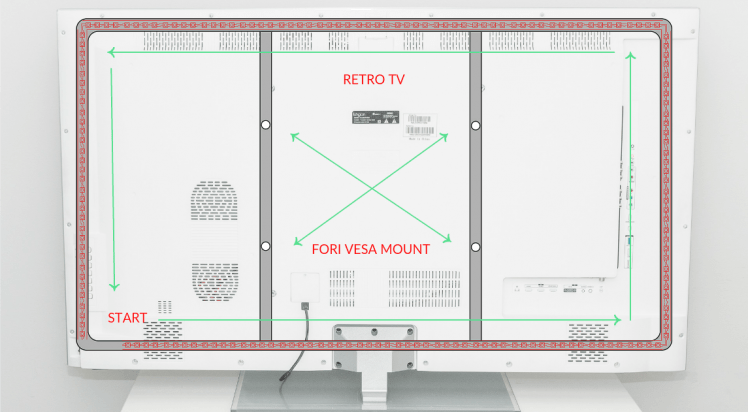
To fix the frame to the TV, we recommend using the “VESA Flat Display Mounting Interface” holes, also known as FDMI or more commonly VESA mount.
Step 2: Mount the LED Strip to the frame
To mount the LED strip to the frame, go behind the TV and apply the strips in counterclockwise starting from 6 o'clock.
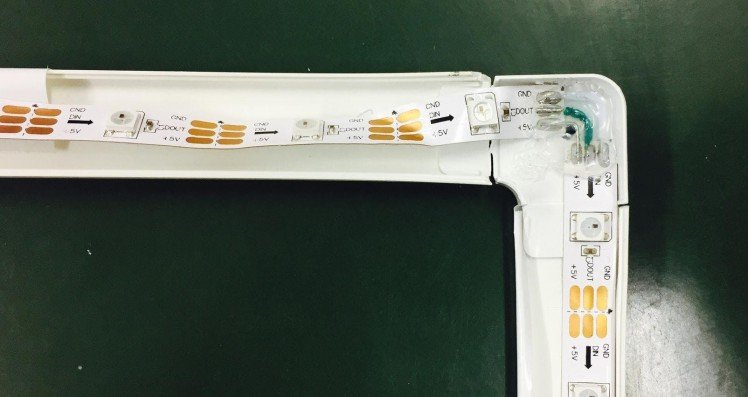
When you select the LED strips, be careful not to buy multiple one-meter-long strips to patch them together afterwards, look for a custom LED strip instead, and your job will be way smoother. Anyway, if you decided to follow the harder road make sure to spend more time on Boblight Config Maker (it’s available for Windows, Mac and Linux OS).
Step 3: Attach the cables
First of all, remember that thin cables are not your friends: LED strips are hungry for electricity, and you do not want to overcharge them.
Then heat up the LED strips connectors and apply solder on them. The same should be done for the ends of the heat shrink sleeves of the cables we want to connect.
To do this, just heat up again the solder you applied to the connector and, gently, place the cable on the Frame.
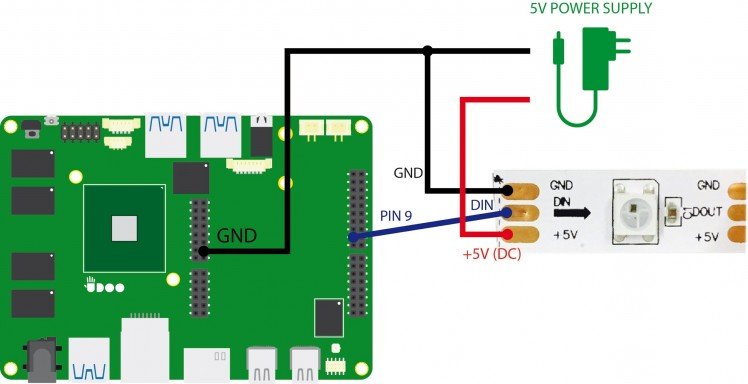
Step 4: Connect the LED strip to the Arduino 101 compatible part of UDOO X86
The initial part of the LED strip must be connected to the Arduino 101 compatible part of UDOO X86 as shown below:
- Din
, the LED strip Data pin must be connected to pin 9;
- +5v
, must be connected to the positive power pole of the 5V power supply;
- GND
, must be connected to the negative power pole of the 5V power supply and to a GND pin of the Arduino 101 part of UDOO X86.
Step 5: Upload the Arduino sketch
To upload an Arduino sketch, you need to install the Arduino IDE and, inside the software, the Arduino 101 board manager. Following this link, you’ll find all the pieces of information you need to upload the sketch.
https://www.arduino.cc/en/Guide/Arduino101
The parameters that can be changed in the sketch to suit your needs are:
- DATAPIN 9 // Pin connected to the Din of the strip
- LEDCOUNT 80 // Number of LED used
- SHOWDELAY 200 // Delay in microseconds
- BAUDRATE 460800 // Serial port speed
- BRIGHTNESS 90 // Max Brightness %
Download the sketch here:
http://download.udoo.org/files/tutorial/ambient_light_UDOOx86_boblight.zip
You’ll need to install the Adafruit_NeoPixel library as well (it’s used in the sketch). You can do it directly from the Arduino IDE using the Library Manager.
Step 6: Install KODI and BobLight
You can install Kodi for Windows here:
Now you need only 2 components to install.
XBMC Boblight addon
Install Kodi, open it and install the ‘XBMC Boblight’ add-on also used for the configuration. To do so go to:
Settings -> Add-ons -> Install from repository -> Kodi add-on repository -> Services -> XBMC Boblight and select “Install”.
Boblightd
We also need to install ‘boblightd’ (the daemon that communicates with the Kodi add-on). You can download the Windows 64bit version (the one that the UDOO X86 needs) here: http://download.udoo.org/files/tutorial/boblightd.zip
Unzip all the files here: "C:boblightd"
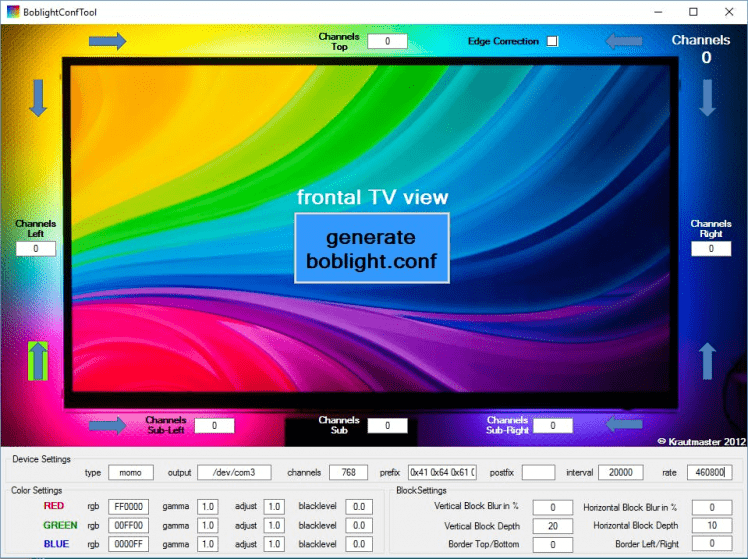
Step 7: Create the Boblight Config File
Once installed the boblightd daemon, you need to create a config file.
The boblightd config file defines the way boblightd and your Arduino communicates. In this way, we’ll identify the device and the communication type.
We can also define the LED colours we’re going to use. For every LED a corresponding area will be defined from the shape of a rectangle inside the display with specific dimensions and position.
To create the config file you can use the manual solution, but we suggest to use the BoblightConfigTool you’ll find inside the archive, in this way you’ll save a lot of time. Remember to use the right parameters for the connected COM port, and the other constants declared in the sketch.
Now the boblight.conf is created in the boblightd folder.
You can now start the daemon with the “start.bat” file.
Final Step: First test
Congratulations you set up everything. You just need to turn on the system.
To do so make sure that you already:
- uploaded the sketch on the Arduino 101 compatible part of UDOO X86;
- Powered up the LED strip with it’s own 5V power supply;
- Installed and booted the boblightd” and installed the “XBMC Boblight” on Kodi;
- Placed the “boblight.conf” in the boblightd folder;
- Started Kodi.
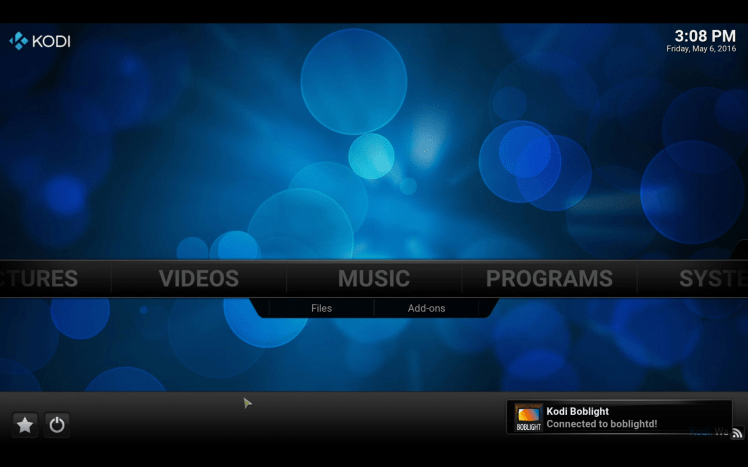
If the LED strip turns up and the Kodi boblight popup is shown, the system is ready and working.
Now select your favourite movie and have fun watching it.
Follow this link to find a video tutorial that sums up all the guide:
Credits
Related products


Leave your feedback...