
Historic Voicebot
Made by 8BitsAndAByte / Art / Artificial intelligence / Displays / Retro Tech / Voice
About the project
Have a chat with your favourite person from the past with the Historic Voicebot!
Project info
Items used in this project
Hardware components


Hand tools and fabrication machines
Story
Overview
Below a quick overview of the content.
- Introduction and showcase video
- Concept
- Architecture
- Step 1: Chatbot
- Step 2: Touchscreen
- Step 3: Break
- Step 4: Vintage Phone & Voice Kit
- Step 5: Test!
Introduction and showcase video
Have a chat with your favourite person from the past with the Historic Voicebot! With this interactive installation, you can talk to a historical figure through both chat and voice. Made using Dialogflow, Node.js, HTML Canvas, an AIY Voice Kit, a Raspberry Pi and a vintage phone.
Concept
A quick sketch of the concept:
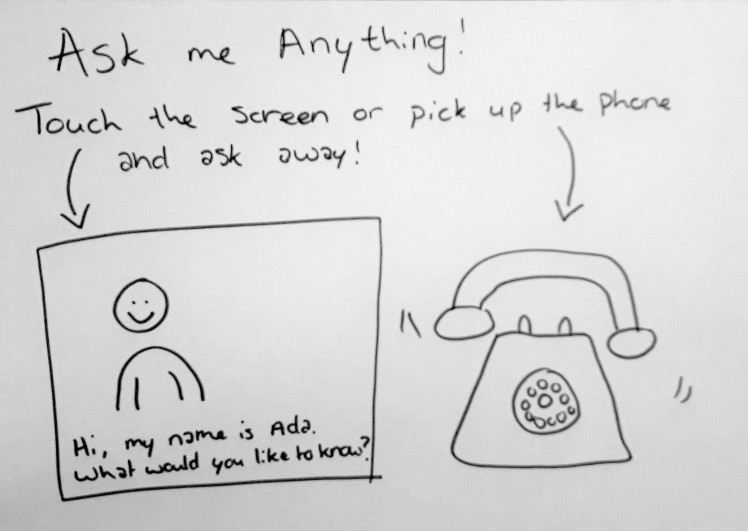 Concept Sketch
The concept consists of two parts:
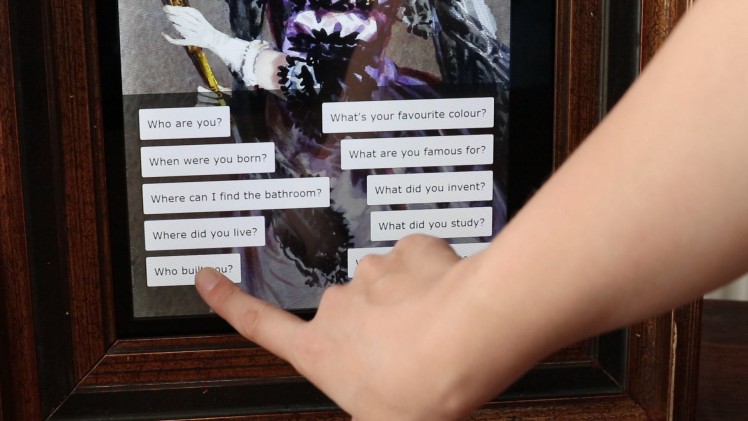
- A touchscreen with animations of a historical figure. The touchscreen also displays the dialog and has buttons so people can ask a FAQ.
- A physical phone that captures speech and give audio output, so it can be used to ask questions and listen to the answer.
Architecture
To bring the concept to life, I’ve outlined the following architecture:
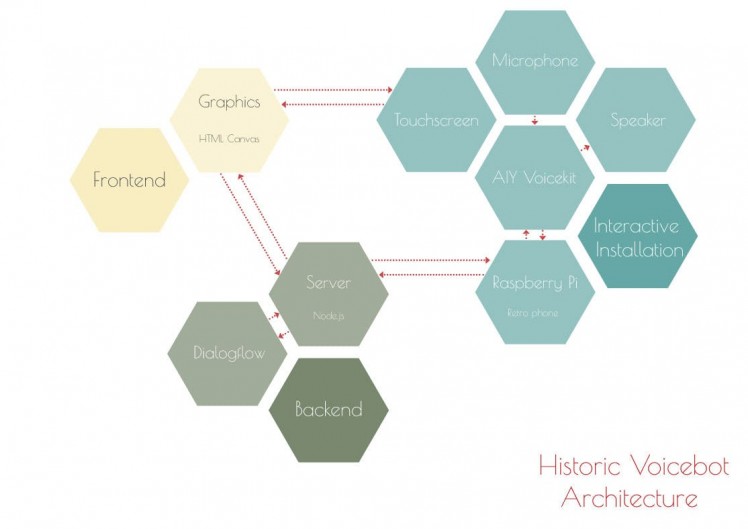 The Historic Voicebot Architecture
The three main parts are:
- The backend, which includes Dialogflow and a Node.js server
- The frontend, which consists of a HTML Canvas page
- The interactive installation, which includes a touchscreen and an AIY Voice Kit integrated into a vintage phone
Step 1: Chatbot
Dialogflow To create the conversational agent in Dialogflow, I tried and tested a number of different approaches to get the most accurate and reliable answers possible. I also set out to automate as much of the dialog creation as possible.
I found that in this case the easiest and most reliable way of adding knowledge to a Dialogflow chatbot was by adding a CSV file with question and answer pairs.
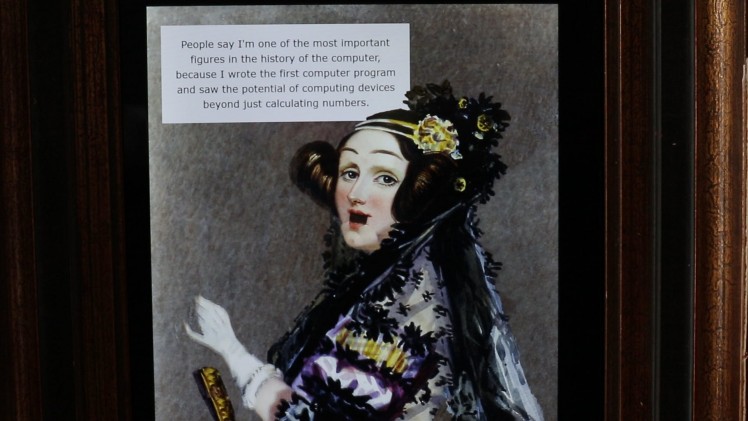
For the Historic Voicebot, I’ve manually created 20 question & answer pairs and added these to Dialogflow. As you can see, Ada Lovelace’s answers are correct, timely and reliable.
You can find more information about Dialogflow right here.
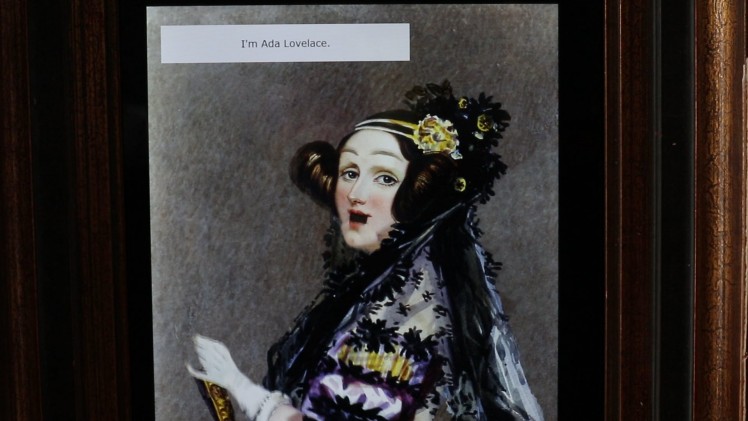 Ada can talk!
Node.js Server As mentioned in the architecture, the Node.js server is the brains of the operation, providing the connection between Dialogflow and the different devices.
For the first versions, the server was running locally on my laptop. For the current version, the server is deployed on an EC2 Amazon Web Services server running Ubuntu.
There are some great tutorials on Node.js and running it on AWS.
Step 2: Touchscreen
Graphics The animations for the Historic Voicebot were created by cutting various elements, like the arms, eyebrows and chin, out of a painting of Ada Lovelace using Adobe Photoshop. Each of these elements were individually placed on the HTML Canvasfrontend. The TweenJSJavaScript library was used to move and animate these cut-outs based on the input from users and the responses from Dialogflow.
 HTML Canvas animations
 Touchscreen
Frame To complete the picture, an old frame was cut to the size of the touchscreen. As always, measure twice, cut once.

Step 3: Break
Don’t forget to take a relaxing break every once in a while!
 Sleeping beauty!
Step 4: Vintage Phone & Voice Kit
For the phone I tried to find one that was used during the Ada Lovelace era. Not only were phones invented long after she died, really old phones are hard to come by. Nevertheless, I was able to purchase an old Ericsson rotary phone produced in the 1960’s.
 1960's phone
To create the working voicebot, I aimed to place the AIY kit inside the phone whilst reusing as many of the original features as possible.
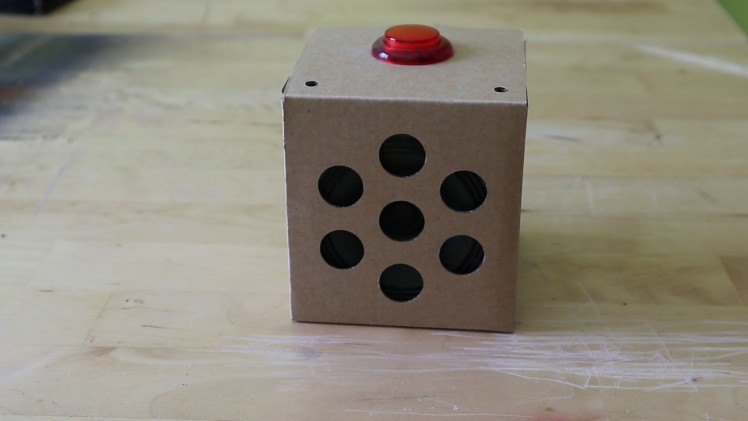 The AIY Voice Kit
I was able to reuse the speaker and the two bells inside the phone. The rotary disk was also kept intact, but is currently not functional. I updated the microphone that was inside the handle to a modern one, to be able to accurately capture the audio input. I replaced the old phone cord with a new one to be able to correctly wire the new microphone.
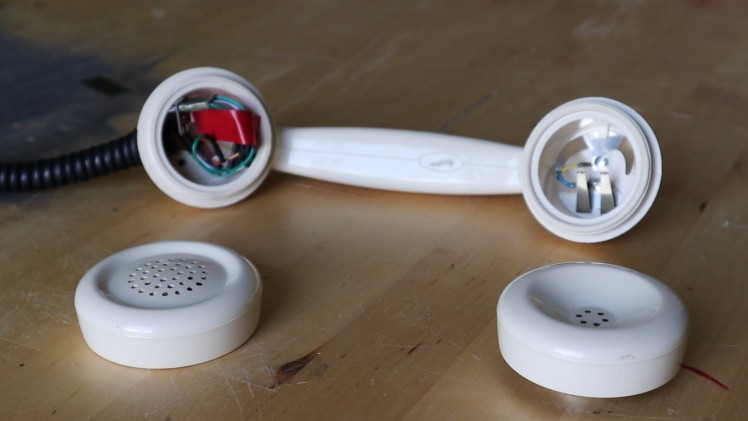 New microphone and original speaker
Step 5: Test!
Does it actually work? Only one way to find out, let’s test it!
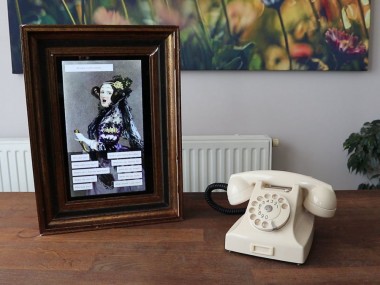
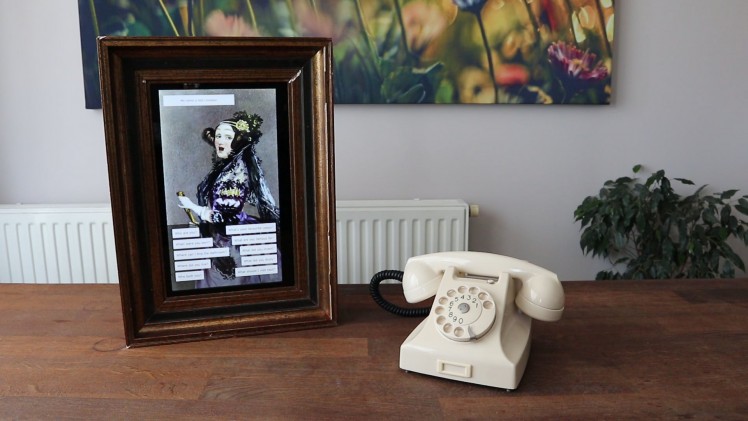 The Historic Voicebot
That’s it for the Historic Voicebot project, talk to you later!
 Bye!
Bye!
Credits
8BitsAndAByte
We’re Dane & Nicole, two makers that create tremendously terrible tech, which we happily share with you on our channel! https://www.youtube.com/c/8bitsandabyte
Related products


Leave your feedback...