

Items used in this project
Software apps and online services
Story
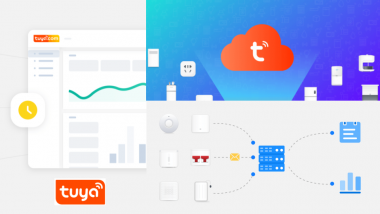
With the AIoT technology reaching new heights, many of the industries are targeting it mainly to automate their systems. IoT alone is not sufficient to make devices smart- especially when there are thousands of devices to manage. By combining Cloud platforms with IoT, it becomes a lot easier to build, analyze and manage devices. To cater to that need, Tuya, a global leading IoT cloud platform, launched its Cloud Development Platform in 2020, As Tuya puts it on its website, “the platform fully opens basic IoT capabilities such as device management, AI scenarios, and data analytics, as well as industrial components.”. The platform offers a variety of development tools to quickly implement IoT solutions.
Tuya’s Cloud Development platform offers a SaaS (Software as a Service) development framework, which is the most widespread type of cloud app. Developers just need a Tuya-enabled device and code for it, and the rest will be handled by the Cloud service. So developers won’t have to worry about spending money on separate software and updating it every time. Tuya also offers OpenAPI for app developers along with a huge number of other APIs to integrate your project with. New users can also avail a few coupons to try on Tuya's platform.
A glance at Tuya’s Cloud platform’s featuresTuya’s Cloud platform unlocks a huge number of applications with its heap of features. Following are some key features of the platform:
Comprehensive IoT Platform Capabilities
Developers can easily connect their smart devices through MQTT and HTTPS protocols and offer 99.9% SLA, thus ensuring performance stability. Adding on it, the platform offers MQTT service for hundreds of millions of IoT devices simultaneously, thus giving a very tough competition to the IoT services offered by Microsoft’s Azure IoT.

Along with the device connection, other IoT capabilities like device registration authorization, AI scenarios, and big data analytics are also offered. These help the developers to build robust SaaS-based IoT applications.
Quick development capabilities
Once the Tuya-enabled device is connected to the internet, app developers can make use of OpenAPI or the firmware offered by Tuya itself to quickly build Andriod, iOS, and web applications. Examples include IoT WeChat Mini Programs, SaaS backends, and cloud platforms.
Along with it, multiple devices can be integrated into projects quickly as the platform shortens device debugging from 30 man-days to just around 10 minutes. Tuya’s Open-Source SaaS Development Framework also reduces development time by 70%, thus making the overall implementation much quicker.
A well-experienced platform and support
With over 324, 000 developers around the world, Tuya has its roots deep into the AIoT Cloud-based industrial sector. There are over 310, 000 smart devices powered by Tuya, covering various business scenarios like hotels, apartments, communities, commercial lighting, security, and other industries.
Tuya’s Cloud platform handles more than 84 billion daily cloud requests. The company thus offers a world-class IoT ecosystem by offering an all-in-one solution of hardware, cloud services, OS, and SaaS development.
Tuya’s industry-specific solutions to help you implement applications quickly
Along with a feature-rich Cloud Development platform, Tuya also helps the end-users to visualize and implement their solutions. These resources give a very clear idea of business practices in different industries such as smart agriculture, smart industry, smart energy, and a few more.
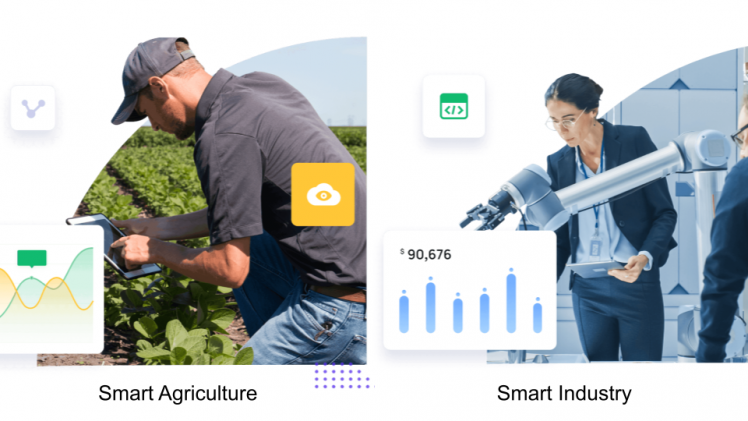
Smart agriculture is one of the booming fields as it has a lot of physical parameters which need to be taken care of. Tuya with their solution enables small and medium-sized manufacturers to reduce cost and improve efficiency. While talking about the pros of this solution, Tuya also gives an insight into all the possible drawbacks and justifies them well. This helps the developers to build better solutions overall.
With Industry 4.0 coming into the picture, Tuya follows the ongoing trends to build Smart industry solutions. They provide complete architectures for PaaS, SaaS, and Edge IoT applications. By partnering with prominent industry leaders like Philips, Siemens, Midea, Schneider, etc. Tuya helps developers to build the best possible version of their applications. Some scenarios for industries are smart manufacturing, Energy Consumption management, and Smart factory security.
Getting started with Tuya’s Cloud development platform
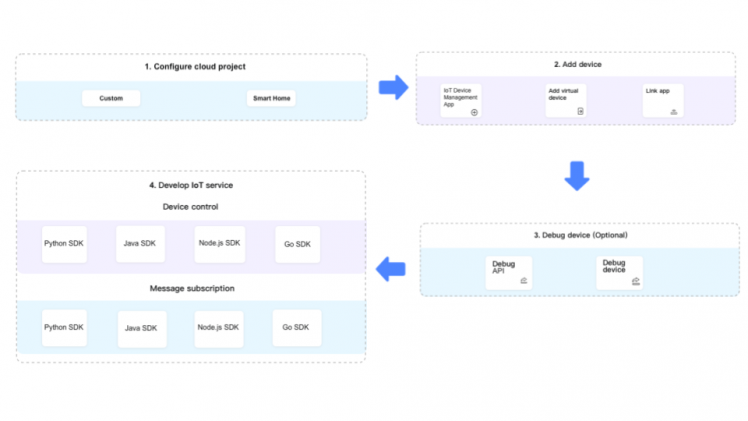
For demonstrating a simple use case, we’ll use a Tuya-enabled Virtual device and control it with Python SDK via API calls. There are a total of just four steps with device debugging being an optional one:
Configure cloud project
Go to Tuya’s Cloud Development platform website and Signup with an email address. The free trial versions with a limited time period are available if you’re interested in just experiencing the platform for now. After signing in, go to Cloud > Development > Create Cloud Project. A new window will show up asking you to fill in some details which are pretty straightforward.
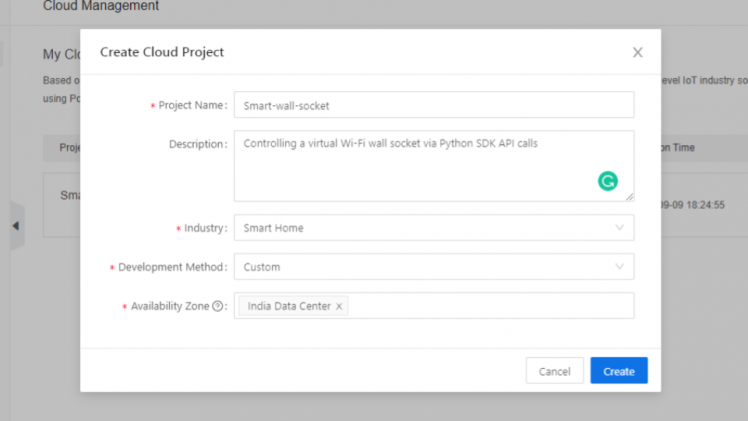
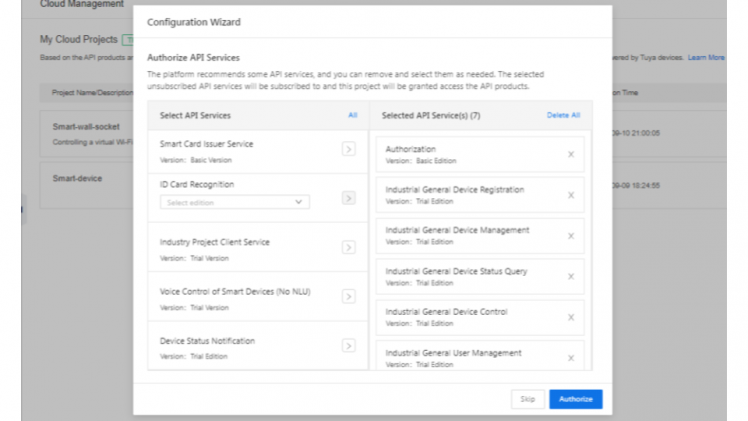
Next, you’ll be navigated to Authorize API Services where you can select the API Products for your use. By default, a few APIs are already selected based on the type of project you’re going for, so we’ll keep it like that and click on Authorize.
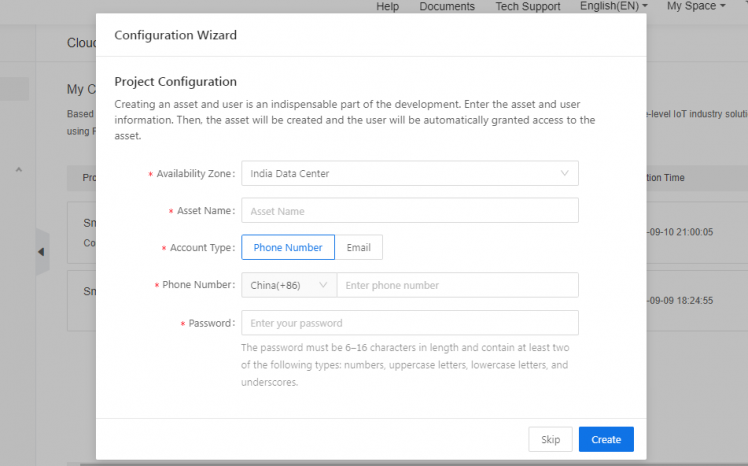
Finally, you’ll get the Project Configuration which you can fill if interested or skip for now. With this, the project should be created and we can move on to the next step.
The project will now be created and once you click on it you’ll see the Access ID and Access secret key which will be used in the further sections.
Add device
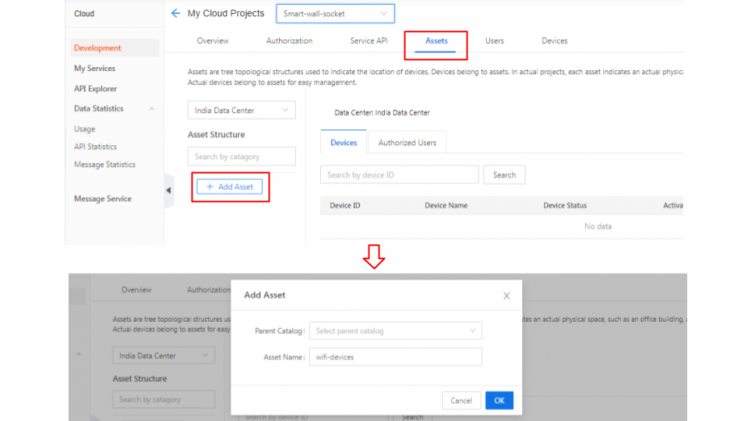
Before adding a specific device, you need to add an asset under which the devices would be grouped together. Go to your project > Assets > Add Asset. You get the window asking for Asset name, we’ll name it wifi-devices for now.
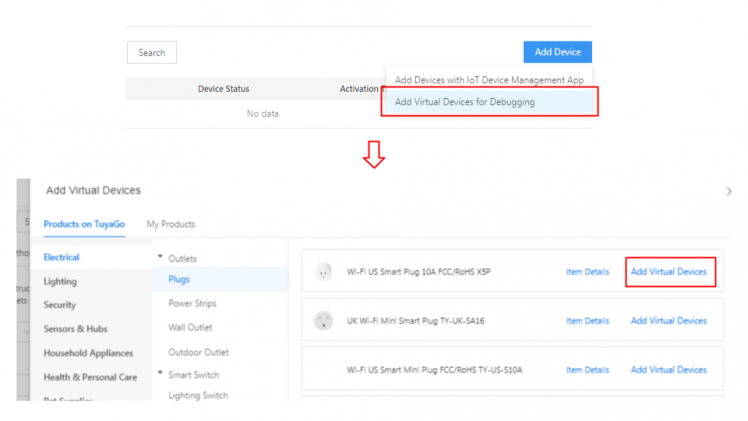
Now, go to Add Device at the right corner and click on Add Virtual Devices option. You’ll be provided with a huge list of available devices, so choose the one you like and click on Add Virtual Devices.
With this, the device is added successfully and should be visible under the Assets tab as well as the Devices tab.
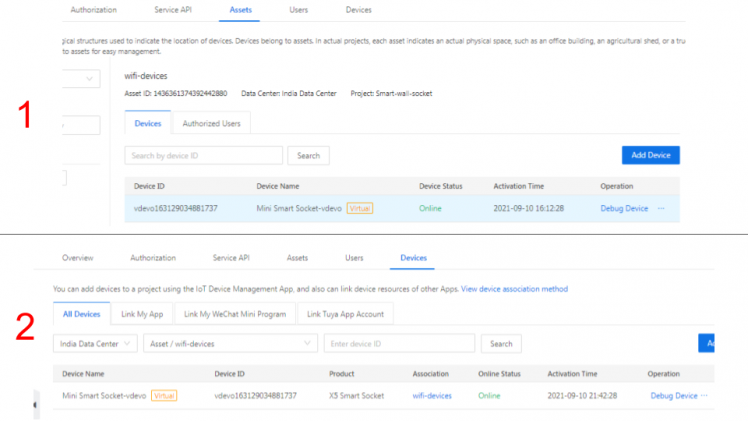
Click on Debug Device and you’ll be navigated to a new tab. There under the Basic Information section, you’ll see the Device ID which will be used in the next section.
Develop IoT service (using Python)
For testing out the Cloud services, we’ll use the Python SDK provided by Tuya to control our virtual device. The very first step would be to install Tuya’s Python support package using the following command:
$ pip3 install tuya-connector-pythonNow, open a Python code editor of your choice and copy the device_control.py code from here. Enter your Access ID and Access secret key which we had obtained in the first section. The API_ENDPOINT differs for every region as shown in the table below. Select the one nearest to you.

Also, make sure you enter the Device ID which we had obtained from the device debugging page. Once done, go to the following line where we send the commands and change switch_led to switch_1. The value as False indicates that we are switching off the device.
# Send commands
commands = {'commands': [{'code': 'switch_1', 'value': False}]}
With that, the code is all set and you can run it now. The response should be something like:
[2021-09-10 21:23:17,542] [tuya-openapi] Request: method = POST,  url = https://openapi.tuyain.com/v1.0/iot-03/devices/vdevo163121020750588/commands, params = None, body = {'commands': [{'code': 'switch_1', 'value': False}]}, t = 1631289197542
[2021-09-10 21:23:17,596] [tuya-openapi] Response: {
"result": true,
"t": 1631289197597
}
Inside Response, the result: true depicts the command was sent successfully and the device should be turned off. You can confirm it by checking the Device Logs section: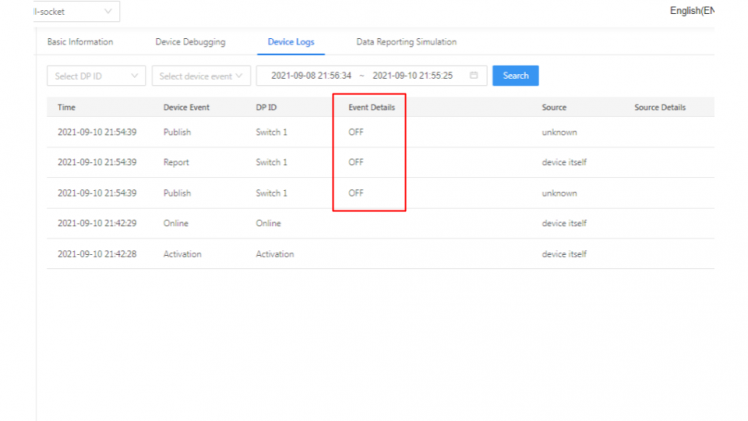
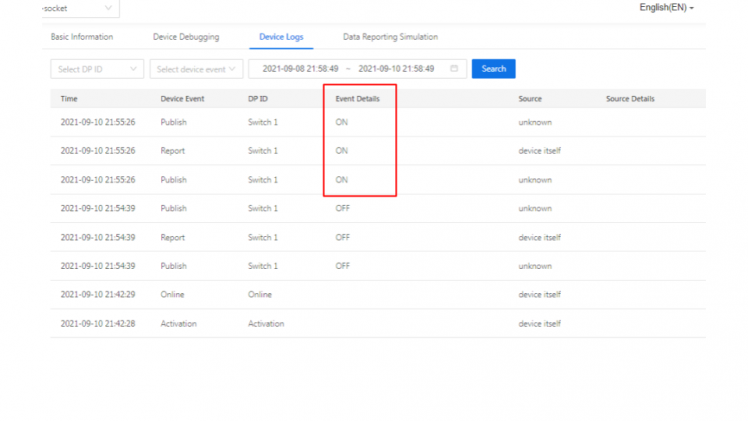
Now, again change the commands line but this time set the value as True which will turn on our virtual device’s switch.
# Send commands
commands = {'commands': [{'code': 'switch_1', 'value': True}]}
After running with the above command, the Device Logs should show that the device turned on.
With this, we’ve successfully built a very basic Cloud-based IoT system and in a similar way, the other APIs can be used as well. If followed properly, the process won’t take longer than 15 minutes which proves the fast development advantage. Everything is available within clicks of buttons, making the process a lot simpler.
You can learn more about Tuya’s Cloud Development platform on its website.
Leave your feedback...