
Flowpi: The Affordable Reflow Oven With Smart Features
Made by Danivbel / Productivity / IoT
About the project
Reflow ovens are generally expensive to buy and boring, so why don't I make one myself which is cheaper and smarter.
Project info
Difficulty: Moderate
Platforms: Raspberry Pi, MicroPython
Estimated time: 1 week
License: GNU General Public License, version 3 or later (GPL3+)
Items used in this project
Hardware components

View all
Story
Overview
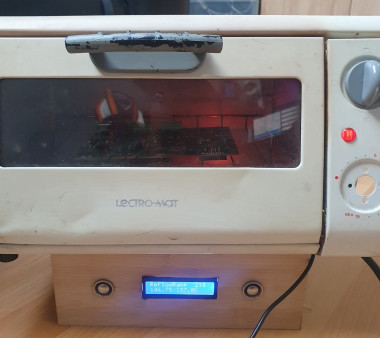
The goal of this project is to turn an old oven into a smart reflow oven with raspberry pi pico W. A Reflow Oven is used to solder smd(Surface Mounted Device) components onto a pcb, because soldering smd components by hand is not always possible. Some time ago I started learning how to design PCBs, I ordered my first PCB and the components I needed, but I had one problem: I didn't have a way to solder the components on.
This problem and the fact that the cheapest reflow ovens i could find were €150,- led me to making my own oven, I got the idea to make it "smart", because apparently everything device is smart nowadays.
How does it work
To reflow components to a PCB it is best to use a specific reflow pattern for heating up which you can find in the datasheet of the solderpaste you're using. You can change the patern in the control panel I coded in HTML: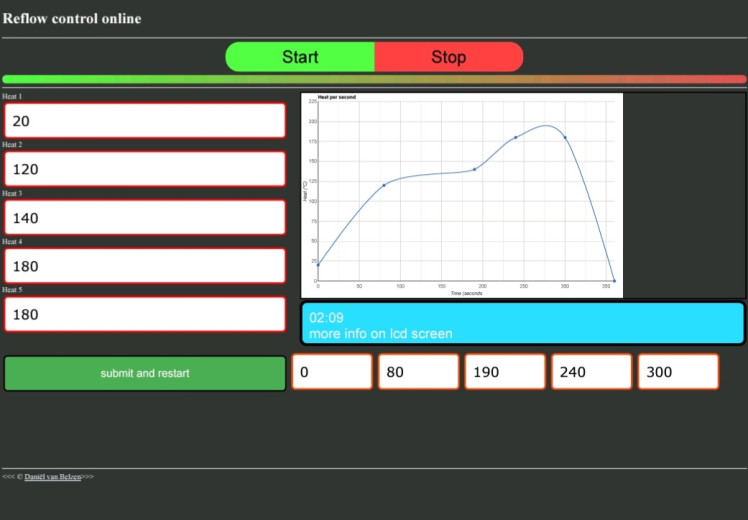
- <!DOCTYPE html>
- <html lang="en">
- <head>
- <script type="text/javascript" src="https://www.gstatic.com/charts/loader.js"></script>
- <script>
- var timerVar = setInterval(countTimer, 1000);
- var totalSeconds = 0;
- function countTimer() {
- ++totalSeconds;
- var hour = Math.floor(totalSeconds /3600);
- var minute = Math.floor((totalSeconds - hour*3600)/60);
- var seconds = totalSeconds - (hour*3600 + minute*60);
- if(hour < 10)
- hour = "0"+hour;
- if(minute < 10)
- minute = "0"+minute;
- if(seconds < 10)
- seconds = "0"+seconds;
- document.getElementById("timer").innerHTML = minute + ":" + seconds;
- }
- </script>
- <script>
- </script>
- <script>
- google.charts.load('current',{packages:['corechart']});
- google.charts.setOnLoadCallback(drawChart);
- function drawChart() {
- // Set Data
- var data = google.visualization.arrayToDataTable([
- ['Time', 'Heat'],
- [val6,val1],[val7,val2],[val8,val3],[val9,val4],[val0,val5],[val0 + 60,0]
- ]);
- // Set Options
- var options = {
- title: 'Heat per second',
- hAxis: {
- title: 'Time (seconds',
- gridlines:{
- count: 11
- }
- },
- vAxis: {title: 'Heat (°C)',
- gridlines:{
- count: 10
- }
- },
- legend: 'none',
- backgroundColor: 'white',
- chartArea:{
- left: 48,
- top: 24,
- bottom: 48,
- right: 24,
- },
- curveType: 'function',
- pointsVisible: true
- };
- // Draw
- var chart = new google.visualization.LineChart(document.getElementById('myChart'));
- chart.draw(data, options);
- }
- </script>
- <meta charset="UTF-8">
- <meta name="author" content="Daniël van Belzen">
- <meta name="description" content="This page is a control panel made by Daniël van Belzen for the FlowPi oven he made.">
- <title>FlowPi Online</title>
- <link rel="icon" href="3565450.png" type="image/x-icon"><!--replace this img-->
- <link rel="stylesheet" href="style.css">
- </head>
- <body>
- <h1>Reflow control online</h1>
- <hr><form onsubmit="return waitforsub(); ">
- <center>
- <div class="stap"><button name="start" id="start">Start</button><button name="stop" id="stop">Stop</button></div>
- <div class="ripple"></div>
- </center></form>
- <hr>
- <div id="Cp">
- <div style="position:relative;"><div id="myChart"><br></div></div>
- <div class="stats"><div class="stopwatch"><div id="timer"></div> <br> more info on lcd screen</div></div>
- <form>
- <div id="Heatparent">
- <label for="Heat1">Heat 1</label>
- <input type="number", id="Heat1", name="Heat", min="0", max="200", step="10", class="Heat", placeholder="ºC", value="val1"><br>
- <label for="Heat2">Heat 2</label>
- <input type="number", id="Heat2", name="Heat", min="0", max="200", step="10", class="Heat", placeholder="ºC", value="val2"><br>
- <label for="Heat3">Heat 3</label>
- <input type="number", id="Heat3", name="Heat", min="0", max="200", step="10", class="Heat", placeholder="ºC", value="val3"><br>
- <label for="Heat4">Heat 4</label>
- <input type="number", id="Heat4", name="Heat", min="0", max="200", step="10", class="Heat", placeholder="ºC", value="val4"><br>
- <label for="Heat5">Heat 5</label>
- <input type="number", id="Heat5", name="Heat", min="0", max="200", step="10", class="Heat", placeholder="ºC", value="val5"><br>
- </div>
- <br><br><br>
- <div id="Timeparent">
- <input type="submit" name="submit" value="submit and restart" id="submit">
- <input type="number", id="Time1", name="Time", min="0", max="300", step="10", class="Time", placeholder="Preheat", value="val6">
- <input type="number", id="Time2", name="Time", min="0", max="300", step="10", class="Time", placeholder="soak", value="val7">
- <input type="number", id="Time3", name="Time", min="0", max="300", step="10", class="Time", placeholder="ReflowRamp", value="val8">
- <input type="number", id="Time4", name="Time", min="0", max="300", step="10", class="Time", placeholder="Reflow", value="val9">
- <input type="number", id="Time5", name="Time", min="0", max="300", step="10", class="Time", placeholder="Cooling", value="val0">
- </div>
- </form>
- </div>
- <hr>
- <<< © <a href="about.html" class="link">Daniël van Belzen</a>>>>
- </body>
- </html>
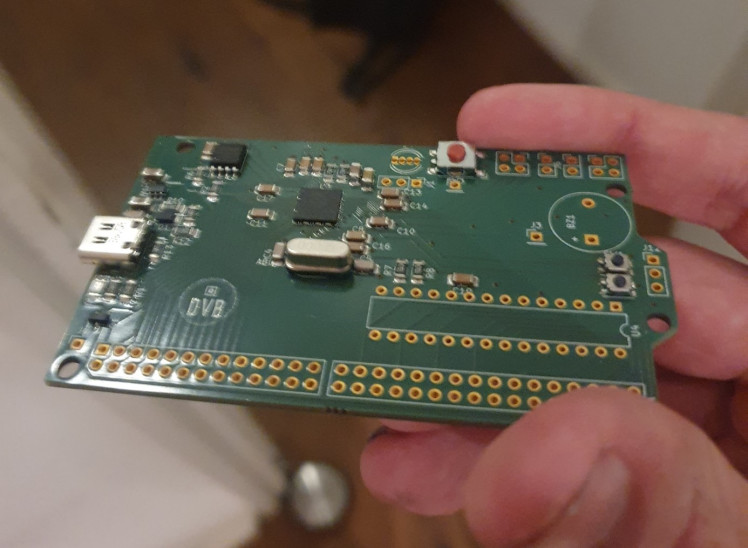
I was planning to host this from my arduino with an esp8266, but while working on this project a new raspberry pi board was released: the raspberry pi pico W, this board has the wireless functions I needed for the project, is more compact and is also more powerfull than the arduino uno.
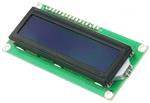
I'm using the micropython network, socket and re libraries to host the website to an IP address on my network, this IP address will be shown on the lcd screen until you start the oven.
When a user changes the heating profile, the data will be saved to a csv file, this data will be loaded on startup.
I had some issues making the oven be able to host a website, receive data and use it to control the oven all at the same time, I fixed this by using multithreading, this makes the website run on one of the cores and the oven on the other core.
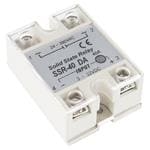
The oven works with PID, it has a target temperature which the raspberry pi tries to stay at, the raspberry pi controls the oven with a solid state relay.
The reflow process usually happens in 5 stages, you can customize the stages on the website, and the display will show in what stage the oven is.
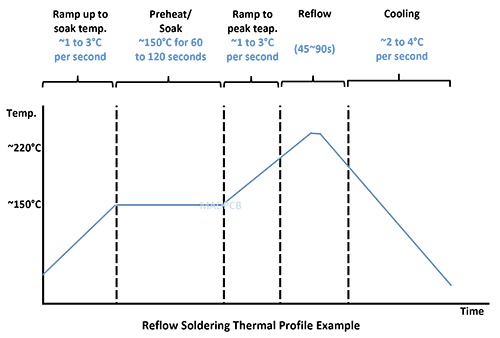 (source: madpcb
Building the oven
I started with cleaning the oven, it had been used for years to make food in, so there was a lot to clean.
I then started wiring everything together, I had a nice bamboo box I used as enclosure for the electronics, I made holes in the front for buttons and an lcd screen.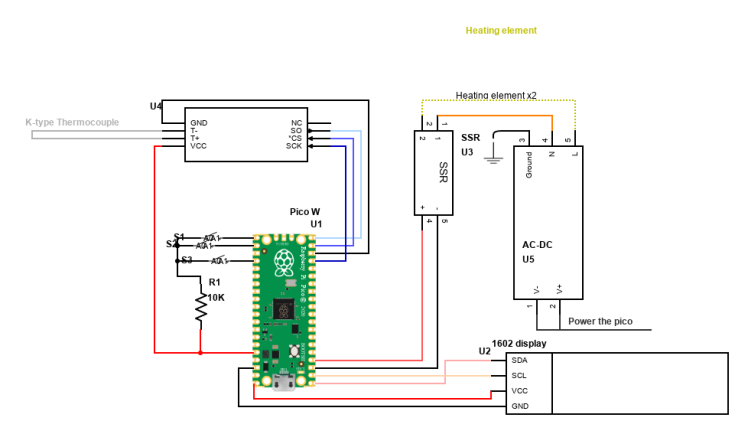
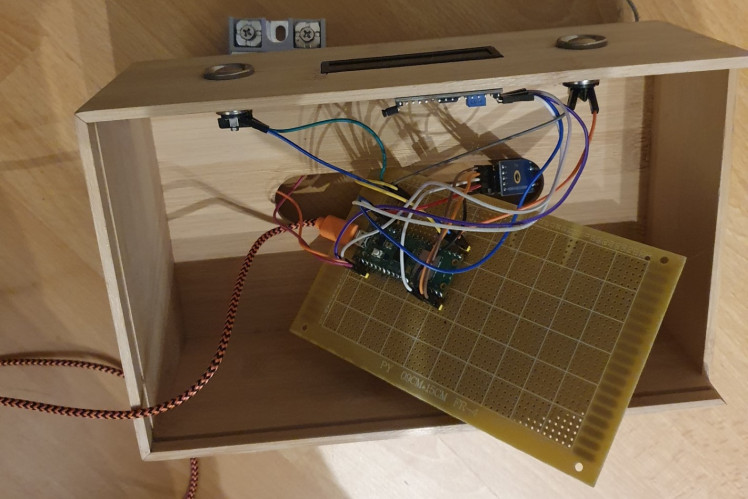
The oven worked on mains electricity, I did this together with my dad, because I had never done anything with it before, and didn't want our house to burn down.
End Result
In the end I still had some bugs, but it worked, I assembled my first pcb and put in in the oven, the pcb looks great! 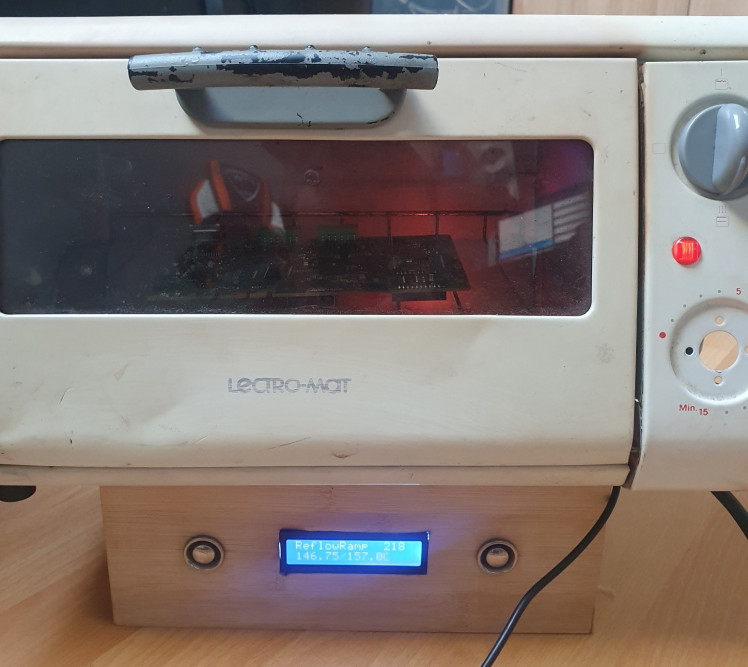
Schematics, diagrams and documents
Code
Credits
Related products


Leave your feedback...