
Flame Throwing Iot Pumpkin

Made by K-SID / Communication / Fire & Pyrotechnics / Holidays
About the project
Dominate Halloween by having this Internet of Things pumpkin on your front porch throwing flames at the press of a button.
Project info
Items used in this project
Hardware components


Story
DISCLAIMER: Playing with flammable things is dangerous. SUPER dangerous. I will not be held accountable for your Darwin Award if you choose to try this project and have it go explosively wrong. I know playing with fire is irresistible so please be careful. If you blow a hand off it's your fault, not mine, as I am proof that this project can be done safely without loosing a limb, eyebrow, or your life. Proceed at your own risk.
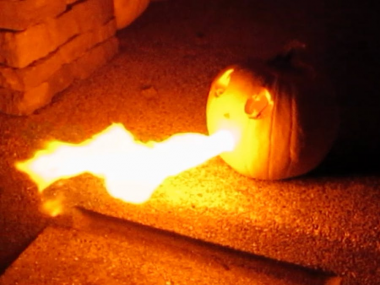
The final productWhy Another Flame-Shooting Pumpkin?
So the idea of a flame shooting pumpkin is not a new one. Many people have done it before including David Bates on Hackster. So the first question is "Why do this?" to which my answer is a simple "Why the heck not?". Anything that involves electronics and fire is destined to provide many hours of child-like fun to your otherwise mundane existence!
I started this project with no external influence, meaning I did not go straight to the search engines looking for instructions on how to build a fire-breathing pumpkin (I found David's post after the fact). I think that's something that limits our creativity and learning sometimes. Re-solving problems or creating projects that have already been done before is OK.
The Process
The starting point for this project was literally the following comment to my wife:
Me: "I bet I could use a small bottle of hairspray and the candle in the pumpkin to get it to shoot fire." Wife: "Uh huh. Sounds great dear."And that's how projects start. You don't have to have it all figured out. Just take a simple idea and run with it. Now don't tell my mom but this was not the first time I played with matches and flammable substances. However, it has been a while.
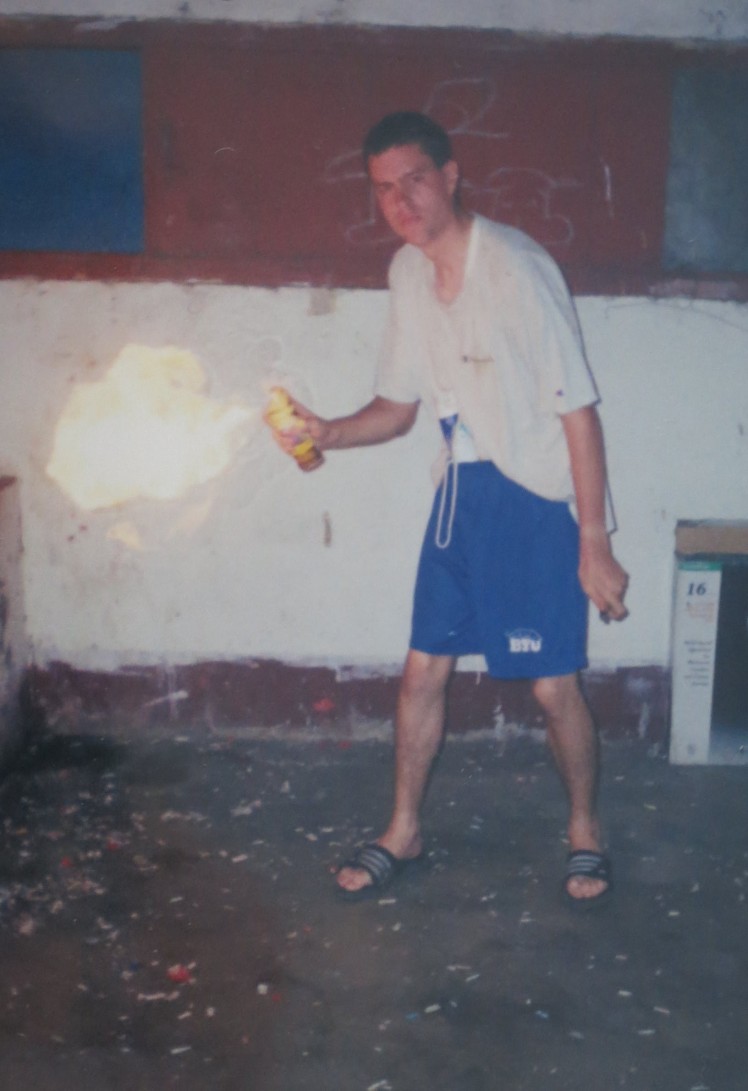 A much younger me that thought he was way cooler than he was because he could make fire.
I honestly wasn't even sure if hairspray was still flammable. I thought maybe by 2016 we had solved that problem which would put a real damper on the project. So as with all projects it's a good idea to test assumptions as you go so the first step was making sure I could create amazing streams of fire with hairspray and a flame.
Hairspray is still scary flammable!Phew! Hairspray is still just as dangerous AND awesome as it was when I was a teenager.
Servo-Controlled Spray Action
From the beginning I assumed I would use a Servo to somehow depress the nozzle of the hairspray. Making that a reality, however, is harder than it sounds. I tried several different arm attachments and different ways of attaching the Servo to the bottle including trying to use some of my little girls' hair bands. Nothing was working. It was time to give up on my elitist ideals of learning and turn to my old friend Google for help. It only took a few minutes to come across a solution by Eric Kingston.
I love this approach for several reasons. First, it's simple and didn't require any special parts like an electronic sprayer. Second, the entire spray-triggering mechanism is contained within the existing hairspray lid. This allows for a very simple reload when you run out of fire juice. Simply remove the custom lid and pop it onto the next can.
The longest part of making the custom lid was getting the measurements down on where to cut the holes. I've attached a template to this post that will save you the trouble of measuring should you decide to recreate this project. I used a Dremel tool to make all of the lid cuts.
I didn't have any metal hangers for the actuator arm but did find some 18 gauge craft wire in my wife's stash. Creating the custom bend is really just a process of trial and error. This is where the craft wire really shined over hanger wire as it is stiff enough to trigger the spray but flexible enough to be easily adjusted by hand bending it. It also happened to fit nicely in the servo arm holes.
Once the servo is secured to the top of the lid with a tie wrap it's time to figure out the range of motion required to trigger the nozzle. This took only a few minutes and was easily adjustable with this code running on the Photon which attempts to activate the nozzle every 10 seconds. This was a very easy process using the Photon OTA update capabilities.
Servo myServo;
void setup() {
   myServo.attach(D3);
}
void loop() {
   myServo.write(40);
   delay(10000);
   myServo.write(1);
   delay(300);
}
I obviously didn't want this contraption on my desk shooting hairspray everywhere so I had to take it outside. Okay, my wife made me take it outside. As long as the Photon is still connected to your WiFi, it's trivial to update it. It took about 3 or 4 iterations of the servo angles (the write() arguments) to get a good activation on the nozzle. With that done all you have to do is stick a flame in front of it and you're in business.
Internet All The Things
I'm not gonna lie, a pumpkin that shoots fire every 10 seconds is pretty amazing and sure to enhance any decorated porch on Halloween. But wouldn't it be better to add a little IoT integration? I thought so too. The sky is the limit at this point. Once you have a Particle Photon controlling your pumpkin there are numerous web services you can tap into. It's just a matter of what your tastes are.
In my case I decided to re-purpose an IoT Button I created previously. It's a maker version of the Amazon Dash button and provides a starting point to build any project that requires an internet-connected button. So essentially we're going to use a Photon-controlled button to activate a Photon-controlled pumpkin. The Particle ecosystem makes this insanely easy using the Particle Cloud. All we need to do is make our button node publish an event when pressed and have the pumpkin node subscribe to those events and trigger the servo. The code is ridiculously simple. See the attached code for the commented versions.
Pumpkin Node
Servo sprayActuator;
void bringTheHeat(){
   sprayActuator.write(1);
   delay(500);
   sprayActuator.write(40);
}
void subscriptionHandler(const char *event, const char *data)
{
   bringTheHeat();
}
void setup() {
   sprayActuator.attach(D3);
   sprayActuator.write(40);
   Particle.subscribe("bring_the_heat", subscriptionHandler, MY_DEVICES);
}
void loop() {
}
Button Node
int LED = D7;
int BUTTON = D2;
void callCloudService(void);
void setup() {
   pinMode(LED, OUTPUT);
   pinMode(BUTTON, INPUT);
   System.sleep(BUTTON, RISING);
}
void loop() {
   callCloudService();
   System.sleep(BUTTON, RISING);
}
void callCloudService(){
   while(!Particle.publish("bring_the_heat", PRIVATE));
   for (uint32_t ms=millis(); millis()-ms < 4000; Particle.process());
}
Install It
The last step is installing our flame throwing goodness in the pumpkin. I found that digging a shallow holder hole into the bottom of the pumpkin worked just fine. One thing to remember is that the flame needs to be an inch or so below the stream of hairspray coming out of the nozzle. Otherwise the force of the spray will extinguish the flame and nobody will be very impressed with your lame, non-fire-breathing pumpkin. I simply placed the candle on a small piece of cardboard that I cut a hole in and slid onto the hairspray can.
What's going on inside.Another approach is to cut the mouth of your pumpkin just right so the candle can rest in the mouth hole at just the right height. Play around with it a bit and you'll figure out just the right positioning to achieve peak flame-throwing awesomeness. Remember to create a mouth design that will not impede the stream of fire. Otherwise you'll end up with a ball of fire INSIDE your pumpkin which will cut your Halloween fun short. With a big enough pumpkin the rest of the electronics (Photon and USB battery) fit nicely inside the pumpkin.
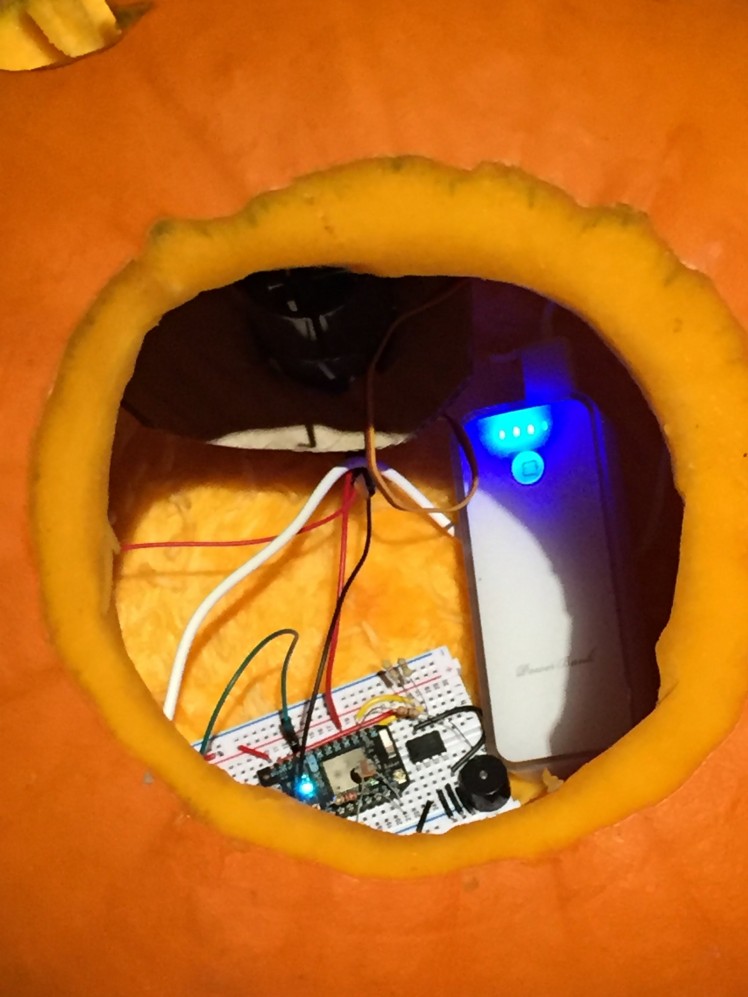 Plenty of room inside the pumpkin for everything.
Lessons Learned
After a night of Trick or Treating I was able to collect some real world data as to how the pumpkin performed over an extended period of time. This is an important part of any project and should never be overlooked. Plans and prototypes are great but many assumptions go out the window in the real world. These are the things I learned and changes I'd make in v2 of this project.
- Wind is a problem - I live in the pacific northwest and, as expected, it was windy and rainy. The wind kept blowing out the candle so v2 would have a different ignition method. I'd keep the candle more inside the pumpkin for traditional ambiance instead of right at the mouth opening and perhaps try a gap igniter for actually lighting the hairspray.
- WiFi range is limited - I did my testing on the porch where the pumpkin would be but WiFi can be picky. This resulted in both the pumpkin and button experiencing connectivity issues at times. This is definitely a device that shouldn't rely on an internet connection but I designed it that way on purpose to showcase the ease of inter-device communication using the Particle Cloud. I would fix this not by redesigning the system but by temporarily relocating my router so it wasn't on the other side of the house.
Schematics, diagrams and documents
CAD, enclosures and custom parts
Code
Credits
Related products

Leave your feedback...