
Farmguard : Farm Security With Cellular Iot And Ai

Made by darksam / Automotive
About the project
Cutting-edge farm security system that revolutionizes protection for agricultural asset.
Project info
Difficulty: Moderate
Platforms: DFRobot, Raspberry Pi, Twilio
Estimated time: 1 hour
License: Apache License 2.0 (Apache-2.0)
Items used in this project
Hardware components

Story
Agriculture is the foundation of human society, providing us with food and financial stability. However, it faces a big problem - wild animal attacks that can lead to significant financial losses and threaten our food supply. Protecting crops and farming isn't just about necessity; it's our responsibility.To address this pressing issue, I will introduce the FarmGuard project, a visionary solution that combines the power of visual recognition through the Vision Sensor, real-time data communication via the Notecard, and cloud-based management using Notehub. The project's key objectives include creating a system for wild animal detection and also to implement real-time alerts
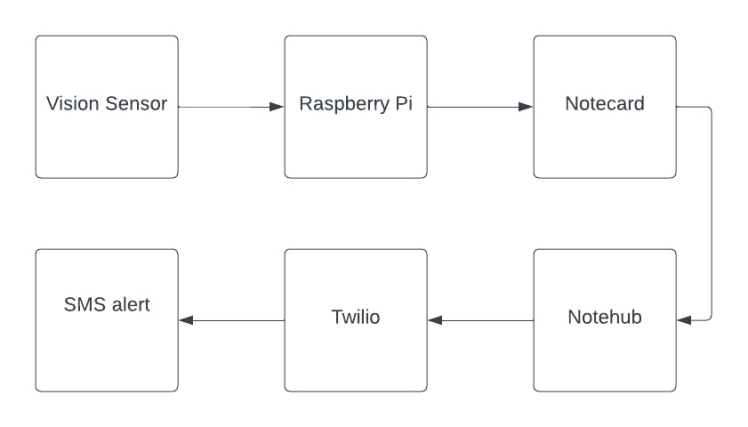
FarmGuard operates through a harmonious synergy of technology. The system comprises the Notecarrier, Notecard, Vision Sensor, and a Single Board Computer. The Vision Sensor, trained to detect specific wild animals relevant to the farm's geographical region, springs into action when a potential threat intrudes. It immediately alerts the user via Notehub through SMS, facilitated by the Notecard's rapid data transmission capabilities. The alert the user receives offers a comprehensive overview of the situation, including the specific wild animal detected and the exact timestamp of the intrusion.
Data FlowHere is the data flow of the Farm Guard
Blues ecosystem
Cellular connectivity is added to this project using the Blues ecosystem. The Blues ecosystem offers several advantages for cellular IoT compared to other solutions, primarily focusing on simplicity, efficiency, and cost-effectiveness. They have a wide variety of modules available for different purposes.
To achieve cellular IoT connectivity in this project using the Blues ecosystem, we need three things
- Notecard with Notecarrier
- Notehub
Notecardwith Notecarrier
The Notecard is a tiny cellular communication module that allows devices to send and receive data over cellular networks. It is simple to set up, uses low power, and is affordable. The Notecard sends or receives the data using the Note, a JSON object.
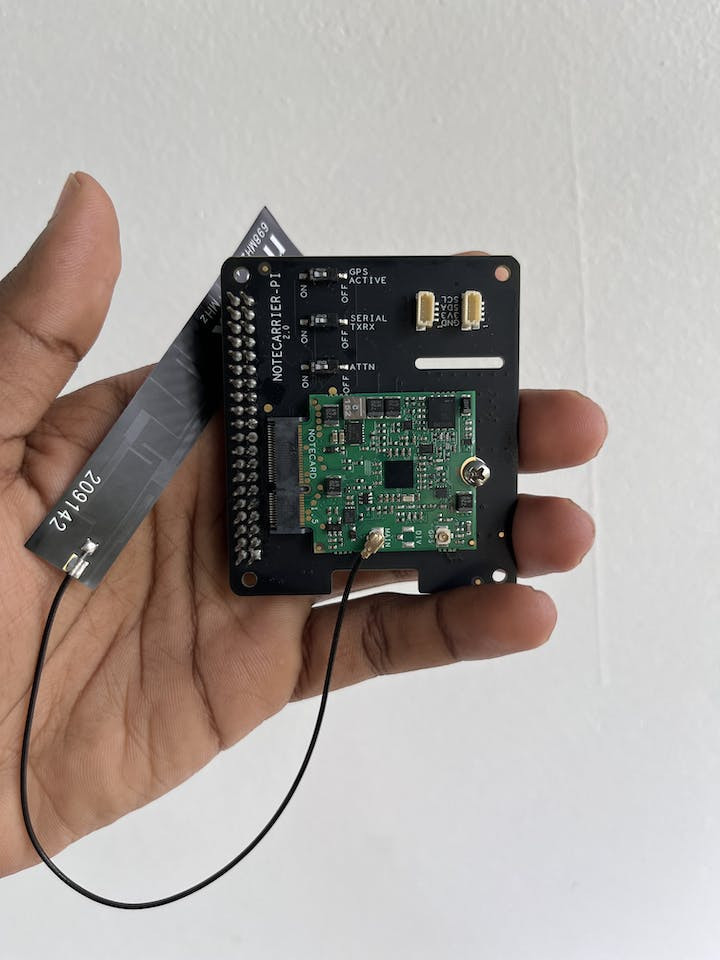
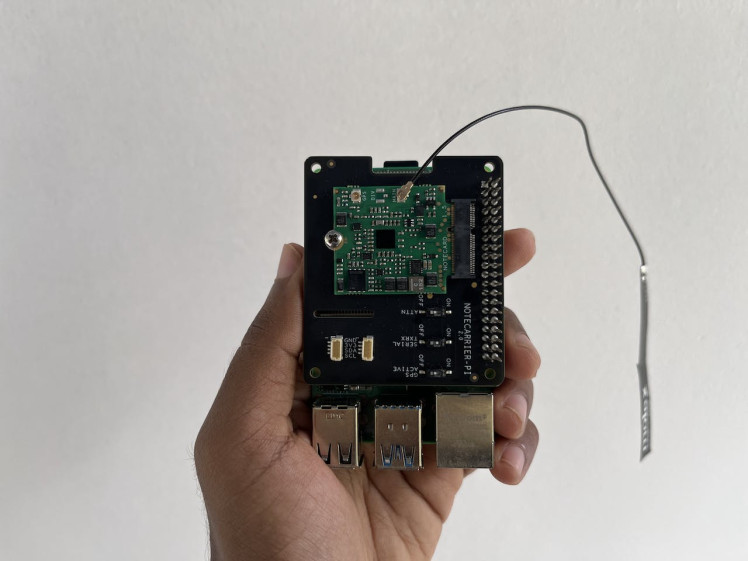
Here I am using the Notecard cellular global version to send the data from the device. To extend the functionality of the Notecard, the Notecarrier is used. This project utilizes the Notecarrier Pi. The Notecard will be plugged into this Notecarrier like the above image to establish the connection with the Notehub. A Molex antenna will also be attached to Notecard to ensure sufficient signal strength.
Notehub
Notecard is just one piece of the Blues ecosystem puzzle. Its power shines brightest when paired with Notehub. It is a cloud platform that manages and interprets data which is coming from the Notecard. It also makes it easy for developers to route data to other cloud applications.
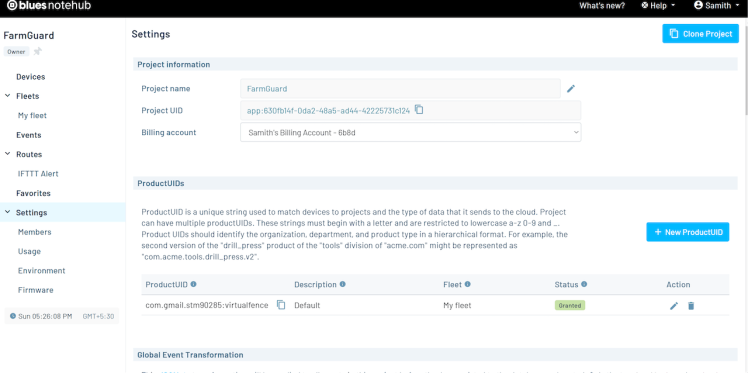
By setting up the New project in the Notehub we will get a product ID which will be unique and will be associated with our notecard.
The below image shows my Notehub project with my Notecard UID.
The Notehub also has this In-Browser Terminal to communicate with the Notecard over USB.
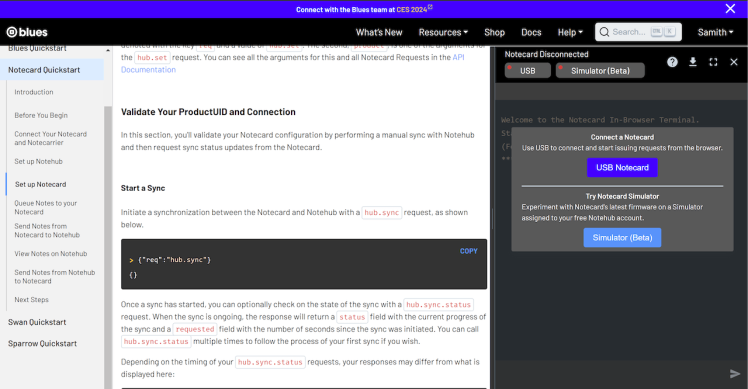
Anyone can easily troubleshoot the Notecard if any error occurs during development.
So I first validated my notecard by issuing this command in the terminal.
{"req":"card.version"}Then I got a response like this which indicates that the hardware is working and running the latest firmware.
{
  "version": "notecard-5.3.1.16292",
  "device": "dev:86xxxxxxxxxxxxxxx",
  "name": "Blues Wireless Notecard",
  "sku": "NOTE-NBGL",
  "board": "1.11",
  "cell": true,
  "gps": true,
  "api": 5,
  "body": {
    "org": "Blues Wireless",
    "product": "Notecard",
    "target": "r5",
    "version": "notecard-5.3.1",
    "ver_major": 5,
    "ver_minor": 3,
    "ver_patch": 1,
    "ver_build": 16292,
    "built": "Sep 17 2023 20:28:51"
  }
}
Then I tried to connect it to the Notehub using the following JSON request.
{"req":"hub.set", "product":"com.gmail.stm90285:virtualfence"}And now it's time for the first sync.
{"req":"hub.sync"}Now let's try sending test data
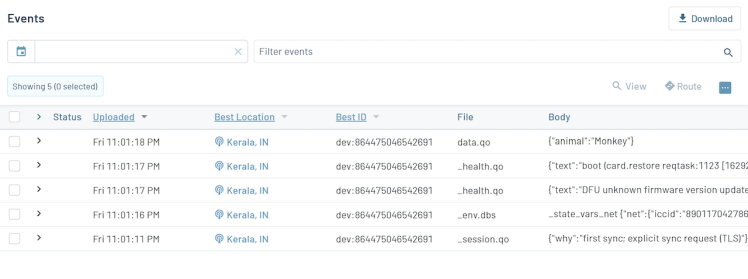
{"req":"note.add","body":{"animal":"Monkey"}}
{"req":"hub.sync"}
If the sync is successful you will see the data like this in the event of Notehub.
Husky Lens

Husky Lens
Wild animal detection is done using the HuskyLens. It is an easy-to-use AI Camera Huskylens which is equipped with multiple functions, such as face recognition, object tracking, object recognition, line tracking, colour recognition, and tag(QR code) recognition. It also contains 2 inch IPS LCD screen so we don't need any external display to see the output.
Object recognition function is used here to detect the wild animals. It can recognize 20 built-in objects. They are aeroplanes, bicycles, birds, boats, bottles, buses, cars, cats, chairs, cows, dining-able, dogs, horses, motorbikes, people, potted plants, sheep, sofas, trains, and TVs.
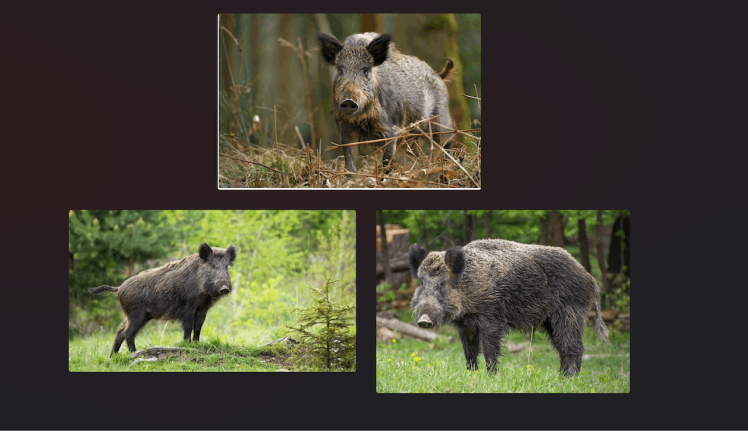
They are the basic objects, here we have to focus on the specific wild animals which pose threats. So in my geographical region, the animals which are a major threat to farming areas are Wild Boar, Elephant and Monkey. It's a very tough task to train the husky with live data, So I went with the web images. But instead of training on a single image, I tried the same animal in different photos.
To start training, I put the Husky in the object recognition mode. I then pointed the Husky to the image of the animal which should be learned and pressed the learning button.(If you need to know about the basic usage of the Husky lens head over to their official website). First I trained the Wild boar, these three images are used for training.
Husky While Training

Husky While Training
Then I trained the Husky to detect the remaining animals such as Elephant and Monkeys.
When encountering the learned objects, they will be selected by the colour frame, and the name and ID number will be displayed. When encountering new ones, the selection frame will be white. As you can see below, the monkey is marked as the Dog with ID 7. The Husky will always assign the name for the object that is even trained by ourselves with its pre-defined object names which can be recognized.
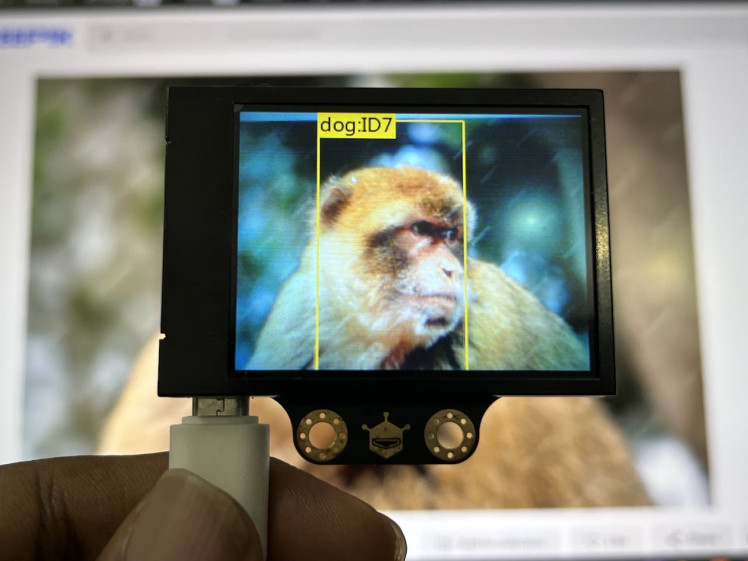
The ID number is related to the order of marking objects. In this case, the ID from 1 to 3 represents Wild Boar, 4 to 6 represents Elephant and 7 to 9 represents Monkey.
This can be used as a simple filter to determine the specific animal.
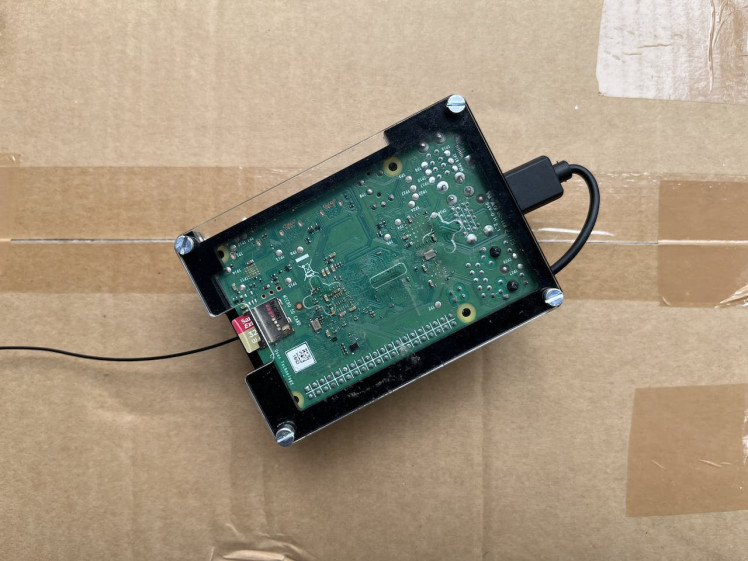
ControllerRaspberry Pi 4

Raspberry Pi 4
The Raspberry Pi 4 acts as the central nervous system of FarmGuard, processing data, making decisions, and orchestrating actions. Its affordability, customization options, and scalability make it the perfect choice for driving a powerful and accessible smart farm solution
The Notecarrier can be attached to the Raspberry through its headers making it a compact device which can be plugged anywhere.
I used a 32 GB micro SD card with the Raspbian Bulls Eye OS to run the project and used VNC for communicating with it. Python library named "note-python" is used here for communicating with the Notecard and its installation requires only line code which is shown below.
pip3 install note-pythonThe communication between the Raspberry Pi and the Notecard is done through the I2C.
Note: To communicate through UART with the Notecard you need to enable one of the three dip switches named as the serialin the Notecarrier PI.
The DIP switch which I am talking about

The DIP switch which I am talking about
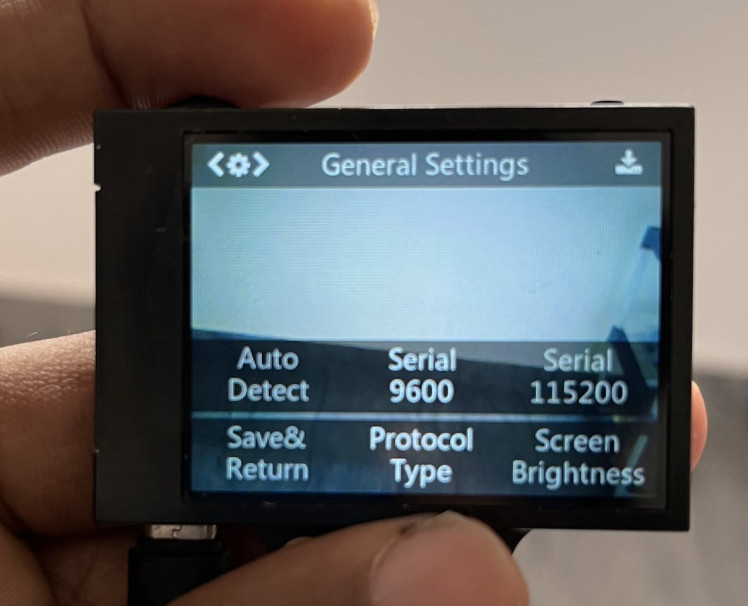
The Pi and Husky lens communication is done through the UART at 9600 bits per second baud rate. This should be set in the general settings. You can also choose I2C for communication.
The below modules are required to work on Huskylens with the Raspberry Pi.
sudo apt-get install python-smbus
sudo pip3 install pyserial pypng
You also need to place the Husky lens library in the application folder for the proper working of the main code. You can find the entire assets in the Github repo. Check here for more details regarding the setup of Husky with Raspberry Pi.
Setting SMS AlertTo send the SMS alert I have used the Twilio Service. The Notehub.io can support a broad range of API endpoints by utilizing the Route feature. It also supports the Twilio API. I forgot to tell you about the route, the Route is one of the most powerful features of the Notehub, which allows you to forward your data from Notehub to a public cloud like AWS, Azure, or Google Cloud, a messaging platform like MQTT, or a custom HTTP/HTTPS endpoint
First I set up my Twilio account.
My Twilio Dashboard

My Twilio Dashboard
Then I created a Route in the Notehub providing my Twilio details.
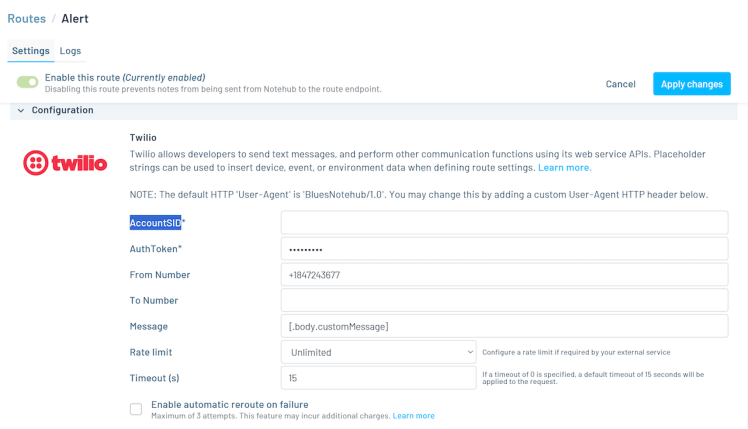
Here I need to create a dynamic SMS body which includes the wild animal detected, So I create a placeholder variable(to hold the animal name) which will be set from the Raspberry PI and will also reflect in the routing.
This is the JSON body

This is the JSON body
If your messages aren't being sent through Twilio as expected, you can navigate to the Events section in your Notehub project and check the details on the Route log.
This is the error response I got in Route log when I used an unverified number

This is the error response I got in Route log when I used an unverified number
We will get an SMS like this when a wild animal is detected if the routing is successfully placed.

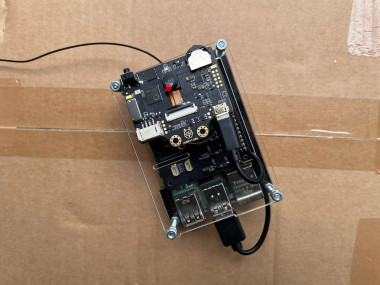
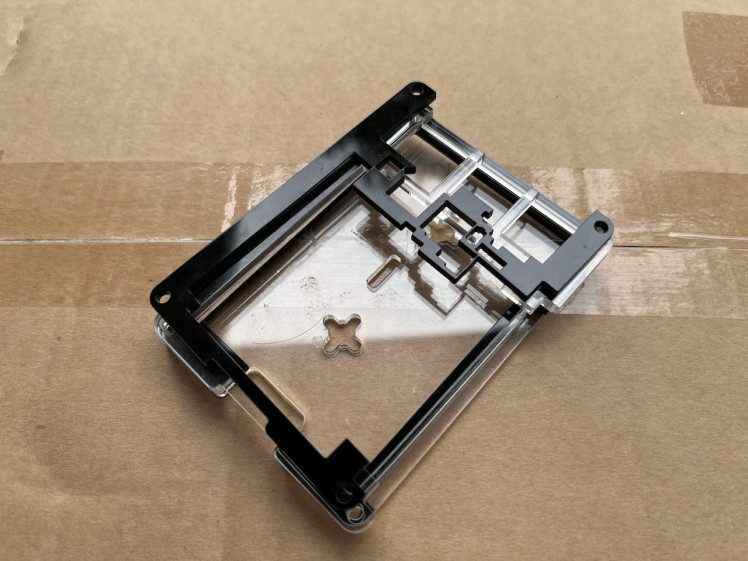
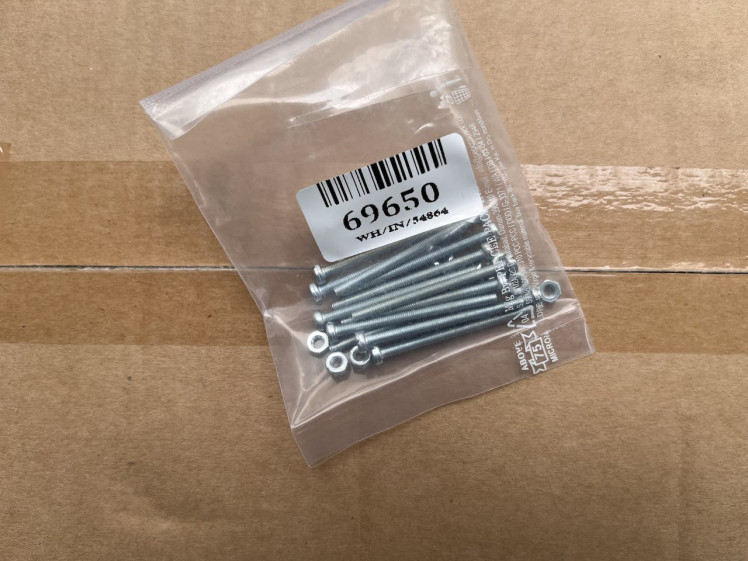
To enclose the device I have used 6 layers of 3mm acrylic pieces which are made stronger using M3 Nuts and bolts. The Husky lens is connected to the Raspberry Pi via a smaller micro USB cable.
1 / 2

Schematics, diagrams and documents
Code
Credits
Related products


Leave your feedback...