
Exailerate

Made by piela001 / Artificial intelligence / Photos & Video
About the project
Have you ever been with a group of friends or family and felt that the room has low energy? We all know how hard it can be to lift the mood of a single person, let alone a group. We propose a solution with ExAilerate using the Google AIY Vision Kit! ExAilerate will find the preferences for each friend or family member, then will
Project info
Difficulty: Easy
Platforms: Raspberry Pi, AIY
Estimated time: 1 hour
License: Apache License 2.0 (Apache-2.0)
Items used in this project
Hardware components


Story
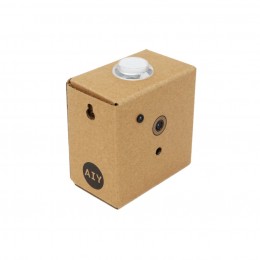
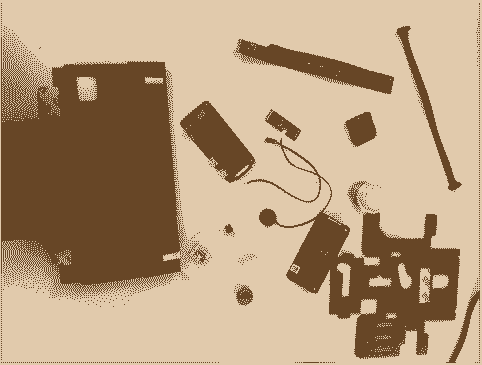
Building the Kit:
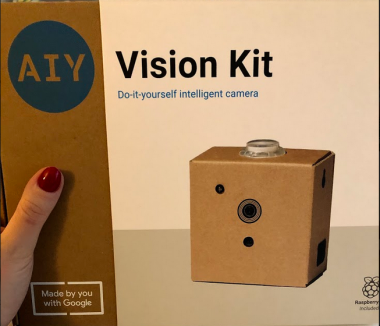
To build the kit, we followed the official AIY kit assembly guide found here:https://aiyprojects.withgoogle.com/vision#assembly-guide
We’ve taken pictures of the process which are included below.
 Kit Contents

Assembled Kit
- While the AIY libraries contain everything needed for the Joy recognition, we needed to find another library to handle displaying the images for the user configuration and final presentation.
- The TkInter library provided several necessary functions that we needed. This includes the ability to load all files in a directory as a slide show as well as have these images cycled either manually or on a timer.
- To fully use the functionality that we need from TkInter we also need to install the Python Imaging Library along with the Python Imaging Library - ImageTk Module.
- All necessary dependencies can be installed with the command:
- sudo apt-get install python3-pil python3-pil.imagetk
Using the AIY Face Detection library
To start, we have to import all of the necessary libraries.
- import io
- import os
- import sys
- import collections
- from itertools import cycle
- import tkinter as tk
- from PIL import Image, ImageTk
- from picamera import PiCamera
- from aiy.board import Board
- from aiy.leds import Color, Leds, Pattern, PrivacyLed
- from aiy.toneplayer import TonePlayer
- from aiy.vision.inference import CameraInference
- from aiy.vision.models import face_detection
The image display using TkInter is used to display the slideshow with the option to display each slide based on a trigger or a timer. Pictures used for the slide show (total 19) are from pexels free stock images website.
- # Displays all images contained within given list
- # display_slides will run a slideshow of all loaded images, use run() to start
- # show_slides will display slides one at a time using the next() function
- class ImageViewer(tk.Tk):
- def __init__(self, image_files, x, y):
- print("Initializing Image View")
- tk.Tk.__init__(self)
- self.geometry('+{}+{}'.format(x, y))
- self.size = len(image_files)
- self.shown_total = -1
- self.pictures = cycle(image for image in image_files)
- self.pictures = self.pictures
- self.picture_display = tk.Label(self)
- self.picture_display.pack()
- self.images=[]
- self.return_name = ""
- self.bind('<Escape>', self.toggle_screen)
- def toggle_screen(self, event):
- self.attributes("-fullscreen", False)
- def show_slides(self):
- print("Showing Slides")
- self.shown_total += 1
- img_name = next(self.pictures)
- self.return_name = img_name
- image_pil = Image.open(img_name)
- self.images.append(ImageTk.PhotoImage(image_pil))
- self.picture_display.config(image=self.images[-1])
- self.title(img_name)
- def display_slides(self):
- img_name = next(self.pictures)
- image_pil = Image.open(img_name)
- self.images.append(ImageTk.PhotoImage(image_pil))
- self.picture_display.config(image=self.images[-1])
- self.title(img_name)
- self.after(DELAY, self.display_slides)
- def next(self):
- print("Next Slide")
- self.show_slides()
- self.run()
- def get_title(self):
- return self.return_name
- def display(self):
- self.mainloop()
- def run(self):
- self.update_idletasks()
- self.update()
- def is_finished(self):
- return self.size == self.shown_total
We then create our functions which will use the AIY libraries.
- # detect if emotion is above the detection threshold
- def detect_emotion(model_loaded, joy_moving_average, joy_threshold_detector, animator, player):
- for faces, frame_size in run_inference(model_loaded):
- joy_score = joy_moving_average.send(average_joy_score(faces))
- animator.update_joy_score(joy_score)
- event = joy_threshold_detector.send(joy_score)
- if event == 'high':
- print('High joy detected.')
- player.play(JOY_SOUND)
- return "joy"
- elif event == 'low':
- print('Low joy detected.')
- player.play(SAD_SOUND)
- return "sad"
Once we are able to detect the users emotion, we can create the function needed to save their image preference.
- # Test the user for each image and configure the user file for future use
- def preference_config(pref_file, image_view):
- # initialize all components
- leds = Leds()
- board = Board()
- player = Player(gpio=BUZZER_GPIO, bpm=10)
- animator = Animator(leds)
- camera = PiCamera(sensor_mode=4, resolution=(820, 616))
- # turn on privacy light
- leds.update(Leds.privacy_on(brightness=128))
- def model_loaded():
- player.play(MODEL_LOAD_SOUND)
- joy_moving_average = moving_average(10)
- joy_moving_average.send(None) # Initialize.
- joy_threshold_detector = threshold_detector(JOY_SCORE_LOW, JOY_SCORE_HIGH)
- joy_threshold_detector.send(None) # Initialize.
- # cycle through all pictures in the image_view until all have been viewed
- # each new image is displayed after the user emotions has been recognized for that image
- while not image_view.is_finished():
- emotion = detect_emotion(model_loaded, joy_moving_average, joy_threshold_detector, animator, player)
- if "joy" in emotion:
- pref_file.write(image_view.get_title() + 'n')
- image_view.next()
- animator.shutdown()
- leds.update(Leds.privacy_off())
The full code can be found in the file exAilerate.py in our github repository:
https://github.com/piela001/exAilerate
Running the program
Clone the repository
- git clone https://github.com/piela001/exAilerate.git
Run the installer
- ./install.sh
Start the program
- ./exAilerate.py
Follow the command prompt to configure all new users. Once everyone is configured, run the program again to start PARTY MODE!
More details of our project, including our trial and error, and more info about why we chose what we did is available at:
https://docs.google.com/document/d/1w48Zfb2NK-u5amr86Q1gw50dpLKvsy14RsLNvOAnNL8/edit?usp=sharing
Code
Credits
Related products


Leave your feedback...