

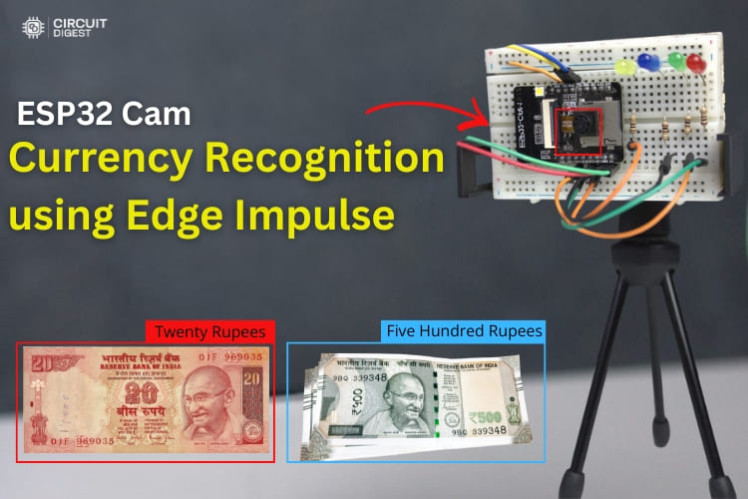
Esp32-cam Currency Recognition With Edge Ai

Made by electroscope_archive / Sensors
About the project
Learn how to build a real-time Indian currency note recognition system using ESP32-CAM and Edge Impulse for TinyML at the edge.
Project info
Items used in this project
Hardware components

Story
Imagine a low-cost embedded device that sees and identifies Indian currency notes in real time — without relying on the cloud. In this project, we show how to combine the powerful ESP32 CAM Currency Recognition and the Edge Impulse TinyML platform that classifies denominations using machine learning directly on the device.
This guide walks you through the complete process — from collecting and labelling image data, training a custom model in Edge Impulse, to deploying and testing on the ESP32-CAM hardware. Along the way, you’ll learn important edge-AI concepts and practical embedded system techniques that are widely applicable to TinyML projects.
ESP32 CAM Currency Recognition
🎯 What This Project DoesOnce built, your ESP32-CAM can:🔥 Capture an image of a currency note🧠 Run a trained AI model locally — no cloud needed💡 Light up an LED representing the recognised denomination📤 Print the detected denomination to the Serial Monitor
Running the model directly on the device reduces latency, improves privacy, and cuts dependency on network connectivity. These are the hallmarks of edge computing and TinyML.
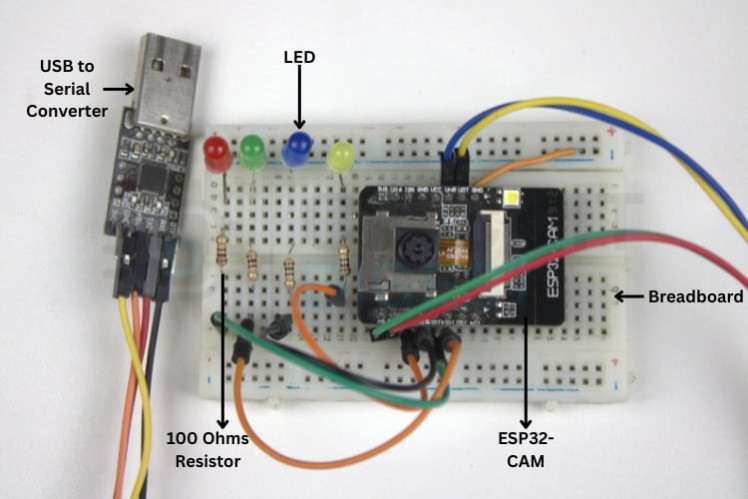
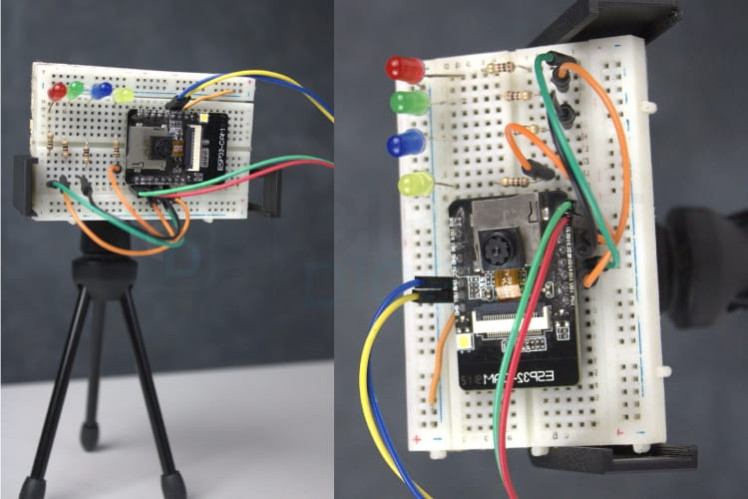
Hardware setup
🧩 Circuit and Hardware SetupConnect the ESP32-CAM to the USB-to-Serial adapter as follows:✔ FTDI TX → ESP32-CAM RX✔ FTDI RX → ESP32-CAM TX✔ 5 V and GND properly connected
Attach LEDs to selected GPIO pins through 100 Ω resistors, and tie all cathodes to common ground. Each LED corresponds to a currency denomination.
Without proper connections, the module won’t upload or operate correctly, so refer to the circuit diagram before powering up.
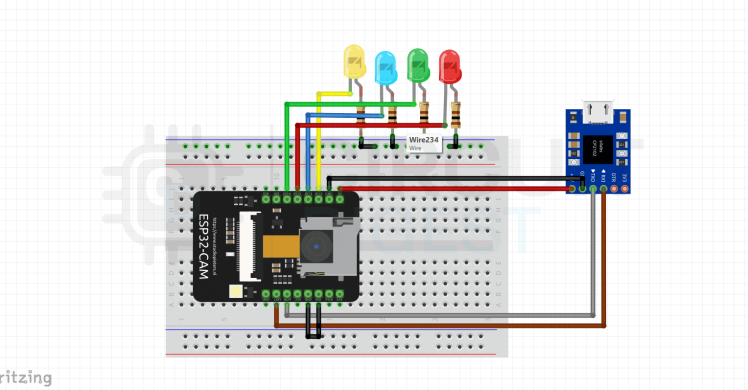
Circuit Diagram
The quality and variety of your training images directly affect model accuracy. While you can find datasets online, this project uses custom image capture:
- Program the ESP32-CAM with a data-collection sketch that starts a web server.
- Use any device on your Wi-Fi to connect to the camera interface.
- Place each denomination (e.g., ₹10, ₹20, ₹50, ₹500) in front of the camera.
- Capture multiple images per note under consistent lighting and background.
Aim for at least 50 images per class — more images improve model robustness.
A white or uniform background helps the model focus on the visual features of the notes.
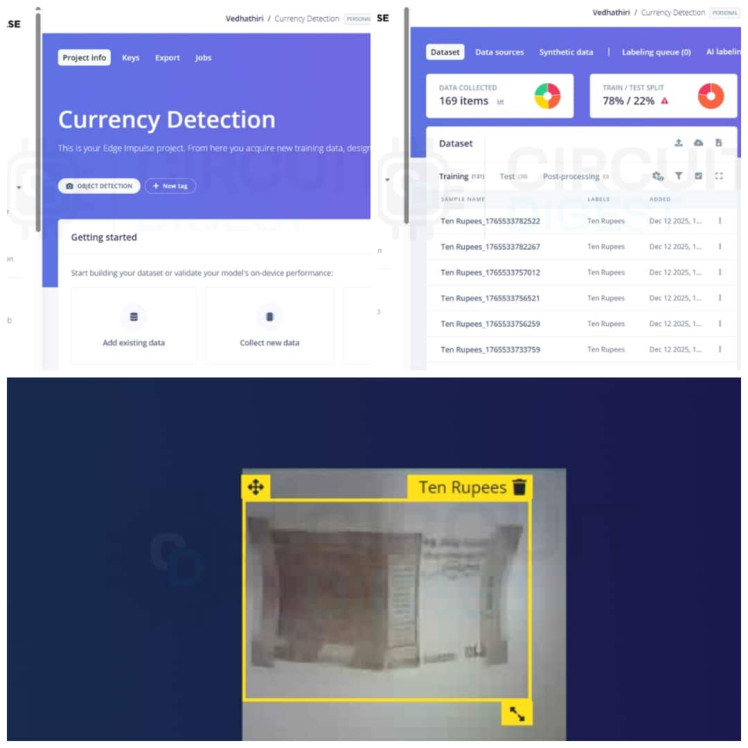
🤖 Training Your Model in Edge ImpulseThe Edge Impulse platform drastically simplifies the TinyML workflow:
- Create a new project and upload the labeled images.
- Draw bounding boxes around each note for object detection.
- Configure the Impulse with proper image processing (e.g., 96×96 size).
- Train your model and check performance metrics like F1 score.
- Deploy the model by generating an Arduino library tailored for the ESP32-CAM.
After training, Edge Impulse compiles an optimized model that runs efficiently on microcontrollers like the ESP32.
Edge impluse
🧠 Integrating the Model with ArduinoOnce the model library is built:➡ Copy it into the Arduino libraries folder.➡ Update your sketch to include the AI model.➡ Select the correct board profile and camera model (CAMERA_MODEL_AI_THINKER).➡ Upload to the ESP32-CAM.
After deployment, the ESP32-CAM runs inference locally to classify new currency images.
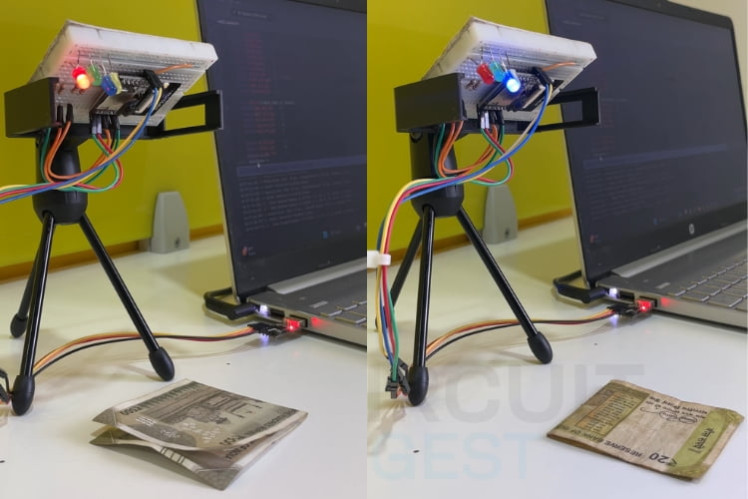
Working demo
🔍 Testing and ResultsFix the ESP32-CAM at a steady angle with good lighting. Place a note within the camera’s field of view, and watch:✨ The appropriate LED lights up✨ The Serial Monitor displays the classificationThis confirms real-time recognition accuracy.
Maintaining consistent camera placement and lighting improves performance.
Your currency recognition system can be extended to:
✔ Assist visually impaired users with audio feedback✔ Verify denominations at point-of-sale systems✔ Automate currency counting✔ Integrate with vending machines
These real-world uses show how embedded AI can enhance everyday devices.
🚀 Future EnhancementsHere are some exciting upgrades you can explore:
🔹 Extend support to more denominations and coins🔹 Add an OLED/LCD screen to display results visibly🔹 Use a buzzer or speaker for audible output🔹 Implement fake currency detection by training the model accordingly
These enhancements can make your system more powerful and user friendly.
🛠 Troubleshooting TipsIf you run into issues:
load Failure: Ensure GPIO0 is grounded during flashing and the correct COM port and board are selected.
- No Serial Output: Double-check baud rate and wiring.
- Wi-Fi Connection Problems: Confirm SSID/password accuracy and 2.4 GHz network usage.
- Black Image or Camera Error: Define the correct camera model and secure the camera ribbon.
This project demonstrates how TinyML and edge AI can transform inexpensive embedded hardware like the ESP32-CAM into a practical, real-time currency recognition tool. By leveraging Edge Impulse, we offload the complexity of model training and focus on delivering a compelling, interactive application that anyone can build.
Start experimenting, extend functionality, and inspire others to explore embedded AI! If you’re looking for more inspiration and practical guides, check out these ESP32 projects.
Leave your feedback...