
Diy Smart Lock

Made by Mellow_Labs / Home Automation
About the project
I didn't want to buy a Smart Lock without knowing that I would actually use its functionalities so I decided to make my own
Project info
Difficulty: Moderate
Platforms: Autodesk, Seeed Studio, Walabot, MicroPython, Espressif
Estimated time: 3 hours
License: Creative Commons Attribution CC BY version 4.0 or later (CC BY 4+)
Items used in this project
Hardware components

Hand tools and fabrication machines
Story
I've always wanted to upgrade to a smart lock for my front door, but I was not willing to spend £100 on something I might not like. I wanted an option to try it out first and see if it's an improvement to my life.
Yes, I could buy one from Amazon and return it within 30 days, but that's too easy and boring. Plus, I have a 3D printer and some knowledge of electronics and some rudimentary programming skills. So why not make my own smart lock?
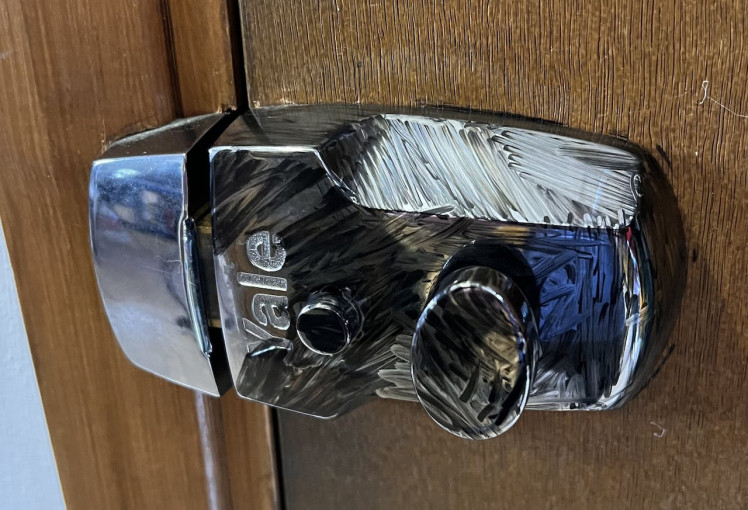
Scan the Lock.The first thing I needed was a 3D model of my existing lock. I use PolyCam, an app that lets you scan objects with your phone camera, but that didn't work on the first try because my lock was very reflective. It looked like a shiny blob.

To get a better result, I covered the lock with whiteboard marker pen and scanned it again. That worked perfectly! The pen made the surface matte and gave enough contrast for the app to capture the shape.#
1 / 2

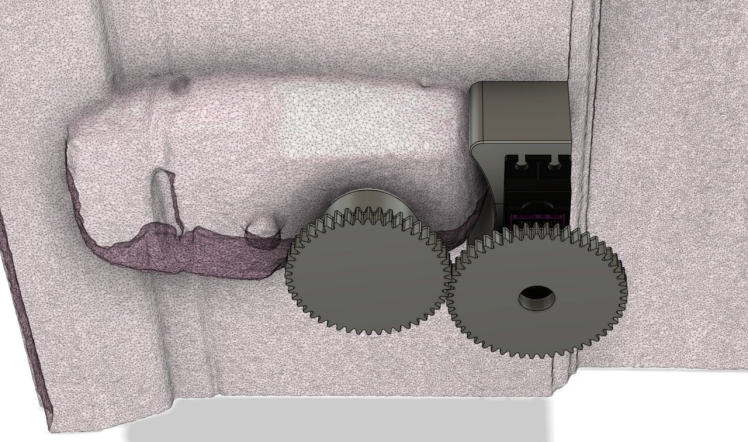
I imported the scan into Fusion 360 and used it as a reference for my design.
The Design.The next thing I needed was a way to turn the knob of the lock with a servo motor. I decided to use gears for this purpose. I modeled two gears: one for the servo shaft and one for the knob.
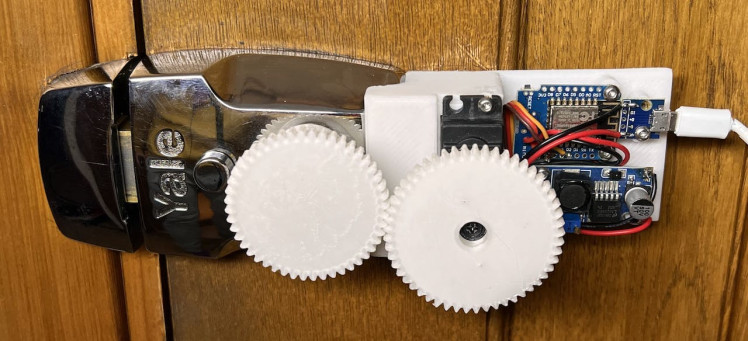
I printed them out in no time and glued them to the door with hot glue. It was so satisfying to see them work flawlessly with a servo tester. They looked great and turned smoothly. I was ready for version 2.
I was careful not to use screws that would ruin my door. Instead, I used hot glue directly to the door because it's super easy to peel off with isopropyl alcohol.
Version 3.Version 2 didn't really work. Not because of the mechanical parts, but because of the electronics. I burnt 2 microcontrollers because the servo was demanding too much current for their built-in voltage regulator to handle. Apparently servos are power-hungry beasts that don't play well with others.

For version 3, I simply added a buck converter as a sort of filter for the power input. I'm mostly used it to bypass the voltage regulator on the D1 Mini which solved the problem.
Home Assistant.
Everything in my home already runs on Home Assistant, so I'm obviously using ESPHome to control the servo motor that operates my door. With a very simple on and off switch programmed through Node-RED, I can hit a button on my dashboard to open and close the door with ease. It's amazing!
Of course, it's not flawless yet. There are still some kinks to iron out. For instance, the servo doesn't disable itself when it's in the locked position, so if I need to open the door quickly to get a package, I have to use the app instead. And we all know how stressful it is to receive packages these days - it's like a mini-game with a timer!
Thanks for reading! If you enjoyed this post and would like to support me in creating more content like this, please consider becoming a patron on my Patreon page. By joining, you'll get access to exclusive content, behind-the-scenes updates, and other perks. Your support means a lot and helps me continue to create high-quality content. Thanks for your consideration!
Credits
Leave your feedback...