
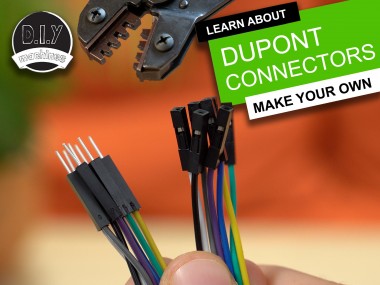
How To Crimp Dupont Connectors

Made by DIY-Machines / Productivity / Robotics
About the project
When I'm building a prototype project I know I will need to connect and disconnect leads many times during its design. Dupont connectors are ideal. This guide will show you how to add your own connectors onto the end of your own wires. You can make any configuration of any length cable to suite your needs when you need it.
Project info
Difficulty: Easy
Estimated time: 1 hour
Items used in this project

Story
Step 1: Supplies


You'll need to have some Dupont metal connectors, some plastic housings and crimpers. You can get a kit which contains all of these from Amazon here: https://geni.us/DupontCrimper
You'll of course need some prototyping wire as well. This is similar to what I'm using in the video: https://geni.us/22AWGWire
Step 2: Video Version
If you prefer to follow a video guide then I have made one which you can watch here, otherwise for the written version with photos please keep reading onwards...
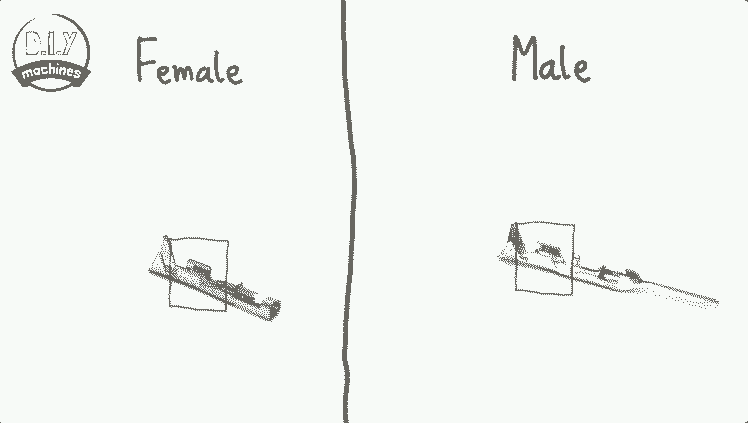
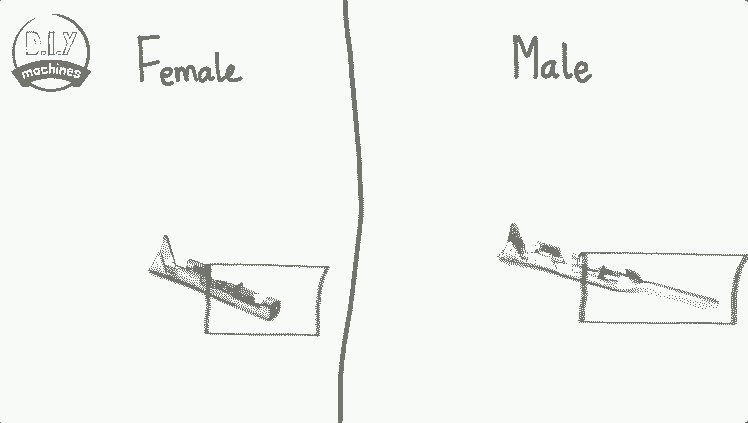
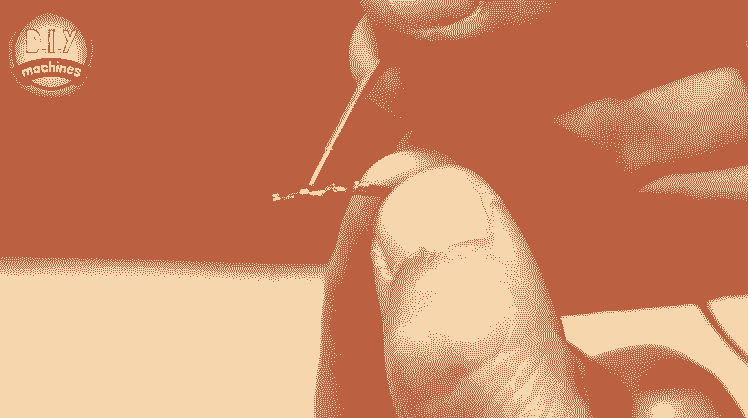
Step 3: The Two Possible Ends

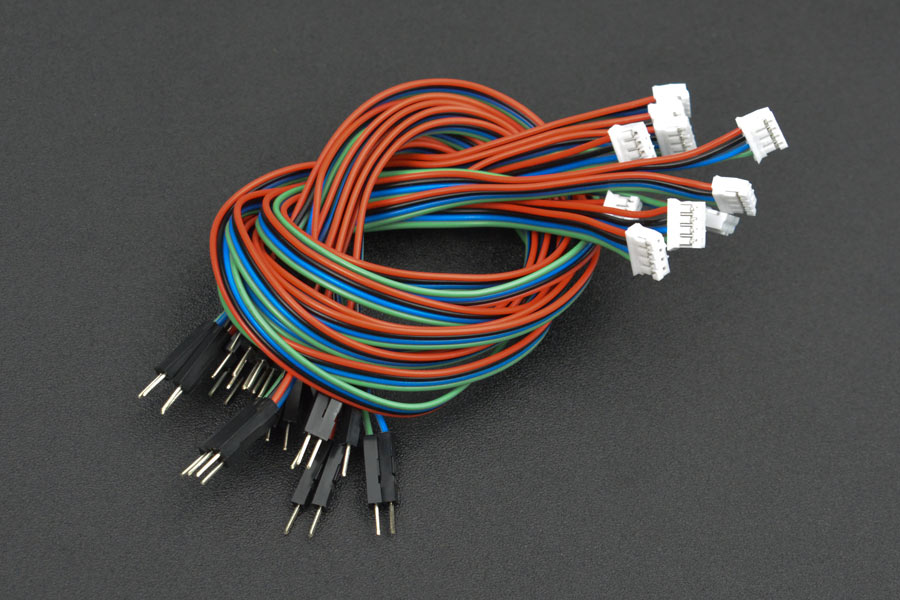
Dupont connectors come in matching male and female connectors. The photo shows both types once they are completely assembled.
They are both assembled in almost identical steps with the only difference being which metal connector you use during the assembly. The plastic housing and crimping tool used is identical for both.
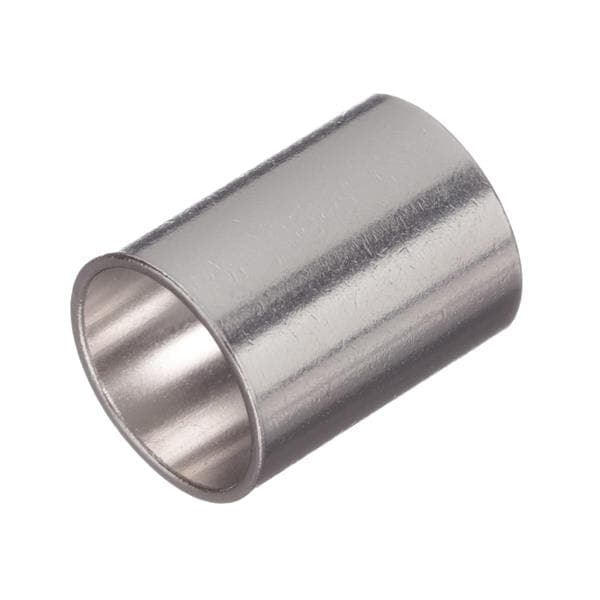
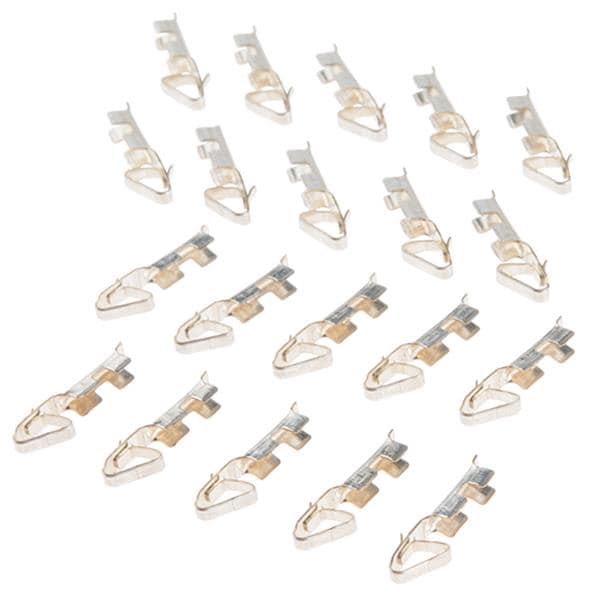
Step 4: The Metal Connector
Both the male and female connectors share most of the same design characteristics and it is just the last section of the connector which changes. The three main parts of the metal component are:
1: Both feature a 'V' shaped wing of metal at the top of the connector and boxed in the first photo. This part, once crimped, will grab onto the insulation of the wire.

2: The 'U' shaped section will make contact with the core of the wire once crimped.
3: Finally the remainder of the metal connector is the part which makes the physical connection between your wire and the device that you want to connect it to.
When you buy the metal sections they are usually supplied as part of a long roll. To remove them, gently bend them back and forth a few times and it should come away eas

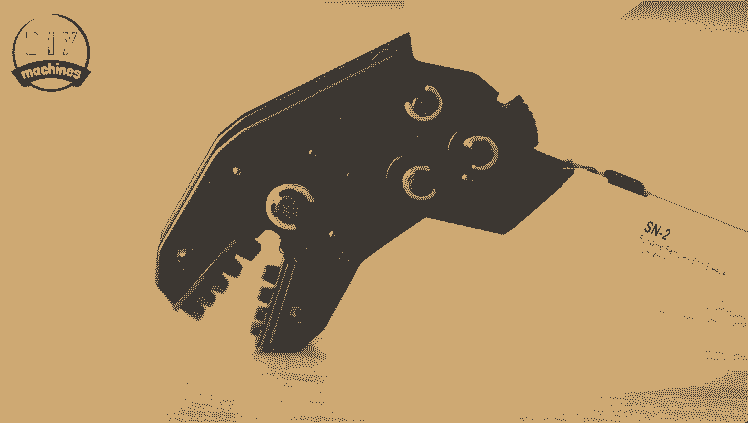
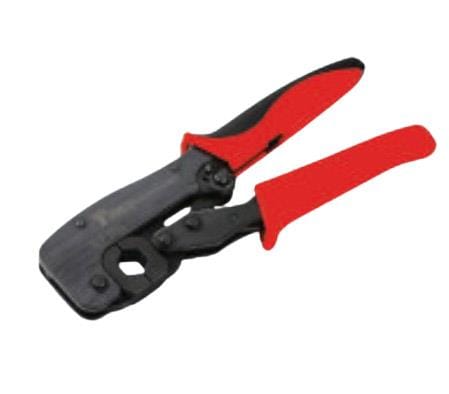
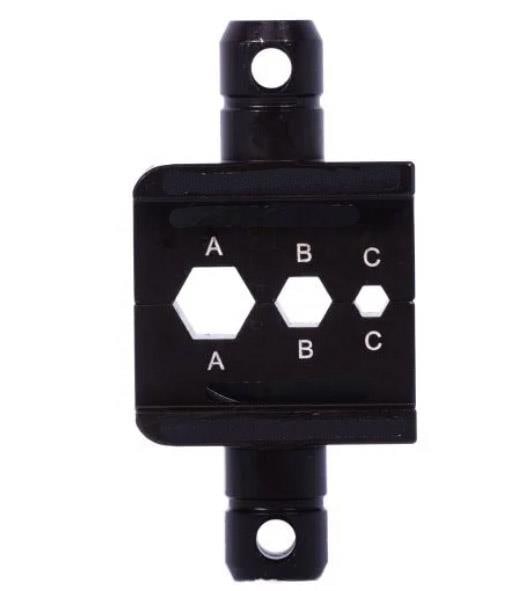
Step 5: The SN-2 Crimper
There are many different style of crimpers available from a budget friendly prices of around $10 all the way up to thousands of dollars. I'm using the pocket money friendly SN-2 in this guide. If you are using a different pair the following steps should be much the same.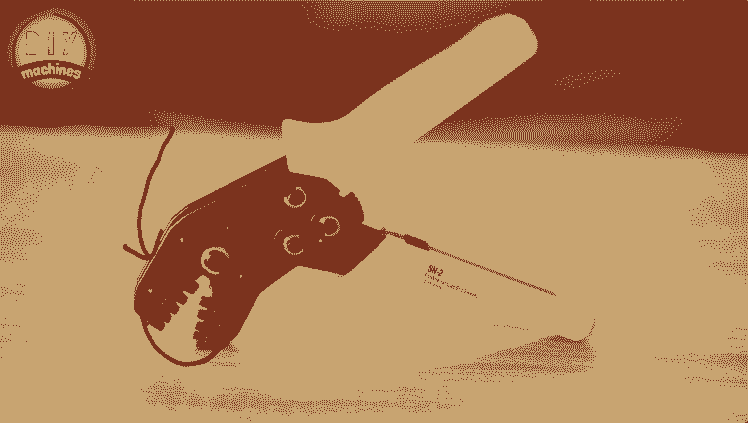
The jaws of the crimper feature several different sized recesses for the different size of Dupont connectors available.
You will also find a small screw and geared wheel for making adjustments to the strength of the crimp. I did not need to adjust mine, but if you feel your crimpers are crimping too tight or not tight enough then you can remove the screw, rotate the geared cog and then reseat the screw again. The direction for tightening or loosening the bite is usually marked on the gear with '+' or '-' sign and an arrow.

The little arm nestled inside the handles allows you to release the ratchet mechanism of the crimpers and abandon a crimp without having to complete the crimping motion all the way through - ideal for when you realise the crimp is not going as planned and need to reseat something before crimping again. To use this lever just push it upwards.
Step 6: Seating the Connector Ready for Crimping
 The metal part should be inserted into the crimper with the 'V' shaped section of the connector facing into the 'V' shaped tooth of the crimper. Some crimpers have this V shaped tooth of the bottom set of teeth and others, like mine, have it on the top set of teeth.
It should also be slid up against the ridge shown with an arrow in the photo above so that it protrudes out the other side of the crimpers.
You can then partially close the crimpers just enough to hold the connector in place without actually starting to bend any of the metal parts. We can then prepare our wire.
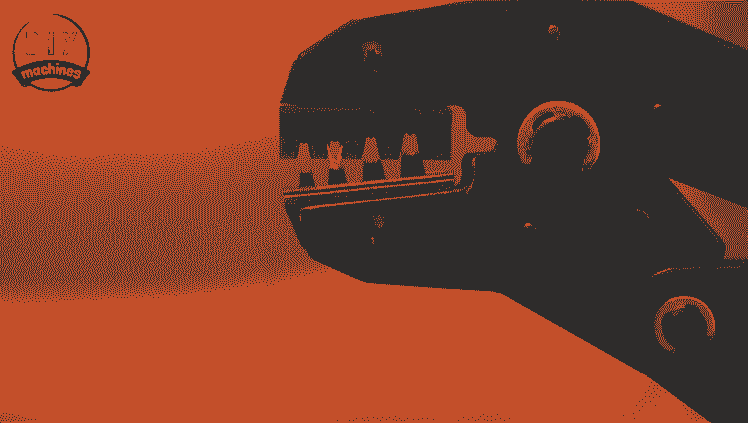
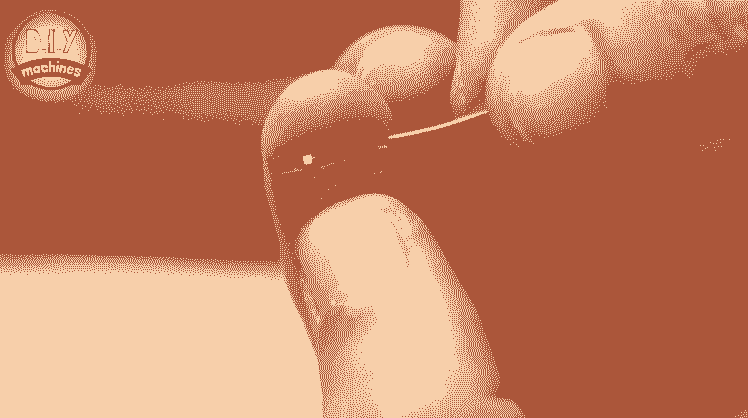
Step 7: Adding the Wire

 You will need to strip about 5 to 7mm of insulation from the end of your wire. I'm using a 22AWG wire.
This can then be inserted into the connector. Check from the other side that the wire has remained inside the connector before attempting to crimp it.
For clarity, in the above image above I have shown you how the wire should be seated inside the connector when it's inside the crimper. Note how the insulation occupies the 'v' shaped section, the exposed wire is in the 'u' shaped section and then the remainder of the unsheathed wire does not continue far into the remainder of the connector. If it did, it would interfere with the mating of the connector when used after assembly.
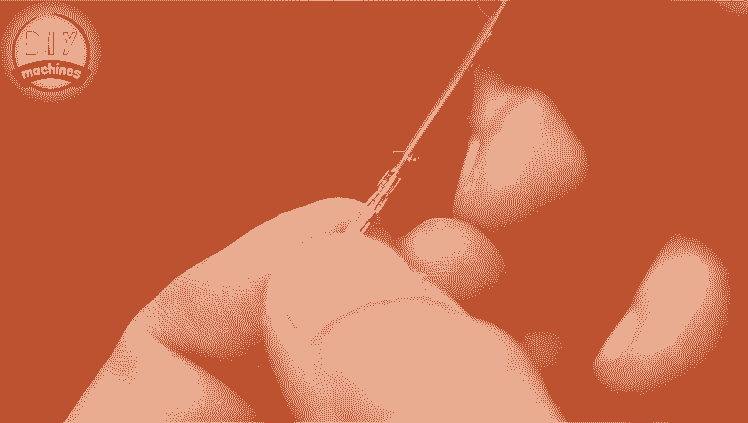
If everything looks OK then squeeze the crimper firmly shut, release and then inspect your crimp before proceeding.
Step 8: What to Check For:

Are the wings from the 'V' shaped section gripping the insulation?
- Are the side of what was the 'U' shaped section firmly in contact with the core of the wire?
- Is the wire not interfering with the rest of the connection?
- If all this is great we'll add it into a plastic housing.
Step 9: Fitting Into the Plastic Housing
There are many different configurations of plastic housing available to choose between. They go from connectors which can fit between one or up to 10 wires (and more) in either one, two, or three rows. You can choose whichever best suits your requirements. The choice of plastic housing is the same for if you want to create male or females connectors (or a mixture).
 When inserting the crimped wire into the housing ensure that the open top side of the crimped wire is facing towards the open side of the plastic housing where the plastic 'tongues' are. (Pointed to in the two images above).
Once aligned the crimped were is pushed firmly into the housing (through the wider opening at one side of the housing). Gently tug on the wire to ensure that it will not accidentally unseat itself later whilst in use.
Crimp Complete. :)
I hope you found this guide and video useful. The first few connectors I made took me some time to do and were not the best - but after a few I can now make them much more quickly and consistently. Practice helps a lot.
Please take a moment to look at some of my other projects.
Subscribe here on Instructables and YouTube to find out what my next project is.
Otherwise until next time chow for now!
Subscribe to my Youtube channel: https://www.youtube.com/channel/UC3jc4X-kEq-dEDYhQ8QoYnQ?sub_confirmation=1
Support me on Patreon: https://www.patreon.com/diymachines
Facebook: https://www.facebook.com/diymachines/
Lewis
Credits
Related products


Leave your feedback...