
Covid-19: Face Mask Detection System Using Deep Learning
Made by shakhizat / Artificial intelligence / IoT
About the project
In this tutorial, we will cover how to build a face mask detector using YOLOv4 object detection algorithm on the Nvidia Jetson board.
Project info
Difficulty: Difficult
Platforms: NVIDIA
Estimated time: 4 hours
License: GNU General Public License, version 3 or later (GPL3+)
Items used in this project

Story
Object Detection is a task in computer vision that focuses on detecting objects in images and videos. There are a few different algorithms for object detection and they can be split into two groups:
- Algorithms based on classification. Most known example of this type of algorithms is the Region-based convolutional neural network (RCNN) and their cousins Fast-RCNN and Faster-RCNN.
- Algorithms based on regression.Most known example of this type of algorithms is YOLO (You only look once) commonly used for real-time object detection.
The real-time object detection system YOLO was a milestone in object detection research. It is a really popular DNN (Deep Neural Network) object detection algorithm, which is really fast and works also on not so powerfull devices, like Raspberry PI, Nvidia Jetson Nano and etc.
In this tutorial we’ll:
- Install Nvidia Jetson performance monitoring tool - jtop
- Install CUDA and OpenCV on your Nvidia Jetson board
- Compile darknet with CUDA and OpenCV enabled.
- Perform face detection on your images with YOLOv4 and Darknet
Let’s dive in!
PrerequisitesTo complete this tutorial, you need:
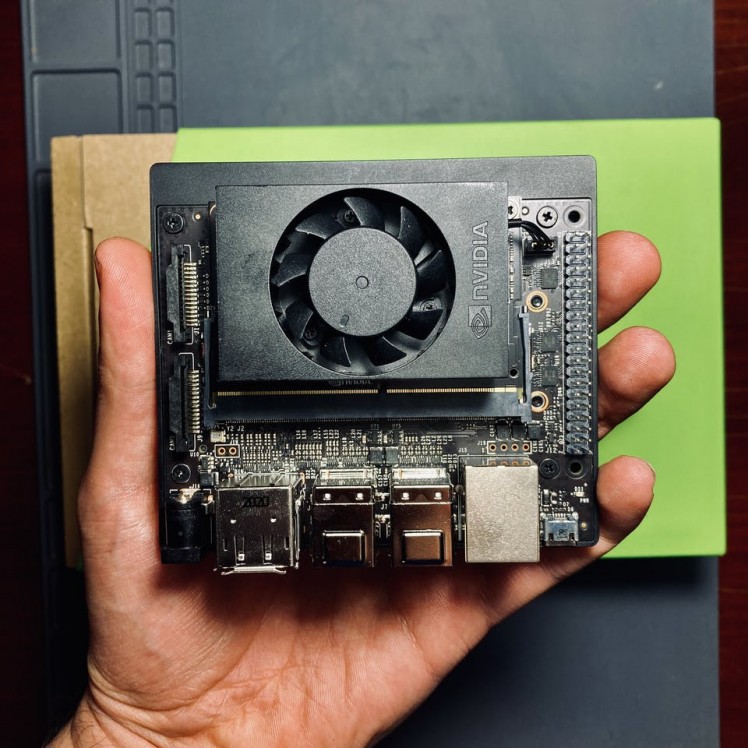
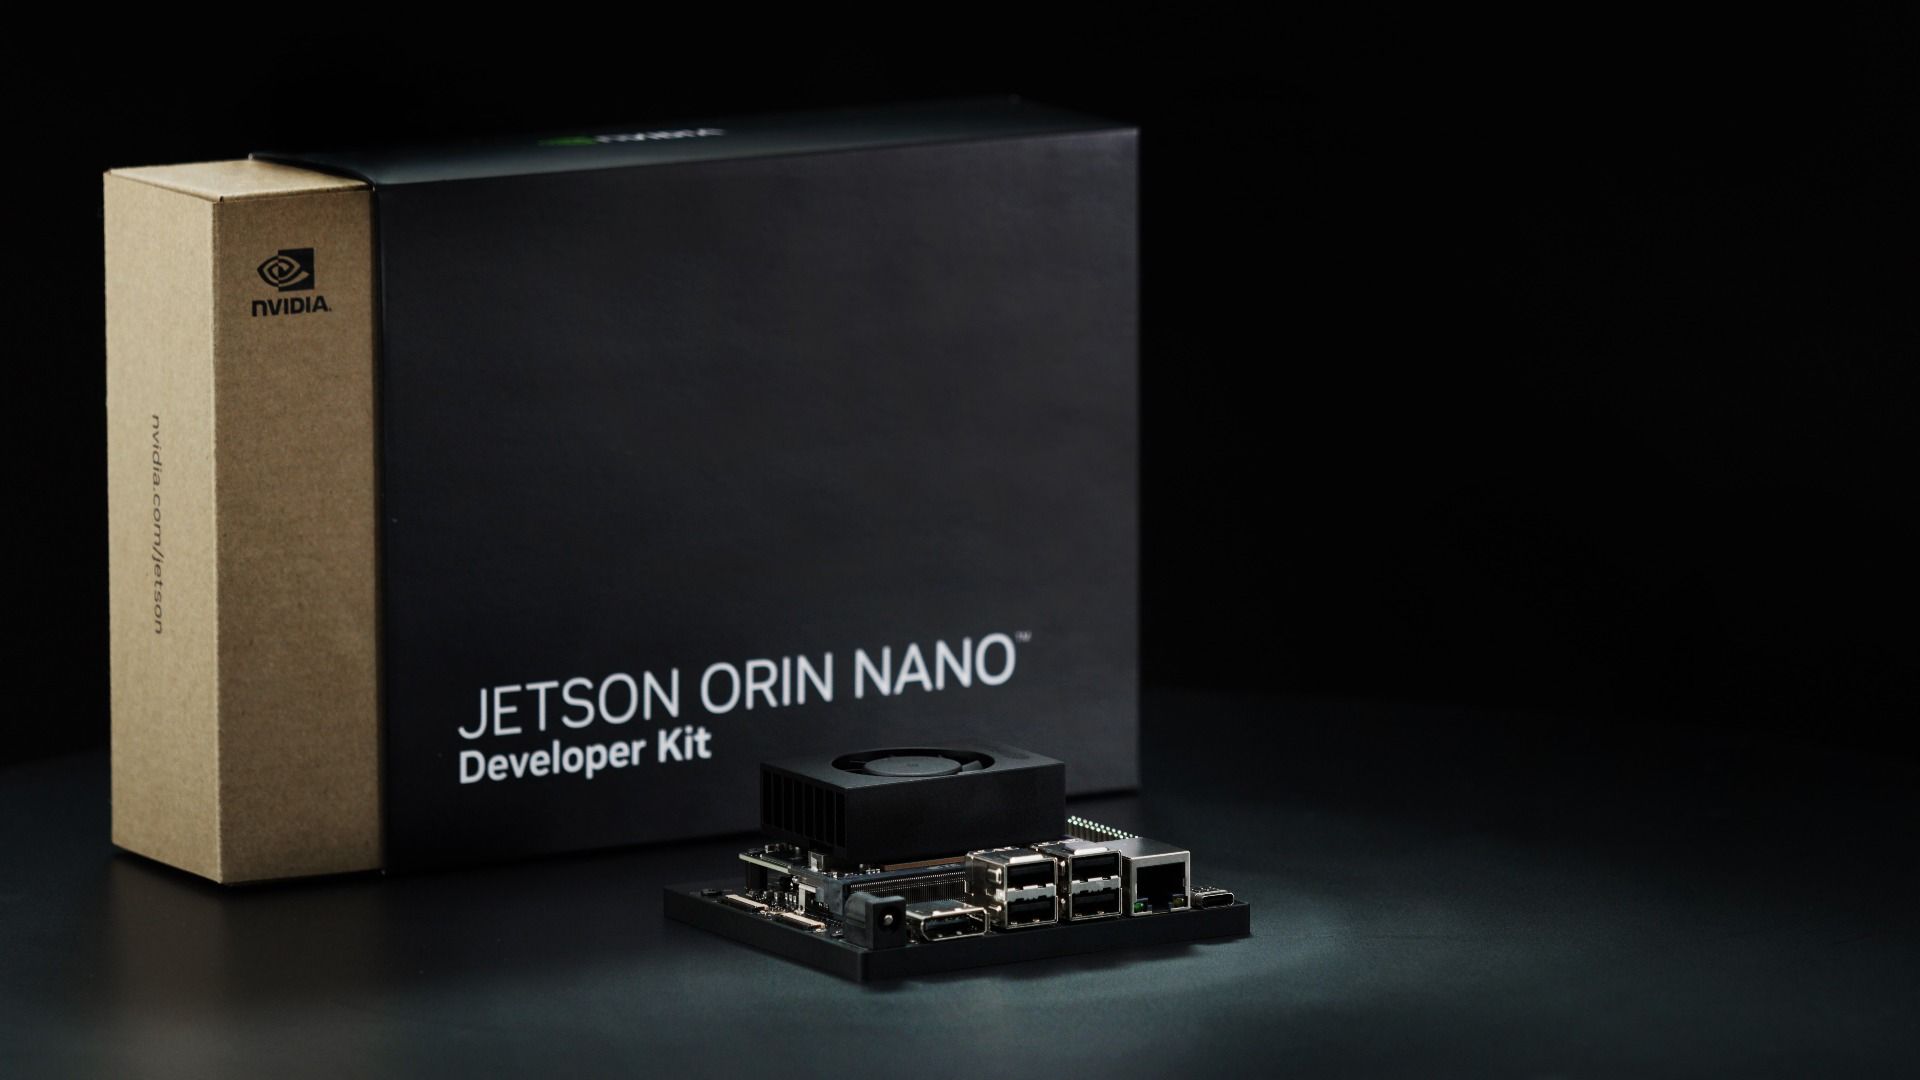
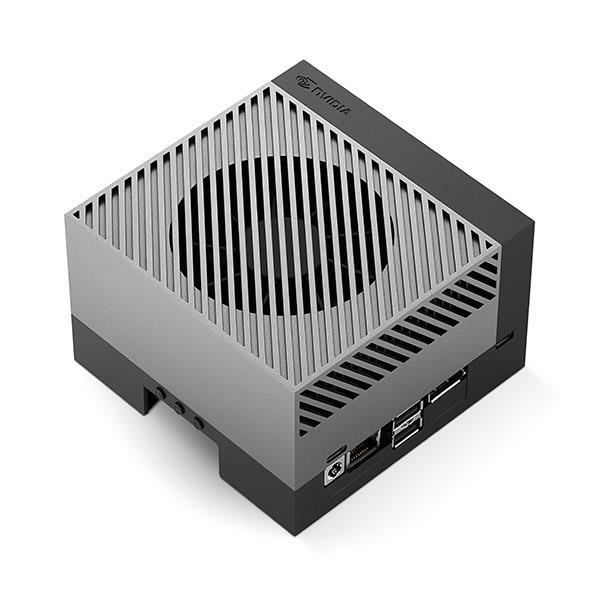
- Jetson Nano Developer Kit. Here, I will be using Nvidia Xavier NX board. Compared to the Jetson Nano, the Xavier NX is anywhere between two to seven times faster, depending on the application.
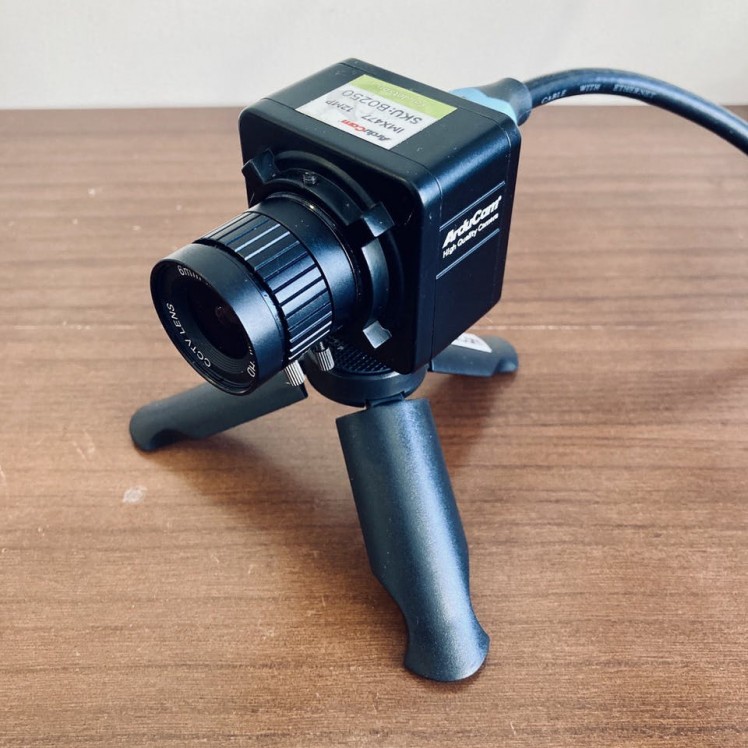
- An USB web-camera or CSI Raspberry PI camera. Here, I will be using Arducam 12MP IMX477 CSI camera.
- This tutorial would benefit developers working on Jetson modules implementing deep learning applications. It assumes that readers have a Jetson module setup with Jetpack installed, are familiar with the Jetson working environment and are somewhat familiar with deep learning frameworks.
- Familiar with the Linux command line, a shell like bash, and an editor like nano.
- DNN applications use a lot of compute resources and the heat sink may not be enough for the heat generated. Consider adding a cooling fan. I recommend you use the ICE Tower CPU Cooling Fan for Nvidia Jetson Nano.
You probably already have jtop installed. If not, you should do it right away. An excellent debug tool by Raffaello Bonghi especially made for the Jetson family. It gives you all the information you are looking for during development, just like htop. You can install it with the following command.
sudo -H pip3 install -U jetson-statsThen, reboot your board.
sudo reboot nowYou can start the app with the simple command
jtopWe can run YOLO either in CPU or run with GPU acceleration. In order to do GPU acceleration, you may need a good Nvidia based graphics card with CUDA cores. Compute unified device architecture (CUDA) is an Nvidia-developed platform for parallel computing on CUDA-enabled GPUs. So, make sure you have CUDA installed.
In order to compile CUDA-related sources, the CUDA path must be added to the environment variable. The installation process on the Jetson platform is also quite simple. Copy the following code into your terminal then execute. First, do the following:
sudo apt install -y git wget build-essential gcc g++ make binutils libcanberra-gtk-module
cd /usr/local/src
echo "export PATH=/usr/local/cuda/bin${PATH:+:${PATH}}" >> ~/.bashrc
echo "export LD_LIBRARY_PATH=/usr/local/cuda/lib64${LD_LIBRARY_PATH:+:${LD_LIBRARY_PATH}}" >> ~/.bashrc
Source the bashrc file.
source ~/.bashrcAfter installation, run command to check it. If the CUDA install was done correctly, the PATH environment variable will be properly set up.
dpkg -l | grep cudaAlso, you can now check your nvcc version with:
nvcc --versionYou may get following below output if everything is successful. If it returns Command 'nvcc' not found, you need to install cuda properly.
nvcc: NVIDIA (R) Cuda compiler driver
Copyright (c) 2005-2019 NVIDIA Corporation
Built on Wed_Oct_23_21:14:42_PDT_2019
Cuda compilation tools, release 10.2, V10.2.89
You can use the linux which command to find the path to nvcc executable:
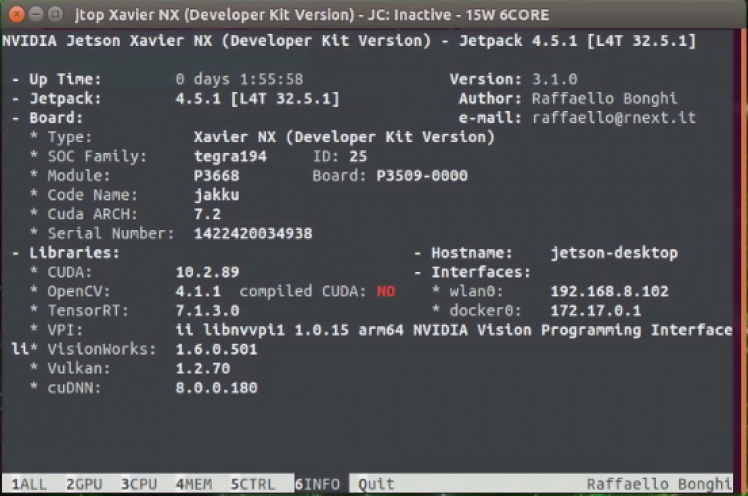
which nvccBy default, OpenCV is not compiled with CUDA enabled. It can be seen using jtop utility. Building the OpenCV library from source is the recommended way of installing OpenCV. It will be optimized for your particular system and you will have complete control over the build options.
To install the latest OpenCV version from the source, perform the following steps:
Install the required dependencies:
sudo apt-get install build-essential cmake git unzip pkg-config
sudo apt-get install libjpeg-dev libpng-dev libtiff-dev
sudo apt-get install libavcodec-dev libavformat-dev libswscale-dev
sudo apt-get install libgtk2.0-dev libcanberra-gtk*
sudo apt-get install python3-dev python3-numpy python3-pip
sudo apt-get install libxvidcore-dev libx264-dev libgtk-3-dev
sudo apt-get install libtbb2 libtbb-dev libdc1394-22-dev
sudo apt-get install libv4l-dev v4l-utils
sudo apt-get install libgstreamer1.0-dev libgstreamer-plugins-base1.0-dev
sudo apt-get install libavresample-dev libvorbis-dev libxine2-dev
sudo apt-get install libfaac-dev libmp3lame-dev libtheora-dev
sudo apt-get install libopencore-amrnb-dev libopencore-amrwb-dev
sudo apt-get install libopenblas-dev libatlas-base-dev libblas-dev
sudo apt-get install liblapack-dev libeigen3-dev gfortran
sudo apt-get install libhdf5-dev protobuf-compiler
sudo apt-get install libprotobuf-dev libgoogle-glog-dev libgflags-dev
If you want the Qt5 support enabled in OpenCV, you have to download the library as shown in the command below.
sudo apt-get install qt5-defaultWhen all third-party software is installed, OpenCV itself can be downloaded. There are two packages needed; the basic version and the additional contributions.
Let's begin by downloading Open CV 4.5.2:
wget -O opencv.zip https://github.com/opencv/opencv/archive/4.5.2.zipDownload the opencv_contrib repository, which contains some additional modules. Enter the following command:
wget -O opencv_contrib.zip https://github.com/opencv/opencv_contrib/archive/4.5.2.zipUnzip the files using the following command:
unzip opencv.zip
unzip opencv_contrib.zip
After unzipping opencv and opencv_contrib, move folders
mv opencv-4.5.2 opencv
mv opencv_contrib-4.5.2 opencv_contrib
Clean up the zip files
rm opencv.zip
$rm opencv_contrib.zip
Once the download is complete, create a temporary build directory, and switch to it:
cd ~/opencv
mkdir build
cd build
We are now ready to use cmake to configure our build.
cmake -D CMAKE_BUILD_TYPE=RELEASE
-D CMAKE_INSTALL_PREFIX=/usr
-D OPENCV_EXTRA_MODULES_PATH=~/opencv_contrib/modules
-D EIGEN_INCLUDE_PATH=/usr/include/eigen3
-D WITH_OPENCL=OFF
-D WITH_CUDA=ON
-D CUDA_ARCH_BIN=5.3
-D CUDA_ARCH_PTX=""
-D WITH_CUDNN=ON
-D WITH_CUBLAS=ON
-D ENABLE_FAST_MATH=ON
-D CUDA_FAST_MATH=ON
-D OPENCV_DNN_CUDA=ON
-D ENABLE_NEON=ON
-D WITH_QT=ON
-D WITH_OPENMP=ON
-D WITH_OPENGL=ON
-D BUILD_TIFF=ON
-D WITH_FFMPEG=ON
-D WITH_GSTREAMER=ON
-D WITH_TBB=ON
-D BUILD_TBB=ON
-D BUILD_TESTS=OFF
-D WITH_EIGEN=ON
-D WITH_V4L=ON
-D WITH_LIBV4L=ON
-D OPENCV_ENABLE_NONFREE=ON
-D INSTALL_C_EXAMPLES=OFF
-D INSTALL_PYTHON_EXAMPLES=OFF
-D BUILD_opencv_python3=TRUE
-D OPENCV_GENERATE_PKGCONFIG=ON
-D BUILD_EXAMPLES=OFF ..
Hopefully, everything went well and CMake comes with a report that looks something like below.
-- Configuring done
-- Generating done
-- Build files have been written to: /home/jetson/opencv/build
With all compilation directives in place, you can start the build with the following command.
make -j6We launch the make command - make -j6. With all the six cores (j6 stands for six cores here). You can adjust the j option with respect to the hardware available. This will take about two hours!
If the build completed successfully, you will see the following files.
[100%] Built target opencv_videostab
Scanning dependencies of target opencv_python3
Scanning dependencies of target opencv_python2
[100%] Building CXX object modules/python3/CMakeFiles/opencv_python3.dir/__/src2/cv2.cpp.o
[100%] Building CXX object modules/python2/CMakeFiles/opencv_python2.dir/__/src2/cv2.cpp.o
[100%] Linking CXX executable ../../bin/opencv_perf_superres
[100%] Built target opencv_perf_superres
[100%] Linking CXX shared module ../../lib/cv2.so
[100%] Linking CXX shared module ../../lib/python3/cv2.cpython-36m-aarch64-linux-gnu.so
[100%] Built target opencv_python3
[100%] Built target opencv_python2
Then, install OpenCV with:
sudo rm -r /usr/include/opencv4/opencv2
sudo make install
sudo ldconfig
To verify the installation, import the cv2 module and print the OpenCV version:
python3 -c "import cv2; print(cv2.__version__)"It should print
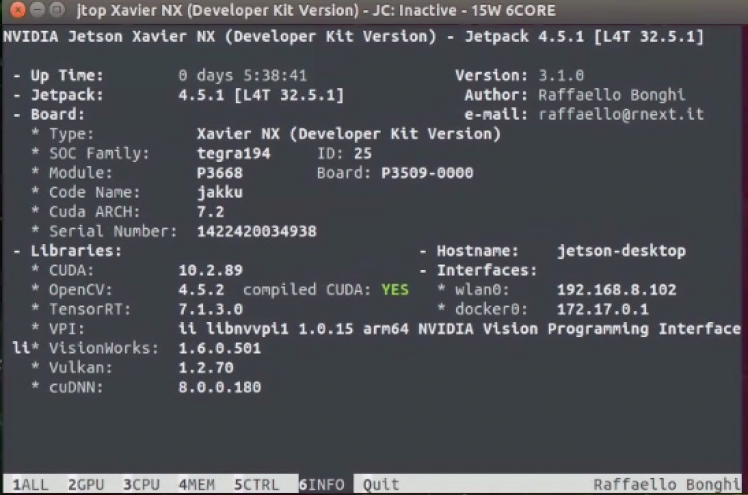
4.5.2Also, you can check is using jtop utility.
Finally, now that OpenCV is installed, let’s perform a bit of cleanup and remove the unnecessary files.
make clean
sudo rm -rf ~/opencv
sudo rm -rf ~/opencv_contribTo use Kaggle resources and you need to log in to the Kaggle website. If you searching for custom Dataset you've come to the right location.
As a first step, download the dataset from Kaggle. This dataset is available for download at the following link. Unzip a zip file.
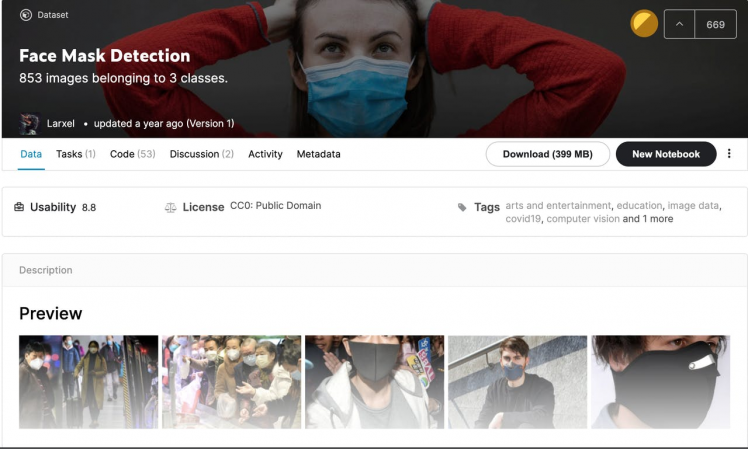
The classes are:
- With mask
- Without mask
- Wearing the mask incorrectly.
To train our object detector, we need to supervise its learning with bounding box annotations. We draw a box around each object that we want the detector to see and label each box with the object class that we would like the detector to predict. Fortunately, this dataset comes pre-labeled annotation files, so we can jump right into preparing our images and annotations for our model.
Conversion of the PNG images to JPG formatHere we are going to use PIL(Python Imaging Library) or pillow library which is widely used for image processing in python.
Create a directory inside of dataset folder using the command mkdir:
mkdir jpg_imagesYou need to install Pillow package to convert PNG to JPG.
pip3 install PillowPython script to convert all files in current directory to "jpg" images:
from pathlib import Path
from PIL import Image

inputPath = Path("./images")
inputFiles = inputPath.glob("**/*.png")
outputPath = Path("./jpg_images")
for f in inputFiles:
    outputFile = outputPath / Path(f.stem + ".jpg")
    im = Image.open(f)
    rgbim = im.convert('RGB')
    rgbim.save(outputFile)
Save the above code in a file named convert.py and run it as follows:
python3 convert.pyAfter running the above script, you should get the images inside of jpg_images folder.
Therefore, the data folder contains images jpg and their associated annotations. The annotations need to be converted into YOLO format.
Conversion data to Darknet Yolo format using RoboflowNow with the images on jpg format next step is to convert annotations to yolo format and create train.txt and test.txt files.
For this purpose, we will use roboflow.com platform. It’s very simple and easy.

- To get started, first sign up for a Roboflow account.
- After creating an account with roboflow.com, go ahead and click on create a project.
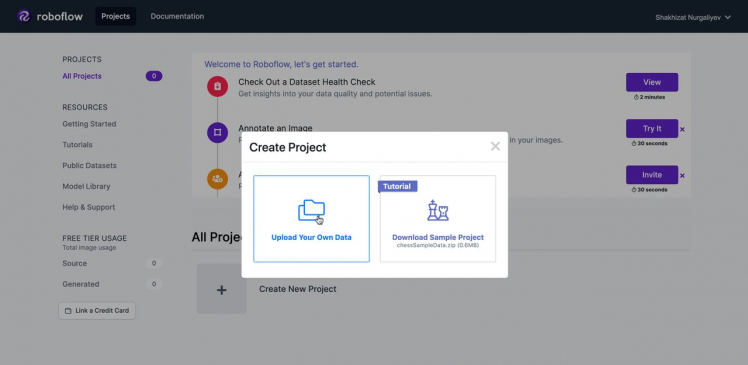
- Enter the details of the project.

- Upload.jpg images
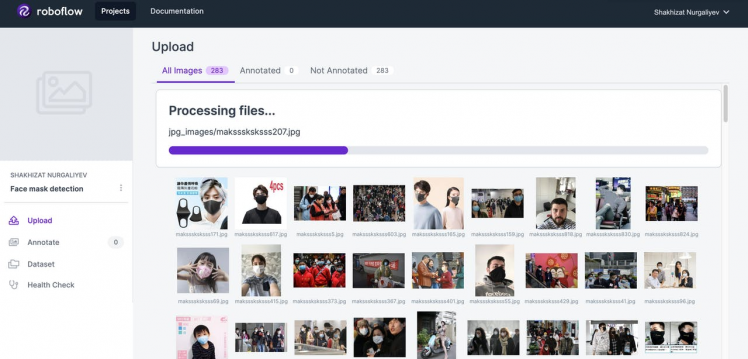
- Click on the select folder button. Upload annotations.
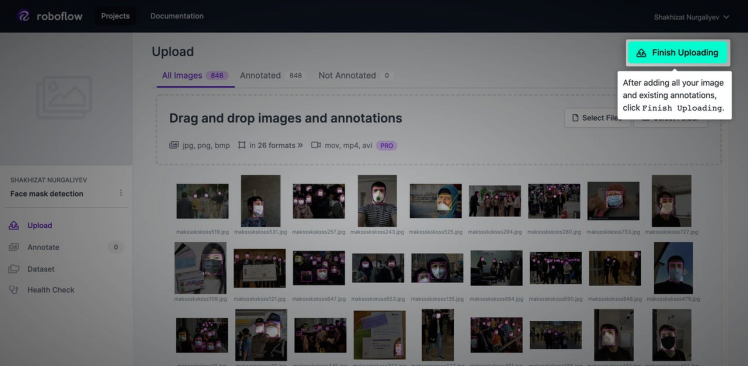
- Click Finish Uploading
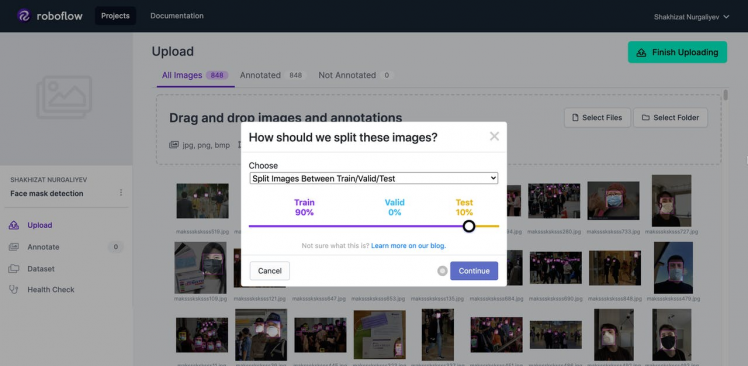
- Click Continue
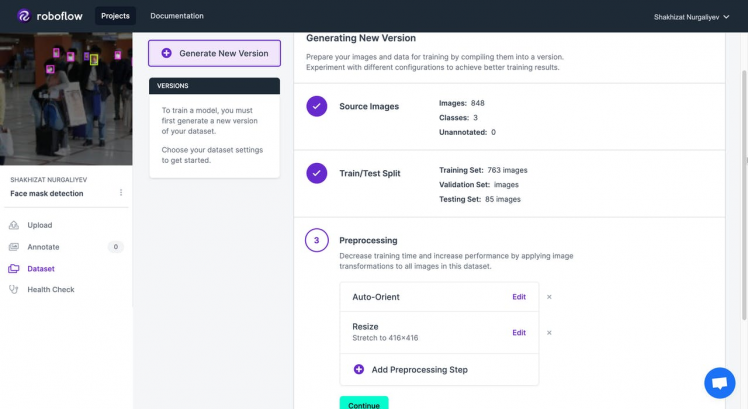
- Under preprocessing, Auto-Orient and Resize should have been done automatically. Click Continue.
- Finally, click on generate button. This will give you a link for you to download your train data. Select format -> Yolo Darknet and click Export.
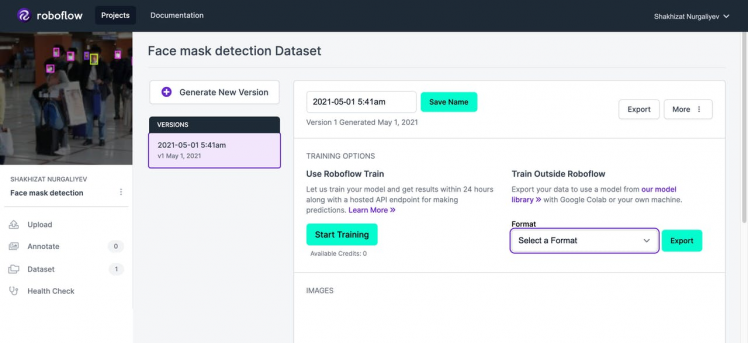
Download a zip file.
Building YOLO-V4 using Darknet FrameworkThere are very few implementations of the YOLO algorithm that exists on the web. The Darknet is one such open-source neural network framework written in C. It is fast, easy to install, and supports CPU and GPU computation. Darknet is used as the framework for training YOLO, meaning it sets the architecture of the network.
Clone the latest darknet code from GitHub.
git clone https://github.com/AlexeyAB/darknet.gitOpen the terminal you need first to access the Darknet folder. So just type:
cd darknetWe need to edit the Makefile to enable the GPU, Cuda and OpenCV. Let’s edit the Makefile by typing.
nano MakefileMake these changes, for Jetson Nano board
# Set these variable to 1:
GPU=1
CUDNN=1
OPENCV=1

# Uncomment the following line
# For Jetson TX1, Tegra X1, DRIVE CX, DRIVE PX - uncomment:
ARCH= -gencode arch=compute_53,code=[sm_53,compute_53]

......
NVCC=/usr/local/cuda/bin/nvcc
For Jetson TX2
# Set these variable to 1:
GPU=1
CUDNN=1
OPENCV=1

# Uncomment the following line
# For Jetson Tx2 or Drive-PX2 uncomment
ARCH= -gencode arch=compute_62,code=[sm_62,compute_62]

......
NVCC=/usr/local/cuda/bin/nvcc
For Jetson Xavier
# Set these variable to 1:
GPU=1
CUDNN=1
CUDNN_HALF=1
OPENCV=1

# Uncomment the following line
# Jetson XAVIER
ARCH= -gencode arch=compute_72,code=[sm_72,compute_72]

......
NVCC=/usr/local/cuda/bin/nvcc
We can directly compile the source using make. Just go to the directory where darknet is cloned and run the command:
make -j6If the build completed successfully, you will see the following files inside of darknet folder.
total 8068
drwxrwxr-x 4 jetson jetson    4096 Мам  3 22:14 3rdparty
drwxrwxr-x 2 jetson jetson    4096 Мам  4 19:46 backup
drwxrwxr-x 3 jetson jetson    4096 Мам  3 22:14 build
-rwxrwxr-x 1 jetson jetson   13691 Мам  3 22:14 build.ps1
drwxrwxr-x 3 jetson jetson    4096 Мам  3 22:14 cfg
drwxrwxr-x 3 jetson jetson    4096 Мам  3 22:14 cmake
-rw-rw-r-- 1 jetson jetson   22916 Мам  3 22:14 CMakeLists.txt
-rwxrwxr-x 1 jetson jetson 3820848 Мам  4 19:47 darknet
-rw-rw-r-- 1 jetson jetson    1406 Мам  3 22:14 DarknetConfig.cmake.in
-rw-rw-r-- 1 jetson jetson    9469 Мам  3 22:14 darknet_images.py
-rw-rw-r-- 1 jetson jetson   10334 Мам  3 22:14 darknet.py
-rw-rw-r-- 1 jetson jetson    6694 Мам  3 22:14 darknet_video.py
drwxrwxr-x 3 jetson jetson    4096 Мам  3 22:14 data
-rwxrwxr-x 1 jetson jetson     110 Мам  3 22:14 image_yolov3.sh
-rwxrwxr-x 1 jetson jetson     110 Мам  3 22:14 image_yolov4.sh
drwxrwxr-x 2 jetson jetson    4096 Мам  3 22:14 include
-rwxrwxr-x 1 jetson jetson     345 Мам  3 22:14 json_mjpeg_streams.sh
-rwxrwxr-x 1 jetson jetson 4070856 Мам  4 19:48 libdarknet.so
-rw-rw-r-- 1 jetson jetson     515 Мам  3 22:14 LICENSE
-rw-rw-r-- 1 jetson jetson    5961 Мам  4 19:46 Makefile
-rwxrwxr-x 1 jetson jetson     159 Мам  3 22:14 net_cam_v3.sh
-rwxrwxr-x 1 jetson jetson     159 Мам  3 22:14 net_cam_v4.sh
drwxrwxr-x 2 jetson jetson    4096 Мам  4 19:47 obj
-rw-rw-r-- 1 jetson jetson   61687 Мам  3 22:14 README.md
drwxrwxr-x 2 jetson jetson    4096 Мам  3 22:14 results
drwxrwxr-x 4 jetson jetson    4096 Мам  3 22:14 scripts
drwxrwxr-x 2 jetson jetson    4096 Мам  3 22:14 src
-rwxrwxr-x 1 jetson jetson  132776 Мам  4 19:48 uselib
-rw-rw-r-- 1 jetson jetson    2609 Мам  3 22:14 vcpkg.json
-rwxrwxr-x 1 jetson jetson     108 Мам  3 22:14 video_yolov3.sh
-rwxrwxr-x 1 jetson jetson     108 Мам  3 22:14 video_yolov4.sh
The installation is now completed. You will get a file named darknet, which is a binary and executable file. You can use this binary executable to run the YOLO.
To test darknet just use pre-configured COCO dataset with 80 classes.
We are going to use a pre-trained YOLOv4 model. Download the trained weights for this model and copy it into darknet folder:
wget https://github.com/AlexeyAB/darknet/releases/download/darknet_yolo_v4_pre/yolov4-tiny.weightsThen, you can run the detection on one image:
./darknet detector test cfg/coco.data
cfg/yolov4-tiny.cfg
yolov4-tiny.weights
data/dog.jpg
An image called predictions.jpg will be saved in current directory.

And of course, you can try with your own pictures as well!
Train your custom Face Mask detection dataset.We now know everything we need to get started, so its time to get hands-on!
All YOLO models are originally implemented in the DarkNet framework and consist of two files: .cfg file with model configurations .weights file with model weights. YOLO is having a smaller architecture version called Tiny-YOLO which can work at higher framerates with less accuracy compared to the actual model. It is smaller version of YOLO v4 that emphasizes speed in model predictions, which is perfect for limited compute environments like embedded machine learning devices(Nvidia Jetson boards, Raspberry Pi and etc.).
Follow the instruction provided on the AlexeyAB Github page to train your custom YoloV4-Tiny model.
You can run the below python script to create the train.txt and test.txt files inside the data folder.
import glob, os

train_dir = 'data/obj/facemask/train'
test_dir = 'data/obj/facemask/test'

# Create and/or truncate train.txt and test.txt
file_train = open('data/train.txt', 'w')
file_test = open('data/test.txt', 'w')

# Populate train.txt and test.txt

for pathAndFilename in glob.iglob(os.path.join(train_dir, "*.jpg")):
    title, ext = os.path.splitext(os.path.basename(pathAndFilename))
    file_train.write("build/darknet/x64/data/obj/facemask/train" + "/" + title + '.jpg' + "n")

for pathAndFilename in glob.iglob(os.path.join(test_dir, "*.jpg")):
    title, ext = os.path.splitext(os.path.basename(pathAndFilename))
    file_test.write("build/darknet/x64/data/obj/facemask/test" + "/" + title + '.jpg' + "n")
The contents of the file obj.data.
classes = 3
train  = data/train.txt
valid  = data/test.txt
names = data/obj.names
backup = backup/
The contents of the file obj.names. This file consists of a list of class names.
with_mask
without_mask
mask_was_worn_incorrectly
Now that we have everything set up, we need to only invoke one command to kick off training on our custom data. Substitute your_path with your data.
./darknet detector train your_path/obj.data cfg/your_custom.cfg your_path/ yolov4-tiny.conv.29During training, you will be watching the graph to see how your detector is learning to detect on your validation set, higher is better. You can read the AlexeyAB Github page which gives a detailed explanation on when to stop training. The training time taken might very long depending on the performance of CPU and GPU.
Detect Face Mask With YOLOv4-tiny from Saved WeightsWhen training has completed the darknet framework will drop weight file inside of backup folder, where your model achieved the highest mAP on your validation set.
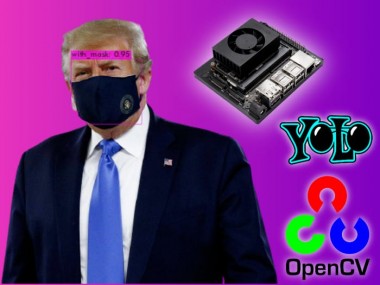
As told earlier, everything is run using the darknet exeutable file. Suppose we have an image named trump.jpeg, then we can try predicting the face mask as:
./darknet detector test obj.data cfg/yolov4-tiny-masks.cfg your_custom.weights trump.jpg -thresh 0.3Once done, there will be an image named predictions.jpeg in the darknet folder. You may get an output as shown below.
Source: https://static.politico.com/

Source: https://static.politico.com/
The thresh flag sets the minimum accuracy required for object detection. You may get following output if everything is successful:

Feel free to add your own images to test with.
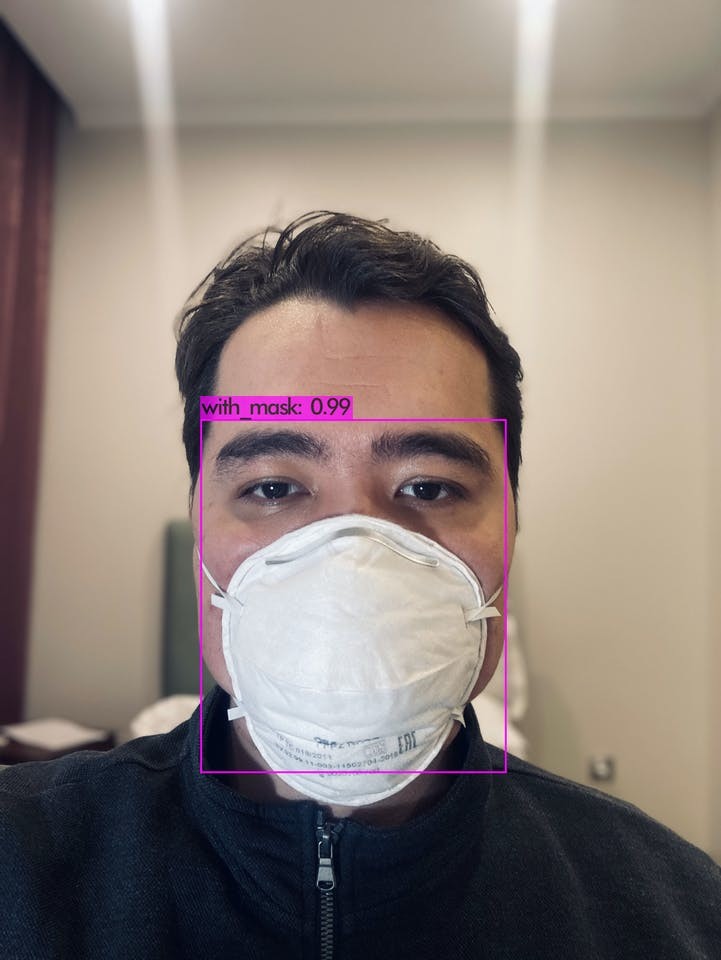
As we can see in the images above, running the inference using YOLOv4-tiny model has provided pretty good results in both detecting the objects of interest with high confidence as well as their corresponding bounding boxes.
The following command will start the YOLO detection either using your USB webcam or CSI camera module on the Jetson module.
./darknet detector demo obj.data cfg/yolov4-tiny-masks.cfg your_custom.weights "nvarguscamerasrc ! video/x-raw(memory:NVMM), width=(int)1280, height=(int)720,format=(string)NV12, framerate=(fraction)30/1 ! nvvidconv flip-method=2 ! video/x-raw, format=(string)BGRx ! videoconvert ! appsink"You can change the resolution just modify this part: width=(int)1280, height=(int)720. Nevertheless, when I was conducting inference at the performance watt mode (jetson_clocks enabled), I saw decreased frames per second.
FPS:13.7 AVG_FPS:12.4Two things you could try to speed up inference:
- Use a smaller network size.
- Try converting your network to TensorRT and use mixed precision (FP16 will give a huge performance increase and INT8 even more although then you have to recalibrate your network)
Congratulations! Now you know how to train YOLOv4 tiny on a custom dataset. In this tutorial, we have gone through the YOLOv4 face mask detection algorithm. Overall, it is fair to say, YOLOv4 is a highly optimized machine-learning model to recognize objects in videos and images.
If you have questions, you can comment below.
References- Nvidia Jetson Nano Face Mask Yolov4 Detector
- How to Install and Run Yolo on the Nvidia Jetson Nano (with GPU)
- TRAIN A CUSTOM YOLOv4-tiny OBJECT DETECTOR USING GOOGLE COLAB
- A Gentle Introduction to YOLO v4 for Object detection in Ubuntu 20.04
- When training the YOLO v4 model, convert xml format to txt format
- Object Detection and Image Classification with YOLO
- How to use OpenDataCam v3 without docker
- Face Mask Detector using YOLO
- Install OpenCV 4.5 on Jetson Nano
- Jetson stats
- Jetson Nano - Yolo v4 Installation
- Introduction to CUDA Programming With Jetson Nano
- Object detection with darknet (YOLOv3)
Credits
Related products


Leave your feedback...