
Control A Ledbar Using A Rotary Encoder With Meadow

Made by jorgedevs
About the project
Learn how to connect a LED battery bar to a 74HC595 IO expander, and control it using a Rotary encoder, all using Meadow. Foundation.
Project info
Difficulty: Easy
Platforms: Microsoft, Meadow, Wilderness Labs
Estimated time: 1 hour
License: MIT license (MIT)
Items used in this project
Hardware components


Story
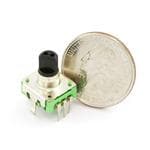
In this Meadow project we're going to wire up a LED bar graph, a 74HC595 shift register and a rotary encoder to Meadow, turning the rotary will control the LED bar lighting it up or turning it down like a volume controller.
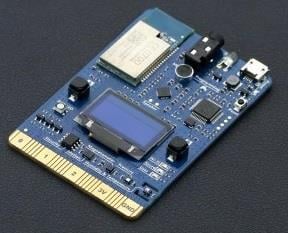
Everything you need to build this project is included in the Wilderness Labs Meadow F7 w/Hack Kit Pro. We'll see how easy is to program these peripherals using Meadow.Foundation.
Meadow.Foundationa platform for quickly and easily building connected things using.NET on Meadow. Created by Wilderness Labs, it's completely open source and maintained by the Wilderness Labs community.
If you're new working with Meadow, I suggest you go to the Getting Started w/ Meadow by Controlling the Onboard RGB LEDproject to properly set up your development environment.
Step 1 - Assemble the circuitWire your project like the following Fritzing diagram:
Fritzing Diagram for this project

Fritzing Diagram for this project
Step 2 - Create a Meadow Application projectCreate a new Meadow Application project in Visual Studio 2019 for Windows or macOS and name it RotaryLedBar.
Step 3 - Add the required NuGet packagesWindows
Right-click on your RotaryLedBar project and click Manage NuGet Packages. In the Browse tab, search for Meadow.Foundation.ICs.IOExpanders.x74595 and click Install to add it to your project.
macOS
Alt-click on your RotaryLedBar project in the Solution Explorer, and click Add => Add Nuget Package to open the NuGet Package window. Search for Meadow.Foundation.ICs.IOExpanders.x74595 and click Install to add it to your project.
Step 4 - Write the code for RotaryLedBarCopy the following code below:
public class MeadowApp : App<F7Micro, MeadowApp>{ float percentage; x74595 shiftRegister; LedBarGraph ledBarGraph; RotaryEncoder rotaryEncoder; RgbPwmLed onboardLed; public MeadowApp() { onboardLed = new RgbPwmLed(Device, Device.Pins.OnboardLedRed, Device.Pins.OnboardLedGreen, Device.Pins.OnboardLedBlue, 3.3f, 3.3f, 3.3f, Meadow.Peripherals.Leds.IRgbLed.CommonType.CommonAnode); onboardLed.SetColor(Color.Red); shiftRegister = new x74595(Device, Device.CreateSpiBus(), Device.Pins.D00, 8); shiftRegister.Clear(); IDigitalOutputPort[] ports = { Device.CreateDigitalOutputPort(Device.Pins.D14), Device.CreateDigitalOutputPort(Device.Pins.D15), shiftRegister.CreateDigitalOutputPort( shiftRegister.Pins.GP0, false, OutputType.PushPull), shiftRegister.CreateDigitalOutputPort( shiftRegister.Pins.GP1, false, OutputType.PushPull), shiftRegister.CreateDigitalOutputPort( shiftRegister.Pins.GP2, false, OutputType.PushPull), shiftRegister.CreateDigitalOutputPort( shiftRegister.Pins.GP3, false, OutputType.PushPull), shiftRegister.CreateDigitalOutputPort( shiftRegister.Pins.GP4, false, OutputType.PushPull), shiftRegister.CreateDigitalOutputPort( shiftRegister.Pins.GP5, false, OutputType.PushPull), shiftRegister.CreateDigitalOutputPort( shiftRegister.Pins.GP6, false, OutputType.PushPull), shiftRegister.CreateDigitalOutputPort( shiftRegister.Pins.GP7, false, OutputType.PushPull), }; ledBarGraph = new LedBarGraph(ports); rotaryEncoder = new RotaryEncoder( Device,Device.Pins.D02, Device.Pins.D03); rotaryEncoder.Rotated += RotaryEncoderRotated; onboardLed.SetColor(Color.Green); } void RotaryEncoderRotated(object sender, RotaryTurnedEventArgs e) { if (e.Direction == RotationDirection.Clockwise) percentage += 0.05f; else percentage -= 0.05f; if (percentage > 1f) percentage = 1f; else if (percentage < 0f) percentage = 0f; ledBarGraph.Percentage = percentage; }}Meadow Constructor
In the MeadowApp's Constructor, we first initialize the onboard RGB LED and we immediately set the color to Red to indicate that the initialization process has started. Next we initialize the 74HC595 shift register (x74595), which then we call the Clear method to clear and initialize all its registers.
For the LED bar graph, we declare an array of IDigitalOutputPort, creating all eight general purpose ports as Digital Output ports initialized in false, along we two Meadow digital output ports to make for all ten pins required for the LED bar. When creating a new instance of the LedBarGraph, we simply pass the array of ports.
The rotary encoder is also initialized passing pins D02 and D03 from Meadow to use them as aPhase and bPhase ports. To receive events when the rotary is turned, we register the event Changed to the RotaryEncoderRotated method.
Finally we set color on the Onboard LED to green to indicate that the initialization of all the peripherals is done and the app is ready and the user can interact with the project.
RotaryEncoderRotated
As we rotate the rotary, we first check which direction is being rotated (using the enum RotationDirection which can be Clockwise or Counterclockwise), and can increase or decrease a float percentage value by 0.05. After we check the new value does not surpass the valid range which is between 0 and 1, and finally we can set the LED bar graph percentage by such value.
Click the Run button in Visual Studio. It should look like to the following GIF:
RotaryLedBar project running...

RotaryLedBar project running...
Check out Meadow.Foundation!This project is only the tip of the iceberg in terms of the extensive exciting things you can do with Meadow.Foundation.
- It comes with a huge peripheral driver library with drivers for the most common sensors and peripherals.
- The peripheral drivers encapsulate the core logic and expose a simple, clean, modern API.
- This project is backed by a growing community that is constantly working on building cool connected things and are always excited to help new-comers and discuss new projects.
Schematics, diagrams and documents
Code
Credits
Related products


Leave your feedback...