
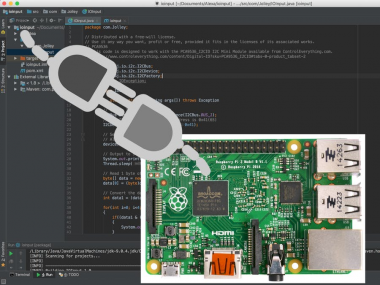
Connect Jetbrains Pycharm To Raspberry Pi

Made by Jolley71717 / Artificial intelligence / Home Automation / Productivity
About the project
Let's be honest, this is the 21st century. We use IDEs for almost everything. I'll explain how to hook PyCharm up to the Raspberry Pi.
Project info
Difficulty: Easy
Platforms: Raspberry Pi
Estimated time: 1 hour
License: GNU General Public License, version 3 or later (GPL3+)
Items used in this project

Story
This project will show you how to connect your Pycharm IDE to your raspberry pi for rapid code development and debugging.
This project is based off of the directions on https://blog.jetbrains.com/pycharm/2017/07/raspberry-ping-1/
*You will need the professional version of PyCharm to connect to a remote device*
First Steps
You can go directly to the source for preparing your raspberry pi here
run the sudo ifconfig command to find out the address of your Raspberry Pi
Next, you'll want to run sudo route -n to find the gateway and destination information.
With the information gained above, we're going to set the Raspberry Pi up with a static address.
We will edit the following file using sudo nano /etc/network/interfaces.
Set up your raspberry pi with a static ip address
allow-hotplug wlan0
iface wlan0 inet static
address 192.168.1.147
netmask 255.255.255.0
gateway 192.168.1.1
wpa-passphrase [yourpassword]
wpa-ssid [yourSSID]
Connecting to your Raspberry Pi
First, ensure that your raspberry pi is on, has SSH enabled, and has a static IP address set up.
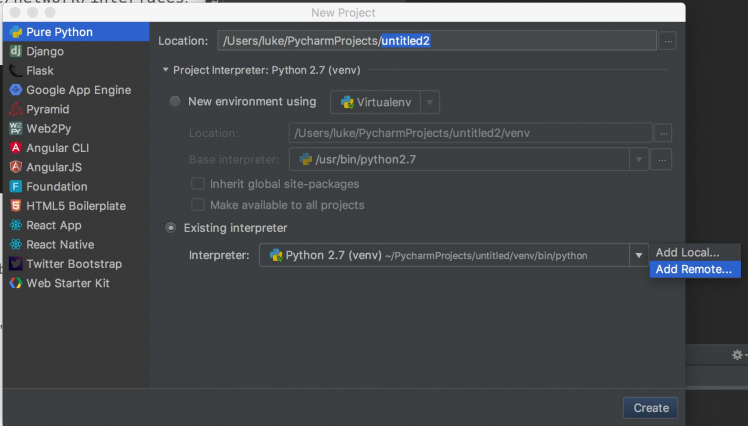
Next, open up your PyCharm Professional IDE. Select "New Project" and choose "Pure Python"
I only had the option to connect to a remote host when I selected the "Existing Interpreter" radio button seen below. Then click on the cog and click "Add Remote"
 Adding a remote connection
Next, you'll need to specify the protocol, location, user, and password for your connection. In my example, I chose SSH. Enter the Static IP address you set up earlier in the tutorial.
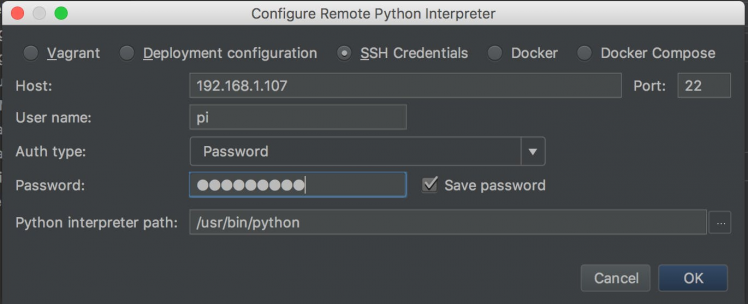 Entering the Pi SSH connection credentials
After confirming your credentials, click "OK" and continue back to the previous screen. You will want to specify the location of your script folder (specifying a folder that does not exist will mean that PyCharm creates that folder upon connection). Make sure that you include "/home/pi/yourFolderHere".
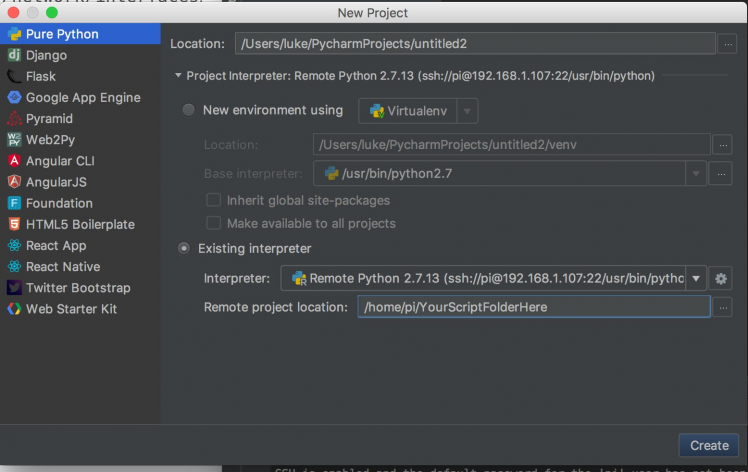 Entering your script location
Now, click "Create" and you will have a PyCharm application that will run using the interpreter of the raspberry pi
Setting up PostgreSQL
Now that you've set up your Pi, you'll want to set up the postgreSQL.
To easily do this from the IDE, simply press command + shift + a (ctrl + shift + a on the PC). Then enter Start SSH Session and choose the option that is presented in the list. You will then need to choose the host to connect to. Simply choose the option that you initially created when creating the remote host at the beginning of the tutorial.
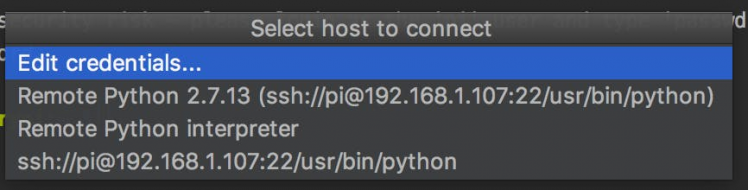 Choosing the remote host
At the prompt, enter the following:
sudo apt-get update && sudo apt-get install -y postgresql libpq-dev python-dev
After Postgress is istalled, you'll want to open the console for it by entering
sudo -u postgres psql
You need to add a role to be able to execute queries from
CREATE ROLE "pi" WITH LOGIN PASSWORD '[password]';
Make sure that the role in PostgreSQL has the same name as your linux username
Now you'll create a database with the same owner
CREATE DATABASE pi WITH OWNER pi;
Next, create a python script in your PyCharm IDE with the following
import os
import re
import subprocess
host = 'jetbrains.com'
ping_output = subprocess.check_output(["ping", host, "-c 5"])
for line in ping_output.split('n'):
 if re.match("d+ bytes from", line):
 print(line)
Press Ctrl + Shift + F10 to run your code and you'll see the output below.
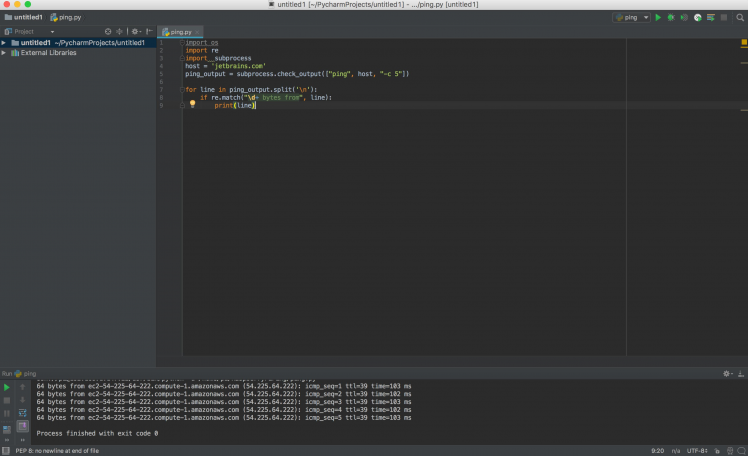 Python code and output
Connecting to the Database
Using the Databases link on the far right side of the application, connect to the postgress sql database on the raspberry pi.
Since you are connecting to the raspberry pi, you are entering everything as localhost. Also, be sure to use the pi user that we created above.
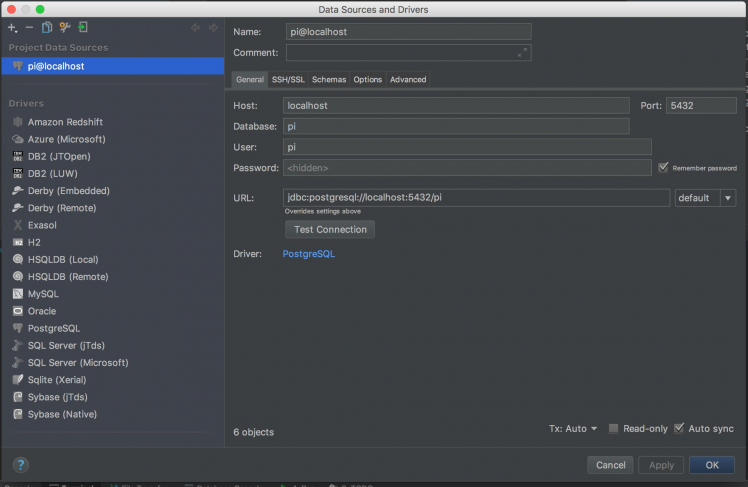 PostgreSQL Database Connection - General
Next, you'll need to specify the SSH/SSL tunnel settings. Enter this information from the perspective of your host computer. The proxy host would be the static IP address you set up at the beginning of the tutorial.
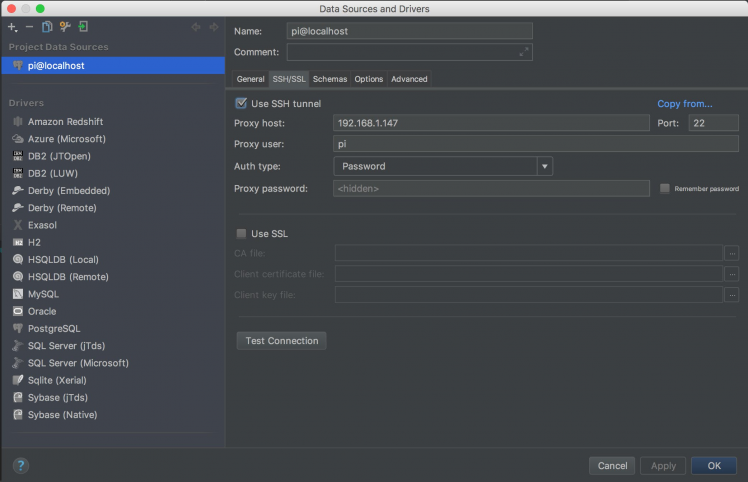 PostgreSQL Database Connection - SSH/SQL
Open an SQL console to enter the commands to create a table that will store ping information. Enter the following information:
create table pings
(
	recorded_at timestamp with time zone default now(),
	destination text,
	ttl integer,
	bytes_received integer,
	pingtime numeric
);
create index pings_recorded_at on pings(recorded_at);
Now, you'll need to modify your ping script to be a little more robust. Navigate to the following github link to find the code
https://github.com/ErnstHaagsman/raspberryping/blob/master/ping.py
Adding the log file
Enter the following to add a log file that your new py script will deposit log information into.
sudo touch /var/log/raspberryping.log
sudo chown pi:pi /var/log/raspberryping.log
Crontab
Apparently RaspberryPi has this cool program scheduler, so we are going to utilize it to run the ping program. SSH back into the Raspberry Pi and run the command crontab -e to open up cron file. If this is the first time you're opening the file, you will be asked to create a new one. Also, you'll be asked which editor you prefer to use. Add this information to the end of the file.
*/5 * * * * /home/pi/raspberryping/ping.py jetbrains.com >> /var/log/raspberryping.log 2>&1
Verifying that your code works
You can now open up your postgreSQL console and run:
SELECT * FROM pings
You should see some of the results from your pings
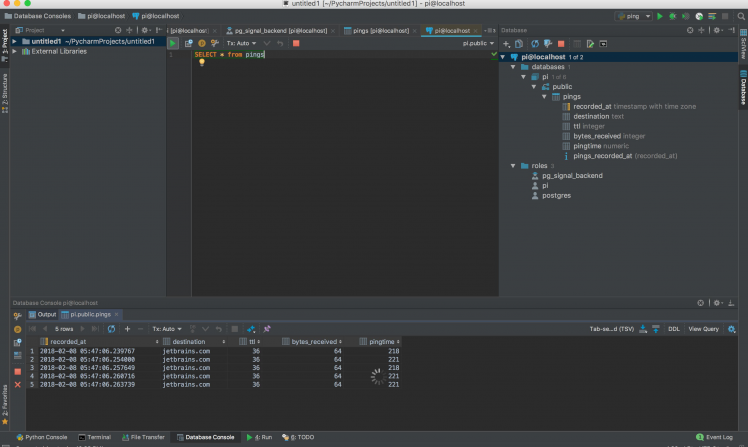 PostgreSQL - Select * from pings
Let me know in the comments if you have any issues getting it to work.
Code
Credits
Related products


Leave your feedback...