
Build Diy Soil Moisture Meter Using Arduino Nano

Made by raushan-kumar / Environmental Sensing / Garden
About the project
One easy way to monitor the moisture in your soil is to build a DIY Soil Moisture Meter using an Arduino Nano. With this project, you can ea
Project info
Difficulty: Moderate
Platforms: DFRobot, Seeed Studio
Estimated time: 1 hour
License: Creative Commons Attribution-ShareAlike CC BY-SA version 4.0 or later (CC BY-SA 4+)
Items used in this project
Hardware components

Story
One easy way to monitor the moisture in your soil is to build a DIY Soil Moisture Meter using an Arduino Nano. With this project, you can easily see when your plants need watering and adjust your watering schedule accordingly.
Thank You, NextPCB:
This project is successfully completed because of the help and support from NextPCB. Guys if you have a PCB project, please visit their website and get exciting discounts and coupons.
1. Only 0$ for 5-10pcs PCB Prototypes https://www.nextpcb.com
2. Register and Get $100 from NextPCB: https://www.nextpcb.com/register
3. See more info about PCB Assembly Capabilities: https://www.nextpcb.com/assembly
This project is perfect for those new to Arduino who want to build a simple yet useful project.
Watch the Full Video on Youtube
SuppliesTo build a DIY soil moisture meter using an Arduino Nano, you will need the following materials:
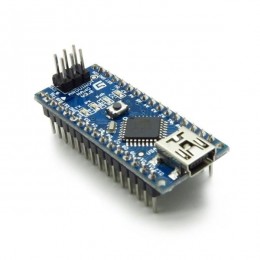
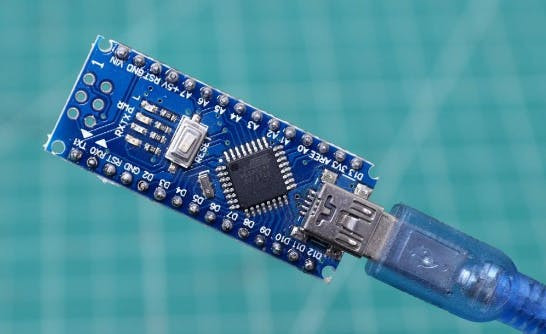
1)Arduino Nano
2) TP-4056 Module
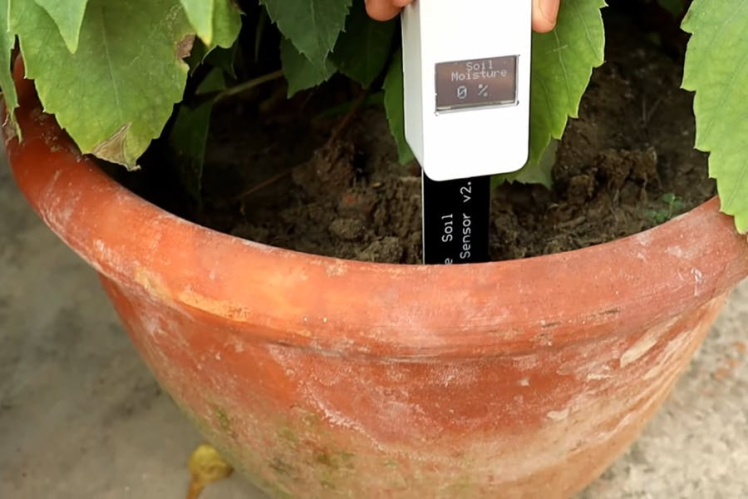
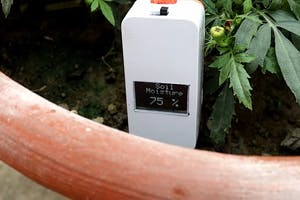
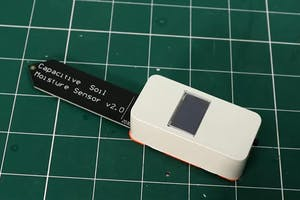
3) Capacitive Soil moisture sensor
4) Lithium Battery
5) MT 3608 Boost converter
6) SSD1306 Display
7) Jumper wires
To get high-quality electronic components at an extremely low cost, hqonline.com Is the perfect site. They have labels from all the international brands, so you can find the best components for your device without spending a lot of money. This offers you the best value for your money.
Capacitive Soil Moisture Sensor?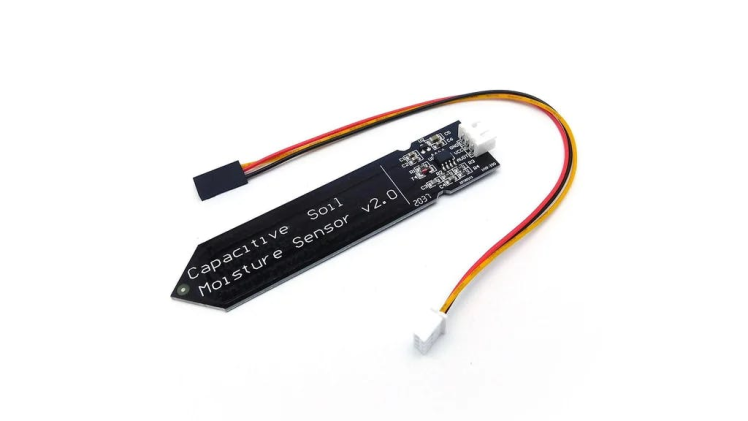
A capacitive soil moisture sensor is a type of sensor that measures the moisture content of soil by measuring the dielectric constant of the soil, which changes with the amount of water in the soil.
The sensor typically consists of two electrodes that are placed in contact with the soil. The sensor works by sending a small electrical current through the electrodes, which creates an electrostatic field in the soil
How Does Soil Moisture Sensor Work?
The sensor consists of two metal plates which are placed in the soil. The plates are connected to an electrical circuit. When the soil is dry, the electrical resistance between the plates is high.
When the soil is wet, the electrical resistance between the plates is low. The sensor can be used to measure the moisture content of soil at a depth of up to 20 cm. Capacitive Soil Moisture Sensor V1.2 With Arduino Tutorial
SSD1306 Display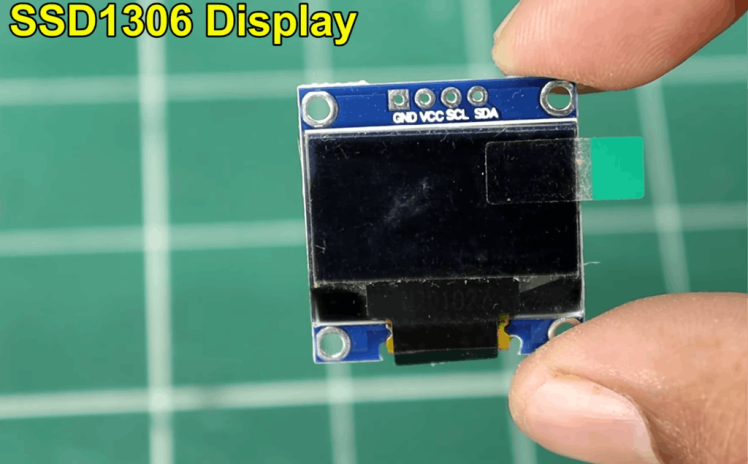
The SSD1306 is a small-sized, low-power display driver IC that can be used to drive an OLED display. This display driver IC is used in a wide range of small to medium-sized OLED displays. It is relatively easy to use and can be easily interfaced with any microcontroller. The SSD1306 display driver IC supports both I2C and SPI communication protocols.
The SSD1306 display controller is very popular because it is inexpensive and easy to use. The controller can be used with a wide range of displays, including OLED and LCD displays.
Wiring and Circuit Diagram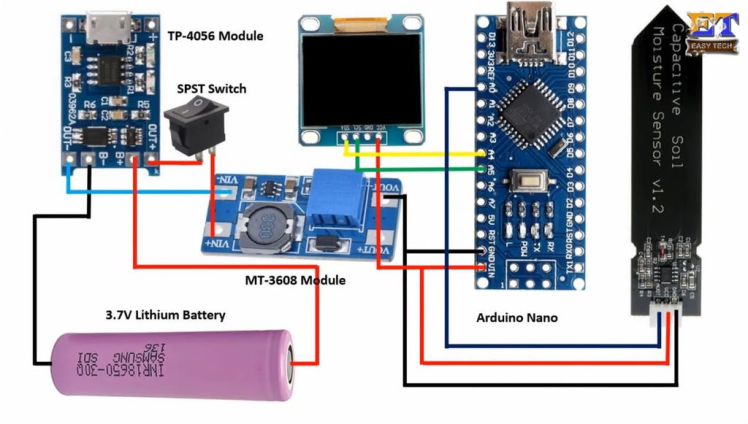

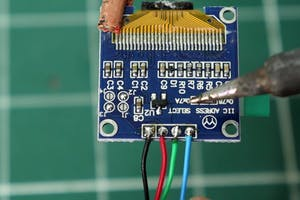
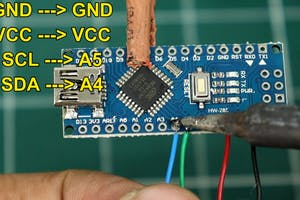
The soil-moisture sensor is connected via analogue mode to pin A0 of the Arduino board. The OLED display is set on an I2C bus with SDA and SCL connected to the A4 and A5 pins of the Arduino board respectively.
- SCL- Pin A5 of Arduino
- SDA - Pin A4 of Arduino
- VCC - 5V of Arduino
- GND - GND of Arduino
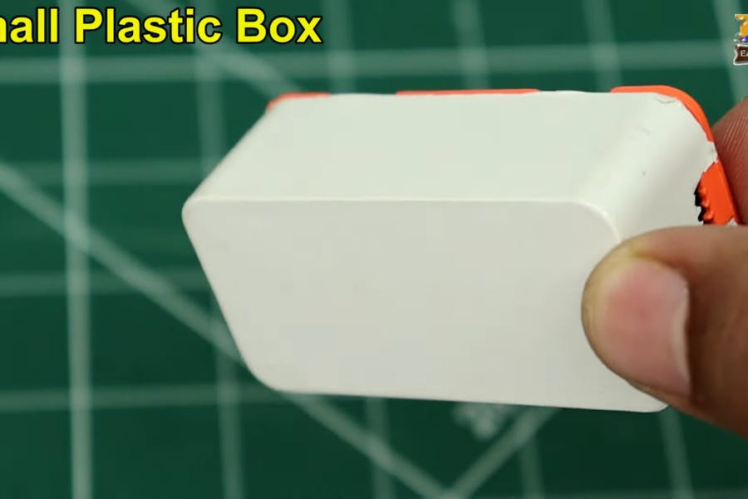
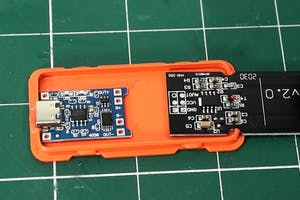
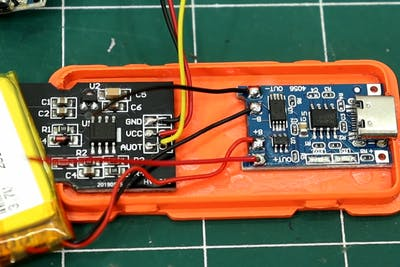
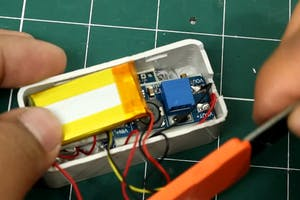
I use the mini plastic box to fit all components.
Check if the wiring of the Arduino main controller, OLED module, and DC-DC boost converter fits into the box before Fixing it.
Upload Codes1 / 2
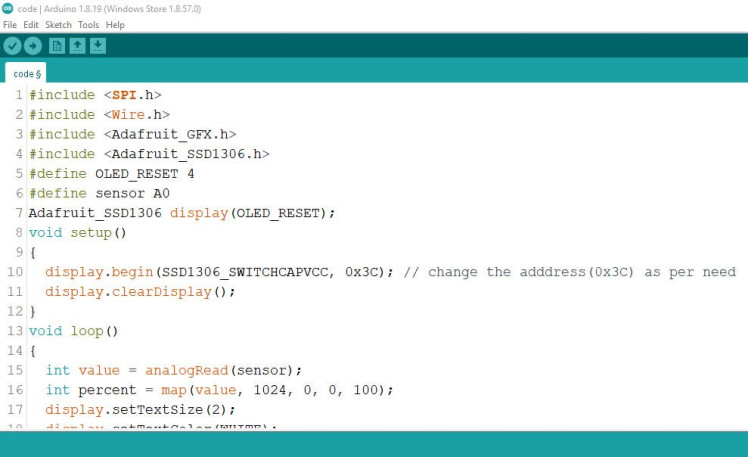
Copy the following code and paste it into the Arduino IDE. and hit the upload button.
Source Code
#include <SPI.h>
#include <Wire.h>
#include <Adafruit_GFX.h>
#include <Adafruit_SSD1306.h>
#define OLED_RESET 4
#define sensor A0
Adafruit_SSD1306 display(OLED_RESET);
void setup()
{
  display.begin(SSD1306_SWITCHCAPVCC, 0x3C); // change the adddress(0x3C) as per need
  display.clearDisplay();
}
void loop()
{
  int value = analogRead(sensor);
  int percent = map(value, 1024, 0, 0, 100);
  display.setTextSize(2);
  display.setTextColor(WHITE);
  display.setCursor(0,0);
  display.println("MOISTURE");
  display.print(percent);
  display.print("%");
  display.display();
  display.clearDisplay();
}

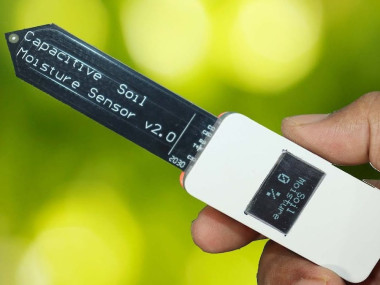
The DIY soil moisture meter is a simple and inexpensive way to measure the moisture content in your soil. By using an Arduino Nano, you can easily create a soil moisture meter that is accurate and easy to use.
this soil moisture meter is a great project for anyone who wants to get into gardening or plant care. With this device, you can measure the moisture content of your soil and know when to water your plants.
https://www.youtube.com/watch?v=dnzLI2ktd9M
Thanks again for checking my post.
Code
Credits
Related products


Leave your feedback...