





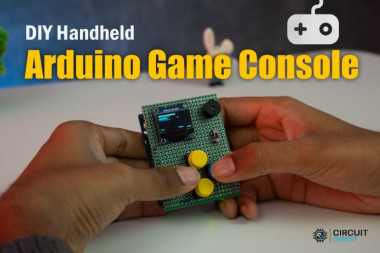
Arduino Handheld Game Console

Made by electroscope_archive / Games & Gaming
About the project
Build a pocket-sized Arduino console with a 128×64 OLED display and 10 retro-inspired games.
Project info
Items used in this project
Hardware components




Story
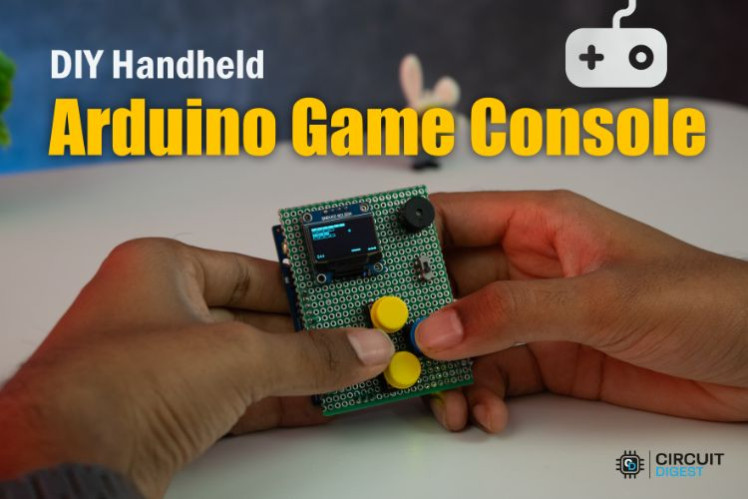
If you have already built the usual Arduino projects like blinking LEDs and sensor monitors, this handheld game console is a fun way to turn your programming skills into something you can actually play. Using an Arduino UNO R4 WiFi, a small OLED display, four push buttons, and a buzzer, you can create a portable gaming system that fits in your pocket.
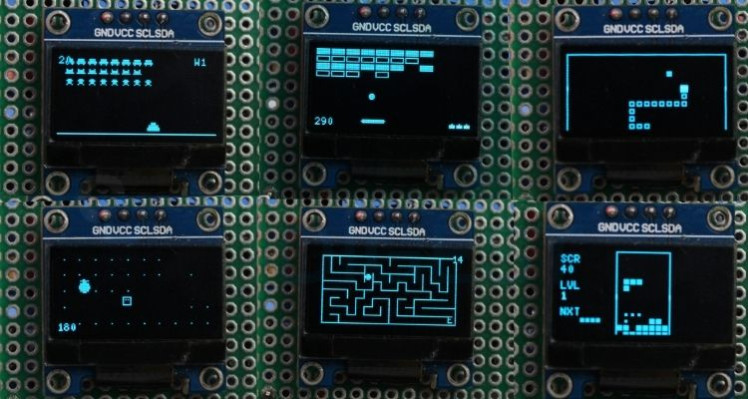
The console includes ten classic arcade-inspired games, all written in Arduino C++ and optimized for a monochrome 128×64 OLED screen. It is a great project for makers who want to improve their skills in embedded programming, graphics rendering, input handling, and power management.
Features
This handheld console includes:
- 10 playable games:
- Snake
- Tetris
- Pong
- Pac-Man
- Breakout
- Space Invaders
- Flappy Bird
- Dino Run
- Asteroids
- Maze Runner
- 128×64 OLED graphics
- Four-button navigation and gameplay controls
- Retro sound effects using a buzzer
- Rechargeable LiPo battery power
- Modular code structure for easy expansion
Why Build This Project?
This project combines several essential embedded system concepts:
- OLED graphics programming
- Menu-driven interfaces
- Button debouncing
- Modular firmware design
- Battery-powered electronics
- Sound generation with PWM
Instead of building another test circuit, you end up with a fully functional device that is both educational and entertaining.
Components Required
To build the console, you will need:
- Arduino UNO R4 WiFi
- 0.96-inch SSD1306 I2C OLED display
- 4 tactile push buttons
- Active buzzer
- 3.7V LiPo battery
- 5V boost converter
- Slide switch
- Perfboard or prototype PCB
- Male and female header pins
- Connecting wires
How the Console Works
When powered on, the OLED displays a splash screen. Pressing any button opens a menu listing all available games.
- UP/DOWN buttons scroll through the game list.
- LEFT/RIGHT buttons launch the selected game.
- After a game ends, the console automatically returns to the main menu.
The interface is simple and responsive, making it easy to add more games later.
Hardware Overview
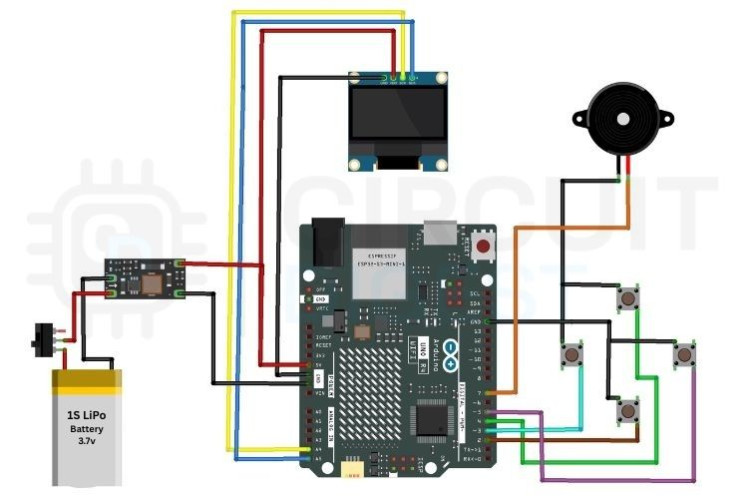
The Arduino UNO R4 WiFi acts as the main controller and handles:
- Display updates
- Button input
- Audio generation
- Game logic
The SSD1306 OLED communicates over I2C, reducing wiring complexity to only two data lines. Each push button is connected to a digital input configured with internal pull-up resistors. A buzzer on a digital pin provides sound effects.
The system is powered by a single-cell LiPo battery. Since the Arduino requires 5V, a boost converter steps the battery voltage up from 3.7V to a stable 5V output.
Pin Connections
Use the following GPIO assignments:
- OLED SDA → A4
- OLED SCL → A5
- UP button → D4
- DOWN button → D2
- LEFT button → D3
- RIGHT button → D5
- Buzzer → D7
The opposite side of each push button connects to GND.
Building the Console
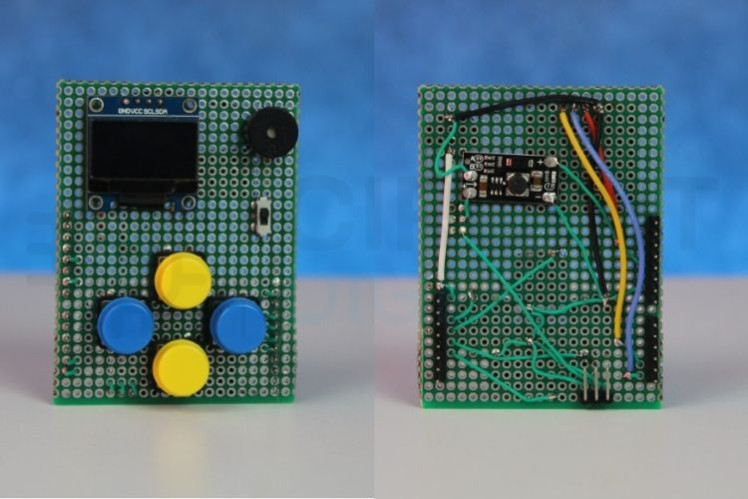
All components are mounted on a perfboard that plugs directly into the Arduino headers, creating a compact HAT-style module.
Assembly Tips
- Use female headers so the board can be removed easily.
- Keep wires short to reduce noise.
- Verify the boost converter output is exactly 5V before connecting the Arduino.
- Insulate LiPo connections with heat-shrink tubing.
- Mount the OLED and buttons in an ergonomic layout.
Firmware Structure
The code is organized into separate files.
Main Program
The main sketch handles:
- Hardware initialization
- Menu navigation
- Game launching
Individual Game Files
Each game is stored in its own header file. This modular design makes the project easy to maintain and expand.
Libraries Used
-
Arduino.h -
Wire.h -
U8g2lib.h
The U8g2 library was selected for its excellent compatibility with the UNO R4 and SSD1306 displays.
Programming Concepts Used
This project demonstrates several useful techniques:
Button Debouncing
Mechanical buttons can generate multiple false presses when actuated. Software debouncing ensures each press is registered only once.
Random Number Seeding
The firmware seeds the random number generator from an analog input to create varied gameplay.
Display Buffering
The OLED uses frame buffering to render smooth graphics and animations.
State Management
The menu system and games use state-based logic to control program flow.
Challenges Encountered
Graphics Library Compatibility
Some OLED libraries do not perform reliably on the Arduino UNO R4. Switching to U8g2 solved initialisation and rendering issues.
Button Bounce
Without debouncing, menu selections could skip unexpectedly. Adding a short timing filter fixed the problem.
Limited Resources
The OLED is monochrome, and memory is limited, so each game was carefully optimised for speed and storage.
Possible Improvements
Once your console is working, you can add:
- High-score saving in EEPROM
- Adjustable game difficulty
- Larger display
- Custom PCB
- 3D-printed enclosure
- USB-C charging
- Multiplayer using the UNO R4 WiFi features
What You Will Learn
By completing this build, you will gain practical experience in:
- Embedded C/C++ programming
- OLED graphics rendering
- Portable power design
- User interface development
- Modular project architecture

Final Thoughts
This Arduino game console is a rewarding project that turns a standard development board into a playable retro gaming device. It is simple enough for intermediate makers yet flexible enough to evolve into a polished custom console.
Whether you are building it to learn graphics programming or just to play Snake on hardware you created yourself, this project is a satisfying blend of electronics and software.
Schematics, diagrams and documents
Code
Credits
Related products





Leave your feedback...