
A Smart Hvac Controller Using Tuya Cloud Platform

Made by naumanshakir
About the project
This is a quick tutorial to make a Smart HVAC Controller using Tuya IoT Cloud Development Platform and SDK.
Project info
Difficulty: Moderate
Platforms: ControlEverything.com, Digilent, Espressif
Estimated time: 1 hour
License: Creative Commons Attribution CC BY version 4.0 or later (CC BY 4+)
Items used in this project
Hardware components

Story
This tutorial aims at making a Smart HVAC Controller using the Tuya Cloud Platform.
IntroductionThere are a number of HVAC controllers available on the market, most of them are classic with knobs on them and use analog sensors. To increase the energy efficiency of any system, it must be coupled with sensor nodes that can take readings very fast and it should be connected with the actuators like mechanical knobs or communication protocols like SPI, I2C etc making a robust solution. So a smart system will change the temperature parameters of the air conditioner based on the real-time data feed coming from the sensors. It should not only act to temperature fluctuations but it should be smart enough to make the whole system energy efficient by setting optimum temperatures and turning on/off the air-conditioner based on the out-door temperature parameters and the time of the day.
This tutorial is a step-by-step instruction on how to build a prototype of such a smart system using Tuya platform and off-the-shelf hardware components.
Tutorial PartsWhat is Tuya
- What is Tuya
Why Tuya SDK?
- Why Tuya SDK?
Components Used
- Components Used
Circuit Diagram
- Circuit Diagram
Firmware and Configurations
- Firmware and Configurations
Tuya is an international company that provides IoT and AI solutions along with compatible hardware so that the developers don’t have to spend much time sourcing, testing, and debugging a lot of components before reaching a final BOM. While end-users can instantly get their new Tuya device ready and running in a matter of minutes. Tuya Sandwich Evaluation kit is an example of a powerful merger of hardware along with an easy-to-use SDK.
Why Tuya SDK?Tuya is not only a hardware company, in fact, but it also provides a full-fledged cloud IoT platform.
https://developer.tuya.com/en/?_source=aae11f336c7c5ca1ff908513b7c5802f
Using the Tuya Cloud Development platform, you can add, remove, update and manage your fleet of IoT devices very easily and can even run analytics on real-time data. To make the life of the IoT developers easier, Tuya provides its easy-to-use SDK which with pre-built templates, a lot of tutorials, well-written documentation and a large community of developers using Tuya. All of these features make Tuya an ideal choice for new IoT products.
How Do Traditional IoT Systems Work?
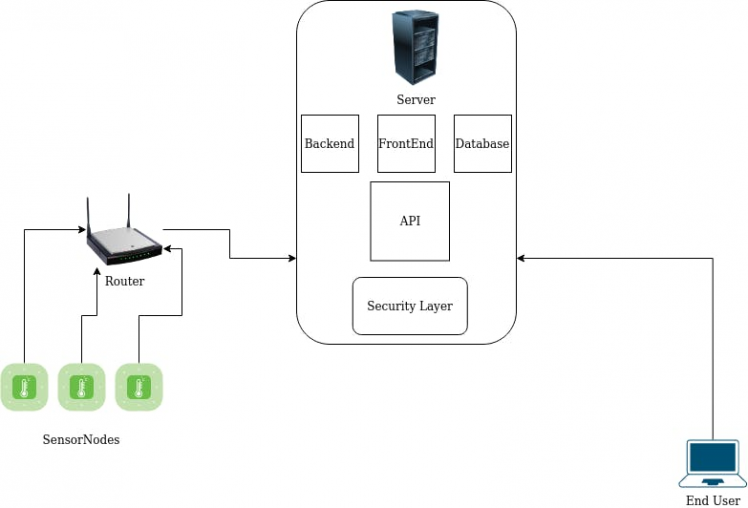
The traditional IoT systems work as shown in the picture above. An IoT solution architect has to manage each and every part of the system in order to roll out a product and it spans over 1-2 years of development.
Typical Tuya Workflow
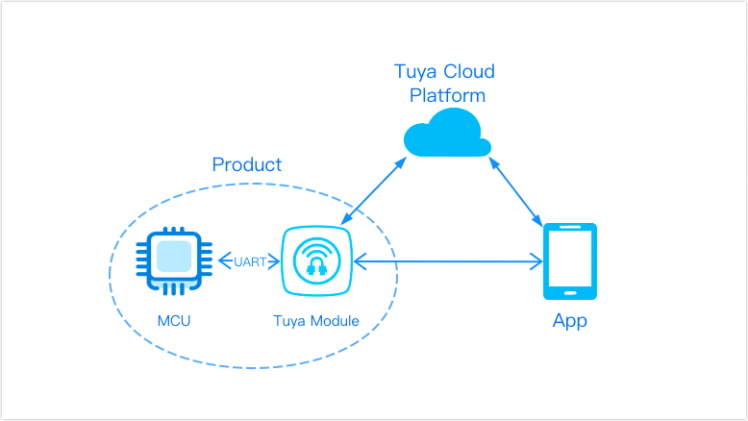
A typical Tuya solution workflow looks something like shown in the picture above. You need to have an MCU and a Tuya module connected over UART. This configuration makes things very easy as you don’t have to worry about the WiFi configurations, communications taking place between the Tuya module and Tuya Cloud Platform and data delivery as all of these things are handled by a black box which we can call Tuya Module. You just need to send simple instructions from your MCU to Tuya Module and the rest is handled by Tuya Module. Tuya Module communicates with the Tuya Cloud Development Platform and you can connect a number of the different devices to the Cloud Development Platform including your custom-built smartphone and webapp.
Components RequiredThe list below is a suggested list of components.
Wemos D1 Mini ESP8266
- Wemos D1 Mini ESP8266
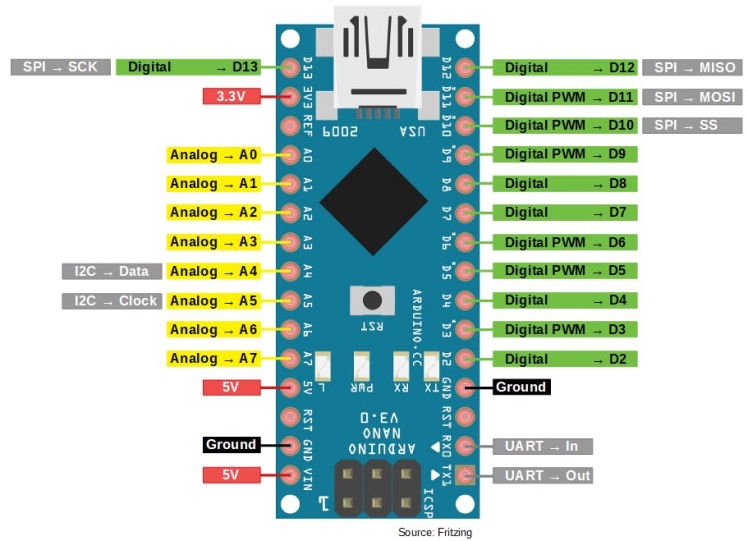
Arduino Nano
- Arduino Nano
DHT22
- DHT22
4 Channel Relay
- 4 Channel Relay
Small 5V UPS to Power Arduino and WeMos
- Small 5V UPS to Power Arduino and WeMos
Create an account at http://iot.tuya.com/?_source=fbe89820b4f49372b482d22144e5889aand log-in to the account
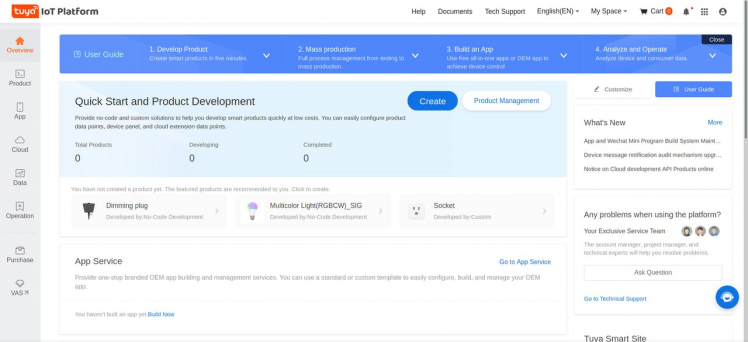
Then click on Create

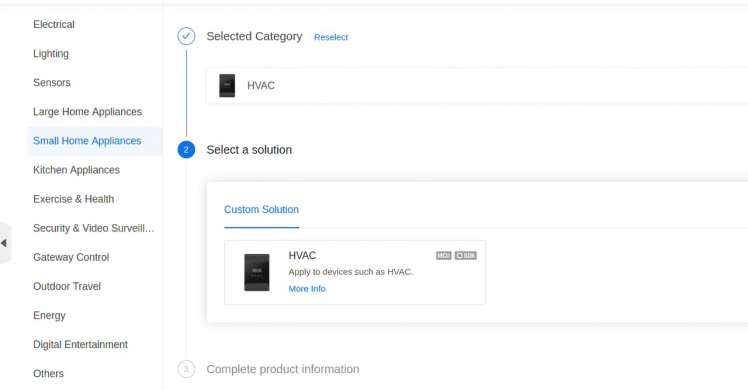
Then again click on Create

Then select HVAC as shown in the picture below
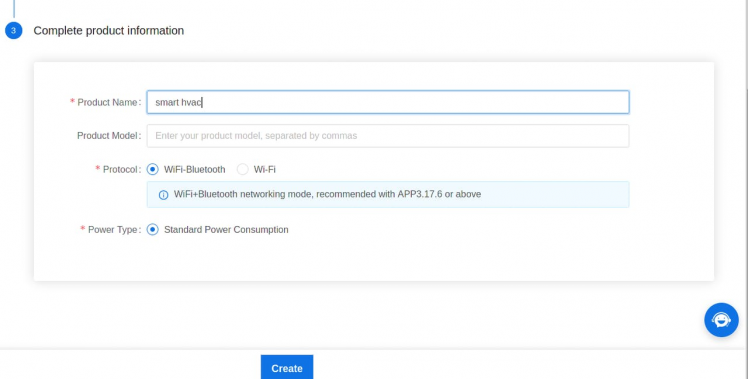
Put the product details as shown below and click Create button
Now select the functions(from Select HVAC Functions and Other Functions tab) as shown below in the next screen

Now in Hardware Development tab, your properties should look like as shown below

And don’t forget to note down your own device PID.
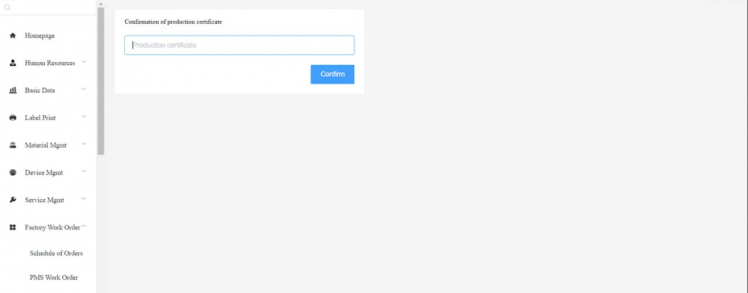
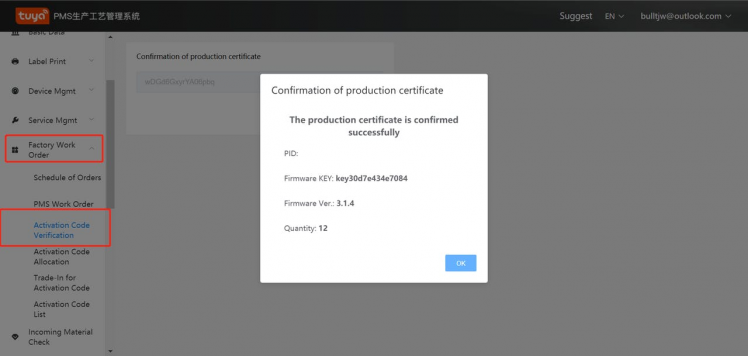
Now go to https://pms.tuyacn.com/en/login, create an account, login access the “Activation Code Verification” option, and enter your “Production Certificate” code. Click on “Confirm” to complete the activation process.
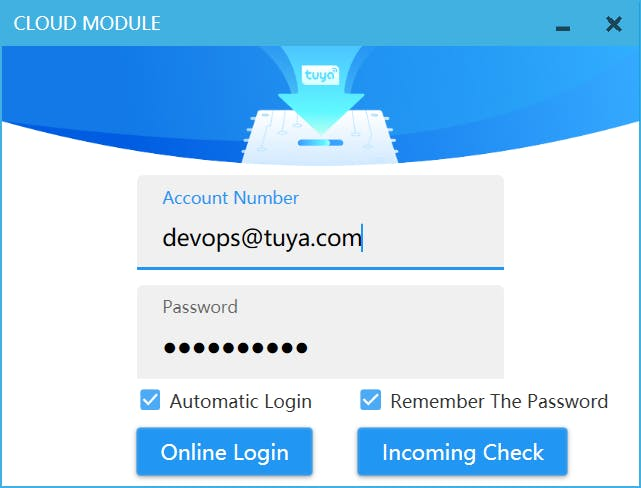
Then send PID and Tuya Account for devops@tuya.com and you’ll receive your token code.
Now, download the Tuya program from the link here: https://drive.google.com/file/d/1SF-rM5qDLaPJiuMHrkqFauVyRXSSHMkj/view?usp=sharing
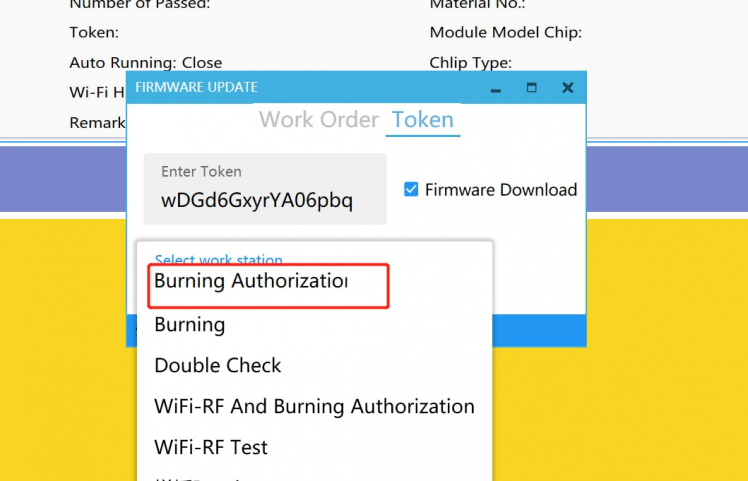
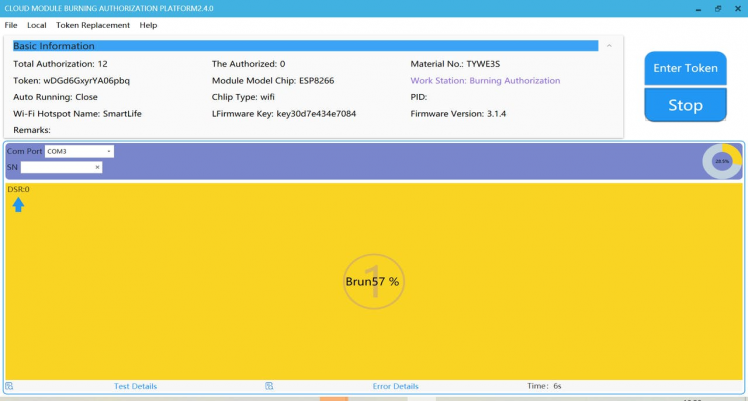
Extract it, open it and follow the instruction screenshots below
??Now install the ESP8266 drivers as shown below.?
?

Once it succeeds, you are good to go. Your ESP8266 is now flashed with the Tuya SDK.
Firmware and Configurations Softwares UsedArduino IDE
- Arduino IDE
Download and install Tuya library from the link given below
https://github.com/tuya/tuya-wifi-mcu-sdk-arduino-library?_source=e4e486334a69bede1529897274cd23a3
Get Firmware Version from the software used above for flashing ESP8266
Download the Firmware from this github repository
https://github.com/Nauman3S/TuyaHVAC
Open Firmware.ino file and put correct PID and Firmware versions in these variables
unsigned char pid[] = {"ma67l9sgmdyg3d2k"};
unsigned char mcu_ver[] = {"1.0.0"};
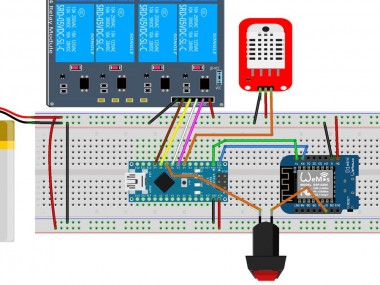
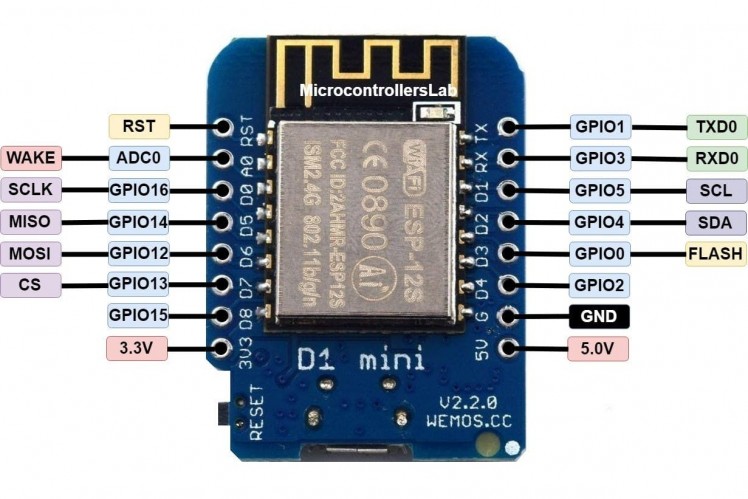
Circuit Diagram WeMos D1 Mini Pinout
To test the Firmware just upload it to Arduino Nano and press the reset button. It will automatically start sending the data feed to the Tuya IoT cloud platform and will control the relays accordingly.
In simple words, whenever the Sensor Node runs, it will get the temperature readings and will use the readings to do comparison with the set-point mentioned in the Firmware to control the heater of Air Conditioner relays.
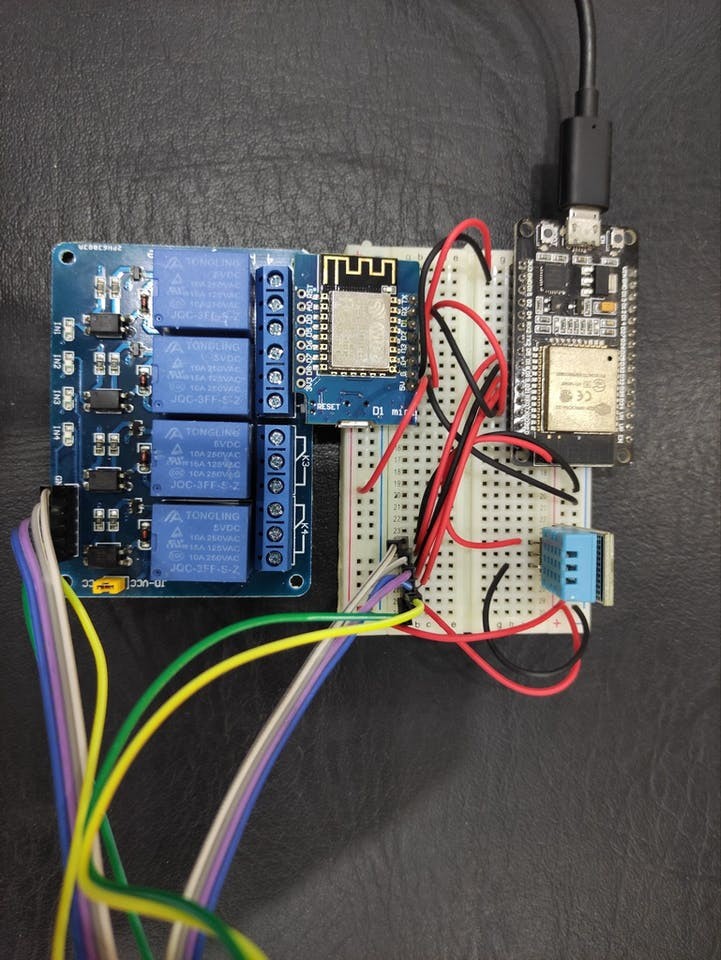
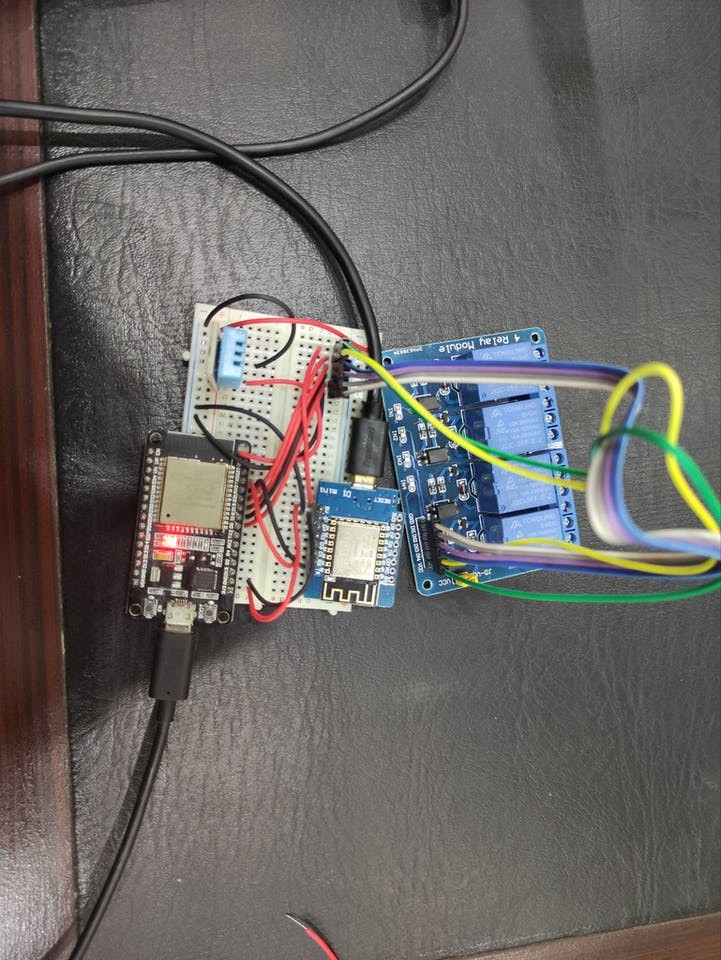
Connect the relays and other components as shown in the diagram above and you will get something like this shown below.
Please note that Arduino Nano can be replaced with Arduino UNO, Arduino Mega or even with ESP32 or ESP8266 boards.
Connected Network State
Once the system is powered on you will see the RED LED lights up on ESP32 or your Arduino.
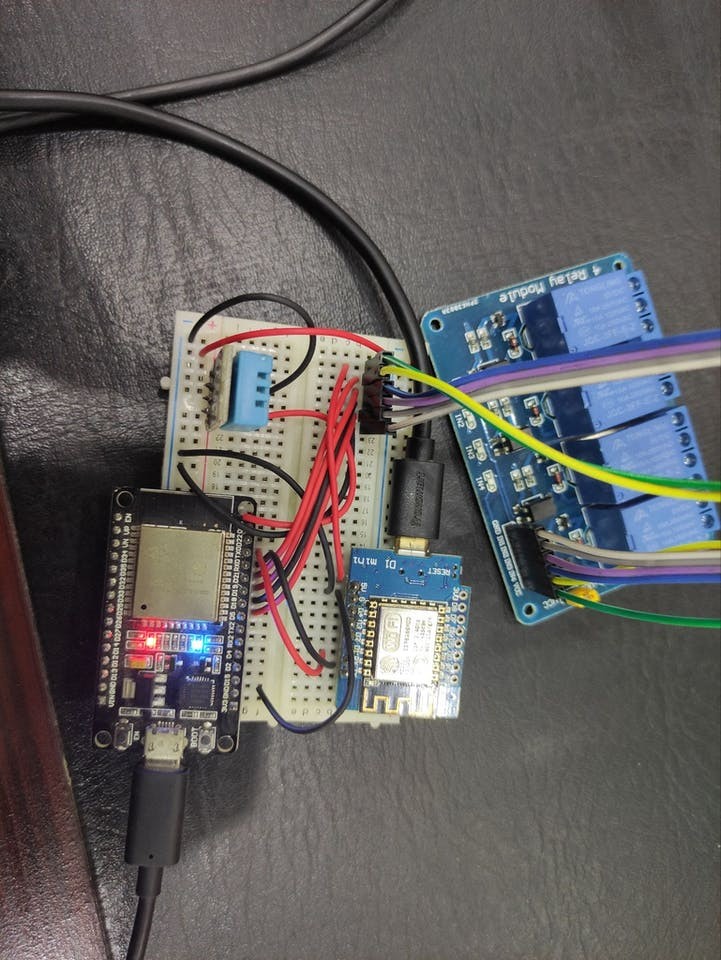
When the system connects to the Tuya platform over WiFi you will see Blue LED lights up on your ESP32 or Arduino.
Short Demo VideoDemo Vidoe: https://youtu.be/PJBbCqMyLOo
Details About the project: https://youtu.be/UVlWeG-6pZQ
ConclusionIn conclusion, we can now say that Tuya IoT Cloud Development Platform and SDK has made the development of Smart IoT products much easier.
In order to learn more about the Tuya ecosystem, have a look at the articles below.
Tuya IoT Platform: http://iot.tuya.com/?_source=fbe89820b4f49372b482d22144e5889a
Tuya Developer Platform:https://developer.tuya.com/en/?_source=aae11f336c7c5ca1ff908513b7c5802f
Tuya Arduino Developer Program:https://pages.tuya.com/develop/ArduinoBetaTest_discord?_source=58a75a214b395949d57c2c03283c251c
Firmware burning guide:https://github.com/GITOLEO/Tuya-ESP8266-firmware-burningauthorizations-guide
Leave your feedback...