
3d Printed Camshaft Text Display Using Evive

Made by stempedia / 3D Printing
About the project
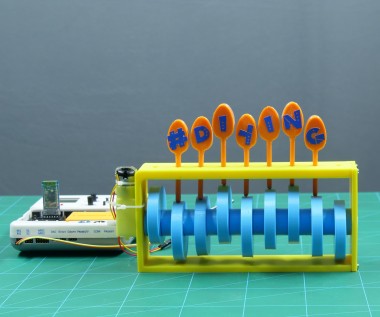
The DIY camshaft home decor with animated text display is one easy DIY Project you can make using some 3D printing, evive (Arduino), DC Motor...
Items used in this project
Hardware components

Story
Step 1: List of Components Required
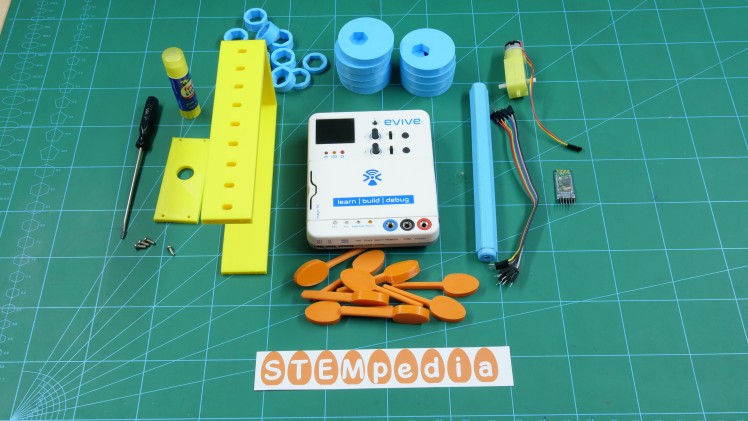
Hardware
- evive
- HC05 Bluetooth Module
- Dual Shaft DC Motor
- M3 Bolts
- Jumper Cables
- Some 3D Printed Parts
Software
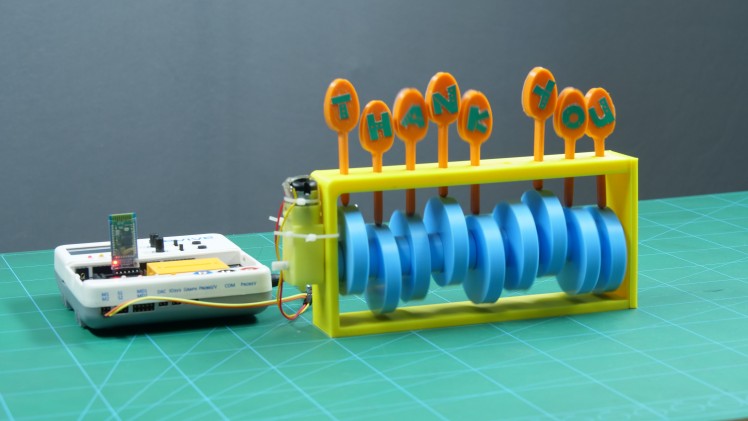
Step 2: Parts of the Camshaft Assembly
The assembly consists of the following parts:
- Rotating shaft
- Cams
- Two types of spacers
- Holder
- Followers
The STL Files of all the above components is given here.
Step 3: Making the Camshaft Assembly
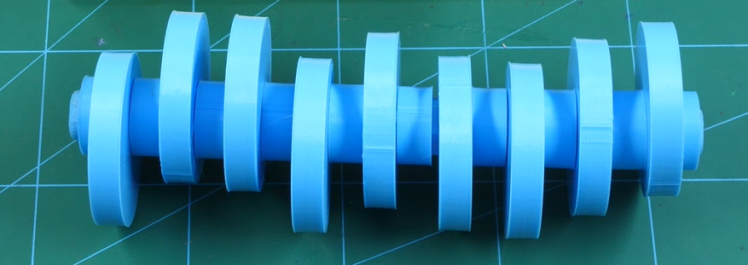
I will attach the two thin spacers at the ends of the shaft. Take one of the two thin spacers and pass the hexagonal shaft through it.
I have pushed a cam next to the spacer. Next, I have inserted a spacer again, but this time a thick one.
Insert another cam next to the spacer but this time I have to make sure that the direction of the cam is slightly changed as compared to the other cams.
Cover the entire shaft in a similar manner and insert the other thin spacer at the end.
Step 4: Making the Camshaft Rotate
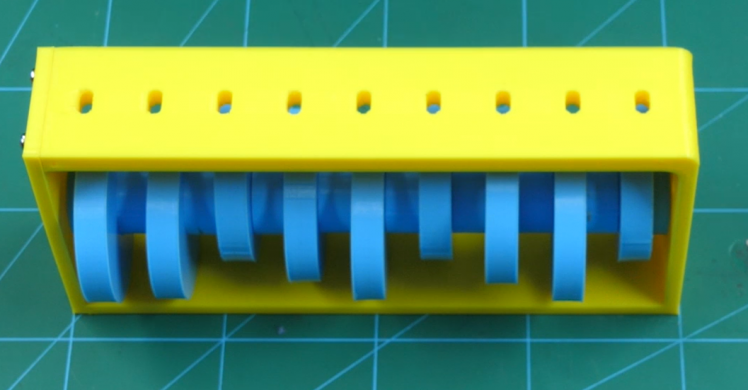
Now, take the holder and fix the prepared shaft in the given space. Close the other end of the holder with the help of the given 3D printed part using M3 bolts of 8mm length.
To rotate the shaft I have used a DC motor.
On one side of the shaft, you will notice a small hole. Fix one of the two shafts of the DC Motor here. Fasten the DC motor using cable ties.
Step 5: Completing the Assembly

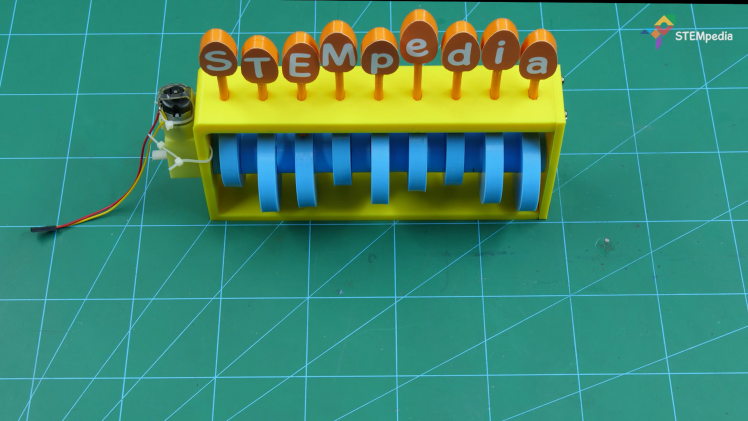
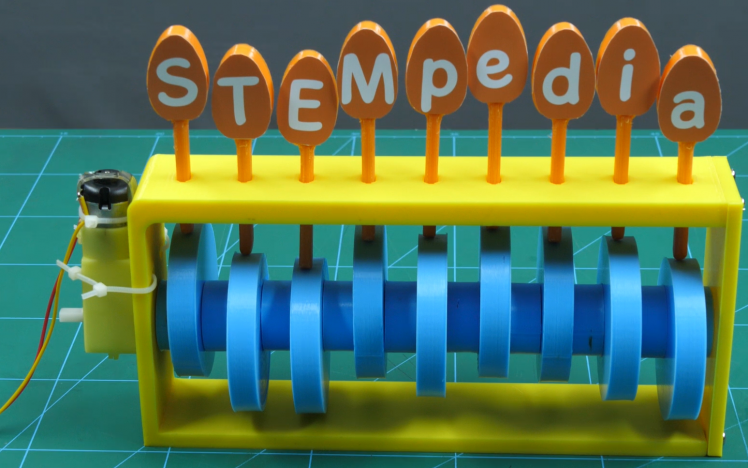
I have 3D printed the followers on which the letters can be glued to.
Take the cutouts of the letters and glue them one by one on each follower. Note: You can print any message you want to.
Insert the followers in the space given on top of the holder.
Yay! The assembly is now complete.
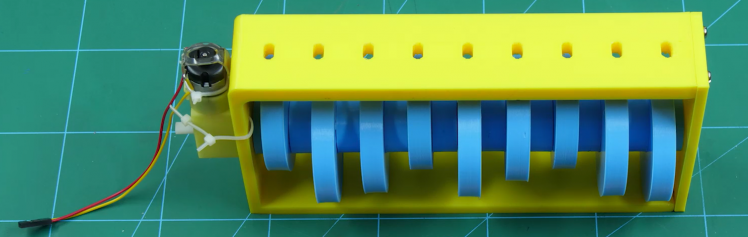
Step 6: Circuitry
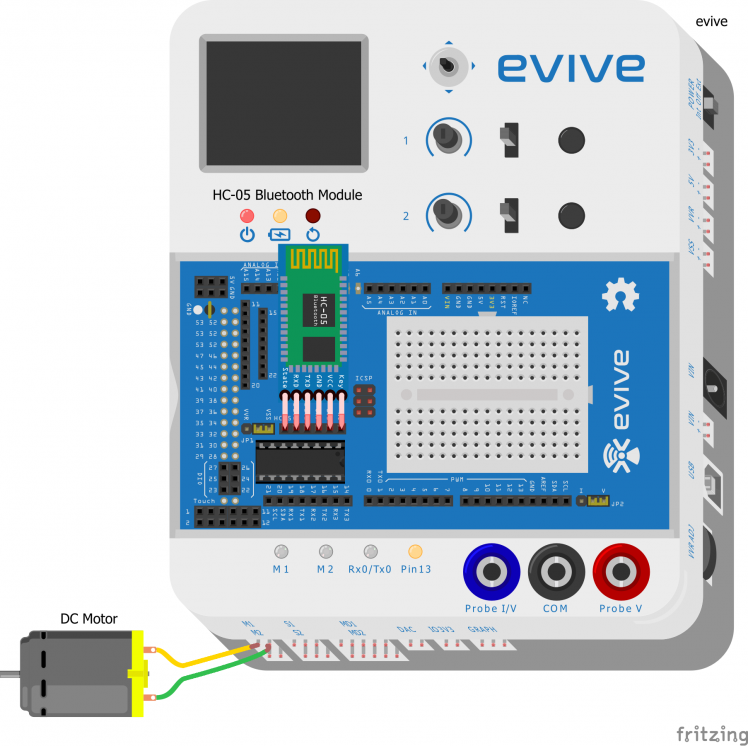
Make the connections as given:
- Take the DC motor and connect it to the motor channel 1.
- Then, insert the Bluetooth module in its holder.
Note: If you need to add another assembly of the servo, as we can control both motor and servo at a time using the Motor Module of Dabble, you need to attach it at Servo Channel 2. Or visa-versa.
Step 7: Working
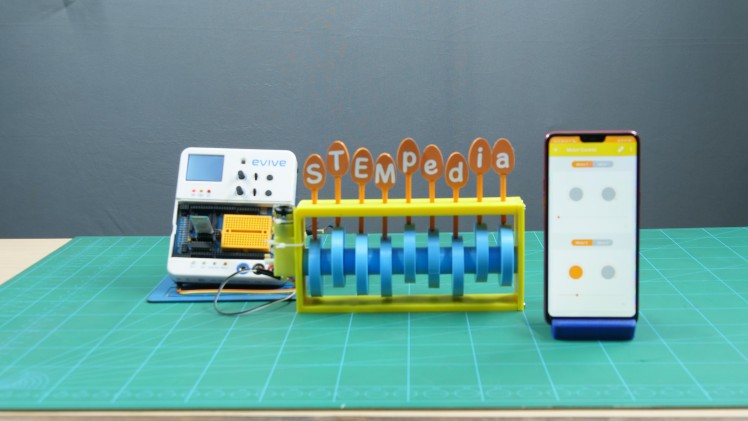
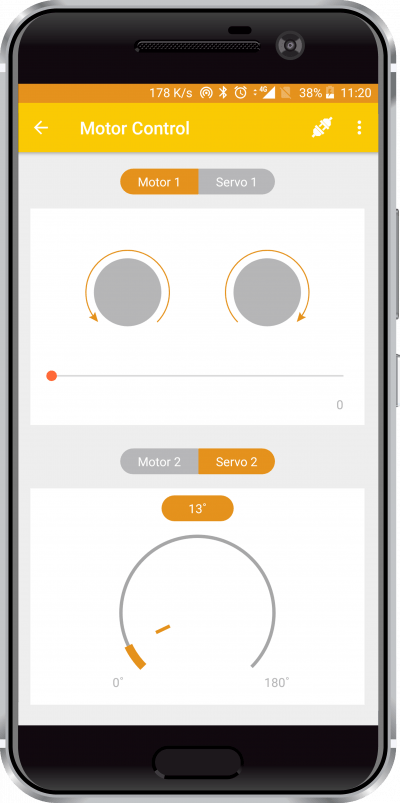
I am going to use my Smartphone to control the DC motor. How? With the help of Dabble.
Open Dabble on the Smartphone. Pair it with evive. Open the Motor Control module. You can turn the motor ON or OFF, change its, direction as well as its speed.
As the motor rotates, the shaft rotates, which in turn moves the follower away or closer to it, thus making them dance at different heights.
Step 8: Code
Upload the following PictoBlox code to evive:

Note: You need to add the servo channel block into the code, if you are using one.
Step 9: Conclusion
With this, your DIY Camshaft home decor with animated text is ready to put a smile on your special someone’s face!
Credits
stempedia
STEMpedia is committed to providing a one-stop solution for STEM education to enthusiastic students and educators. We work on one principle - Transform Youngsters of Today Into The Innovators of Tomorrow. Thus, your quest for STEM education ends at STEMpedia with full of joy and excitement.
Leave your feedback...