

What Is My Ip?

Made by gusgonnet
About the project
First impressions of a Raspberry Pi connected to the Particle Cloud.
Project info
Items used in this project

Story
This is my first little project with a Raspberry Pi connected to the Particle Cloud.
Particle + Raspberry Pi
On November 2015, Particle announced that they will be providing a mechanism to connect any Raspberry Pi to their cloud.
 Particle + Raspberry Pi = powerful, easy and connected IoT projects!
Not only can you now connect your Pi to the Particle Cloud and flash it from anywhere effortlessly, but it gives you the ability to run Arduino code in your Raspberry Pi.
 Run arduino code in your Raspberry Pi
And it does not end there. From Particle's site:
No more complicated tooling, setup, or scripting to perform simple tasks like trigger a pin, blink an LED, or read a sensor value. With Particle's Raspberry Pi Agent, you can now program in C/C++, making these tasks easy!And from their blog here:
- Simple Arduino Code: Use the existing Particle Web IDE and program your Pi with Wiring. No more complicated tooling, setup, or scripting to perform simple tasks like trigger a pin, blink an LED, or read a sensor value.
- Over-the-Air Updates: Safely reprogram code running on your Pi's one at a time in the Web IDE or as a fleet of devices in the Console.
- Batch Script Execution: Remotely execute customized scripts on groups of Raspberry Pi’s using the exec command.
- Remote Data Collection: Collect and publish data to the Particle Cloud, or store it locally by logging it on your Pi.
- Integrations: Integrate with IFTTT, Google Cloud, or Microsoft Azure.
Very promising!
You can sign up for the beta program here. I, on my end, signed up for the beta right away, got my account set up, and started using my Raspberry Pi 3 for the first time couple of weeks ago.
I was mostly interested in how to trigger remote scripts in the Pi, so this article is the first useful thing I came up with.
Motivation
You can look at this project as my "hello world" with the Particle Cloud + Raspberry Pi. The next use I have for this Rasp Pi is a detection via Bluetooth of my phones around the house. What for? To turn on the away mode of my Minimalist Thermostat automatically when we leave the house. Coming soon!
What is my IP?
Sometimes I need to know my external IP at home. Of course, most of the times when this happens, I am NOT home.
So how was I able to solve this in the past? I would run a script in a Linux server that would email me the external IP address of my home router every single day. Not a good use of bandwidth if you ask me. Today, with the power of the Particle Cloud, I'm able to do this on demand.
Implementation
The Pi will run a firmware with an exposed cloud function that will print in the Particle Console the external IP of my router at home.
- STEP 1: Register for the BETA here.
- STEP 1 loop: Wait until you get in the beta.
- STEP 2: Install the Particle Agent in your Pi.
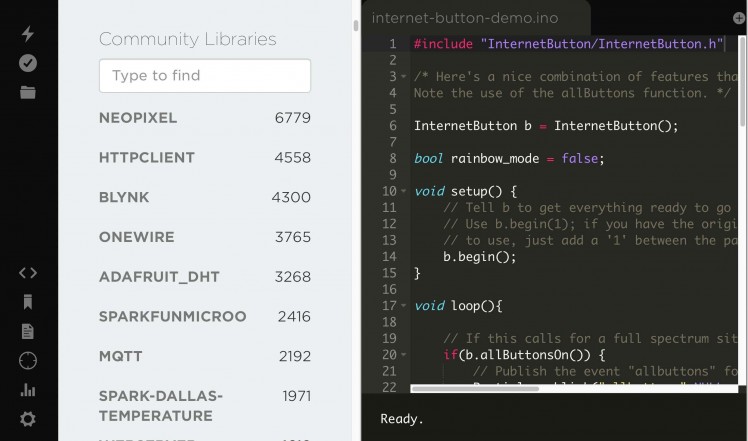
- STEP 3: Flash it with the firmware in this project (see code section below). You can use the Particle online IDE, Particle local IDE (called DEV, based on Atom), Visual Studio as described here, or any other option you may be familiar with.
- STEP 4: Start the Particle console (optional).
- STEP 5: Fire up your Particle 2.0 app (iOS only), Porter (iOS and Android), or from a console if you have the Particle CLI installed.
-
STEP 6: Call the cloud function
whatismyip().
- STEP 7: Observe the IP being printed in the Particle console or in the cloud variable in your Particle app or Porter app.
This is a screenshot of the Porter app showing my external IP:
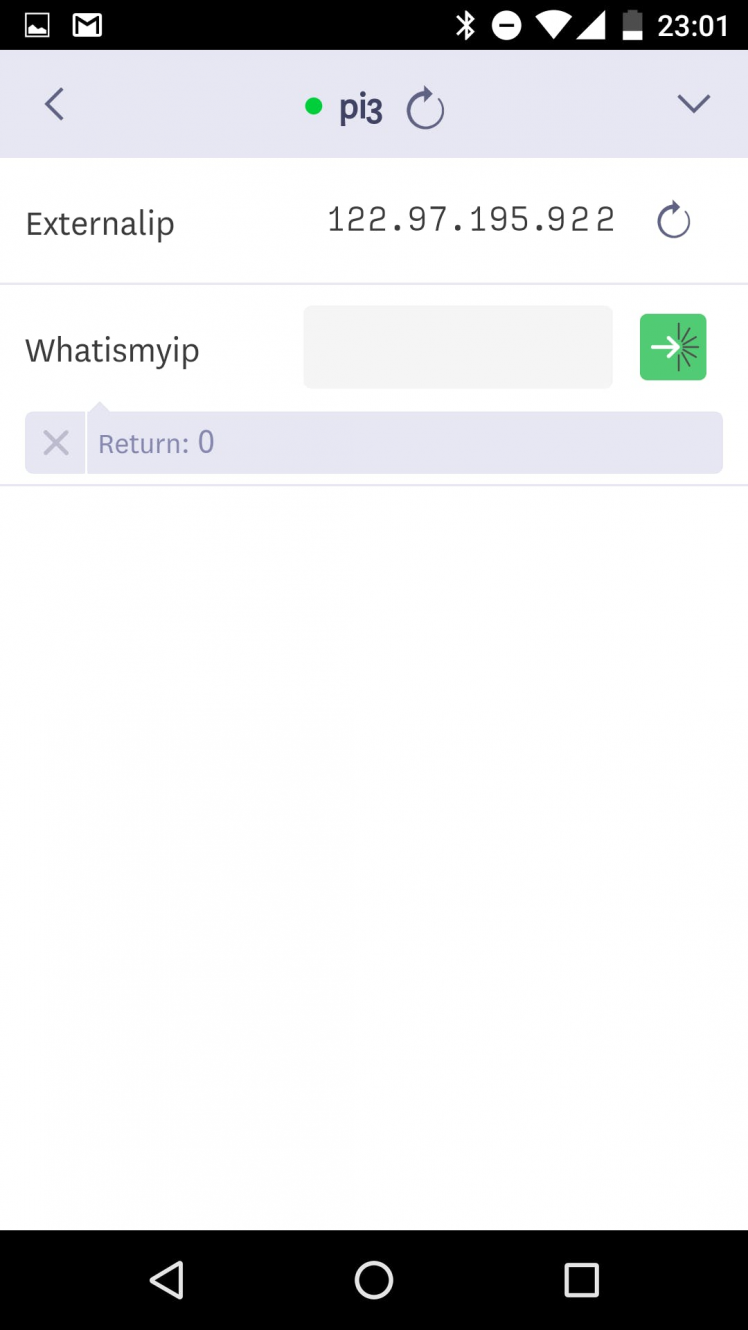 the Porter app showing my IP
This is a screenshot of the Particle Console showing my external IP:
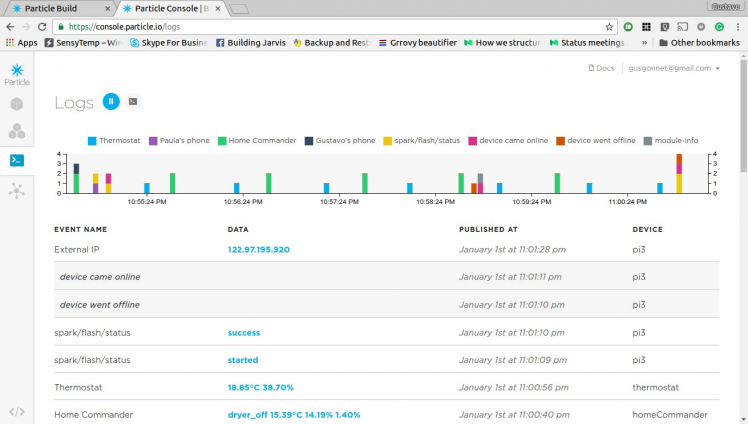 the Particle Console showing my IP
Things to have in mind
The particle agent will run at full speed our firmware. This may or may not be fine with the use you give to your Pi.
In some cases, this might mean that other processes on your Pi will starve for CPU cycles. So one way to slow down the execution of our firmware is to add a delay in the loop() function, like this:
void loop() {
// this delay will slow down this rasppi particle agent process so the pi keeps its cool ;)
// without this delay, top (the command line util on the pi) shows 100% CPU use (of the firmware.bin process)
// with this delay, top shows 2% CPU use
delay(1000);
}
Conclusion
With the Particle Cloud you can control your Pi easily from your phone, tablet or any other device like I showed you in this article. Of course, there is A LOT MORE you can do with your Pi and Particle, the only limiting factors being your imagination and the hardware you may have available at the time.
Hope you find value in this write-up. Feel free to respect it and/or check my other projects here. Leave a comment below if you struggle with something, maybe we can figure it out together.
Gustavo.
Help
If you require professional help with your projects, don't hesitate to write me a line about your needs at gusgonnet@gmail.com. Thank you!
Code
Credits
Related products

Leave your feedback...