

Time-lapse Animations With A Raspberry Pi
Made by Raspberry Pi / Photos & Video
About the project
In this resource you’ll write a small script to capture multiple images, using a Pi camera over a long period of time. These images can then be combined into an animated GIF, allowing you to view very slow events in a few seconds, using the power of time-lapse photography.
Project info
Difficulty: Moderate
Platforms: Raspberry Pi
Estimated time: 3 hours
License: Creative Commons Attribution CC BY version 4.0 or later (CC BY 4+)
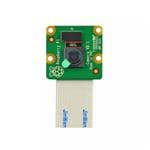
Items used in this project

Story
Software installation
This project requires ImageMagick, a command-line program for image manipulation. To install ImageMagick, run the following commands in a terminal window:
- sudo apt-get update
- sudo apt-get install imagemagick -y
Time-lapse animations with a Raspberry Pi
Time-lapse photography uses multiple images taken over a long period of time, which are then stitched together to produce an animated sequence of images.
If you’ve never seen a time-lapse before, then the one below is an example of what can be achieved.

If you’ve never used the Raspberry Pi Camera Module before, then it’s probably a good idea to have a quick look through the first few steps in the Getting started with PiCamera resource to familiarise yourself with the device, and to make sure it’s working properly.
Taking a picture
You can start by writing a simple script to take a picture using the Camera Module.
- Open IDLE (Menu > Programming > Python 3 (IDLE).
- Create a new file (File > New File) and then save it as timelapse.py.
- Now with three simple lines of code, you can use Python to take a photo:
- from picamera import PiCamera
- camera = PiCamera()
- camera.capture('image.jpg')
- Save (Ctrl+s) your script, and then run it by pressing F5 on your keyboard.
- Open up your File Manager by clicking on the
![]()
icon in the top-left of the screen, and double-click on image.jpg:

Taking multiple images
You can take multiple images using the Camera Module by capturing images with a loop. A for loop can be used to capture a set number of images.
- Modify your file to incorporate a for loop. In this example, the Pi Camera will capture 10 images:
- from picamera import PiCamera
- camera = PiCamera()
- for i in range(10):
- camera.capture('image.jpg')
- Save your script again and run (F5) your program. Then have a look inside your File Manager to see what has been created.
- Can you see the problem? There’s only one image there, and it’s the last image that was taken. This is because each image had the same file name, so it was overwritten by the next image to be taken. This is a problem which can be solved by a little modification of the script:
- from picamera import PiCamera
- camera = PiCamera()
- for i in range(10):
- camera.capture('image{0:04d}.jpg'.format(i))
- If you look in the File Manager now, you should see ten images named image0000.jpg up to image0009.jpg.
- The syntax 'image{0:04d}.jpg'.format(i) adds the value of i, which starts at 0 and ends at 9, to the file name. It also pads the number with zeros, so that there are always 4 digits. This will be important later on.
Making a GIF
Now that you know how to take multiple photos, let’s see how you can turn that sequence into an animated GIF. For this you’re going to need the program ImageMagick. If you haven’t already installed it, there are instructions in the software setup guide.
- ImageMagick is a command line program that can be used to manipulate images. First of all, you can try it out by opening up your terminal (Ctrl+Alt+t) and typing the following:
- convert -delay 10 -loop 0 image*.jpg animation.gif
- The -delay option sets the amount of time (in 100ths of a second) between frames. The -loop option sets the number of times the GIF will loop. Here the 0 tells it to loop forever.
- This will take a little time to run, but once it’s complete you should see the file animation.gif in the File Manager:

- You can double-click this and watch the animation in Image Viewer. Again, give it a little time to open as it’s probably a fairly large file.
- As with all command line programs, you can call ImageMagick from within Python. You just need to use the os library, as shown below:
- from picamera import PiCamera
- from os import system
- camera = PiCamera()
- for i in range(10):
- camera.capture('image{0:04d}.jpg'.format(i))
- system('convert -delay 10 -loop 0 image*.jpg animation.gif')
- print('done')
- This will take a little time to run. You should see the word done printed in the shell when the script has finished. Your new animation.gif will be playable from the File Manager after a couple of minutes.
Reducing the file size
Currently, your animated GIF is probably sitting at around the 10MB range, which is a little large for a ten-frame animation. This is because your Pi camera captures images at a resolution of 3280 x 2464 if you have a Camera Module v2, or 1920 x 1080 if you have an original Camera Module. You can produce smaller GIFs by using a smaller image resolution.
- Go back to your timelapse.py file. Now add in a single new line to set the resolution of the images:
- from picamera import PiCamera
- from os import system
- camera = PiCamera()
- camera.resolution = (1024, 768)
- for i in range(10):
- camera.capture('image{0:04d}.jpg'.format(i))
- system('convert -delay 10 -loop 0 image*.jpg animation.gif')
- If you want even smaller GIFs, then choose an even smaller resolution.
Adding a delay
The point of time-lapse is to take pictures every few minutes or even hours. To do this you can pause your program between captures, using the time library.
- Back in your timelapse.py file, alter the code so that you can import the sleep function, and then pause the script after each capture:
- from picamera import PiCamera
- from os import system
- from time import sleep
- camera = PiCamera()
- camera.resolution = (1024, 768)
- for i in range(10):
- camera.capture('image{0:04d}.jpg'.format(i))
- sleep(60)
- system('convert -delay 10 -loop 0 image*.jpg animation.gif')
- In the above example a picture is taken once every 60 seconds, and ten pictures are taken in total. You can now modify the values for the range() and sleep() functions to whatever suits your purpose. If you want to capture a flower opening, then a picture a minute for a couple of hours would suffice. If you were making a time-lapse of a fruit rotting, then two or three pictures a day might be more appropriate.
- Set up your Raspberry Pi with the Camera Module pointing at your target, run the script, and then sit back and wait for the GIF to be created.
What next?
- Now that you’ve managed to do some time-lapse photography, why not have a go at some other PiCamera resources?
- You could even have a go at playing around with some slow-motion video captures.
Credits
Raspberry Pi
Our mission is to put the power of computing and digital making into the hands of people all over the world. We do this so that more people are able to harness the power of computing and digital technologies for work, to solve problems that matter to them, and to express themselves creatively.
Related products


Leave your feedback...