

Spi-Box: A Motion Activated Security Camera

Made by sb-components
About the project
Spi-Box is a Raspberry Pi-based, motion-activated camera designed to use as a DIY kit for beginners and security purposes.
Project info
Difficulty: Moderate
Estimated time: 1 hour
Items used in this project
Hardware components


Story

Spi-Box is a Raspberry Pi based motion activated camera designed to use as a DIY kit for beginners and security purposes. Spi-Box can send an e-mail notification with an attachment of the captured image or video.
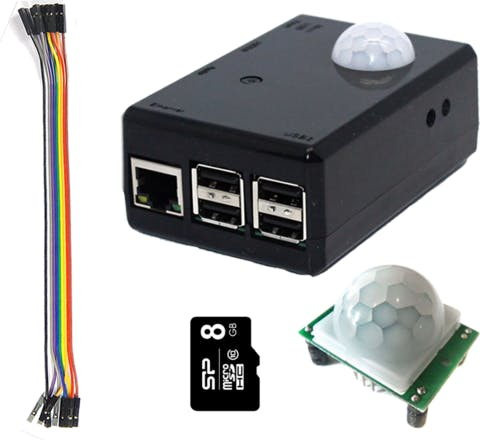
Here are the things you will need to set up a Spi-Box:
Keep caution while assembling Spi-Box, better turn off the power supply if you are using as a beginner.
Spi-Box Hardware Configuration
Please be aware that the bottom half of the case of the Spi-Box is shallower than other SB Components’ cases making the mounting process slightly different:
● Line up the HDMI side of the pi with the lower half of the case and ease it into place at a slight angle pressing down gently but firmly until the mounting posts (highlighted in red)click into place in the Pi’s screw mounting holes.
● Press the other side of the board down into place gently but firmly until the mounting posts on the GPIO side of the board click into place in the board’s screw-mounting holes.
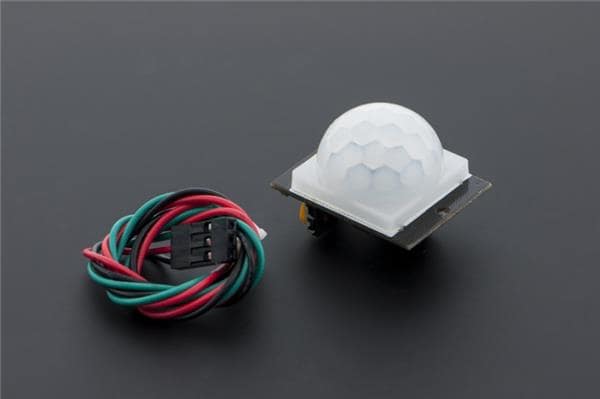
Mounting Camera and PIR
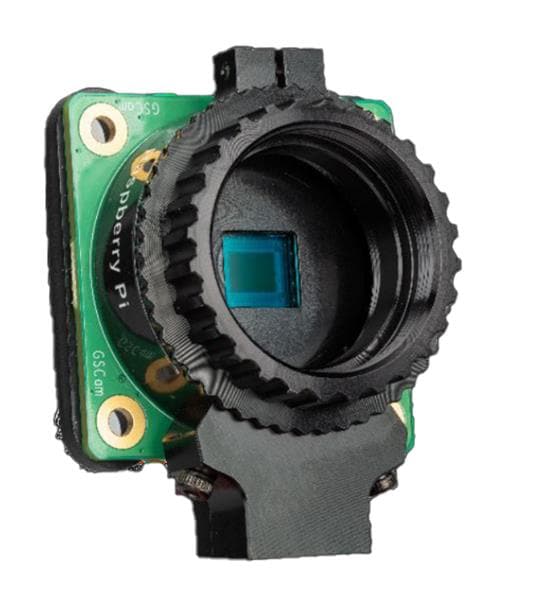
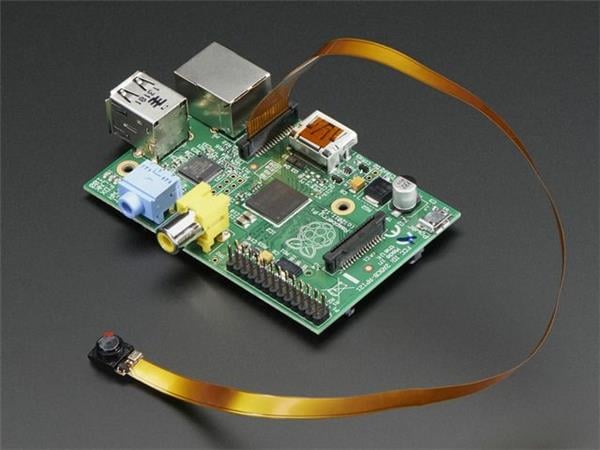
Attach the camera module to the top half of the case using the screws provided to secure it into place. Note: The camera module ribbon cable should point toward the USB holes in the case.
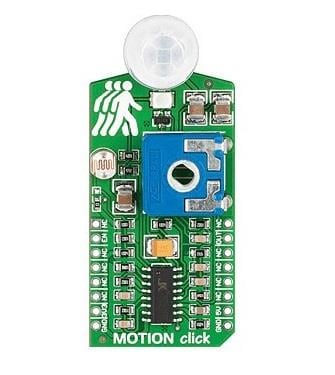
● Attach the PIR module to the top half of the case using the screws provided to secure it into place. NOTE: The pins should be closest to the camera with the orange trimming controls aligned with the two holes in the side of the case.
● Connect the camera module ribbon to the Pi. For detailed information visit Raspberry Pi official documentation:
https://www.raspberrypi.org/documentation/usage/camera/README.md
● Connect the PIR to the Raspberry Pi using the following pin configuration:
- PIR OUT --> Raspberry Pi GPIO4(PIN 7)
- PIR VCC --> Raspberry Pi PIN 2(5V)
- PIR GND --> Raspberry Pi PIN 6(Ground)
● Snap the two case sections together.
Setting Spi-Box
To set up the Spi-Box you will need to first connect the Raspberry Pi to a monitor, keyboard, and mouse. Additionally, you will need to connect Raspberry Pi to the Internet.
● Enable Camera in Raspberry Pi Configuration using the following steps:
- Open terminal and type ‘sudo raspi-config’
- Go to ‘5 Interfacing Options’
- Go to ‘P1 Camera’
- Select ‘Yes’ then ‘Ok’
- Reboot Raspberry Pi
● Install ‘MP4Box’ for converting h264 raw videos to mp4 formatted video using the command:
- sudo apt install gpac
● Set SSMTP and MPACK for email service in your raspberry pi. For more details on ’Email setup’ can be found at 'How to Send an E-mail via Raspberry Pi?', Follow the instruction for ‘SSMTP’ and ‘MPACK’.
● The Spi-Box software can be downloaded using git, open terminal and download the code using:
git clone https://github.com/sbcshop/Spi-Box.git
Or
Visit: https://github.com/sbcshop/Spi-Box
Getting started with Spi-Box
● Find ‘Spi-Box’ directory at ‘/home/pi/’.
● You can find the following files in the ‘/home/pi/Spi-Box’ directory:
- spibox.py
- spiboxconfig.py
- Spi-Box Config (icon)
- Spi-Box (icon)
spibox.py -> This is the main file which runs in the background or via Spi-Box icon. It waits for motion and captures an image or video, save it to ‘capture’ directory and sends the email with an attachment of captured images or videos. When the process is complete images of videos are moved into ‘capture/archive’ directory.
spiboxconfig.py -> This python script will open Graphical User Interface for setting Spi-Box. GUI is explained later in the document.
Spi-Box Config icon -> This icon simply runs ‘spiconfig.py’ script. Spi-Box Config icon can be copied to the desktop or any other path for configuring Spi-Box.
Spi-Box icon -> Spi-Box icon runs ‘spibox.py’ script. You can simply double click on the icon and Spi-Box will start working.
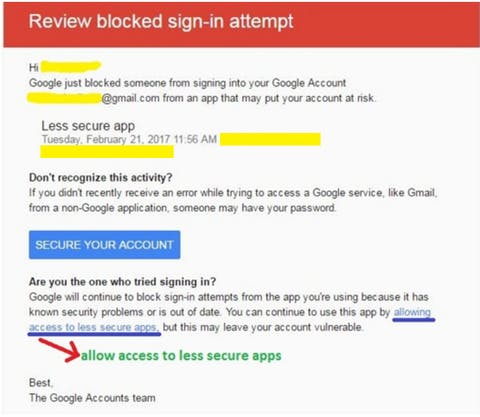
● In case, Google blocks your sign-in attempts, check your mail inbox, find a warning email from Google and allow to less securing apps so that Raspberry Pi can send emails.
Note: If ‘Spi-box is not in ‘/home/pi/’ directory desktop icons may not work.
Using Spi-Box Graphical User Interface
You can copy ‘Spi-Box Config’ from Spi-Box directory and paste it anywhere feasible for you. For using Spi-Box using GUI double click on the icon or run ‘spiboxconfig.py’ and configure Spi-Box according to your need, the following window will appear for configuration:
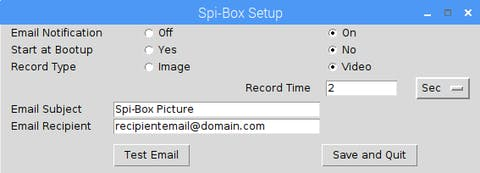
You can turn off ‘Email Notification’ if you don’t want to receive Email attachments.
● To Start ‘Spi-Box’ at boot up select ‘Yes’ in ‘Start at Bootup’ option. With this option, you don’t need to run the program after reboot.
● You can choose to capture an image or record a video when motion is sensed, with ‘Record Type’ button.
● If you choose to record a video ‘Record time’ is necessary and should be between 1 sec to 300 secs or 1 to 5 minutes. You can choose between ‘Sec’ and ‘Minute’ option.
● You have to add a subject for email via the ‘Email Subject’ field.
● You have to add a recipient’s email address which will be added from ‘Email Recipient’.
Note: 1. All fields in ‘Spi-Box Setup’ are mandatory. 2. If you are facing the problem with email, make sure you have correctly configured SSMTP.
3. Higher recording time will increase the size of the file, which may cause failure in sending emails.
Code
Credits
sb-components
The Maker Community Store – We help you to make things intelligent using Raspberry Pi, Micro:Bit, Arduino, robotics, etc.
Related products


Leave your feedback...