

Sharing Laptop's Mouse And Keyboard With Raspberry Pi

Made by rpi-coder
About the project
Use a single keyboard and mouse when using a Raspberry Pi and laptop or while viewing the display with remote desktop or a HDMI Capture card.
Project info
Difficulty: Easy
Platforms: Raspberry Pi
Estimated time: 1 hour
License: GNU General Public License, version 3 or later (GPL3+)
Items used in this project
Hardware components


Software apps and online services
Story
When your viewing your Raspberry Pi's desktop on your laptop or desktop with remote desktop or a HDMI capture card your probably using two keyboards one for your laptop or desktop and one for your Raspberry Pi. Wont it be cool if you could just use one keyboard and mouse to control both of them. Well that's what you can do with the help of an app called barrier. If your too lazy like me to go through a lot of text you can watch this YouTube video I made showing the same stuff mentioned below.
Basic Working
Barrier will require two components a server whose keyboard and mouse are shared, and a client who shares the mouse and keyboard. So here your laptop is the server computer and the raspberry pi is the client computer who shares the laptops mouse and keyboard. The first thing we are going to need to do is to install barrier on your Laptop or Desktop followed by installing it on your Raspberry Pi.
Installing On Laptop or Desktop
The installation is pretty simple on any OS. Install the required installer from the GitHub releases page. If your using windows install the .exe and if your using Mac OS install the .dmg and if your using Linux you can install it with the help of your package manager such as apt and pacman or using Flatpak or Snap.
Debian:
- sudo apt install barrier
Arch Linux:
- sudo pacman -S barrier
Any Other Distro:
- flatpak install flathub com.github.debauchee.barrier && flatpak run com.github.debauchee.barrier
OR
- snap install barrier && snap run barrier
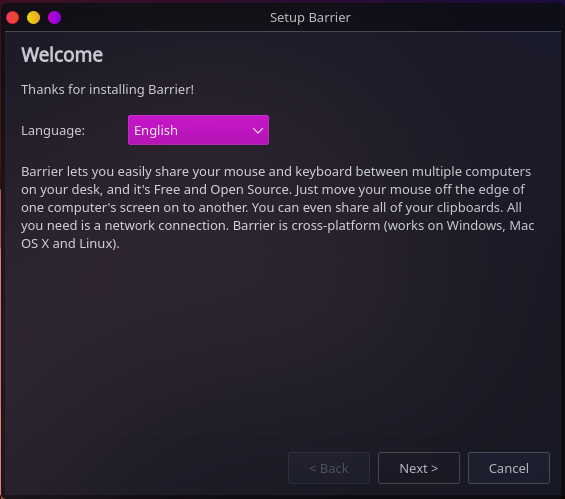
You will have to finish a small setup where you have to choose your language and choose if you want to setup a server or a client.
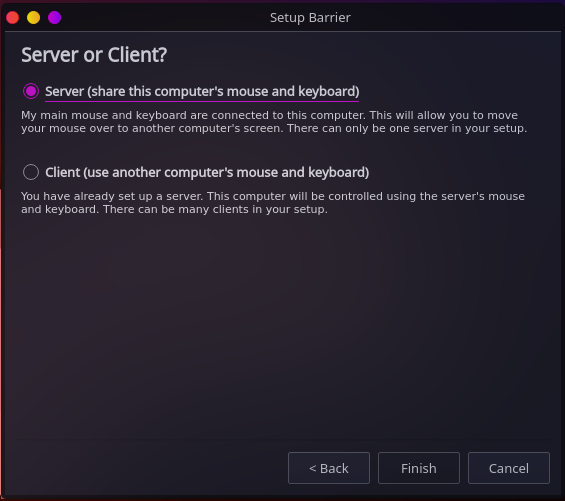
If your using your laptop or desktop click on server and click on finish to finish the setup. Once you finish the setup you will get this window.
Note down the IP address in this window as your going to need it later
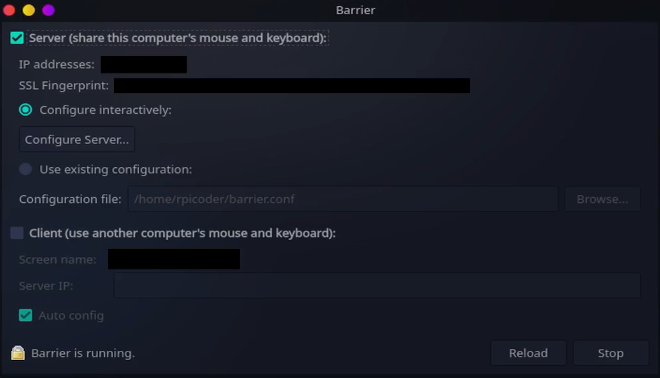
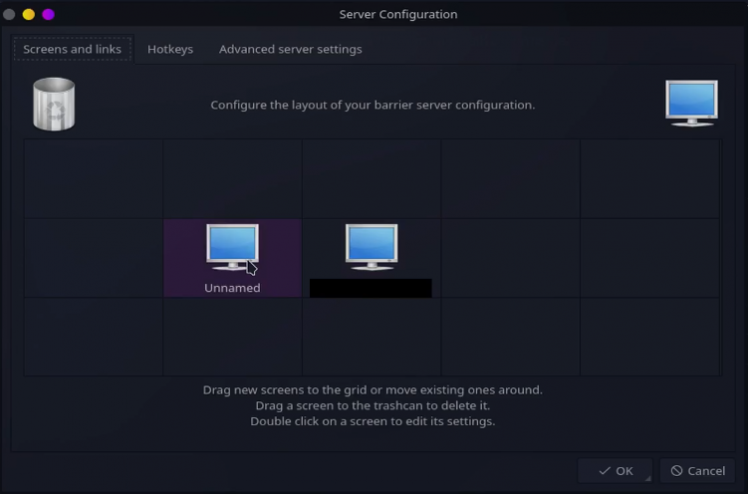
Here Click On Configure server. A new window will pop up.

Here drag the monitor icon in the right top corner to any direction of the other monitor.
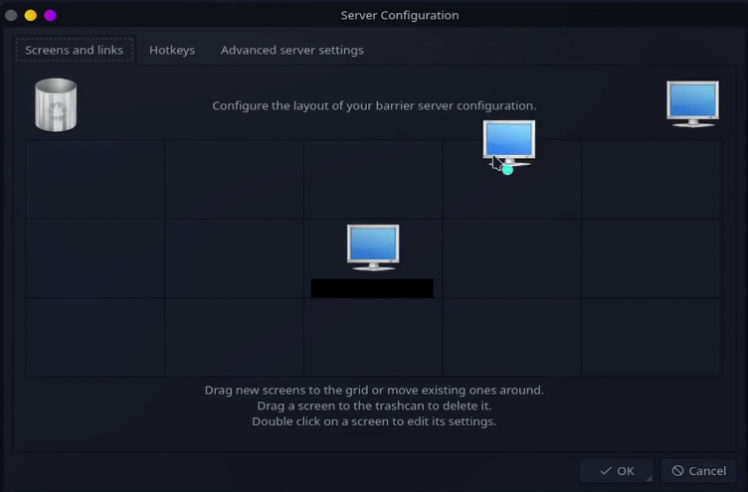
So what this means is if I drag it to the left of the monitor I will be able to control the mouse of the Raspberry Pi when I drag my mouse to the left end of the monitor. Similarly if I place it on the right I will be able to control the pi when I drag my mouse to the right end of the monitor. It will be easier to understand if you think of it as a dual monitor setup where you can move your mouse across two monitors but you cant drag the windows. Then click on the monitor which we just added which will open a screen settings window.
Here change the screen name to raspberrypi
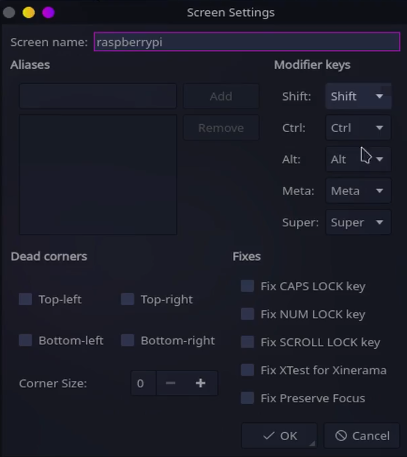
After changing the name click OK and again click OK in the configure server window. Then click on start or if 'barrier is starting' click on reload.
Installing Barrier On Raspberry Pi
If your using raspberry pi with Raspberry Pi OS or any other Debian distribution your can install it by running:
- sudo apt install barrier
If your using any other Linux distribution you can find the installation commands above.
Once you have finished installing it run barrier from the applications menu or run it from the terminal by running:
- barrier
and it will open the app. Here complete the initial setup but choose the client option. At this point your pi should automatically detect your laptop or desktop
If your laptop isn't detected automatically you have to disable auto config and type the IP address you had noted earlier in the Server IP box and click start and apply and your done.

If it shows 'barrier is running' it means that it has connected successfully. One handy feature is that they share a clipboard. For example if I have to install pi apps I have to copy paste a command so I can just copy it in my main laptop and paste it in my pi. Pretty useful right ? You can find a clip of me using barrier and using the shared clipboard in the end of this YouTube video:
Credits
Related products


Leave your feedback...