





Run Home Assistant On The Arduino Uno Q: Docker + Mqtt Setup

Made by tech_nickk
About the project
Set up Home Assistant in Docker on the Arduino Uno Q's Linux side, bridge the STM32 microcontroller with MQTT, and control an onboard LED
Project info
Difficulty: Easy
Platforms: Arduino
Estimated time: 1 hour
License: GNU General Public License, version 3 or later (GPL3+)
Items used in this project


Story
The moment I got my hands on the Uno Q, one question was already nagging at me: could this board, with a real Linux brain sitting next to its microcontroller run Home Assistant? I went looking for a guide and came up empty. Plenty of docs on the Bridge, on App Lab, on the two processors talking to each other, but nothing that walked through actually getting Home Assistant installed and talking to the board's own GPIO. So I decided to just find out the hard way: SSH in, see what's already there, and build the bridge myself. What follows is everything that worked, and everything that quietly broke along the way, so you don't have to rediscover it from scratch.
What You'll BuildBy the end of this tutorial, you'll have:
- Home Assistant running in Docker on the Uno Q's Linux side
- An MQTT broker (Mosquitto) bridging the Linux side and the STM32 microcontroller
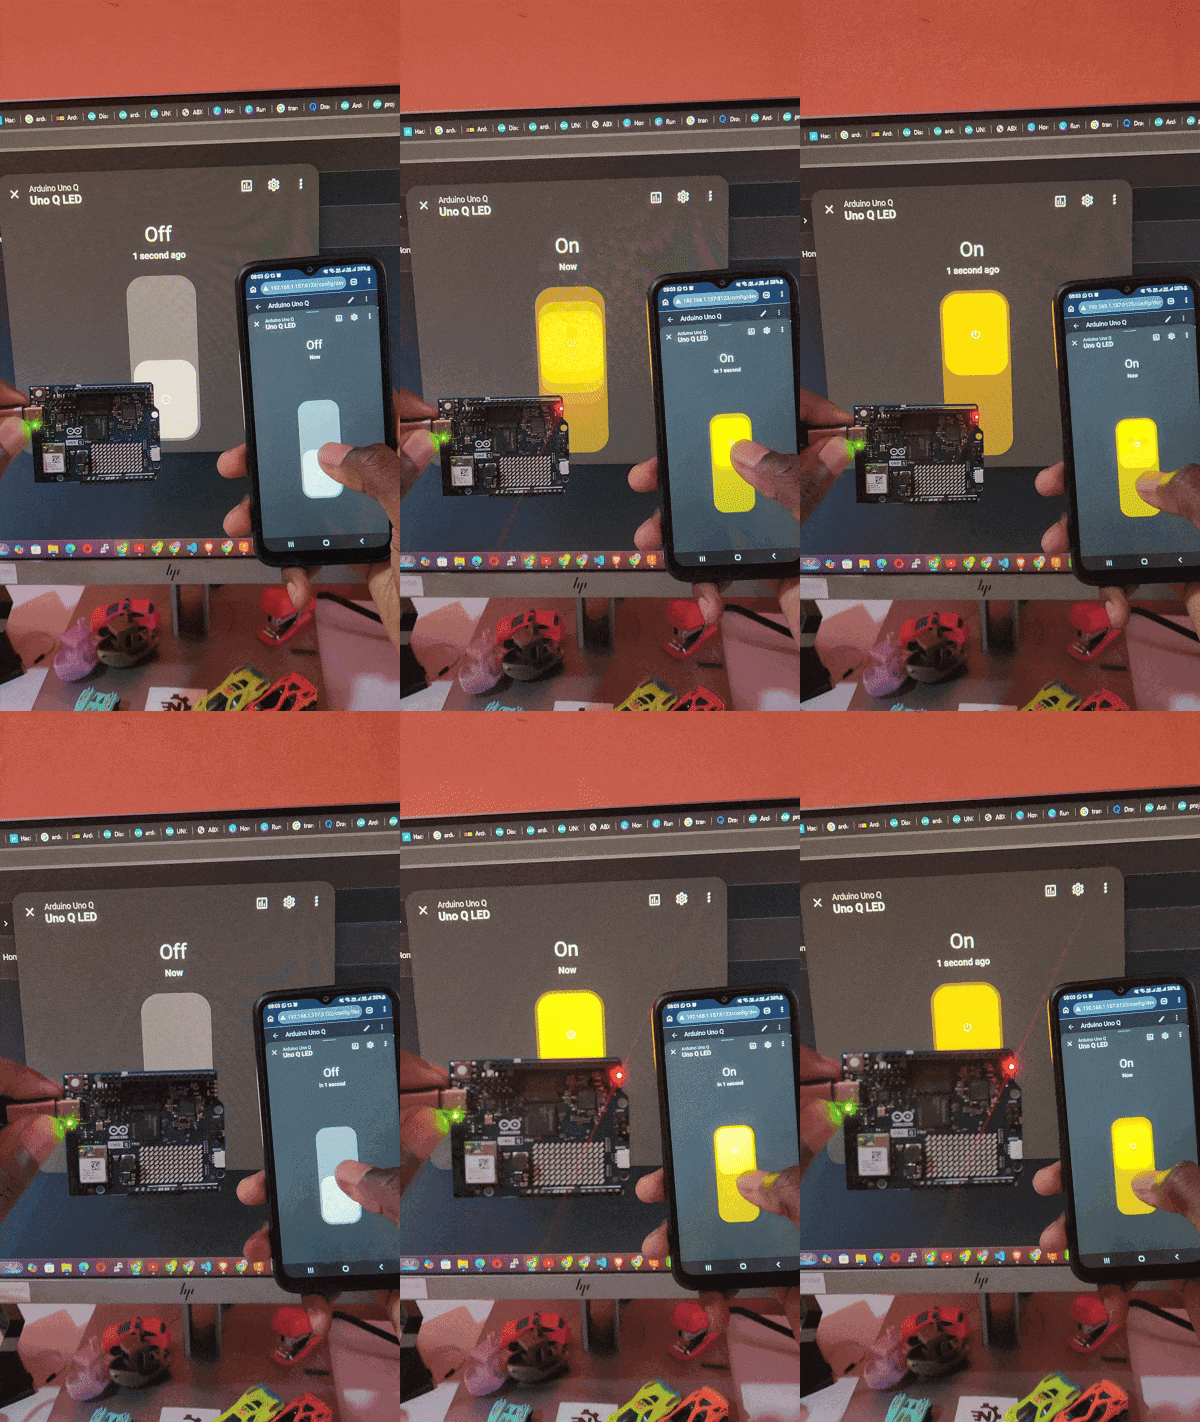
- A working example where toggling a switch in your Home Assistant dashboard turns the Uno Q's onboard LED on and off, with the entity appearing automatically, no manual dashboard configuration required
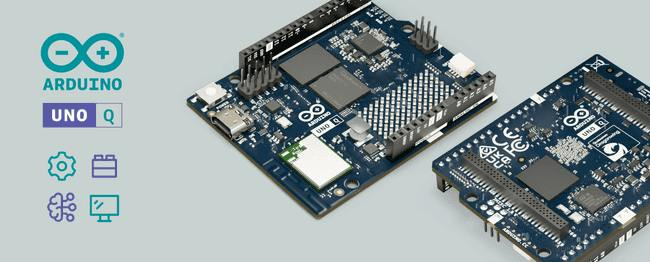
The Arduino Uno Q is a "dual-brain" board:
- A Qualcomm QRB2210 microprocessor (quad-core Cortex-A53) running a full Debian Linux environment
- An STM32U585 microcontroller (Cortex-M33) that behaves like a classic Arduino, it runs sketches and drives GPIO
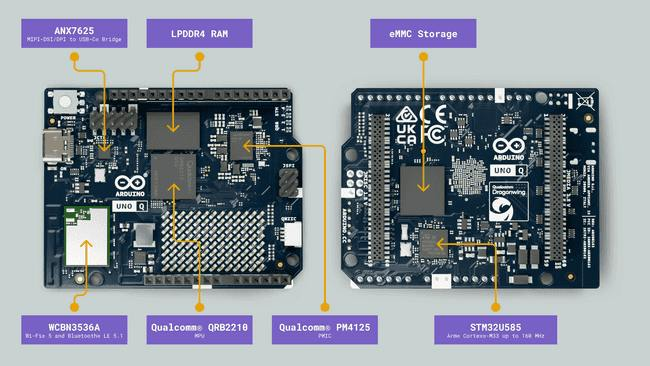
These two processors don't share memory or a network stack. They talk to each other over a purpose-built communication layer called the Router Bridge. That means:
- The Linux side has networking, Docker, Python, and everything you'd expect from a small Debian server. This is where Home Assistant and MQTT live.
- The MCU side has no network access of its own. It can only exchange data with the Linux side through the Bridge.
So the architecture for any physical I/O (sensors, LEDs, relays) controlled from Home Assistant looks like this:
Home Assistant <--> MQTT Broker <--> Python script (Linux side) <--> Router Bridge <--> Sketch (MCU side) <--> Physical pin
Understanding this chain up front will save you a lot of confusion later, most of the "why isn't this working" moments in this tutorial come back to which side of the board a piece of code is running on.
What You'll Need- Arduino Uno Q
- USB-C cable
- A computer on the same network to SSH in and view the Home Assistant dashboard
- Arduino App Lab installed on your computer
No extra components are required for the base tutorial, this version controls the Uno Q's onboard LED. At the end, I'll point you to how to swap it for an external LED on a GPIO pin if you want to extend it.
Step 1: Connect to the Uno QPower the board over USB-C and connect it to your network (Wi-Fi setup happens through App Lab on first boot, not covered here since it varies by App Lab version). Follow this official user manual to set that up.
SSH into the Linux side:
ssh arduino@<uno-q-ip-address>Once connected, confirm your username and IP address:
whoami
hostname -I
Note the IP address down, you'll need it repeatedly throughout this tutorial (Home Assistant's dashboard, and later, the MQTT broker connection).
[IMAGE: terminal screenshot of successful SSH connection]
Pitfall: Don't assume the IP is static. If it changes (DHCP lease renewal, router reboot), re-run hostname -I before troubleshooting anything else — a stale IP address is a surprisingly common cause of "nothing is working" moments.Step 2: Check for DockerThe Uno Q's Debian image ships with App Lab, which uses containers internally, so Docker itself is often already installed. Check before you install anything:
docker --versionIf you get a version string back, skip to Step 3.
If Docker isn't installed, install it with the official script:
curl -fsSL https://get.docker.com -o get-docker.sh && sudo sh get-docker.shPitfall: If you run the install script and see a warning that Docker already appears to be installed, cancel it (Ctrl+C). Re-running the install script over an existing Docker setup can break the existing installation instead of cleanly reinstalling it.
Add your user to the docker group so you don't need sudo for every command:
sudo usermod -aG docker $USERLog out and back into your SSH session for this to take effect.
Step 3: Install Home AssistantRun Home Assistant as a Docker container on the Linux side:
docker run -d
--name homeassistant
--privileged
--restart=unless-stopped
-e TZ=Africa/Nairobi
-v ~/homeassistant:/config
--network=host
ghcr.io/home-assistant/home-assistant:stable
Replace TZ with your own IANA timezone (e.g. America/New_York, Europe/London).
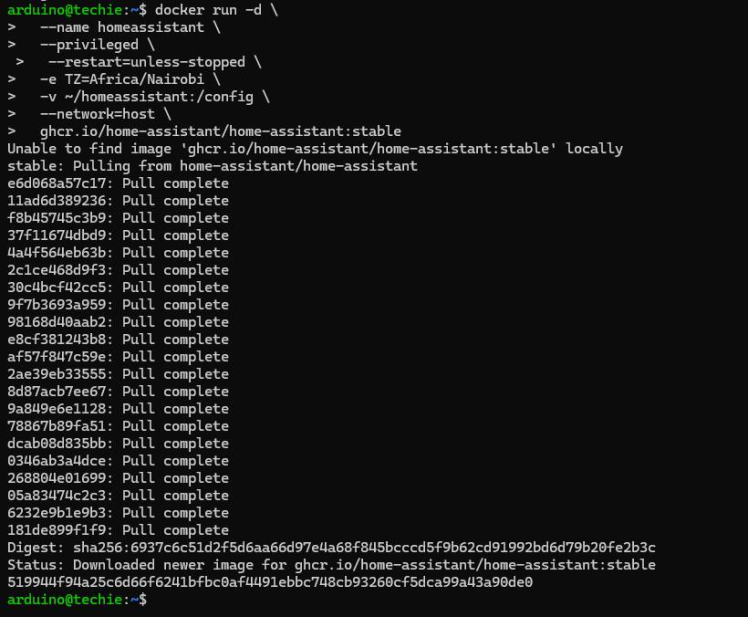
Give it a minute to start, then check it's running:
docker psOpen a browser on the same network and go to:
http://<uno-q-ip-address>:8123Complete the onboarding wizard.
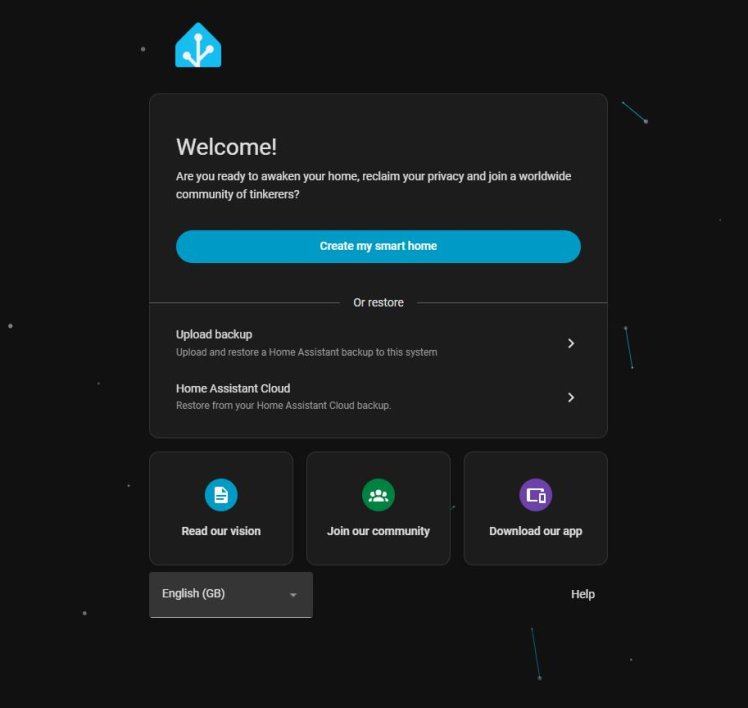
Quick sanity check - before wiring up any hardware, confirm HA itself works end to end using its built-in Demo integration:
Settings → Devices & Services → Add Integration → Demo
This adds fake lights, switches, and sensors so you can confirm the whole stack (frontend, backend) is healthy before adding any real complexity.
Step 4: Install an MQTT BrokerHome Assistant Container (unlike the full Home Assistant OS) has no bundled add-on store, so there's no built-in Mosquitto option. You run it yourself, as its own container:
docker run -d
--name mosquitto
--restart=unless-stopped
-p 1883:1883
-v ~/mosquitto/config:/mosquitto/config
-v ~/mosquitto/data:/mosquitto/data
eclipse-mosquitto
Pitfall — permission denied writing the config file: If~/mosquitto/configdidn't exist before this command ran, Docker auto-creates it owned by root, since the Docker daemon runs as root. When you then try to write a config file into that folder as your normal user, you'll getPermission denied. Fix it before going further:sudo chown -R $USER:$USER ~/mosquitto
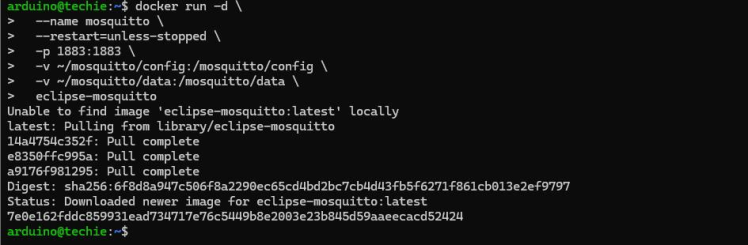
Now create the broker config:
cat > ~/mosquitto/config/mosquitto.conf << 'EOF'
listener 1883
allow_anonymous true
EOF
Pitfall — default config blocks connections: Mosquitto 2.x's out-of-the-box default rejects non-local/anonymous connections. Without thelistenerandallow_anonymouslines above, Home Assistant's MQTT integration will fail to connect even though the port is technically open. This is the single most common failure point in this whole setup.allow_anonymous trueis fine for local testing on a trusted network, but add username/password auth (mosquitto_passwd) before leaving this running long-term.
Restart the container so it picks up the config:
docker restart mosquittoCheck the logs — you want to see it open the listener cleanly:
docker logs mosquittoTest the broker directly, independent of Home Assistant:
docker exec -it mosquitto mosquitto_sub -h localhost -t test -v &
docker exec -it mosquitto mosquitto_pub -h localhost -t test -m "hello"
If test hello prints back, the broker is healthy.
Settings → Devices & Services → Add Integration → MQTT
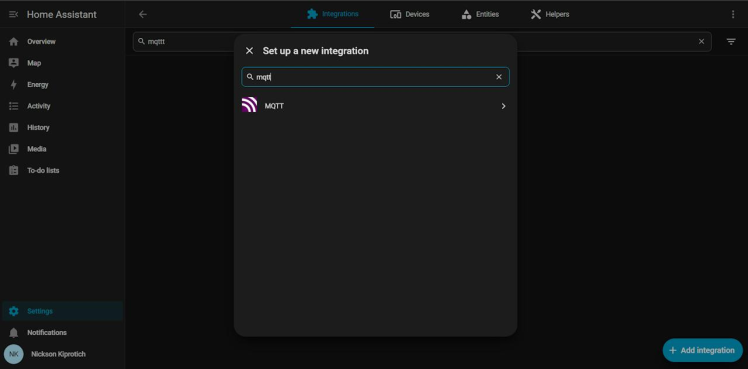
Enter:
- Broker:
localhost - Port:
1883 - Leave username/password blank (matching
allow_anonymous trueabove)
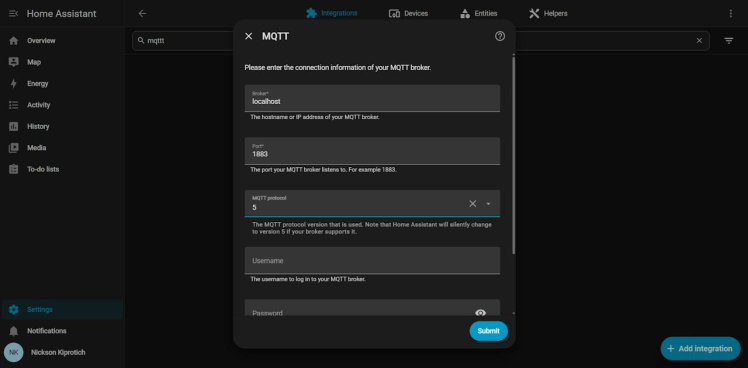
Submit. If you see "Please enter the connection information of your MQTT broker" even with the fields filled in, that's HA telling you it couldn't connect — go back and recheck Step 4 (config file content, container running, docker logs mosquitto).
This is where the two sides of the board actually get bridged together.
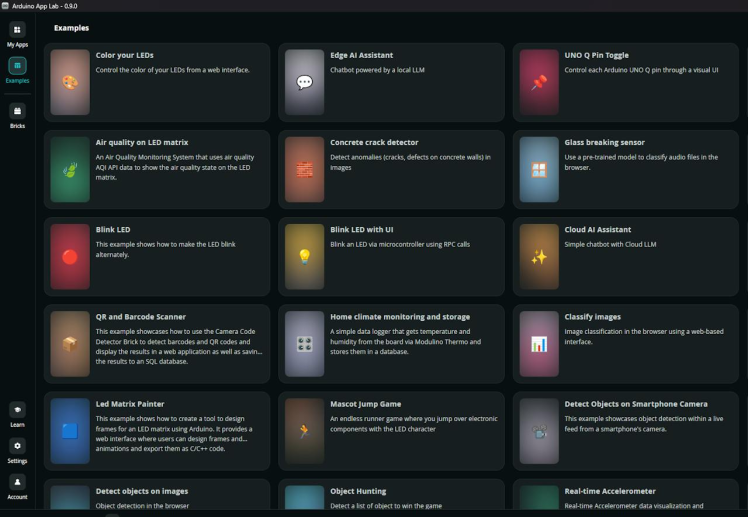
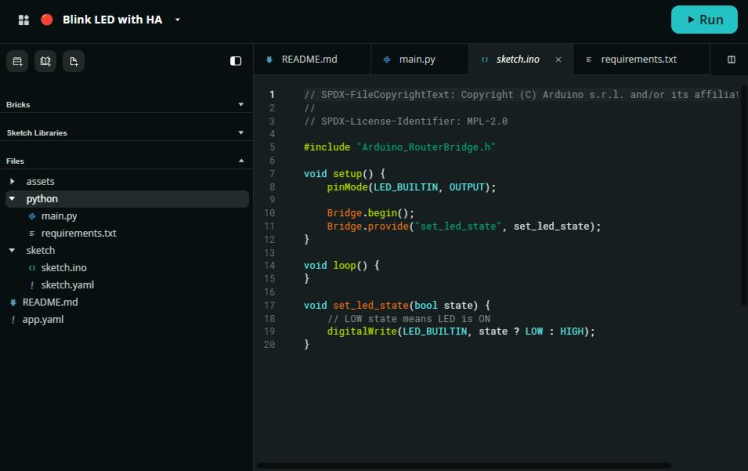
This runs on the STM32 and exposes a function Python can call remotely:
// SPDX-FileCopyrightText: Copyright (C) Arduino s.r.l. and/or its affiliated companies
//
// SPDX-License-Identifier: MPL-2.0

#include "Arduino_RouterBridge.h"

void setup() {
pinMode(LED_BUILTIN, OUTPUT);

Bridge.begin();
Bridge.provide("set_led_state", set_led_state);
}

void loop() {
}

void set_led_state(bool state) {
// LOW state means LED is ON
digitalWrite(LED_BUILTIN, state ? LOW : HIGH);
}
Bridge.provide(...) registers set_led_state as a function the Linux/Python side can call by name, this is the entire mechanism that lets Home Assistant reach across to physical hardware.
This connects to MQTT, listens for commands from Home Assistant, and forwards them to the sketch over the Bridge
# SPDX-FileCopyrightText: Copyright (C) Arduino s.r.l. and/or its affiliated companies
#
# SPDX-License-Identifier: MPL-2.0

import json
import time
from arduino.app_utils import *
import paho.mqtt.client as mqtt

MQTT_BROKER = "192.168.x.x"   # the Uno Q's own LAN IP — see pitfall below
MQTT_PORT = 1883
COMMAND_TOPIC = "home/uno_q/led/set"
STATE_TOPIC = "home/uno_q/led/state"
DISCOVERY_TOPIC = "homeassistant/switch/uno_q_led/config"

led_state = False


def publish_state(client):
client.publish(STATE_TOPIC, "ON" if led_state else "OFF", retain=True)


def on_connect(client, userdata, flags, rc):
print("Connected to MQTT broker, rc =", rc)
client.subscribe(COMMAND_TOPIC)

discovery_payload = {
"name": "Uno Q LED",
"command_topic": COMMAND_TOPIC,
"state_topic": STATE_TOPIC,
"payload_on": "ON",
"payload_off": "OFF",
"unique_id": "uno_q_led_01",
"device": {"identifiers": ["uno_q_01"], "name": "Arduino Uno Q"},
}
client.publish(DISCOVERY_TOPIC, json.dumps(discovery_payload), retain=True)
publish_state(client)


def on_message(client, userdata, msg):
global led_state
payload = msg.payload.decode().strip().upper()
led_state = payload == "ON"
Bridge.call("set_led_state", led_state)
publish_state(client)


client = mqtt.Client()
client.on_connect = on_connect
client.on_message = on_message
client.connect(MQTT_BROKER, MQTT_PORT, 60)
client.loop_start()


def loop():
time.sleep(1)


App.run(user_loop=loop)App Lab installs Python dependencies automatically from a requirements.txt in the project's python/ folder:
paho-mqtt<2.0Open the file and confirm it's exactly one clean line: paho-mqtt<2.0.
Pitfall — pin below v2: Newer paho-mqtt (2.x) changed its callback function signatures. The on_connect/on_message signatures used above are the classic (v1) style. Pinning <2.0 avoids a TypeError crash on connect.
Pitfall — localhost doesn't work here, even though it worked for Home Assistant: This is the one that will cost you the most time if you don't know it going in. Home Assistant's container runs with --network=host, so localhost inside it really does mean "the Uno Q itself." App Lab's Python app runs in a different container, on its own isolated Docker network — localhost inside it means "this container, " which has nothing listening on port 1883. You'll see:
ConnectionRefusedError: [Errno 111] Connection refusedThe fix is to point MQTT_BROKER at the board's actual LAN IP address (from hostname -I) instead of localhost. Since Mosquitto's container publishes port 1883 onto the host, connecting to the host's real IP reaches it from any container.
Pitfall — malformed requirements.txt: Make sure this file contains only the package spec, on its own line. If you copy-paste a shell command into it by mistake (e.g.Step 7: Run and Verifyecho "paho-mqtt<2.0" > requirements.txtending up as literal file content instead of being run in the terminal), App Lab's dependency installer will fail to parse it with an error like:error: Couldn't parse requirement in `python/requirements.txt` at position 0Open the file and confirm it's exactly one clean line:paho-mqtt<2.0.Pitfall — pin below v2: Newerpaho-mqtt(2.x) changed its callback function signatures. Theon_connect/on_messagesignatures used above are the classic (v1) style. Pinning<2.0avoids aTypeErrorcrash on connect.Pitfall —localhostdoesn't work here, even though it worked for Home Assistant: This is the one that will cost you the most time if you don't know it going in. Home Assistant's container runs with--network=host, solocalhostinside it really does mean "the Uno Q itself." App Lab's Python app runs in a different container, on its own isolated Docker network —localhostinside it means "this container, " which has nothing listening on port 1883. You'll see:ConnectionRefusedError: [Errno 111] Connection refusedThe fix is to pointMQTT_BROKERat the board's actual LAN IP address (fromhostname -I) instead oflocalhost. Since Mosquitto's container publishes port 1883 onto the host, connecting to the host's real IP reaches it from any container.
Start the app in App Lab. Watch the console — you should see the sketch compile and flash to the STM32, followed by the Python container building and starting.
Check the Python container's own logs to confirm the MQTT connection succeeded:
docker logs -f <your-app-name>-main-1Look for:
Connected to MQTT broker, rc = 0Now check Home Assistant:
Settings → Devices & Services → MQTT
A device called "Arduino Uno Q" with a "Uno Q LED" switch entity should already be there, you didn't create it manually.
Toggle it. The onboard LED should respond within a second or two, and the toggle should reflect the LED's real state (not just an optimistic guess).
Why the Entity Appeared AutomaticallyThis is worth understanding rather than just accepting as magic. It's the same mechanism you'll reuse for every future sensor or actuator you add.
Home Assistant's MQTT integration always subscribes to homeassistant/# in the background. Any retained JSON message published to homeassistant/<component>/<object_id>/config is treated as an instruction: "create this entity." Our script's discovery_payload told Home Assistant it was a switch, which topic to publish commands to, which topic to read state from, and which device to group it under. HA parsed that and built the entity, this is called MQTT Discovery, and it's the standard pattern most MQTT-based smart home devices use.
Publishing with retain=True means Mosquitto keeps that config message forever (until explicitly cleared), so the entity survives Home Assistant restarts without your script needing to re-announce it every time.
Separately, Home Assistant's default dashboard auto-adds any newly registered entity as a card. That's a general HA behavior, not something specific to MQTT.
Troubleshooting ChecklistIf something isn't working, check these in order: they cover essentially every failure mode from building this:
docker ps— arehomeassistantandmosquittobothUp?docker logs mosquitto— did it open the 1883 listener cleanly, or complain about config?cat ~/mosquitto/config/mosquitto.conf— does it actually containlistener 1883andallow_anonymous true?docker logs <app-name>-main-1— does the Python side showConnected to MQTT broker, rc = 0, or a traceback?- If it's
ConnectionRefusedErroronlocalhost— you're hitting the container-networking pitfall above; use the board's real IP instead. sudo lsof -i :1883— is anything else already bound to that port, conflicting with the Mosquitto container?
From here, the same Bridge → MQTT → Home Assistant pattern extends to real sensors. A natural next step is wiring a DHT22 temperature/humidity sensor into the MCU side and publishing readings the same way. With one known quirk worth flagging in advance: standard DHT libraries are unreliable on the Uno Q's MCU, so use the DHTesp library instead, or an I2C sensor like the BME280 for a more stable alternative.
That'll be a good follow-up tutorial, for now, you've got a fully working, auto-discovered, bidirectional bridge between Home Assistant and the Uno Q's hardware.
That's the full loop, from a blank SSH prompt to a Home Assistant switch controlling real hardware on the Uno Q's own board. If you try this out, I'd genuinely like to know how it went. Drop a comment and let me know if it worked for you, and if you hit any snags along the way I didn't cover, I'll do my best to help you sort them out. And if this saved you the trial-and-error I went through, a like goes a long way in helping more people building on the Uno Q find it.
Credits
Related products





Leave your feedback...