

Raspberry Pi Force Gauge and Weight Scale Using Hexabitz

Made by Aula_Jazmati
About the project
Learn how to build a digital weight scale and force gauge with load cell sensor (H26R0x) and Raspberry Pi.
Project info
Difficulty: Difficult
Platforms: DFRobot, Raspberry Pi, STMicroelectronics
Estimated time: 1 hour
License: MIT license (MIT)
Items used in this project
Hardware components

Story
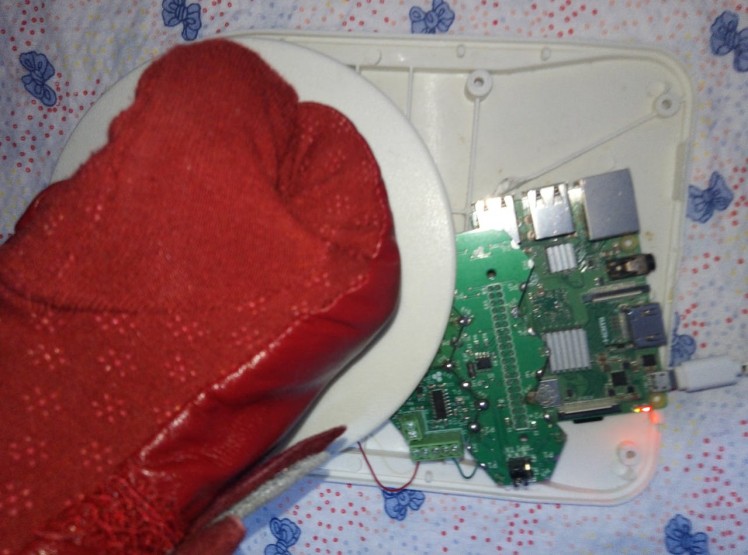
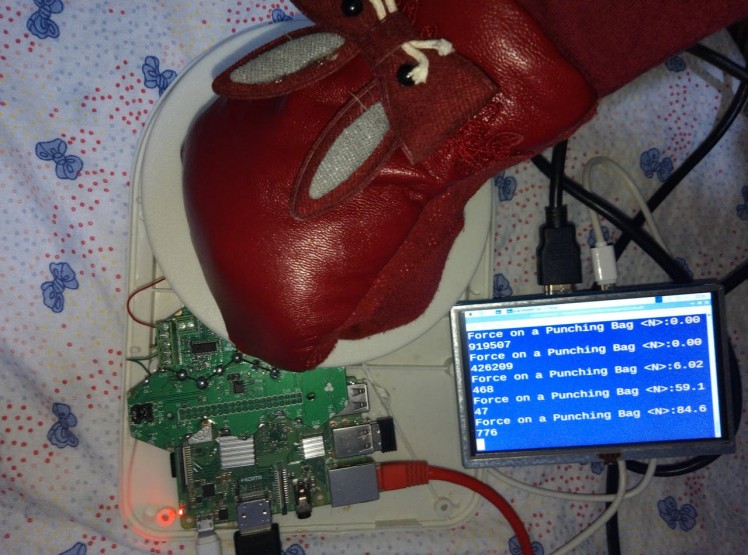
This project uses Hexabitz modules to measuring the boxing punch force. It’s definitely an effective way to learn about load cell sensor, Raspberry Pi interface module & Hexabitz development C++ library.
The force of an object is a product of that object's acceleration and mass. English physicist Isaac Newton introduced this fundamental identity of classical mechanics with his second law of motion, F = ma. F represents force; m represents mass; and the variable a represents acceleration. A fighter's fist or a boxer's glove when it reaches a punching bag will have a force dependent on how fast the fist or glove is speeding up and the mass of the fist or glove and arm. The unit of force is typically the Newton (N), which is one kilogram meter per second squared.
Punch power isn’t everything in boxing, supreme attacking skill, speed and defensive maneuvers are the keys to victory. However, ask any boxer and they’ll tell you that they want more punch power ?? ?

1-Raspberry Pi Interface (HF1R0x)
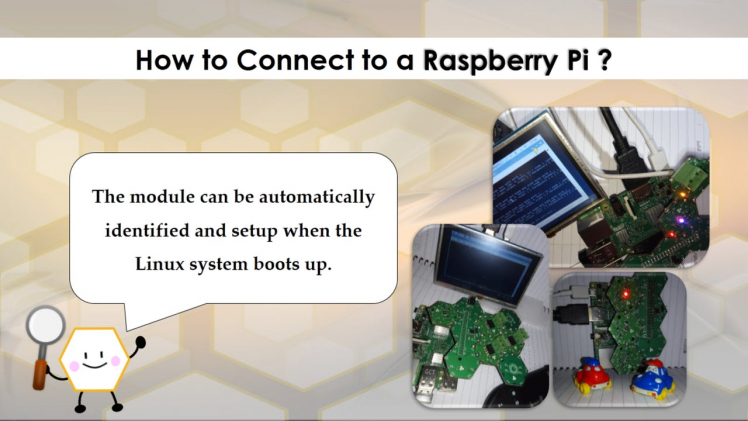
HF1R0x is Hexabitz Raspberry Pi interface module. It interfaces seamlessly to Raspberry Pi 3B/3B+/4B single-board computers and enables you to connect and control your favorite Hexabitz modules from the Raspberry Pi operating system and build your own Raspberry Pi Hat.
You can use C++ Hexabitz Interface library on Raspbian, Ubuntu or other compatible Linux distributions from within your C++ or Python applications.
How to Connect to a Raspberry Pi Single-Board Computer?“Part 1”2-Load Cell Sensor (H26R0x)
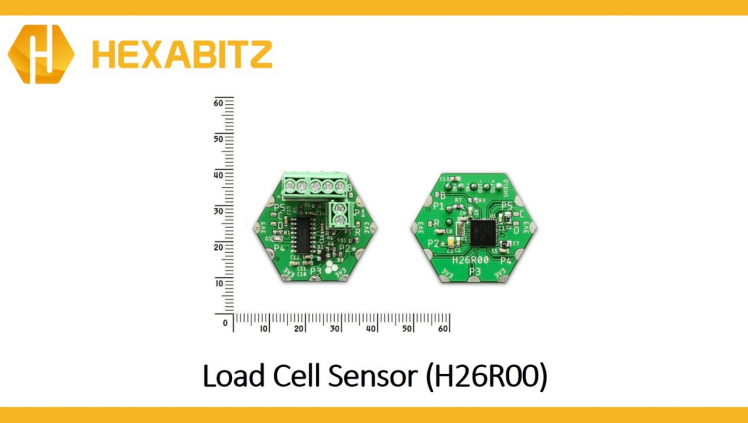
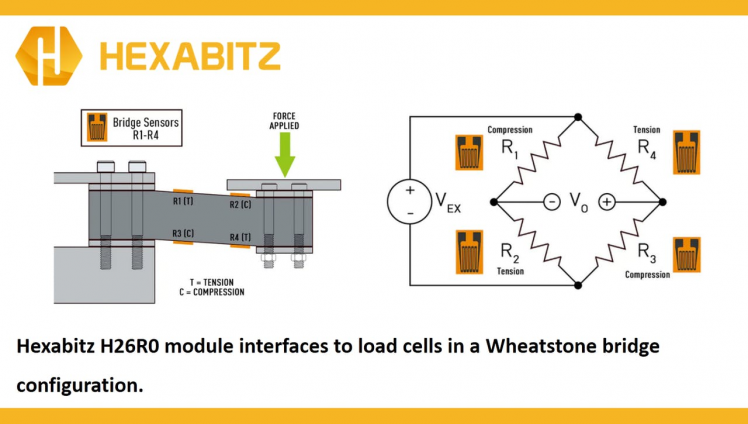
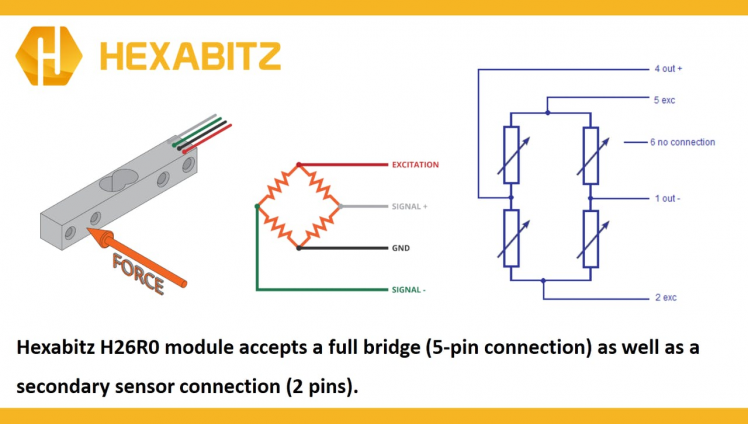
H26R0x is a load cell (strain gauge) sensor interface module based on Avia Semiconductor HX711 Wheatstone bridge ADC and STM32F0 MCU. This module is a precision 24-bit analog-to-digital converter (ADC) designed for weigh scales and industrial control applications. It interfaces to load cells (strain gauges) in a Wheatstone bridge configuration. The module accepts a full bridge (5-pin connection) as well as a secondary sensor connection (2 pins).
1 / 2
To use a load cell module, first you need to calibrate it. To do this add the following APIs to your Hexabitz load cell module code.
Calibration(20, 1.9242, 0.0094);
ZeroCal(1);
3-Load Cell
A load cell is a transducer which converts force into a measurable electrical output. Although there are many varieties of force sensors, strain gauge load cells are the most commonly used type.
A load cell consists of a metal core and a set of electrical resistances that transform when a force is applied to it. But after the force is removed, it returns to its original state. The reversibility of this material determines the quality and accuracy of the load cell. The equivalent electrical circuit of a load cell is as follows:
Our load cell has 4 wires:
? Red for Excitation+
⚫ Black for Excitation-
? Yellow for Output+
? Green for Output-

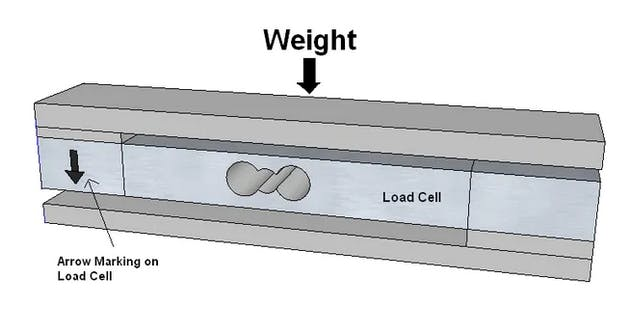
Be careful about the side of the load cell when you’re putting a weigh on it. Usually, there is an arrow on the module that shows the force direction. With the help of this arrow, you can place the weight and the load cell correctly.
Notes:
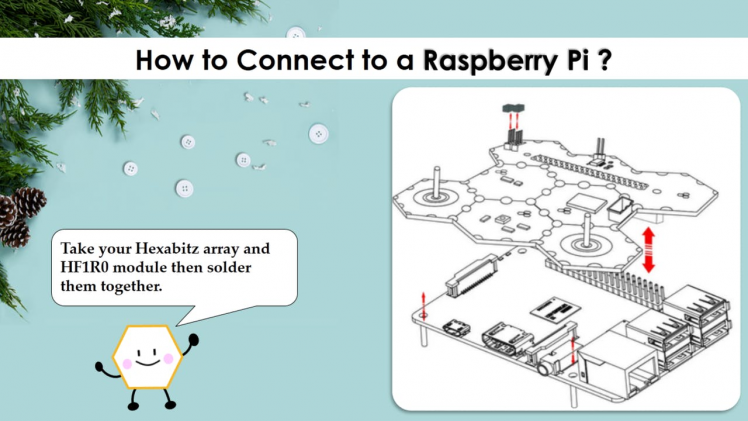
- Connect the H26R0 module to HF1R0 module.
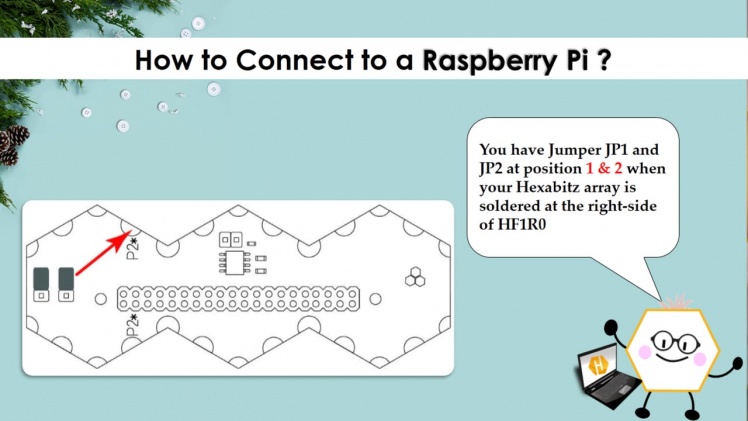
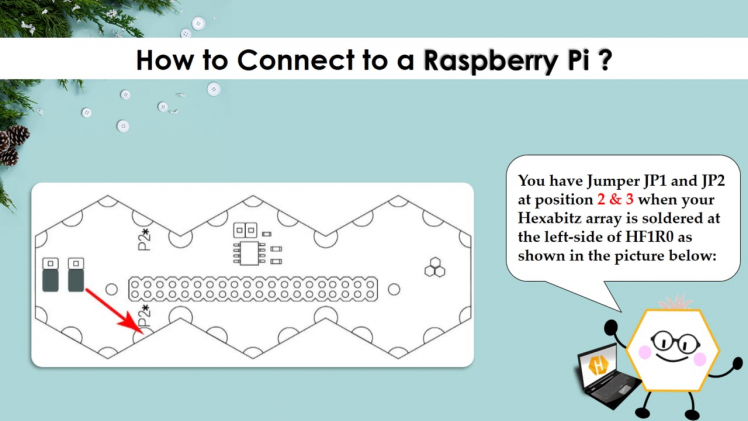
- Make sure to connect your Hexabitz module at the right spot or left spot then put the Jumper JP1 and JP2 at right position.
1 / 3
- Be sure to download the firmware on the module before soldering.
https://hexabitz.com/docs/how-to/update-module-firmware/
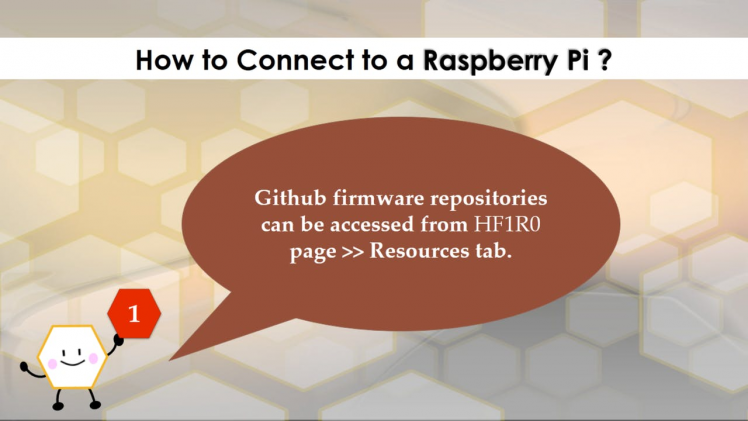
Step 2: Software Design- Install Raspberry Pi OS using Raspberry Pi Imager
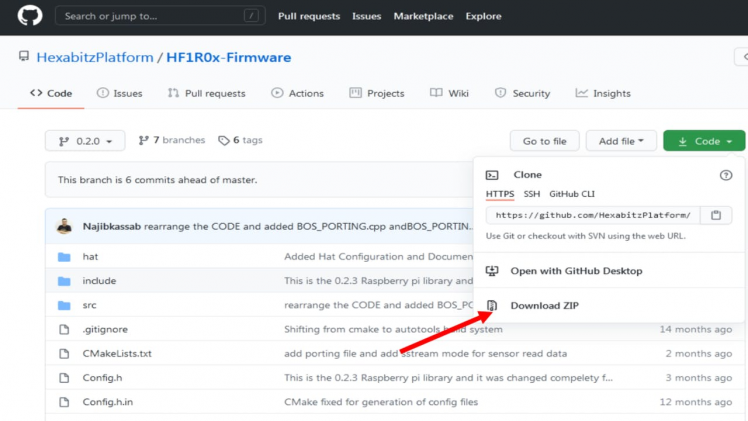
- Github firmware repositories can be accessed from HF1R0 page >> Resources tab.
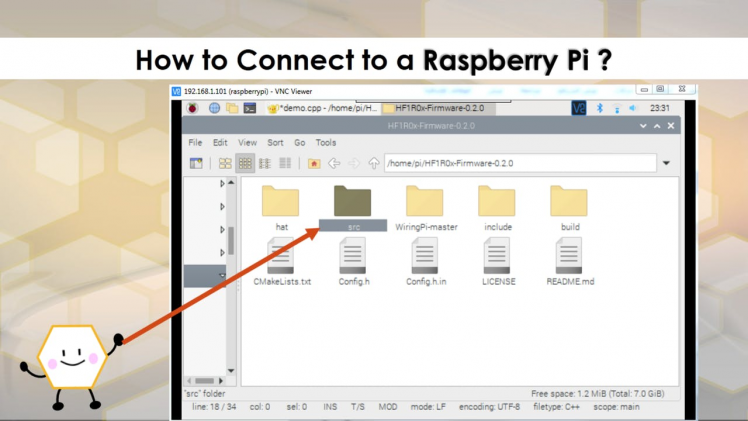
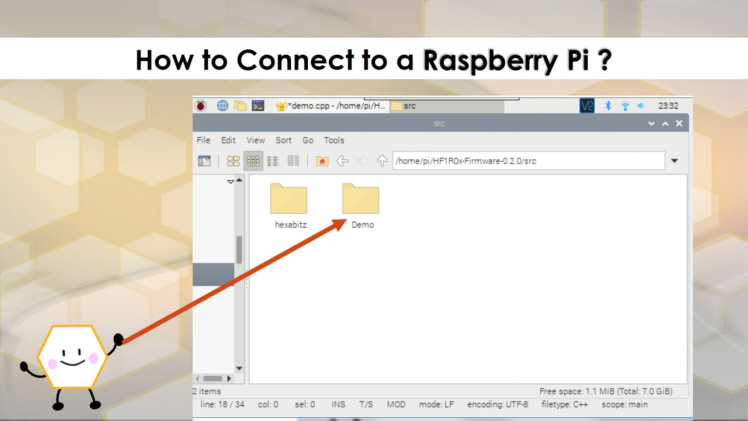
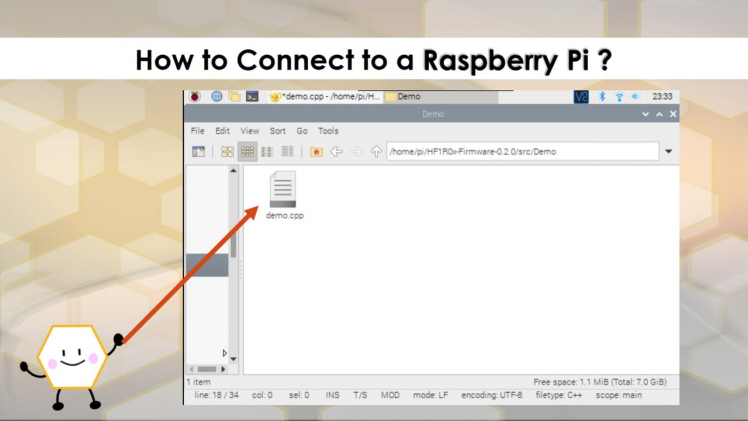
- Your application code should be mainly written in Demo folder for easy portability to future revisions.
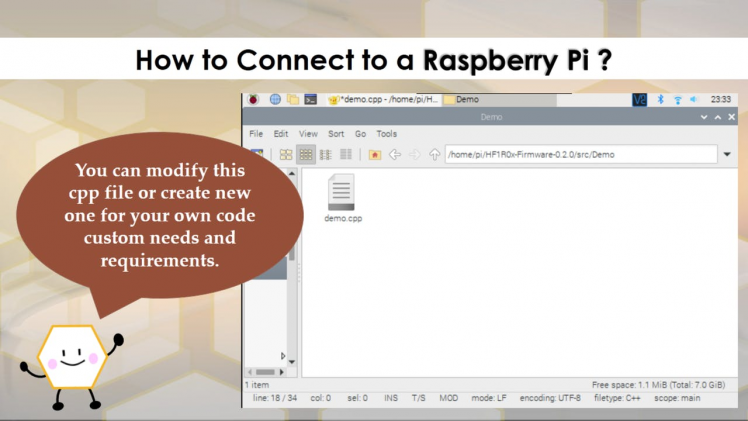
- You can modify this cpp file or create new one for your own code custom needs and requirements.
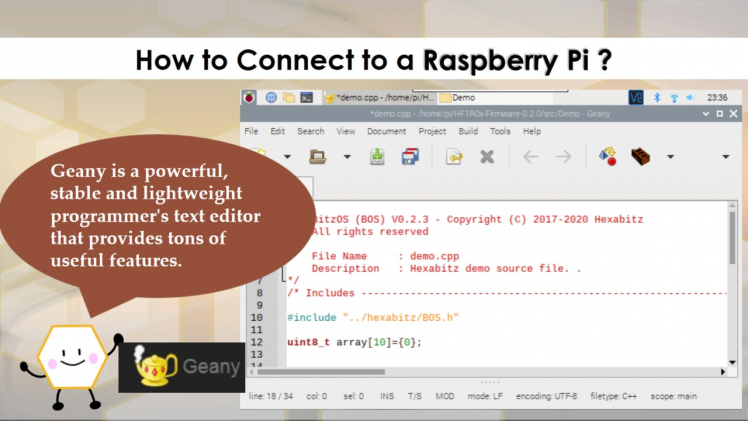
- You can use a Geany to modify the codes. Geany is a powerful, stable and lightweight programmer's text editor that provides tons of useful features.
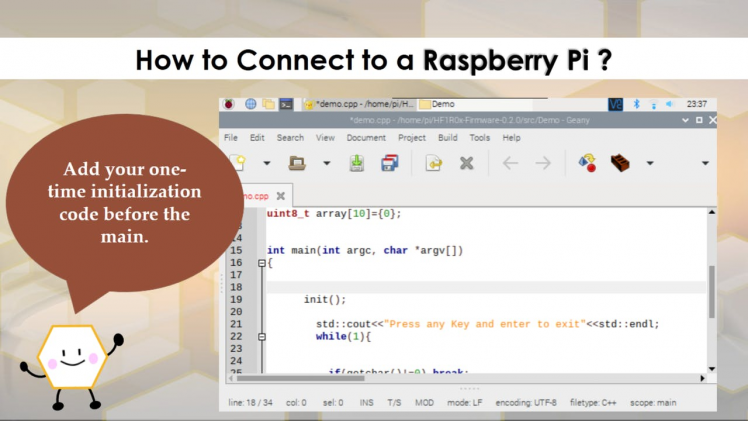
- Add your one-time initialization code before the main ?
1 / 6

1 / 4

1 / 5

sudo apt-get update
sudo apt-get upgrade
sudo apt-get install build-essential
sudo apt-get install cmake
cd ~
git clone https://github.com/HexabitzPlatform/HF1R0x-Firmware.git
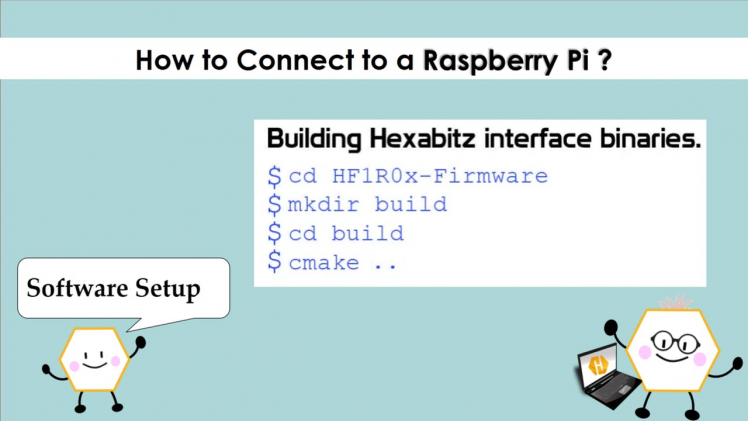
cd HF1R0x-Firmware
git checkout master
rm -rf build
mkdir build
cd build
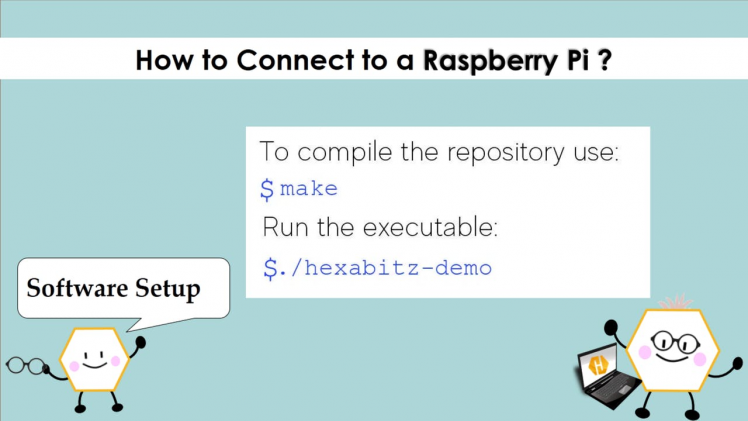
cmake ..How to compile the repository?
makeHow to run the executable?
./hexabitz-demoCode Explanation ?️ ??
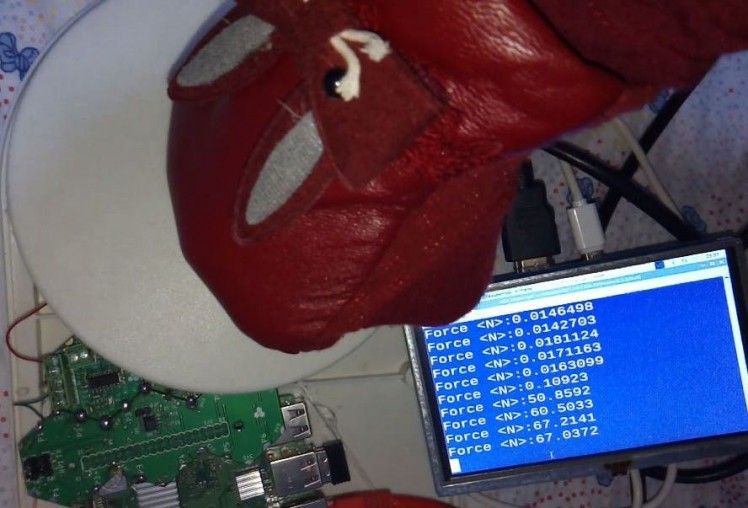
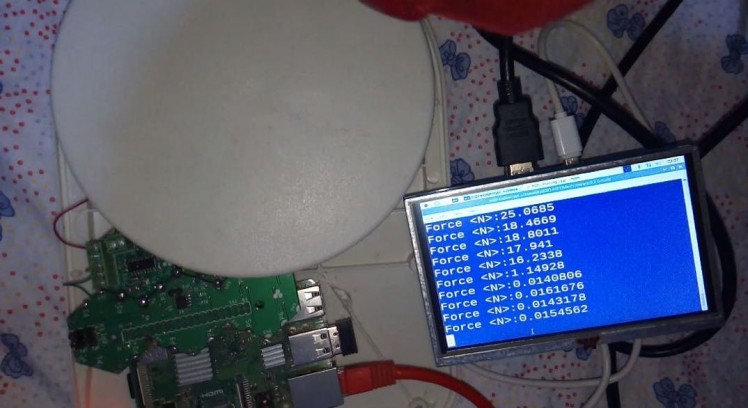
We use load cell module to measure the force in newtons. To do this, you can upload the following code after applying a proper calibration_factor on your Hexabitz module, and see the result by applying different forces to the load cell.
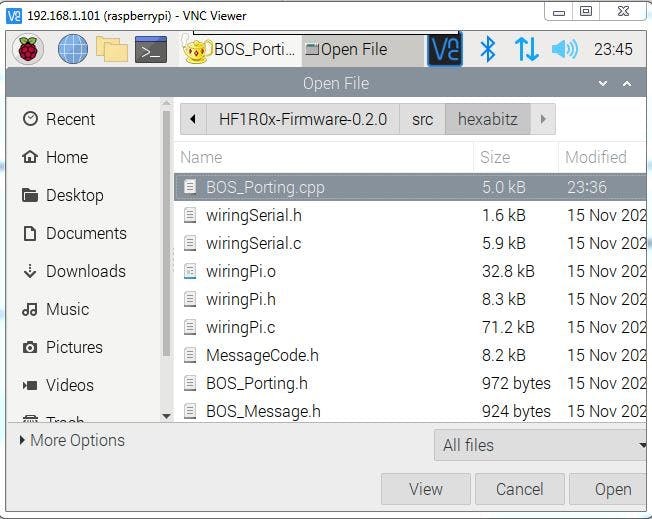
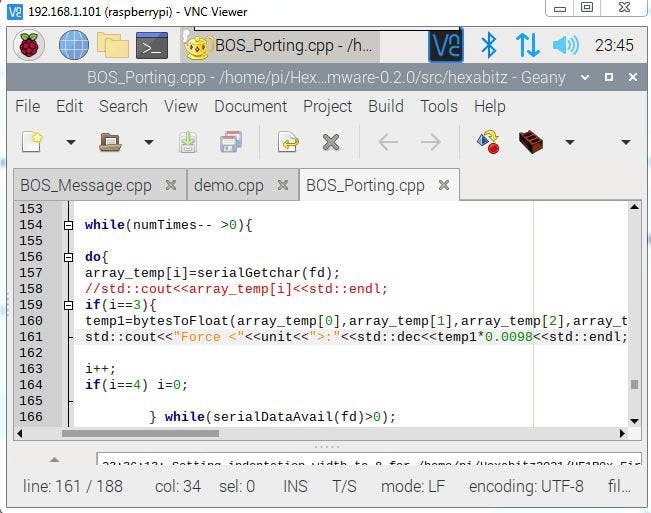
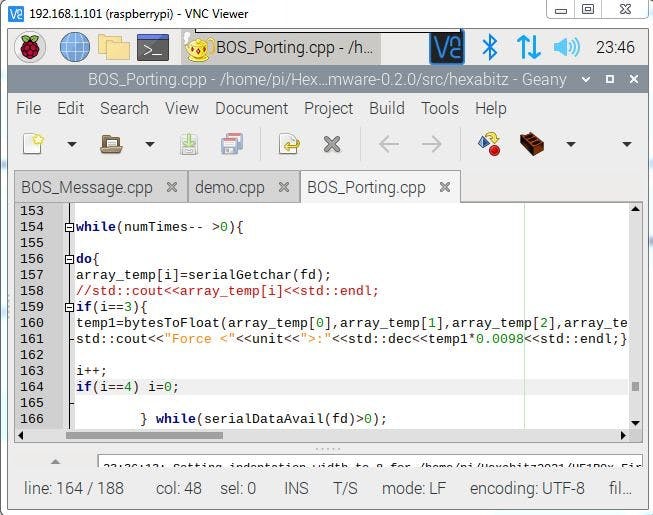
- We use Receive Weight function in BOS_Porting.cpp in HF1R0x-Firmware/src/hexabitz folder.
1 / 4
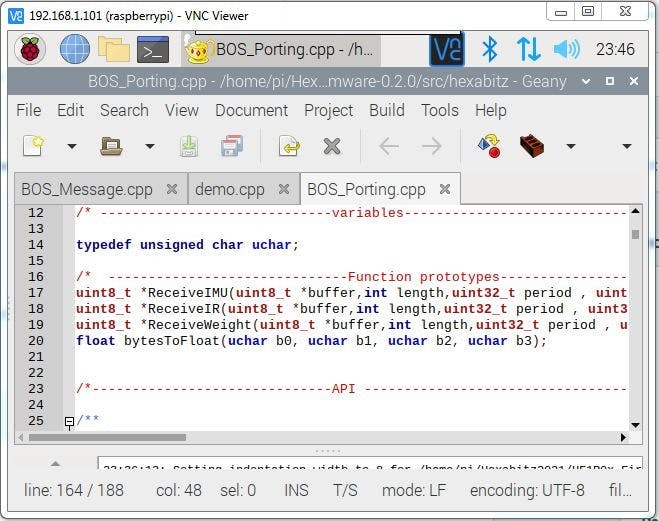
- You can add load cell sensor module message ? inside the main and Initialize the parameters.
- The load cell module message in the following format:
CODE_H26R0_STREAM_PORT_GRAM, channel, port, module, period (4 bytes), timeout (4 bytes).- You can send Messages using the following APIs.
SendMessageToModule (uint8_t dst, uint16_t code, uint16_t numberOfParams)- You can using it to weigh objects in gram, kilogram, pounds and ounces or convert the value to any units like our project (newton).
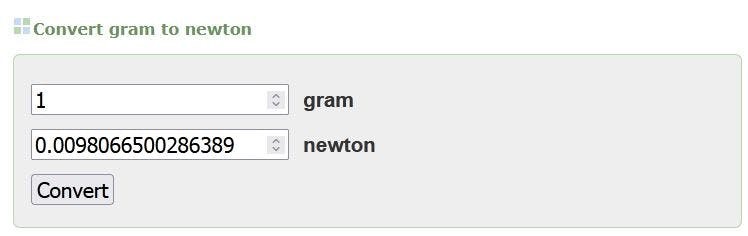
- One kilogram-force is therefore equal to 9.80665 N.
Send Message To Loadcell Module

Send Message To Loadcell Module
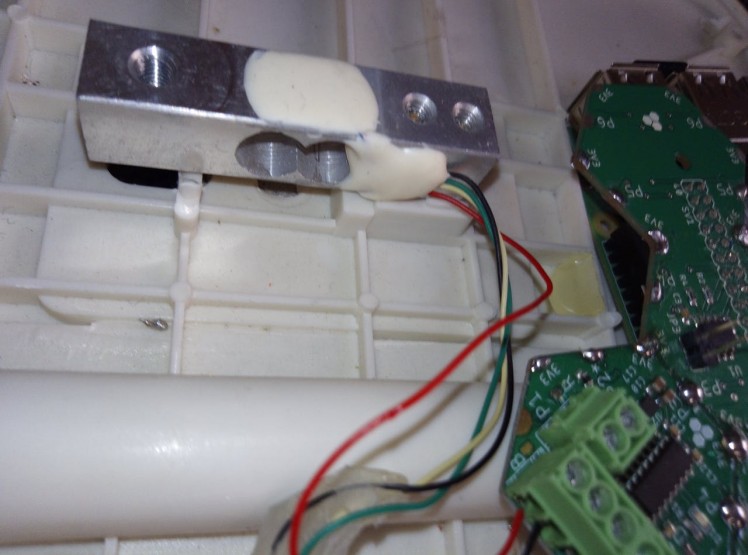
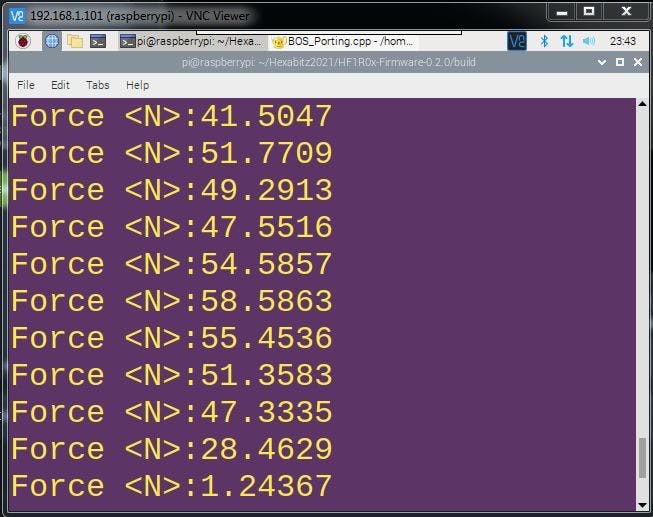
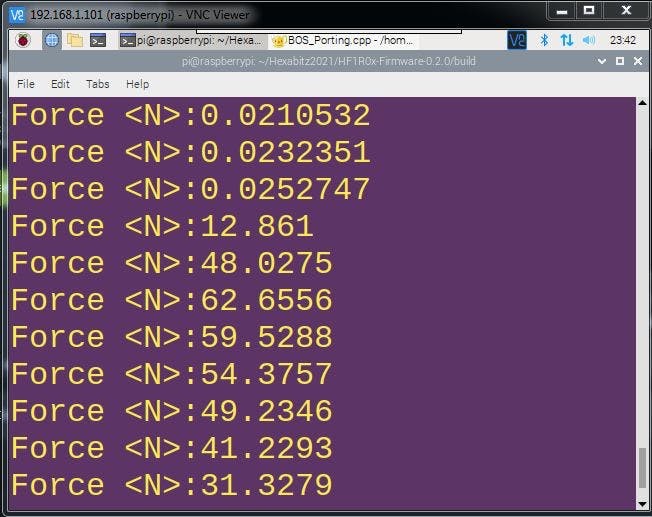
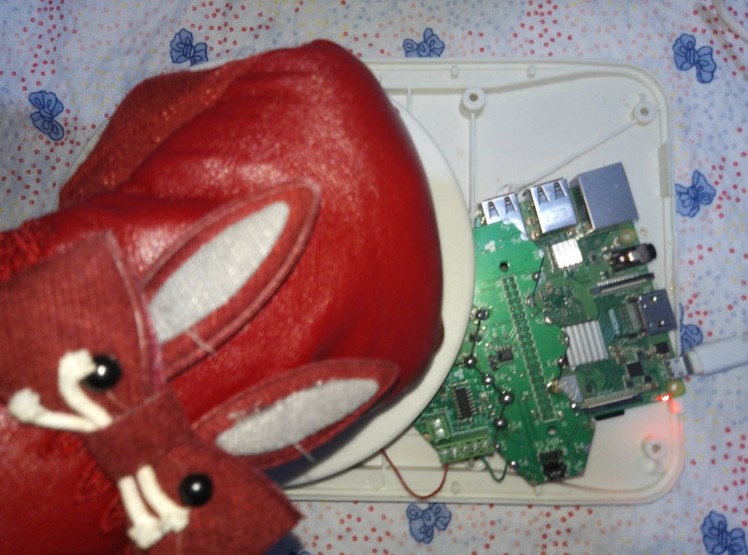
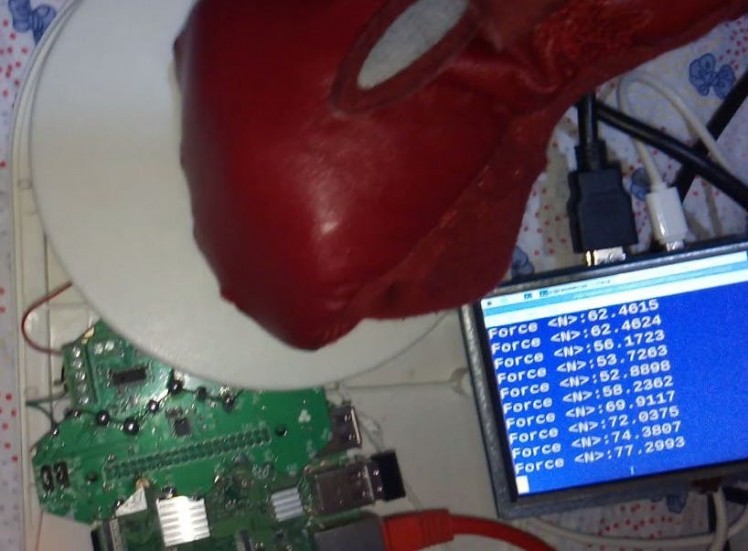
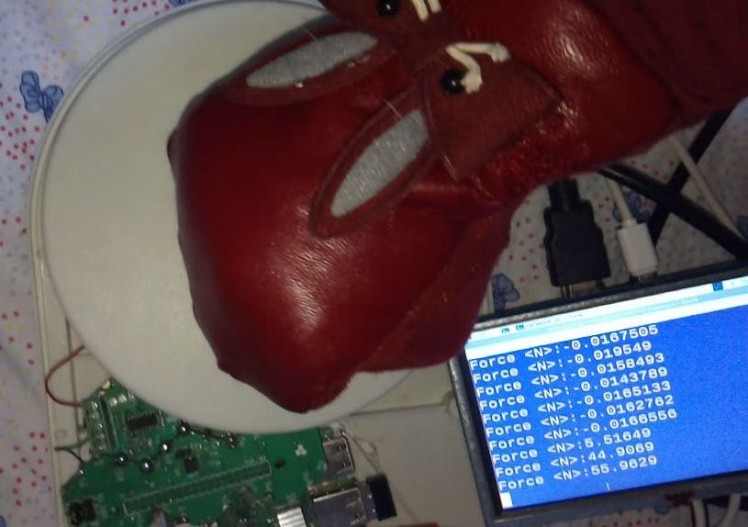
Step 3: Test the System ??Place the load cell on a flat surface or stuff the system into the punching bag and fixing it. Then apply a force to it with your hand. You can see when you apply more force to load the cell, a larger number is displayed.
You can test the system and see the result by applying different forces to the load cell ?
1 / 2
1 / 4

1 / 4
Please feel free to leave a comment here if you have any questions or concerns regarding this project ?
? References:
Schematics, diagrams and documents
Code
Credits
Related products


Leave your feedback...