
Photostax - Digital Epaper Photo Frame

Made by sridhar_rajagopal / Displays / Holidays / Kids & Family / Photos & Video
About the project
Make your own minimalist and modern photo frame with a tri-color ePaper Display
Project info
Difficulty: Easy
Platforms: Raspberry Pi, Python
Estimated time: 1 hour
License: GNU General Public License, version 3 or later (GPL3+)
Items used in this project
Hardware components

Story
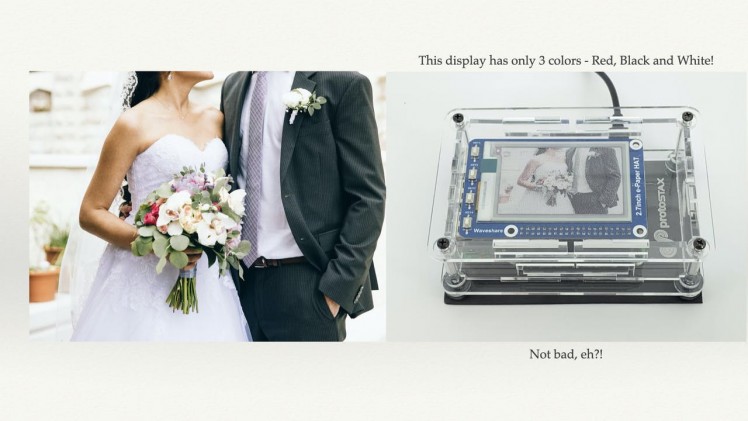
Display regular photographs on a tri-color ePaper Display. You can get pretty good image quality and color variation by using a method called Floyd-Steinberg dithering, even with only three colors (red, white and black) on the ePaper Display!
I automated the image processing so that you can simply place regular image files in a folder, and the program automatically picks the next image to display and performs the necessary image processing required (on the fly) to render it on the ePaper Display. Here are some results!
1 / 2 • Result example 2

Result example 2

Result example 1
Here's a short video on it:
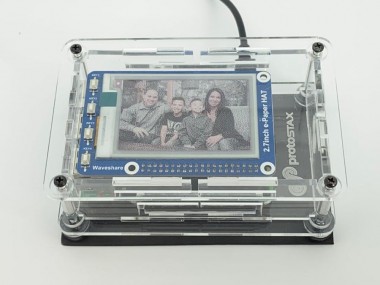
PhotoStax - Digital ePaper Photo FrameRead on to get more details!
A little background on ePaper DisplaysI love the ePaper Display for its austere simplicity and elegance. The display persists even after the power is shutdown. The ePaper display can create highly detailed images with the contrast ratio and readability of printed material. The mechanics of the ePaper display are also quite fascinating in how the colors of the various pixels are manipulated to display the final image.
The ePaper Display I use is a tricolor one from Waveshare that can display white, black and red. I find the little pop of red quite useful in highlighting and providing some visual contrast and relief, as I have done in my International Space Station Tracker, Word Clock, and Weather Station projects. The tricolor display does not support partial updates, and as a result takes about 16 seconds for screen refresh - it is therefore suitable for projects where the display does not change that often. I find these challenges quite refreshing to overcome and am always thinking of new ways to harness the display.
The Waveshare ePaper library Display method takes in two Python PIL images as arguments - one to render the black pixels (all non-white pixels are rendered as black), and the other image to figure out which pixels are red (all non-white pixels in this second image are then rendered as red). It starts by flipping all the pixels to the "white" position, and then starts to flip all the black pixels to the "black" position from the first image. It then proceeds to process the second image, and flip all the non-white pixels there to the "red" position on the physical display to get the final image.
"Black" pixels
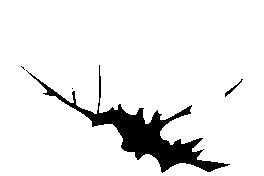
"Black" pixels
"Red" pixels to display
"Red" pixels to display
Final images rendered on ePaper Display

Final images rendered on ePaper Display
The Floyd-Steinberg Dithering AlgorithmThe Floyd–Steinberg Dithering algorithm was first published in 1976 by Robert W. Floyd and Louis Steinberg. It is commonly used by image manipulation software, for example when an image is converted into GIF format that is restricted to a maximum of 256 colors. Of course, our ePaper display is far more restricted than that! 😊
Here is more information on Wikipedia on the algorithm and how it works.
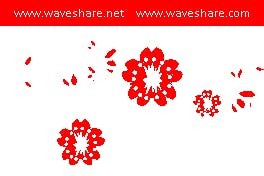
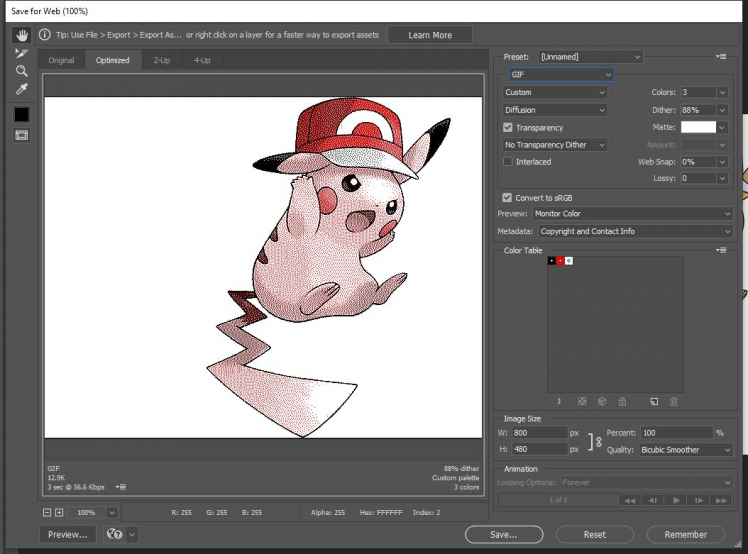
The Waveshare Wiki talks about the Floyd-Steinberg algorithm and how it can be used to create a tricolor image for the ePaper display using Adobe Photoshop, a photoshop color table that they provide, as well as instructions. (See https://www.waveshare.com/wiki/E-Paper_Floyd-Steinberg)
In their example, they use a simple illustrated image.
The results were not bad!! I wondered how the results would look with a photograph that has a lot more detail and colors. Additionally I also wanted to see if I could use some open source tools, preferably command-line vs. using Adobe Photoshop, and something available for the Raspberry Pi.
I also wanted to try to automate the process to have it run on the Raspberry Pi, by taking your vanilla image files and doing the necessary conversions on the fly: just plonk down some regular image files (JPG) into a folder, and let the program do the rest to fully automate the process.
Using a tool with command line options, at the very least I could execute a Bash script from Python to do the needful conversion and then continue -- If I could find a Python library to do the same, even better!
I was surprised when I couldn't find any existing work that already did something like this (did I not search well enough?!), but this just goaded me on to figure it out!
Enter the Dragon..... errr... I mean ImageMagick! 😊
ImageMagick.org

ImageMagick.org
ImageMagick is free software for digital image manipulation, available both as precompiled binaries as well as full source code, that can run on Linux, Mac OS X, Windows and iOS platforms.
It has a TON of options and capabilities. There is a bit of a learning curve here, for sure but there is a lot of online help available from an active community. In fact, I got some hints and help in my capricious quest here on this Stack Overflow question "Convert full color image to three color image for e-ink display."
Beyond the question asked by the original poster (about converting full color images to three color images for e-ink display), I also wanted to figure out how to split the converted image into white-and-black and white-and-red components, and got into a chat with one of the users, Fred Weinhaus (whom I've attributed below along with Mark Setchell). (See the comment thread here).
I ran into some problems initially, and it turned out that my problems arose from working with JPG format and converting the result to JPG as well - this is a lossy format and it ended up with unexpected results, losing the color palette and going back to RGB -- something to bear in mind if you choose to work with the JPG format. After I opted to convert the result to BMP and continued working with that format, everything else worked very nicely!
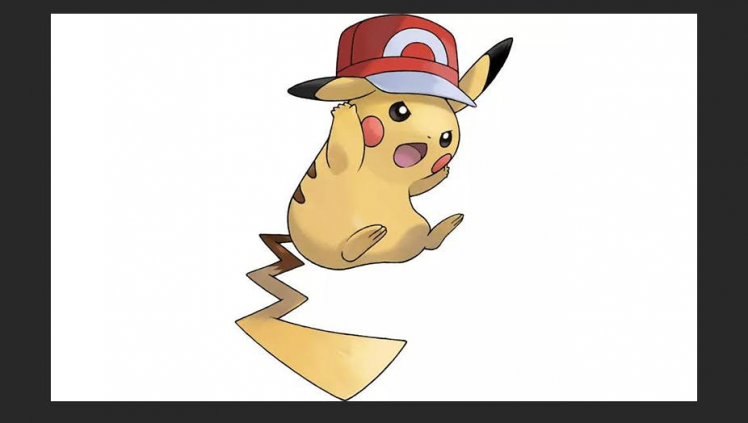
I was able to take a portrait JPG image, and with that, generate scaled-down (to 264x176 pixels suitable for the ePaper Display) Floyd-Steinberg dithered tri-color image that looked really good!! I was blown away! I later also figured out how to split the image into its component white-and-black and white-and-red portions to display on the ePaper Display as I had mentioned above.
Here is a basic overview of the process:
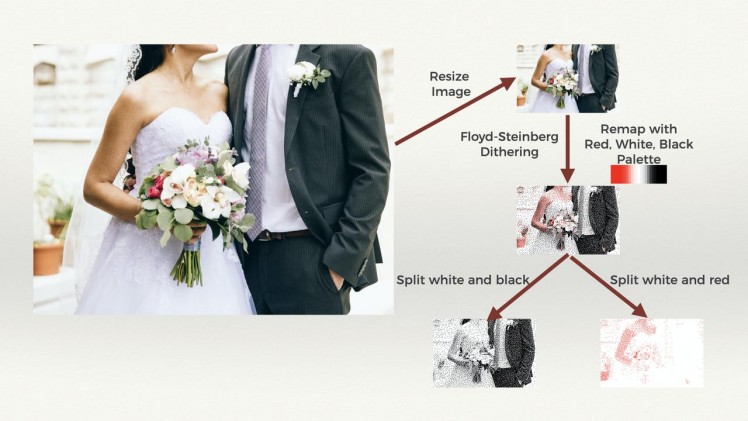
1) Resize the image to 264x176 - the aspect ratio of 6x4 is the same as most photographs - great! Otherwise, ImageMagick also has options to center justify and crop the image to the requisite aspect ratio and dimensions
2) Create a color palette with red, white and black (this is the color table to be used for the remapping)
3) Remap the resized image to this new palette, using Floyd-Steinberg Dithering
4) Clone the image, converting all red pixels to white - this results in a black-and-white image with only the black portion of the non-white pixels showing
5) Clone the dithered image again, this time converting all black pixels to white - this results in a red-and-white image with only the red portion of non-white pixels showing
I took the bottom two images as input to my ePaper Display, using the EPD library. The final rendering was quite satisfactory - ok, it actually blew my mind that a 3-color palette could still show so much detail on a small 264x176 screen!
The next thing I wanted to do was automate the entire process. I could run the ImageMagick commands in a Bash script, execute the Bash script from within Python to generate the final white-and-black and white-and-red images, and then use those images within Python to use in the call to the EPD display() method.
However, a Python wrapper over ImageMagick would be more versatile. There are a few options available, and I settled on one called Python Wand.
There is a bit of a learning curve here as well, especially in trying to figure out how to map the command line options of the ImageMagick "convert" utility to the API calls of Python Wand.
I created a function called getImagesToDisplay():
def getImagesToDisplay(filename):For the given filename, it reads the image data in as a WandImage object. It then
1) Resizes it to 264x176
2) Creates a palette image with red, black, white colors
3) Remaps the original (resized) image to this new palette using Floyd-Steinberg Dithering
4) Clones the resulting image and converts red pixels to white to create a white-and-black image
5) Clones the resulting image and and converts black pixels to white to create a white-and-red image
6) Converts these WandImages to PIL Image format and returns them to the caller
The main() method obtains the list of files in the pic/ folder and then cycles through these files to display on the ePaper Display, sleeping for a configured amount of time in between.
Getting the codeYou can get the code from the link provided to the GitHub repository under the Code section below, and follow the instruction on the README there.
It also provides an option to run the program as a service, so it will run automatically when the Raspberry Pi is booted up, and also shutdown and cleanup when the Pi is shutdown.
Going Forward
As always, I like to end by talking about how you can take this project forward with your own additions! Once you get comfortable playing around with the code sample and understanding the code, it is always nice to try to extend your learning by doing more.
Here are a few suggestions on how you can take this project forward:
- If you're using a different ePaper Display with different colors, modify the code to take into account the palette offered by your display (white and black, or white and black and yellow, or 7 color display) when creating the dithered image and displaying it.
- Currently, the program reads in the files from the pic/ folder once, at startup. It doesn't respond to additions or deletions of image files. Change the code to keep track of changes to the pic/ folder - displaying new images that show up, and removing ones that no longer exist
- Provide a web interface so that a user can upload images directly from their smart phone
- Integrate with Dropbox, Google Drive etc to get photos to display from your cloud storage!
Can you think of other ways to extend this project? Share it with us below! 😊
Happy Making! 😊
Code
Credits
Related products


Leave your feedback...