MQTT over Mesh
About the project
In this post, I've created a simple mesh network using Wi-Fi, and the data from mesh devices were sent to Qubitro.
Project info
Difficulty: Moderate
Platforms: NodeMCU, RakWireless, Raspberry Pi, Espressif
Estimated time: 1 hour
License: GNU General Public License, version 3 or later (GPL3+)
Items used in this project
Hardware components
Story
Have you ever considered that all of our devices are connected wirelessly and communicate with one another across the internet?
In this post, I've created a simple mesh network using Wi-Fi, and the data from mesh devices were sent to Qubitro, so you don't have to configure each device with a network; instead, you can connect a single device to the internet, which will collect all the data from mesh devices and send it to Qubitro.
Let's get this party started…?
Let's do some coding: 1. Hardware Setup:You should first configure your WisBlock or esp32s or esp8266s with the mesh network so that they can communicate with one another through the mesh.
You can refer this page for setting up your Wisblock in Arduino Environment.In this project, I've included some dummy sensor values in the code that you can replace with your own. It's all open to your imagination.
#include "painlessMesh.h"
#include <Arduino_JSON.h>

// MESH Details
#define   MESH_PREFIX     "RNTMESH" //name for your MESH
#define   MESH_PASSWORD   "MESHpassword" //password for your MESH
#define   MESH_PORT       5555 //default port

//Number for this node
int nodeNumber = 5;

//String to send to other nodes with sensor readings
String readings;

Scheduler userScheduler; // to control your personal task
painlessMesh  mesh;

// User stub
void sendMessage() ; // Prototype so PlatformIO doesn't complain
String getReadings(); // Prototype for sending sensor readings

//Create tasks: to send messages and get readings;
Task taskSendMessage(TASK_SECOND * 5 , TASK_FOREVER, &sendMessage);

String getReadings () {
  JSONVar jsonReadings;
  jsonReadings["node"] = nodeNumber;
  jsonReadings["Floor5_temp"] =91 ;
  jsonReadings["Floor5_hum_"] =81;
  jsonReadings["Floor5_pres"] = 21;
  readings = JSON.stringify(jsonReadings);
  return readings;
}

void sendMessage () {
  String msg = getReadings();
  mesh.sendBroadcast(msg);
}

// Needed for painless library
void receivedCallback( uint32_t from, String &msg ) {
  Serial.println(msg.c_str());
}

void newConnectionCallback(uint32_t nodeId) {
  Serial.printf("New Connection, nodeId = %un", nodeId);
}

void changedConnectionCallback() {
  Serial.printf("Changed connectionsn");
}

void nodeTimeAdjustedCallback(int32_t offset) {
  Serial.printf("Adjusted time %u. Offset = %dn", mesh.getNodeTime(),offset);
}

void setup() {
  Serial.begin(115200);


  //mesh.setDebugMsgTypes( ERROR | MESH_STATUS | CONNECTION | SYNC | COMMUNICATION | GENERAL | MSG_TYPES | REMOTE ); // all types on
  mesh.setDebugMsgTypes( ERROR | STARTUP );  // set before init() so that you can see startup messages

  mesh.init( MESH_PREFIX, MESH_PASSWORD, &userScheduler, MESH_PORT );
  mesh.onReceive(&receivedCallback);
  mesh.onNewConnection(&newConnectionCallback);
  mesh.onChangedConnections(&changedConnectionCallback);
  mesh.onNodeTimeAdjusted(&nodeTimeAdjustedCallback);

  userScheduler.addTask(taskSendMessage);
  taskSendMessage.enable();
}

void loop() {
  // it will run the user scheduler as well
  mesh.update();
}
After you've uploaded the code to all the esp devices and turned them on, connect WisBlock to the serial monitor and check the serial monitor results; you should now be able to view the data from all the other devices in the serial monitor.
They're all communicating now, and also they're sharing sensor readings.
Here is the Arduino sketch, this is compatible with both wisblock, ESP8266 and ESP32. 2. Qubitro with Raspberry Pi:We acquired serial monitor results in the previous section, and now we need to submit the serial monitor data to Qubitro. To do so, I updated the python script to interface with Qubitro.
To begin, setup the Qubitro Portal with your device and change the device tokens and id in the Python script with your device tokens and id.
Qubitro Device Portal
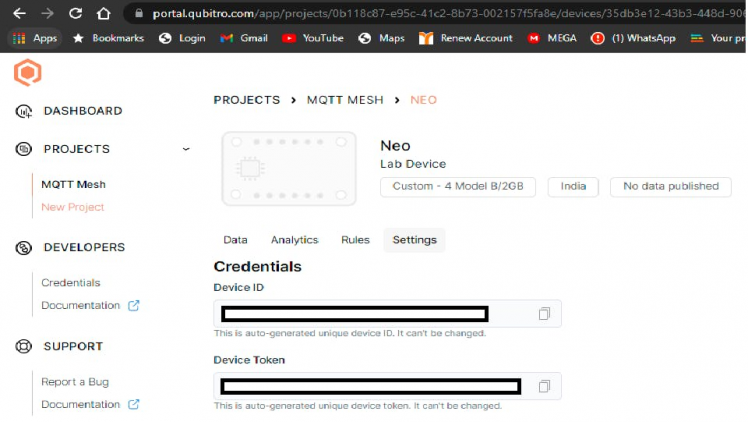
Qubitro Device Portal
The data from the serial monitor can be converted to JSON and delivered to Qubitro using this script.
Connect WisBlock to the Raspberry Pi and execute the Python script. You can see the received data from mesh in the terminal, as well as the data that was sent to Qubitro.
Python Script for MQTT Python Script in TerminalRAK11200 With Raspberry Pi
Python Script
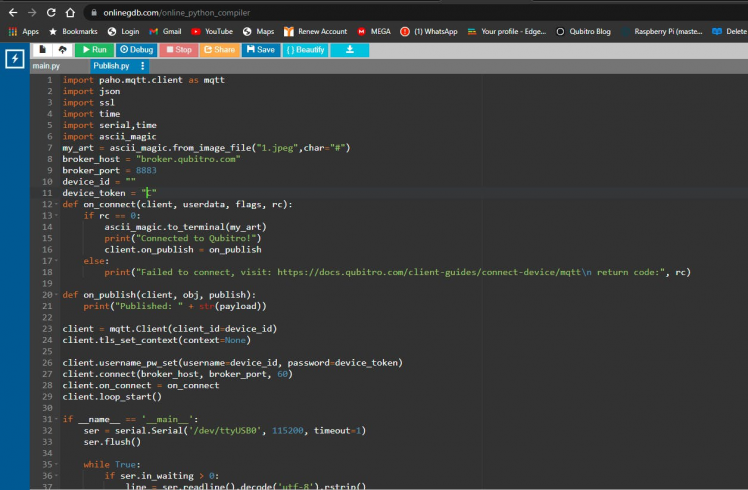
Python Script
Py Script on Raspi Terminal
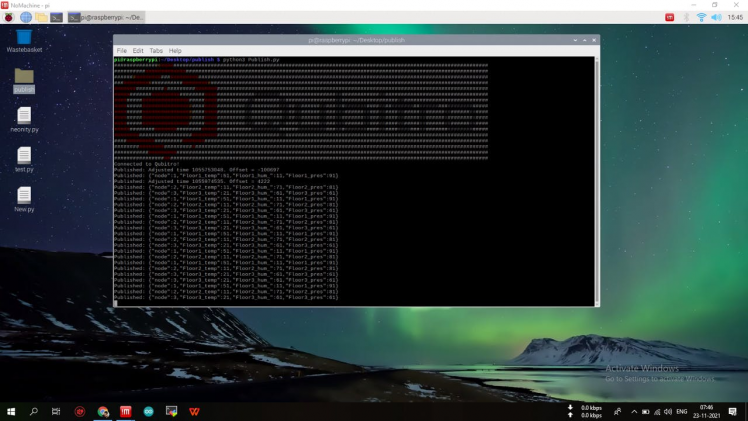
Py Script on Raspi Terminal
WisBlock with Raspi
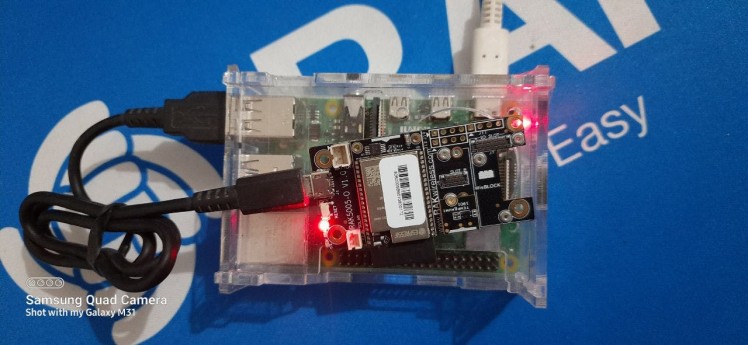
WisBlock with Raspi
Visualize the Data:Now that we've reached the end of the process, open your Qubitro portal and go to the project. Click the Data Tab, and you'll see the mesh device data on the portal…you can now visualize the data as a chart as needed.
Raw Data in JSON Format
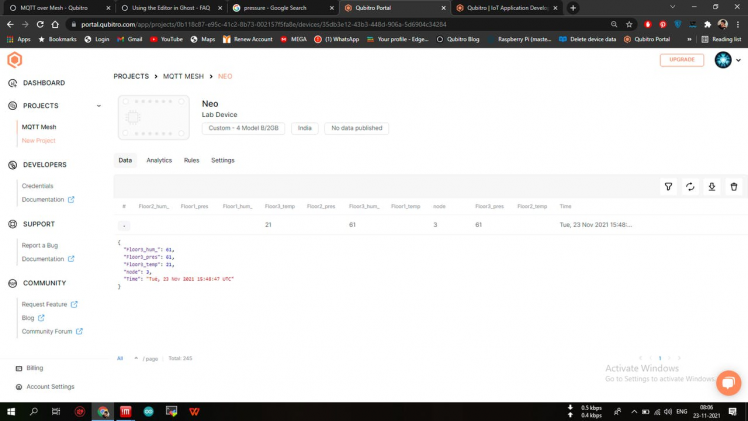
Raw Data in JSON Format
Mesh Data in Visual Charts
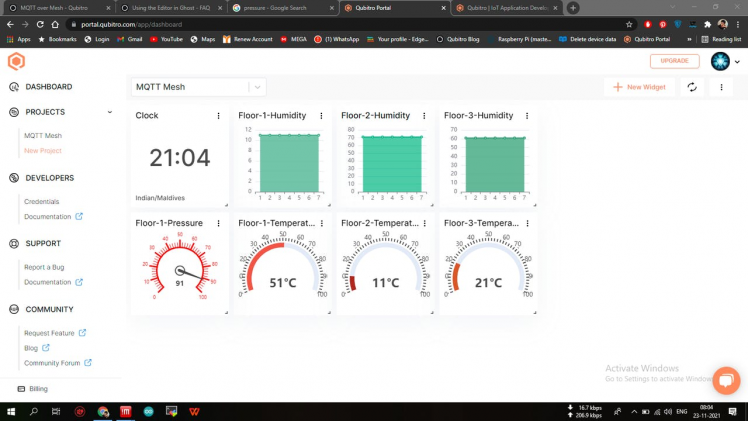
Mesh Data in Visual Charts
You can see some delays in between the reading because of the data transmitting through mesh.That's it for now, guys; I just developed this to communicate the sensor readings in my apartment floors. You are free to use and change it as you see fit.
Happy Making....?
Helpful LinksJoin Qubitro Community to start sharing and connecting with like-minded people.
Qubitro

Qubitro


Leave your feedback...