
Make A Quadcopter Using Esp8266 - This Quadcopter Can Climb

Made by diy-projects-lab
About the project
Hey, friends how are you -:) I hope you all are fine, today I came with a new Ideas. A lot of people are building interest in flying a drone
Items used in this project
Hardware components

Story
Hey, friends how are you -:) I hope you all are fine, today I came up with a new Idea. A lot of people are building interest in flying a drone
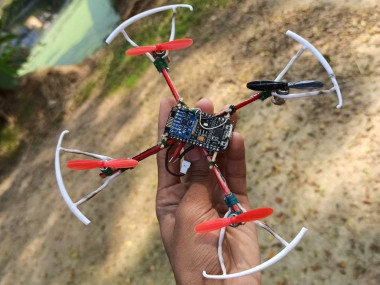
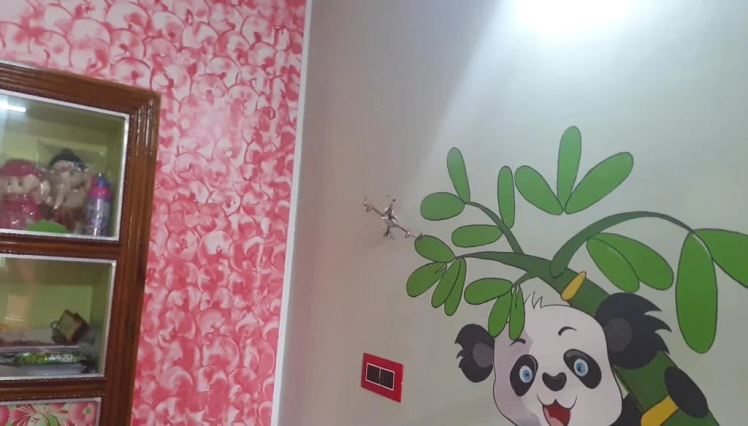
today I will show you how to make a Quadcopter Using ESP8266 (12e) we use esp8266 as a flight controller - This Quadcopter Can Climb on Wall Hue hue. Are you shocked to hear that this drone can climb the wall? joked
Thank You NextPCB:
This project is successfully completed because of the help and support from NextPCB. Guys if you have a PCB project, please visit their website and get exciting discounts and coupons.
- Only 0$ for 5-10pcs PCB Prototypes:https://www.nextpcb.com
- Free shipping 0$ PCB Prototype:https://www.nextpcb.com/?code=Romeohacker
- 4-layer PCB price reduction up to 40%: nextpcb.com/40%off
Flight controller
The flight controller (FC) is the brain of the Quadcopter. It is basically an integrated circuit board that includes sensors that detect changes in orientation. It also receives user commands and controls the motors to keep the quadcopter in the air.
There are a number of flight control boards on the market. Some of them are open source and some of them are not.
Here we will make our own Flight controller esp666 for Quadcopter
You can find all of my projects on -
My Website - https://diyprojectslab.com/
Instructables.com https://www.instructables.com/member/SmartTronix/
Hackster.io- https://www.hackster.io/diyprojectslab
Supplies for Esp8266 QuadcopterComponents Required- Esp8266_____ https://amzn.to/3LDdxJ8
- MPU6050 Acc/Gyro Module______https://amzn.to/3uchUox
- brushed motors_____https://amzn.to/37oBzZj
- Propeller______https://amzn.to/3DKXx5b
- 500 mAh lipo3.7v______https://amzn.to/3JhTe24
- Si2302 mosfet (5x)
- Pencils
- Drone Kit ( Amazon.com) (optional)
Soldering Iron____ https://amzn.to/3DURZoD
Flight Controller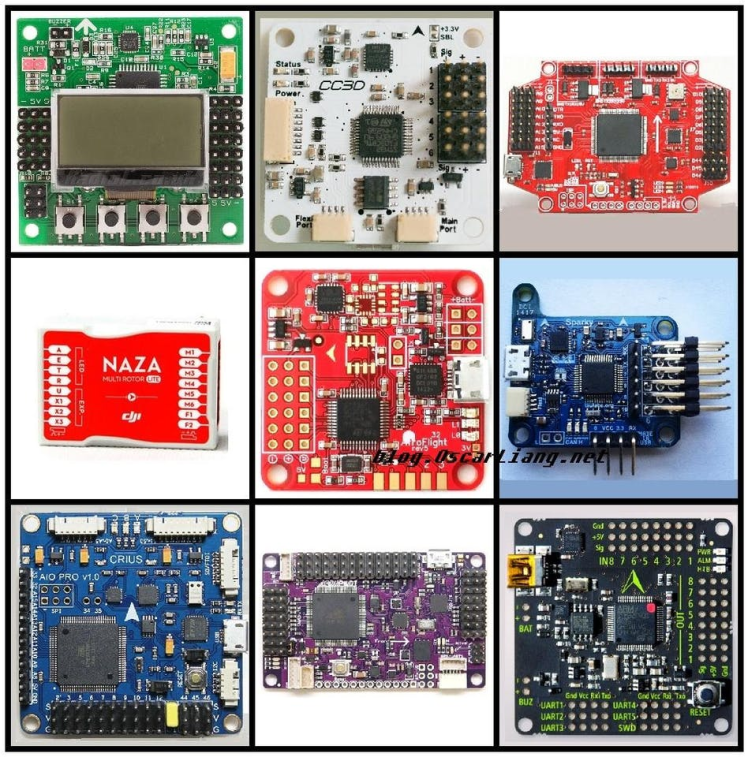
Flight controller
If we know how the brain works, we will know how to deal with it. Here you have the parts of the Flight Controller (FC).
The flight controller (FC) is the brain of the Quadcopter. It is basically an integrated circuit board that includes sensors that detect changes in orientation. It also receives user commands and controls the motors to keep the quadcopter in the air.
Almost all flight controllers (FC) include the basic gyroscope and accelerometer (Gyro and Acc) sensors. Some FCs may include more advanced sensors such as barometers, and magnetometers (compass).
Here I made my own flight controller using ESP8266 And MPU6050 gyroscope and accelerometer (Gyro and Acc) sensors.
If you have not seen our previous post, then you go and see that we have made our First flight controller board using ESP8266.
https://www.instructables.com/Build-Drone-With-ESP...
What Is ESP8266?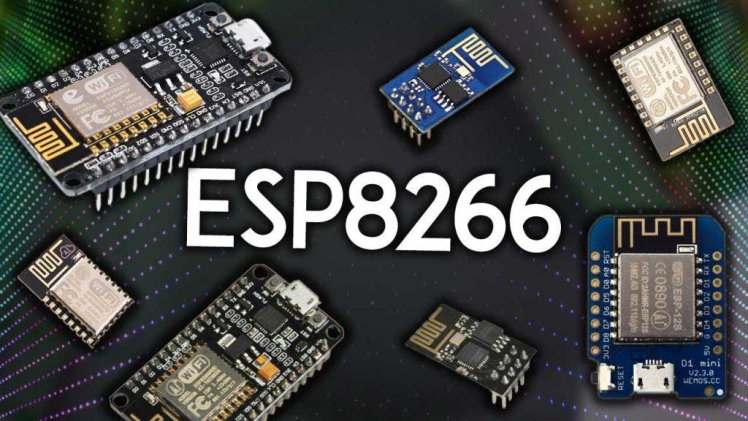
Basically, an ESP8266 is a Wi-Fi module. It has the capability for 2.4 GHz Wi-Fi, which is 802.11 b/g/n. It supports WPA and WPA2. It is a system-on-chip integrated with a 32-bit processor which runs 80 MHz (it can also be overclocked to 160 MHz). It has 64 KB of RAM and a 64 KB boot ROM.
Why do we use ESP8266?
The ESP8266 module enables microcontrollers to connect to 2.4 GHz Wi-Fi
ESP8266 Functions
- ESP8266 has many applications when it comes to the IoT. Here are just some of the functions the chip is used for:
- Networking: The module’s Wi-Fi antenna enables embedded devices to connect to routers and transmit data
- Data Processing: Includes processing basic inputs from analogue and digital sensors for far more complex calculations with an RTOS or Non-OS SDK
- P2P Connectivity: Create direct communication between ESPs and other devices using IoT P2P connectivity
- Web Server: Access pages written in HTML or development languages.
An ESP8266 is a microcontroller:
- Low-power, highly-integrated Wi-Fi solution
- A minimum of 7 external components
- Wide temperature range: -40°C to +125°C
- ESP8285 — 8 Mbit flash embedded
Source: https://www.espressif.com/en/products/hardware/esp
Watch This Video to Understand Better.IMUThe used IMU MPU6050 communicates using I2C and to keep the libraries happy.
Radio Transmitter and Receiver and Yaw, PITCH, ROLL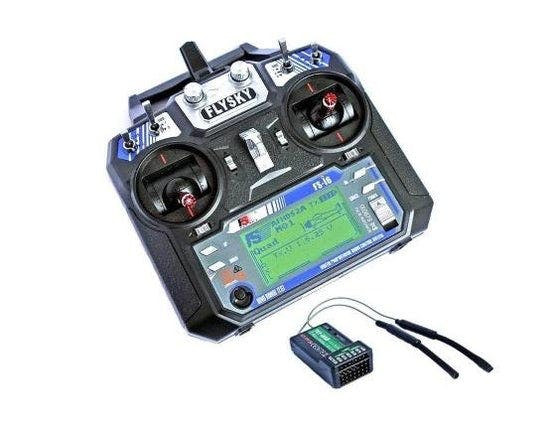
Radio transmitter sends a signal to the receiver. The receiver receives this signal and does according to the command from the transmitter.
Radio controllers typically consist of both a transmitter and receiver, and they generally operate on a radio frequency that does not require licensing for low-power transmitters
Yaw, PITCH, ROLL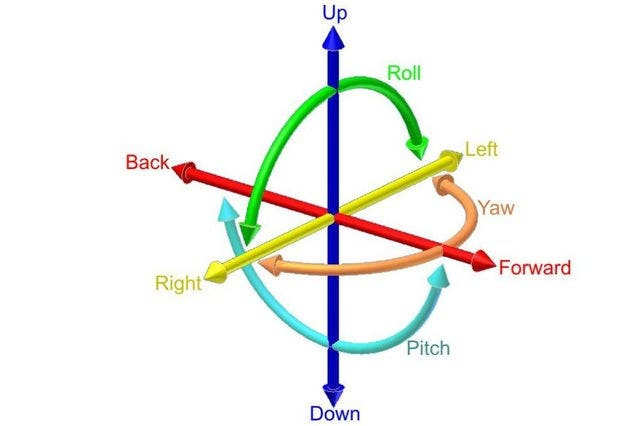
- Roll. Moves your drone left or right in the air, literally “rolling” your drone.
- Pitch. Tilts your drone forward or backward.
- Yaw. Rotates your drone clockwise or counterclockwise, allowing you to make circles or patterns in the air.
- Throttle. Controls the amount of power sent to your drone, which makes the drone go faster or slower.
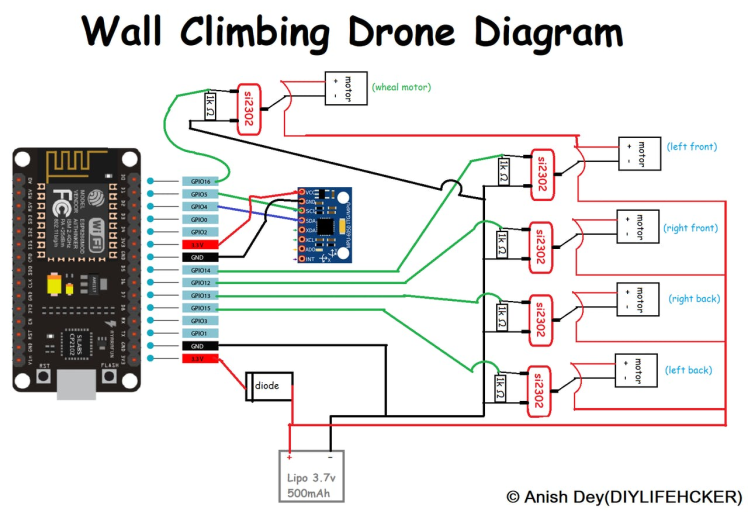
- Here is the schematic for this Drone.
- The wiring diagram is very straightforward.
You have to connect the MPU6050 module pins with Esp8266 pins as per the schematic diagram. The schematic diagram is shown above.
Make the Circuit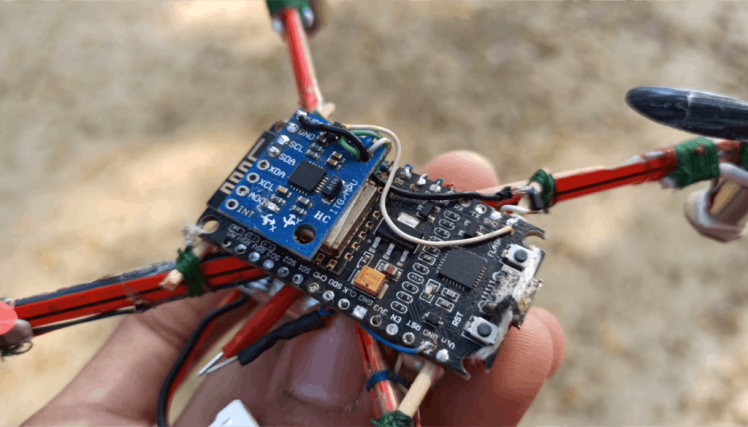
Make the circuit by following the schematic diagram given in the above picture.
Software for Esp8266 Drone
How to install Arduino Desktop IDE?
- Download Arduino Desktop IDE at Arduino Software
- Choose on your Operating System (Windows 7, Windows10, Linux 64 bits, etc.)
- Click on “JUST DOWNLOAD” and follow instructions given
- If you do not have administrator rights, download the “Windows ZIP file for non admin install” and unzip it to the desired location.
- Start Arduino Desktop IDE (if it does not start automatically or you don’t find the Arduino IDE shortcut, click on arduino.exe)
- Select “File –> Preferences”
- Add http://arduino.esp8266.com/stable/package_esp8266... to “Additional Boards Manager URLs
- Click on “OK”
- Install ESP8266WiFi.h library
- Copy code and put your own wifi SSID and password in code
- Go to "Wall-Climbing-Drone" And Download Code.
- Change ssid or pass
WiFi.begin("Diyprojectslab", "romeooo"); //Change ssid and password- Open the provided sketch in the Arduino IDE
- Update WiFI credentials in the Esp826drone.ino file
- Upload it to your ESP8266
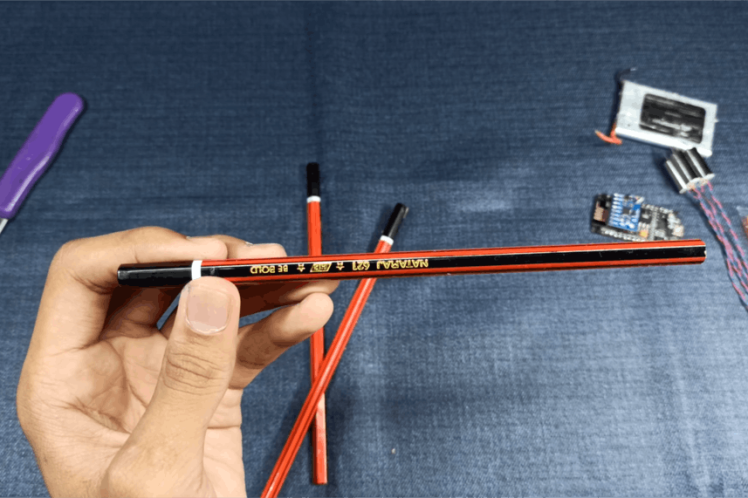
Assembling the frame
I am using apencil for thedrone frames tofollow the photos.
To connect the motors, you need to place the motor on the frame arm.
Install all motors
Install all motors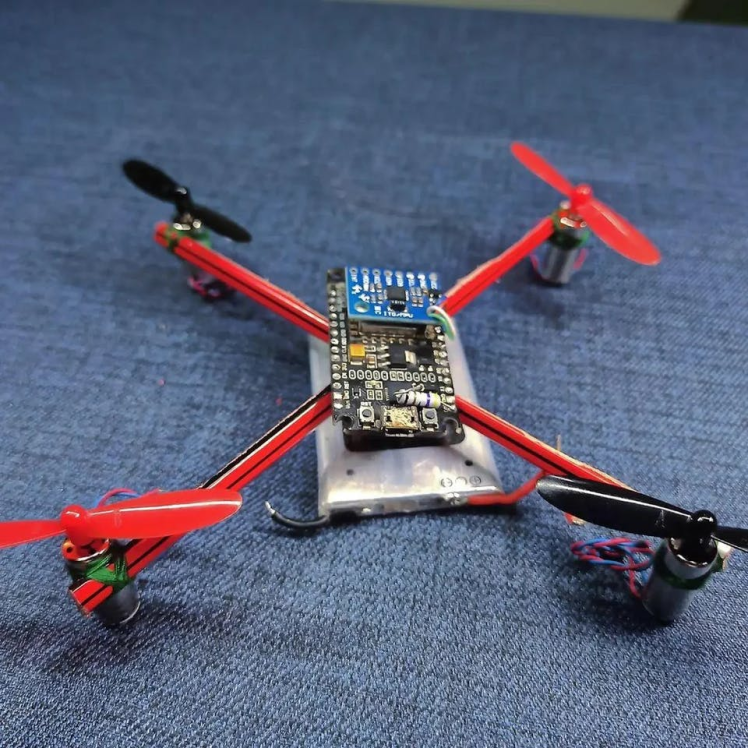
Motor
fat two motors spin in the clockwise direction and two motors spin in the anti-clockwise direction (Refer to the figure), If a motor is not spinning in the right direction simply switch the polarity of the motor
- Check the battery and voltage
- Check whether all the propellers are attached tightly
- Check all the motor mountings
- Check all the motor mountings
Always unplug the battery after flying; only attach the battery few a seconds before flying
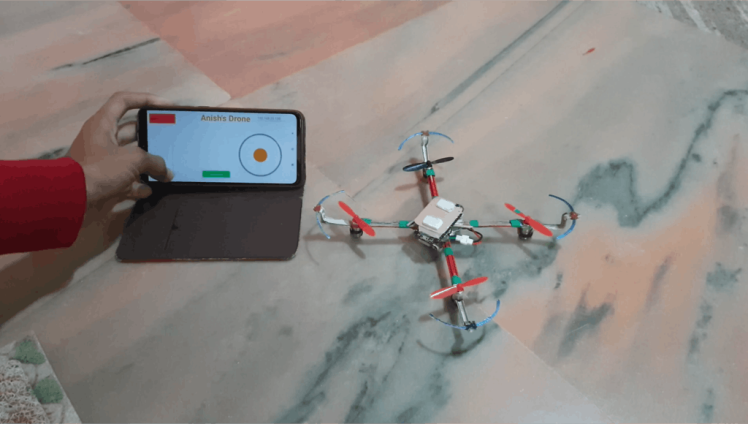
You just need to Download theapplication (Here)
- And install application
- Power-up your ESP8266
- connects to the App
Now... carefully... put your fingers on those two joysticks...
: Fly
This is a very simple Flight Controller. I will upgrade it in upcoming videos. like - adding GPS. compass, autopilot, alt hold and a lot more things. And talking about this...
And thanks for your support, see you very soon in the next video till then bye-bye.If you enjoyed this article, don’t forget to pass it along!

I really hope you'll enjoy building this drone, it's very fun to make and to fly.
Follow me for more DIY projects and ideas.
Schematics, diagrams and documents
Code
Credits
Related products


Leave your feedback...