

Live Security Camera With Unihiker & Firebeetle 2 Esp32s3

Made by pradeeplogu0
About the project
Will guide you to build a live security camera with UNIHIKER with FireBeetle 2 ESP32S3 Sense.
Project info
Difficulty: Easy
Platforms: DFRobot
Estimated time: 1 hour
License: GNU General Public License, version 3 or later (GPL3+)
Items used in this project
Hardware components

Story
UNIHIKER is a compact Linux device that offers a powerful solution for image classification and other tasks. It can run various models and algorithms to process images and extract useful information. In this tutorial, you will discover how to use the FireBeetle 2 ESP32 S3 microcontroller, a small but mighty board that can capture and transmit video over WiFi, to set up a live video surveillance system that can monitor and detect objects in real-time.
To start building the system, first, let's see the process flow.
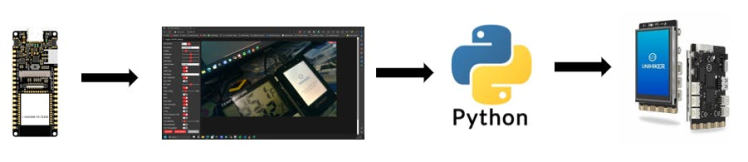
First, we need to make a system that can stream a live video via WiFi. For this, we are going to use FireBeetle 2 ESP32 S3 Sense. Once we get our live video feed, we can use Python OpenCV to show the video feed in UNIHIKER.
Step 1 - FireBeetle2 ESP32S3 Sense Video Streamer:FireBeetle 2 ESP32 Sense board has a facility to connect a camera module and display module.
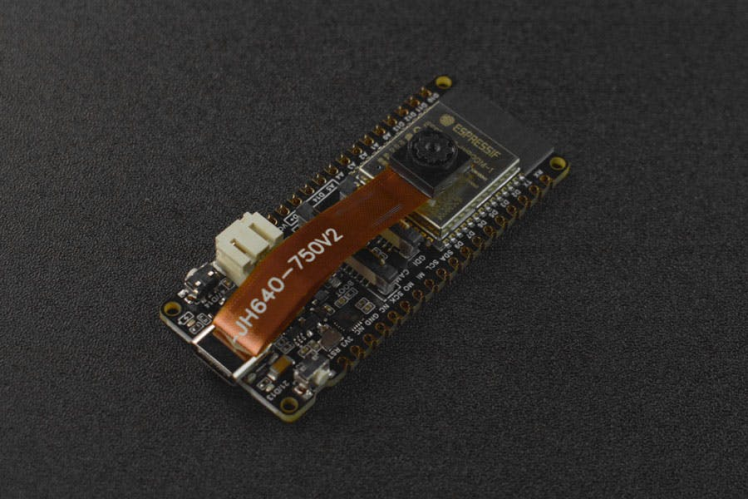
In this project, we are going to use the camera interface. Here is a sample script from the DF's WiKi to build a WiFi video stream.
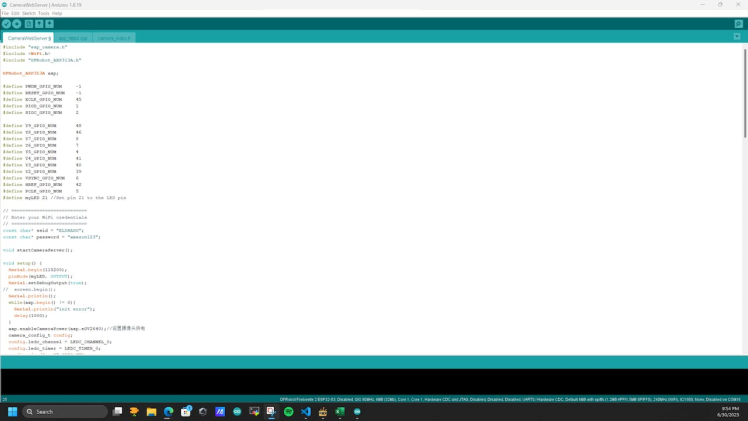
Upload the sketch to the FireBeetle 2 board and check for the video feed.

If you can see the live video feed means, we are good to go.
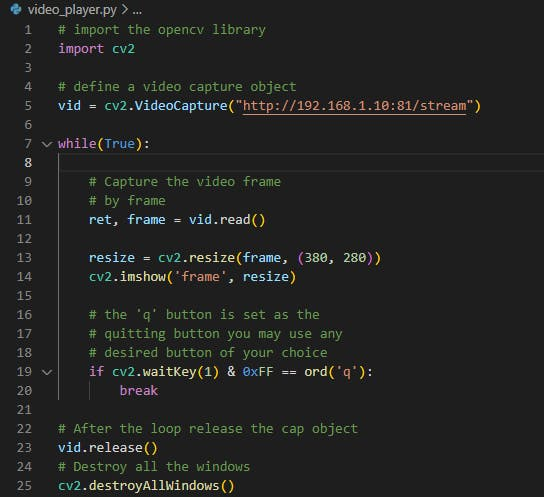
Step 2 - Python video viewer:Next, we need to redirect the web video feed to Python interference. For that, we are going to use OpenCV. Here is the script that can show the webcam feed in the Python GUI window.
# import the opencv library
import cv2
# define a video capture object
vid = cv2.VideoCapture(0)

while(True):
    # Capture the video frame
    # by frame
    ret, frame = vid.read()
    resize = cv2.resize(frame, (380, 280))
    cv2.imshow('frame', resize)
    # the 'q' button is set as the
    # quitting button you may use any
    # desired button of your choice
    if cv2.waitKey(1) & 0xFF == ord('q'):
    break

# After the loop release the cap object
vid.release()
# Destroy all the windows
cv2.destroyAllWindows()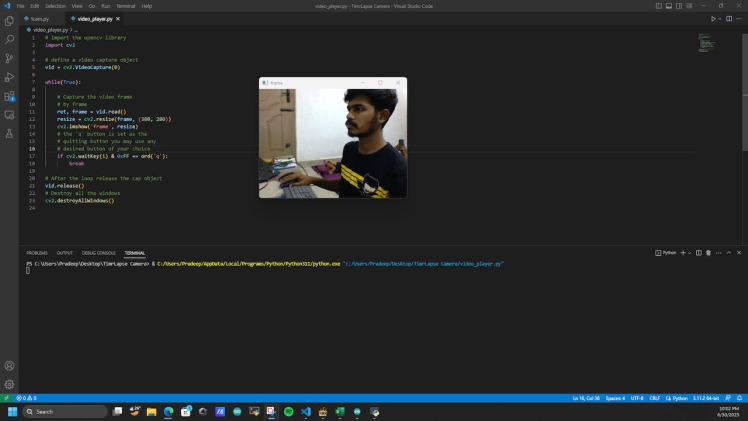
Now we have our webcam feed but we have to redirect to the FireBeetle's camera feed. We can't directly use the IP address to get the feed. For that add this port address at the end of the cam's IP address.
"http://192.168.1.10:81/stream"
Use this format in the Python camera interface. Like this:
Just run the Python script then wait for the response.
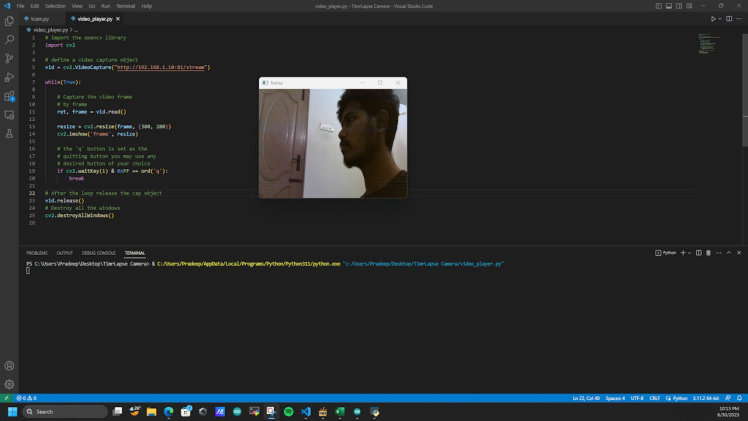
Now our FireBeetle camera feed is in the Python GUI. Let's implement the script in the UNIHIKER.
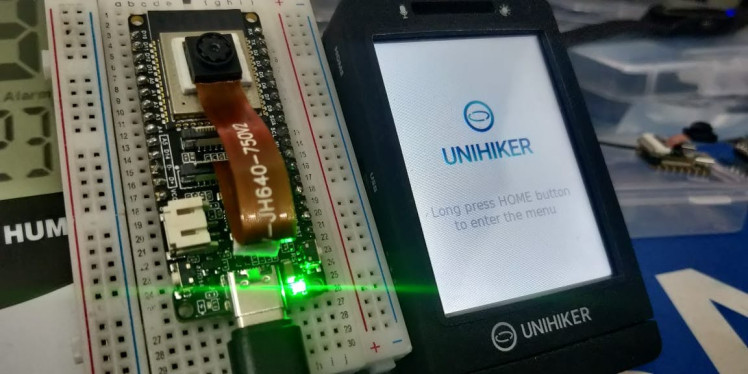
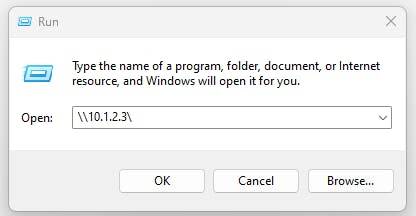
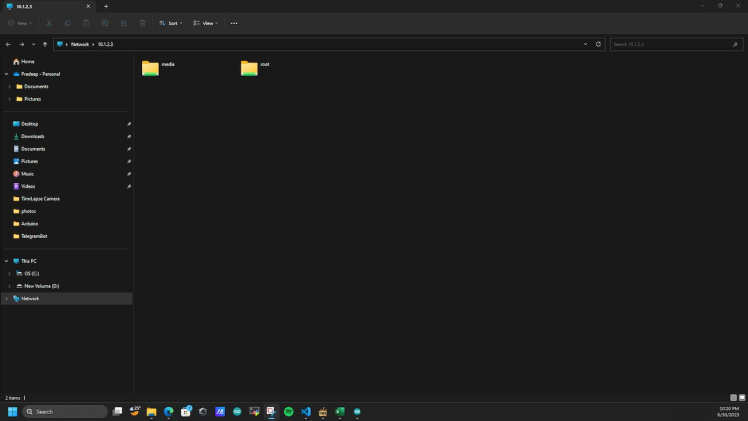
Step 3 -UNIHIKER Setup:Connect UNIHIKER with your PC, and open this IP in the run command.
\10.1.2.3
Then for the first time, it will ask the user for access. Use these credentials.
User name: root, Password: dfrobot
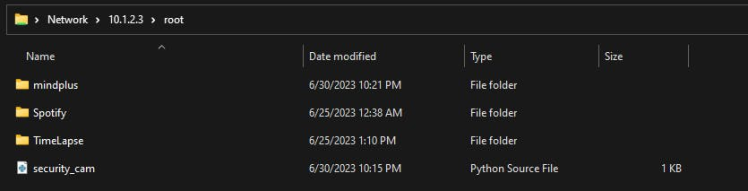
Next, navigate to the root directory.
And paste the OpenCV script into that root folder.
The next step is deployment, just navigate to the run programs option and navigate to the script which we have copied.
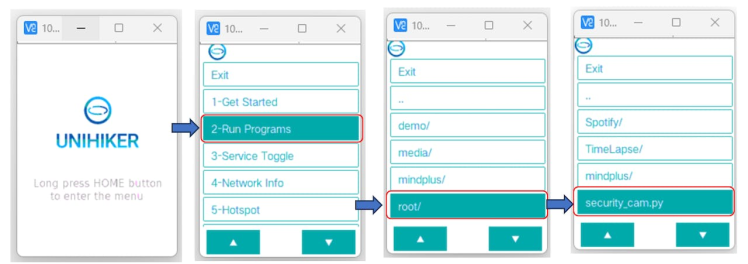
Then the final step is just to execute the script.
Timelapse Camera:Finally, we have our live video feed on the UNIHIKER's display. In just addition to this, I have implemented a TimeLapse camera system using UNIHIKER and FireBeetle 2 ESP32S3 Sense.
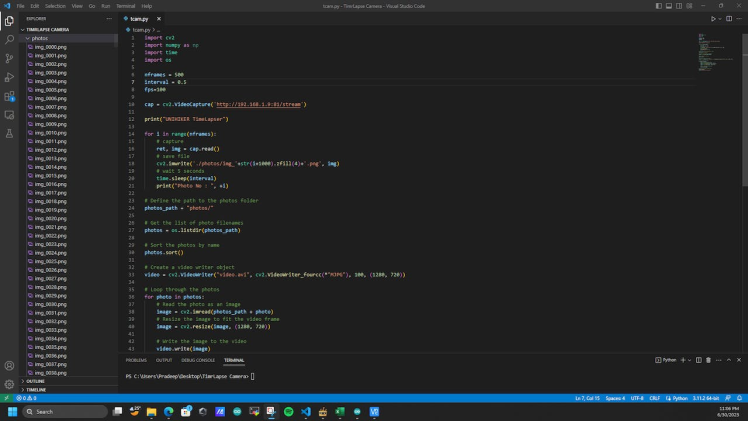
It will capture photos for a particular interval and finally, it will build a video out of it.
import cv2
import numpy as np
import time
import os
nframes = 500
interval = 0.5
fps=100
cap = cv2.VideoCapture('http://192.168.1.9:81/stream')
print("UNIHIKER TimeLapser")
for i in range(nframes):
    # capture
    ret, img = cap.read()
    # save file
    cv2.imwrite('./photos/img_'+str(i+1000).zfill(4)+'.png', img)
    # wait 5 seconds
    time.sleep(interval)
    print("Photo No : ", +i)

# Define the path to the photos folder
photos_path = "photos/"
# Get the list of photo filenames
photos = os.listdir(photos_path)
# Sort the photos by name
photos.sort()
# Create a video writer object
video = cv2.VideoWriter("video.avi", cv2.VideoWriter_fourcc(*"MJPG"), 100, (1280, 720))

# Loop through the photos
for photo in photos:
    # Read the photo as an image
    image = cv2.imread(photos_path + photo)
    # Resize the image to fit the video frame
    image = cv2.resize(image, (1280, 720))
    # Write the image to the video
    video.write(image)

# Release the video writer object
video.release()
print("Video Build Completed")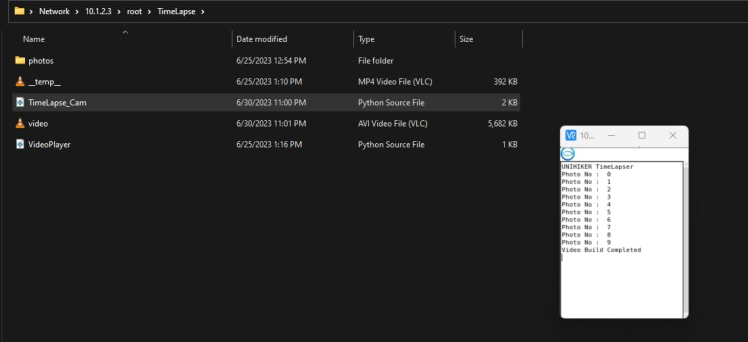
Here is the final output of the UNIHIKER timelapse camera.
Wrap-up:That's all about this UNIHIKER video capture tutorial. Hope you enjoyed this. Let's see in another tutorial. Thank you.
Credits
Related products


Leave your feedback...