

Iot Ai Human Presence Detector Using Grove Vision Ai V2

Made by pradeeplogu0
About the project
Are you ready to build something extraordinary? Let me guide you in creating an IoT-based human presence detection system with instant alert
Project info
Difficulty: Moderate
Platforms: Seeed Studio
Estimated time: 1 hour
License: GNU Lesser General Public License version 3 or later (LGPL3+)
Items used in this project

Story
In our interconnected world, the Internet of Things (IoT) plays a crucial role in creating smart and efficient systems. Our project focuses on developing an intelligent human presence alert system using AI and IoT technologies. By combining sensors, microcontrollers, and cloud communication, we create a robust solution for detecting human presence and triggering timely alerts.
IntroductionThe need for reliable human presence detection spans various domains, including home security, workplace safety, and healthcare. Our project addresses this need by leveraging IoT devices and AI algorithms. The system detects human presence and sends alerts via mobile apps or other communication channels. Whether it’s preventing unauthorized access or ensuring the safety of elderly individuals, our project contributes to a safer environment.
Use Cases:- Home Security:Install the system near entry points (doors, windows) to detect unauthorized access.Receive alerts when someone enters your home.
- Elderly Care:Place the system in rooms where elderly individuals spend time.Get notified if there’s no movement for an extended period.
- Workplace Safety:Deploy the system in office areas or restricted zones.Enhance security by detecting unauthorized personnel.
- Grove Vision AI V2
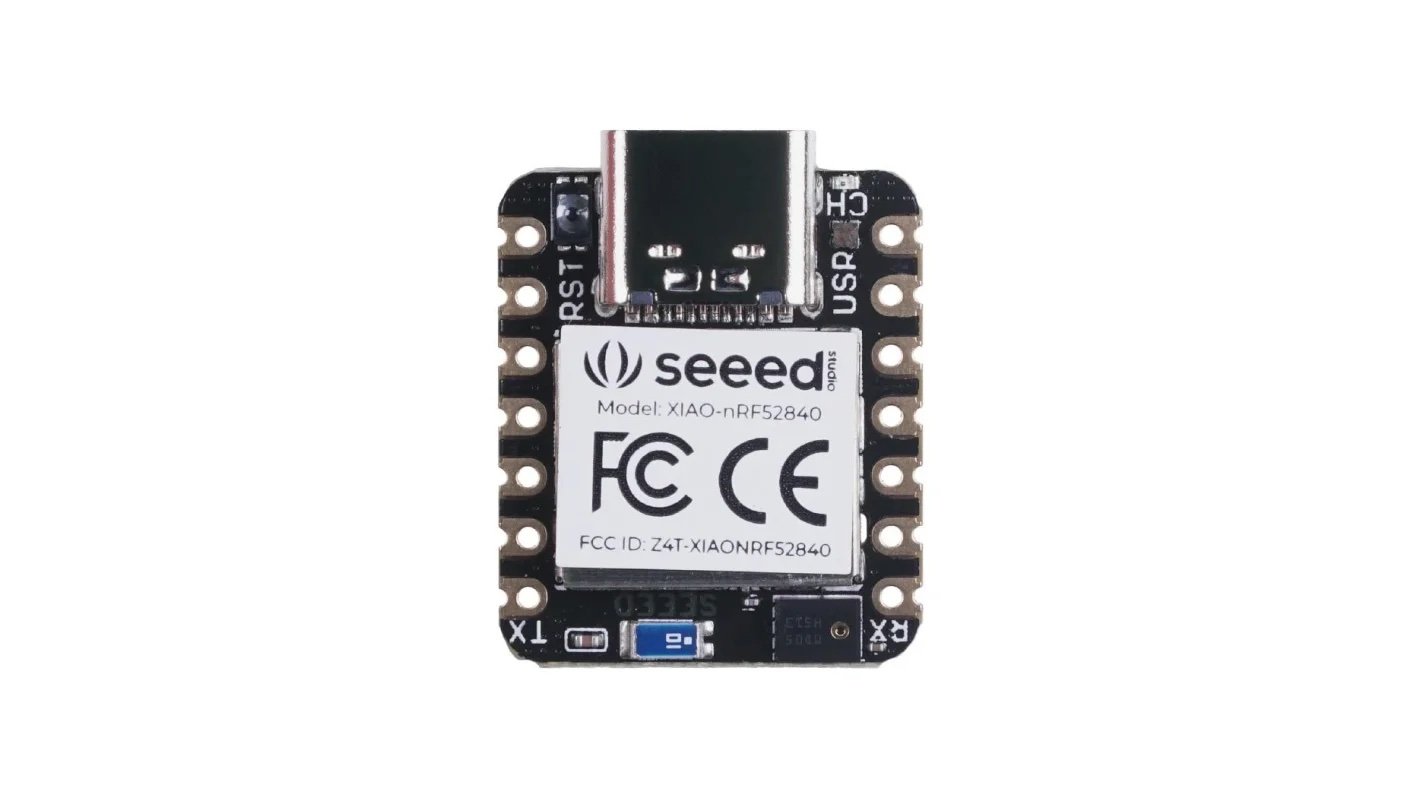
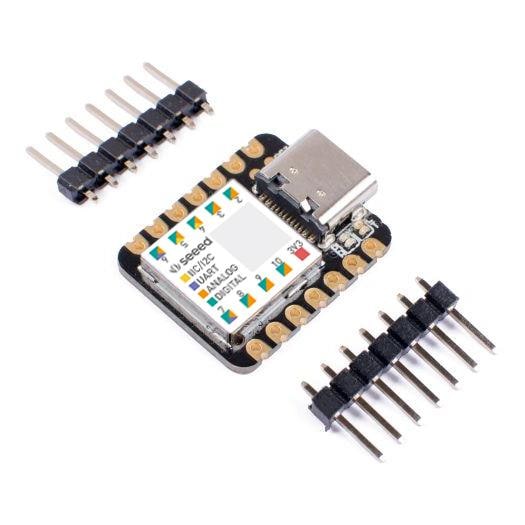
- Xiao ESP32 S3
Image from Seeed

Image from Seeed
The Grove Vision AI V2 is an MCU-based vision AI module powered by the Himax WiseEye2 HX6538 processor. Let’s explore its features and applications:
Features:
- Powerful AI Processing Capabilities:Utilizes the WiseEye2 processor with a dual-core Arm Cortex-M55 and integrated Arm Ethos-U55 neural network unit.
- Versatile AI Model Support:Easily deploy off-the-shelf or custom AI models from SenseCraft AI, including MobilenetV1, MobilenetV2, Efficientnet-lite, Yolov5, and Yolov8. Supports TensorFlow and PyTorch frameworks.
- Rich Peripheral Devices:Includes a PDM microphone, SD card slot, Type-C interface, and Grove connector.
- High Compatibility:Compatible with XIAO series, Arduino, Raspberry Pi, and ESP development boards.
- Fully Open Source:All codes, design files, and schematics are available for modification and use.
Applications:
- Industrial Automation:Quality inspection, predictive maintenance, voice control, etc.
- Smart Cities:Device monitoring, energy management, etc.
- Transportation:Status monitoring, location tracking, etc.
- Smart Agriculture:Environmental monitoring, crop health assessment, etc.
- Mobile IoT Devices:Wearable devices, handheld devices, etc.
Whether you’re building smart security systems or enhancing industrial processes, this module empowers your AI vision projects! ?
About the Hardware - Xiao ESP32 S3:Image from Seeed

Image from Seeed
The XIAO ESP32S3 is a versatile development board powered by the ESP32-S3 chip. It features Wi-Fi, BLE, an integrated camera sensor, a digital microphone, and an SD card slot. Ideal for intelligent voice and vision AI projects! ?
Here are some key specifications:
- Processor: ESP32-S3R8 (dual-core, 32-bit, up to 240 MHz)
- Wireless: 2.4GHz Wi-Fi, Bluetooth 5.0, Bluetooth mesh
- Built-in Sensors:OV2640 camera sensor (1600x1200 resolution), Digital Microphone
- Memory: On-chip 8M PSRAM & 8MB Flash
- Interfaces: UART, IIC, IIS, SPI, GPIOs (PWM), ADC, User LED, Charge LED
- Dimensions: 21 x 17.5mm
- Power Input: Type-C (5V), BAT (4.2V)
Whether you’re prototyping or building compact IoT devices, the XIAO ESP32S3 packs a punch! ?
For more details, check out the Seeed Studio Wiki.
Project Flow:
First, we are going to use SenseCraft to build our people detection system and then we are going to flash that binary on theVision AI V2 module then using Xiao ESP32 S3 we are going to get the data and revert that to the internet. Finally, our Telegram Bot father will alert us once it detects the human.
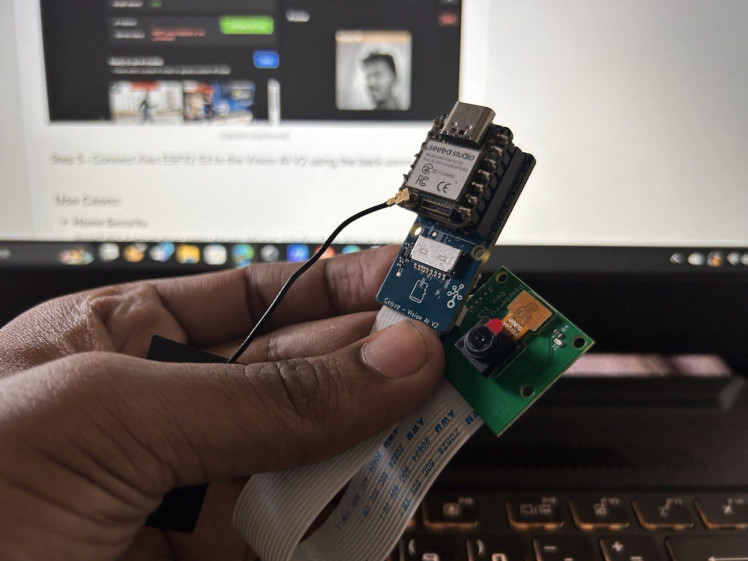
Let's Start the Build:Step 1 - Connect the camera module with the Vision AI V2.
Step 2 - Connect the Vision module to the PC via a Type C cable and launch the Sense Craft website.
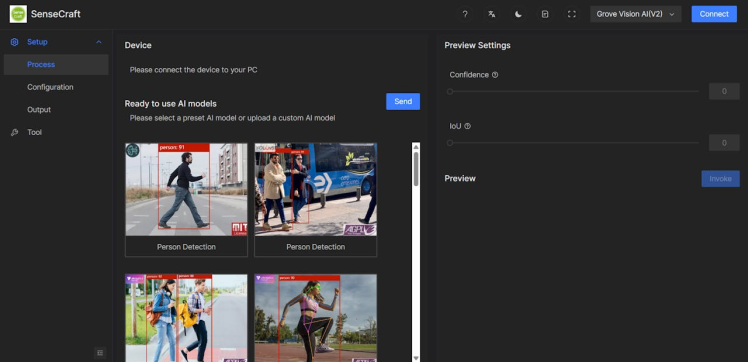
Step 3 - Connect the vision module to the sense craft via web serial.

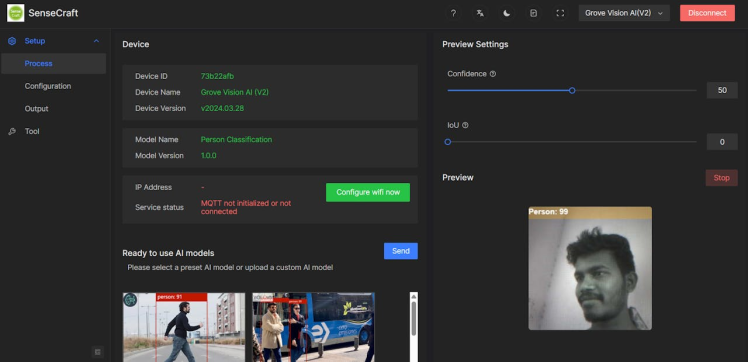
Step 4 - Verify the model via live stream output. (Use person detection dataset)
Step 5 - Connect Xiao ESP32 S3 to the Vision AI V2 using the back connectors.
Step 6 - Connect the Xiao ESP32 S3 to pc via type C cable and upload the below sketch to the Xiao ESP32 S3:
Note: Before uploading the code, download and install this library to the Arduino IDE.

#include <Seeed_Arduino_SSCMA.h>

SSCMA AI;

void setup()
{
    AI.begin();
    Serial.begin(9600);
}

void loop()
{
    if (!AI.invoke())
    {
        Serial.println("invoke success");
        Serial.print("perf: prepocess=");
        Serial.print(AI.perf().prepocess);
        Serial.print(", inference=");
        Serial.print(AI.perf().inference);
        Serial.print(", postpocess=");
        Serial.println(AI.perf().postprocess);

        for (int i = 0; i < AI.boxes().size(); i++)
        {
            Serial.print("Box[");
            Serial.print(i);
            Serial.print("] target=");
            Serial.print(AI.boxes()[i].target);
            Serial.print(", score=");
            Serial.print(AI.boxes()[i].score);
            Serial.print(", x=");
            Serial.print(AI.boxes()[i].x);
            Serial.print(", y=");
            Serial.print(AI.boxes()[i].y);
            Serial.print(", w=");
            Serial.print(AI.boxes()[i].w);
            Serial.print(", h=");
            Serial.println(AI.boxes()[i].h);
        }
        for (int i = 0; i < AI.classes().size(); i++)
        {
            Serial.print("Class[");
            Serial.print(i);
            Serial.print("] target=");
            Serial.print(AI.classes()[i].target);
            Serial.print(", score=");
            Serial.println(AI.classes()[i].score);
        }
        for (int i = 0; i < AI.points().size(); i++)
        {
            Serial.print("Point[");
            Serial.print(i);
            Serial.print("] target=");
            Serial.print(AI.points()[i].target);
            Serial.print(", score=");
            Serial.print(AI.points()[i].score);
            Serial.print(", x=");
            Serial.print(AI.points()[i].x);
            Serial.print(", y=");
            Serial.println(AI.points()[i].y);
        }
    }
}
You can see this kind of response from the serial monitor.
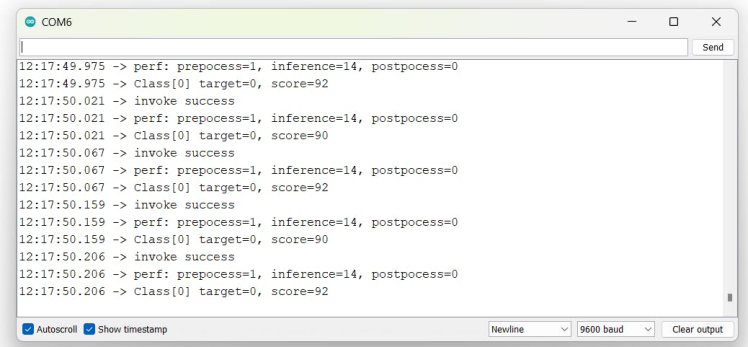
In this, if your target is 0 means it is no person, if it's 1 means it is a person.

Step 7 - Next we need to create a Telegram Bot that can alert us when the Vision module detects the people. Open Telegram and search for Botfather.
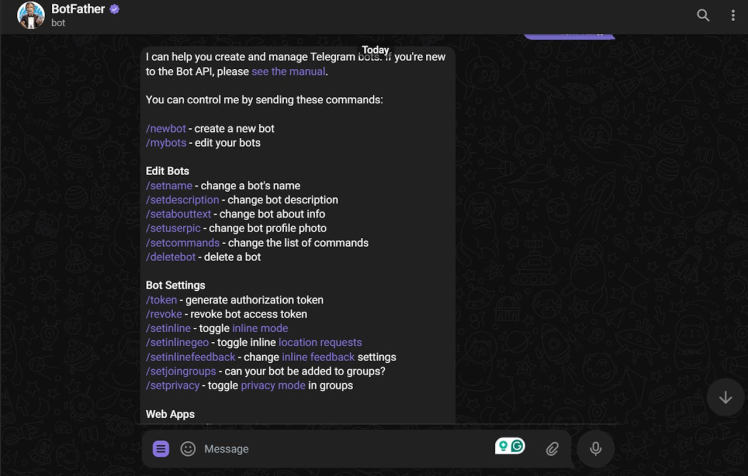
Just follow the steps in the help it will guide you to build the Bot next we need a user ID for that look for IDBot in the telegram and copy the code.

Step 7 - Just copy the Bot Token and Chat ID paste this into the following code and upload this into the Xiao ESP32 S3.
Note: Change the SSID as well as password.
#include <WiFi.h>
#include <WiFiClientSecure.h>
#include <UniversalTelegramBot.h>
#include <ArduinoJson.h>
#include <Seeed_Arduino_SSCMA.h>
SSCMA AI;
const char* ssid = "";
const char* password = "";
#define CHAT_ID ""
#define BOTtoken "" // your Bot Token (Get from Botfather)
WiFiClientSecure client;
UniversalTelegramBot bot(BOTtoken, client);
void setup()
{
AI.begin();
Serial.begin(9600);
WiFi.mode(WIFI_STA);
WiFi.begin(ssid, password);
client.setCACert(TELEGRAM_CERTIFICATE_ROOT); // Add root certificate for api.telegram.org
while (WiFi.status() != WL_CONNECTED) {
delay(1000);
Serial.println("Connecting to WiFi..");
}
Serial.println(WiFi.localIP());
}
void loop()
{
String message = "Message from Vision AI n";
message += "Alert: Human presence detected. Check the area.n";
if (!AI.invoke())
{
Serial.println("invoke success");
Serial.print("perf: prepocess=");
Serial.print(AI.perf().prepocess);
Serial.print(", inference=");
Serial.print(AI.perf().inference);
Serial.print(", postpocess=");
Serial.println(AI.perf().postprocess);
for (int i = 0; i < AI.boxes().size(); i++)
{
Serial.print("Box[");
Serial.print(i);
Serial.print("] target=");
Serial.print(AI.boxes()[i].target);
Serial.print(", score=");
Serial.print(AI.boxes()[i].score);
Serial.print(", x=");
Serial.print(AI.boxes()[i].x);
Serial.print(", y=");
Serial.print(AI.boxes()[i].y);
Serial.print(", w=");
Serial.print(AI.boxes()[i].w);
Serial.print(", h=");
Serial.println(AI.boxes()[i].h);
}
for (int i = 0; i < AI.classes().size(); i++)
{
Serial.print("Class[");
Serial.print(i);
Serial.print("] target=");
Serial.print(AI.classes()[i].target);
if (AI.classes()[i].target == 1 && AI.classes()[i].score > 80 ) {
bot.sendMessage(CHAT_ID, message, "");
}
Serial.print(", score=");
Serial.println(AI.classes()[i].score);
}
for (int i = 0; i < AI.points().size(); i++)
{
Serial.print("Point[");
Serial.print(i);
Serial.print("] target=");
Serial.print(AI.points()[i].target);
Serial.print(", score=");
Serial.print(AI.points()[i].score);
Serial.print(", x=");
Serial.print(AI.points()[i].x);
Serial.print(", y=");
Serial.println(AI.points()[i].y);
}
}
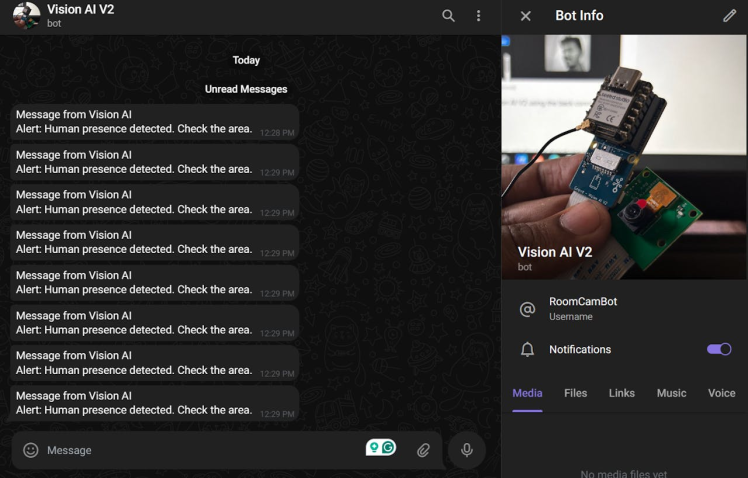
}Step 8 - Finally test the process by looking at the Vision AI V2 board and check your telegram bot.
Our IoT-based AI Human Presence Alert Detector project demonstrates the fusion of cutting-edge technologies to address real-world challenges. By combining Vision AI V2 and Xiao ESP32 S3, we create an efficient and reliable system. Customize and expand this project to suit your specific needs, and contribute to a safer environment! ? Happy building! ?
Credits
Related products


Leave your feedback...