
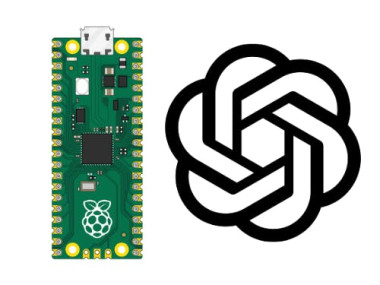
How To Set Up Chatgpt On A Raspberry Pi Pico W

Made by mahmood-m-shilleh
About the project
Learn how to use ChatGPT from your Raspberry Pi Pico W to enhance your IoT applications.
Project info
Difficulty: Moderate
Platforms: MicroPython
Estimated time: 1 hour
License: GNU General Public License, version 3 or later (GPL3+)
Items used in this project

Story
ChatGPT's ability to understand natural language inputs and its versatility make it a useful tool for developing various applications with the Raspberry Pi Pico W. An example can be voice recognition, with the help of external microphones and speakers, ChatGPT can be used to develop voice-controlled systems that can perform various tasks, such as controlling home appliances or responding to user queries.
This tutorial demonstrates how to set up ChatGPT for your Raspberry Pi Pico W using their API in this tutorial. By the end of it, you will be sending ChatGPT prompts and getting responses in return.
Before we get started please consider subscribing and donating to the channel to continue supporting ShillehTek content.
Subscribe:
Support:
https://www.buymeacoffee.com/mmshilleh
Step 1-) Generate an API KeyAPI keys can be generated here: https://platform.openai.com/account/api-keys
The Chat GPT API key is a unique code that allows you to access the Chat GPT service through its API (Application Programming Interface).
When you make a request to the Chat GPT API, the API key is used to authenticate your request and identify your account. This ensures that only authorized users can access the Chat GPT service and that your usage is tracked for billing and security purposes. Eventually, it will ask for billing information, as the API key is only free for a certain amount of usage, so keep that in mind when testing. You will need the Chat GPT API key if you want to use the Chat GPT service in your application or website. Without the API key, you won't be able to make requests to the Chat GPT API and receive responses from the language model.
Step 2-) Connect to the Internet and use API Callimport json
import network
import time
import urequests
# Internal libs
import constants
def chat_gpt(ssid, password, endpoint, api_key, model, prompt, max_tokens):
"""
Description: This is a function to hit chat gpt api and get
a response.
Parameters:
ssid[str]: The name of your internet connection
password[str]: Password for your internet connection
endpoint[str]: API enpoint
api_key[str]: API key for access
model[str]: AI model (see openAI documentation)
prompt[str]: Input to the model
max_tokens[int]: The maximum number of tokens to
generate in the completion.
Returns: Simply prints the response
"""
# Just making our internet connection
wlan = network.WLAN(network.STA_IF)
wlan.active(True)
wlan.connect(ssid, password)
# Wait for connect or fail
max_wait = 10
while max_wait > 0:
if wlan.status() < 0 or wlan.status() >= 3:
break
max_wait -= 1
print('waiting for connection...')
time.sleep(1)
# Handle connection error
if wlan.status() != 3:
print(wlan.status())
raise RuntimeError('network connection failed')
else:
print('connected')
print(wlan.status())
status = wlan.ifconfig()
## Begin formatting request
headers = {'Content-Type': 'application/json',
"Authorization": "Bearer " + api_key}
data = {"model": model,
"prompt": prompt,
"max_tokens": max_tokens}
print("Attempting to send Prompt")
r = urequests.post("https://api.openai.com/v1/{}".format(endpoint),
json=data,
headers=headers)
if r.status_code >= 300 or r.status_code < 200:
print("There was an error with your request n" +
"Response Status: " + str(r.text))
else:
print("Success")
response_data = json.loads(r.text)
completion = response_data["choices"][0]["text"]
print(completion)
r.close()
chat_gpt(constants.INTERNET_NAME,
constants.INTERNET_PASSWORD,
"completions",
constants.CHAT_GPT_API_KEY,
"text-davinci-003",
"Write a tagline for an ice cream shop. ",
100)In this code we do a series of actions:
- We start by connecting to the internet, as you need an active internet connection to access their API. Please pass in an internet name and password.
- We pass in the remaining information needed for the ChatGPT model, most importantly the API key but also the model and the max_tokens variables. You can find all information here in their documentation.
- We are using the “completions” API but there are also several other API paths that have different purposes that you can look into, this includes things such as edits or embeddings which can also have powerful use cases.
- It is important to note that there are many other configurable variables that can be passed in, and you would need to slightly modify the function to incorporate other parameters.
- A very interesting parameter you can add in as an experiment is the temperature parameter. Higher values like 0.8 will make the output more random, while lower values like 0.2 will make it more focused and deterministic. It is generally recommended to alter this or
top_pbut not both.
Do not forget to like, comment and subscribe to the channel. If you have any questions please let us know in the comment section and thanks for reading. Stay tuned!
Credits
mahmood-m-shilleh
Mechanical and Software Engineering Background. University at Buffalo 2019 Texas A&M 2021 I make data pipelines for my day job. Outside of work, I participate in online communities regarding Full Stack Engineering, Microelectronics, and more. You can find more details about me on my Youtube Channel. https://www.youtube.com/@mmshilleh Feel free to reach out!
Related products


Leave your feedback...