
How To Send Data To Aws Dynamodb From Raspberry Pi Pico W

Made by mahmood-m-shilleh
About the project
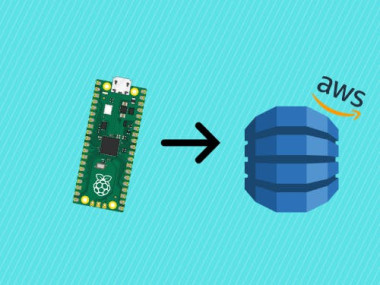
Learn how to send sensor data to AWS DynamoDB in MicroPython using the Pico W with IoT Core and MQTT. Harness the power of AWS!
Project info
Difficulty: Difficult
Platforms: Amazon Web Services
Estimated time: 1 hour
License: GNU Lesser General Public License version 3 or later (LGPL3+)
Items used in this project

Software apps and online services
Story
Discover the transformative capabilities of seamlessly transmitting data from the Raspberry Pico W to AWS DynamoDB. Unleash the potential to elevate your IoT applications within the expansive AWS ecosystem, propelling them to new heights of scalability. This integration not only empowers you to harness the full potential of your data but also paves the way for advanced automation, unlocking a realm of possibilities for dynamic and efficient data-driven applications. Mastering this connection between the Pico W and DynamoDB is not just a learning experience; it is a gateway to unparalleled prowess in the realm of data and IoT innovation.
Before reading the remainder, be sure to subscribe and support the channel if you have not!
Subscribe:
Support:
https://www.buymeacoffee.com/mmshilleh
Hire me at UpWork to build your IoT projects:
https://www.upwork.com/freelancers/~017060e77e9d8a1157
Step 1-) Architecture Overview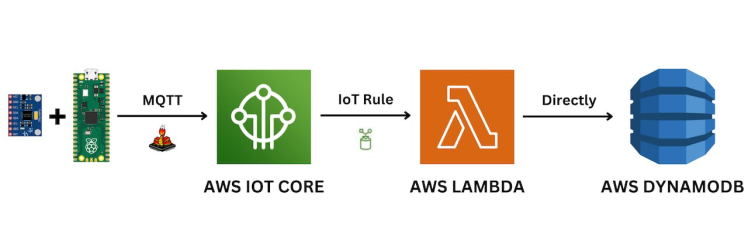
This tutorial will guide you step by step on how to send the data to AWS DynamoDB, we will be following this architecture diagram to funnel the data into the database, most of it is just connecting services in AWS. So please do not be intimidated if you are a beginner.
We first have a MPU6050 connected to our Raspberry Pi Pico W, but really you can use any sensor you would like! The steps are similar/same. You can purchase the accelerometer we use in this video at ShillehTek on Amazon.
We will be using an MQTT library in MicroPython to send data quickly over an MQTT channel to AWS IoT Core. MQTT (Message Queuing Telemetry Transport) is a lightweight and open communication protocol designed for efficient data exchange between devices in a network, particularly in the context of the Internet of Things (IoT). Its simplicity, low overhead, and support for real-time communication make MQTT useful for connecting and coordinating a wide range of devices with diverse computing capabilities.
Once we have the Data in AWS IoT Core we can create an "IoT Rule" to funnel the data to a Lambda function in AWS. Really all the Lambda function is a Python script that handles events upon being triggered. It is an event driven service and only gets triggered when there is data in AWS IoT Core, making it lightweight and easy to host and setup. Also Lambda functions are incredibly useful in practice.
Finally once the Lambda Python code receives the data, we will add Python code logic to simply upload to the AWS DynamoDB table we created in AWS, this is only about 30 lines of code. Thankfully the AWS Python SDK makes it incredibly easy to set this up.
We will then view the data in our database as a sanity check. Are you ready?
Step 2-) Create an AWS DynamoDB TableGo to aws.amamazon.com and create an account, there should be a free tier to get started.
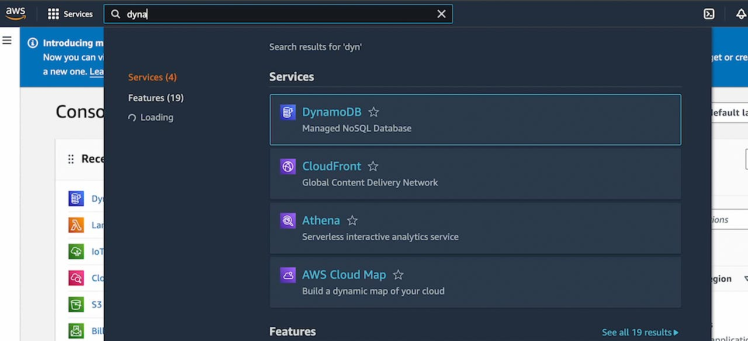
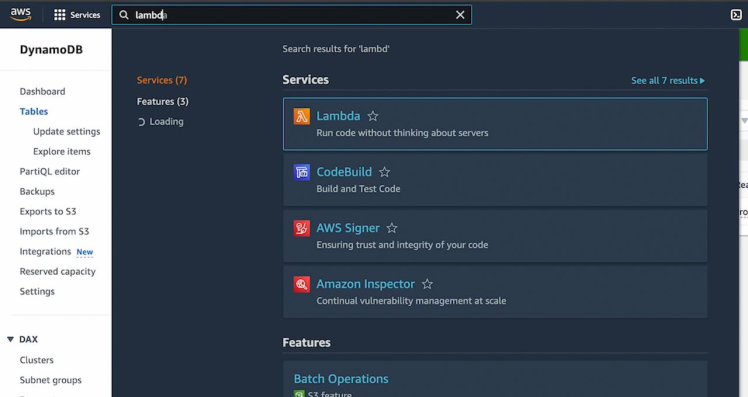
Search dynamodb in the console and select the service.
Select create a table:
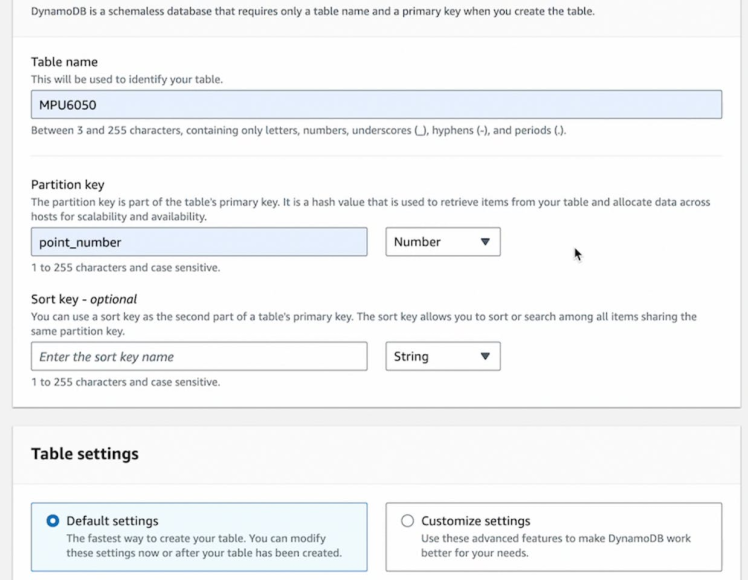
For the Table name you can name it as you like, same thing for the partition key. Make sure the partition key is a number. This is the name of the primary key value in your table, key item added to your table should have a unique partition key value.
Once you configured that, you can just step through and create the table with the default settings. That is all we have to do for the DynamoDB setup, next lets create a Lambda function that is capable of adding rows to this table!
Step 3-) AWS LambdaTo create a lambda, search lambda in the console and select the service:
Select create function. We want to Author from scratch.
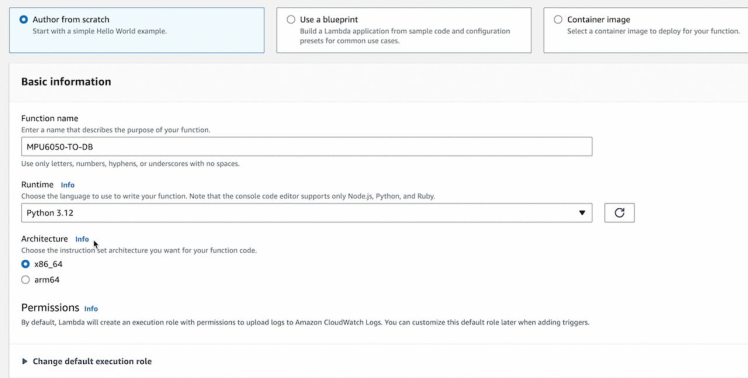
Also we can name it whatever you like, and be sure to select Python for the runtime. Go ahead and create it once that is done.
Next you can scroll down and see the lambda_function.py. This is the code we want to edit. In this example we can simply add the following code:
import boto3
from decimal import Decimal
import logging


# Configure the logging module
logger = logging.getLogger()
logger.setLevel(logging.INFO)

dynamodb = boto3.resource('dynamodb')
table_name = 'MPU6050'
table = dynamodb.Table(table_name)

def lambda_handler(event, context):
    # Log information using the logging module
    logger.info("EVENT")
    ax = Decimal(event['value'])
    topic = event['topic']
    point_number = event['point_number']

    logger.info(point_number)

    # Write to DynamoDB
    table.put_item(
        Item={
            'point_number': point_number,
            'ax': ax,
            'topic': topic
        }
    )

    logger.info('Done Inputting')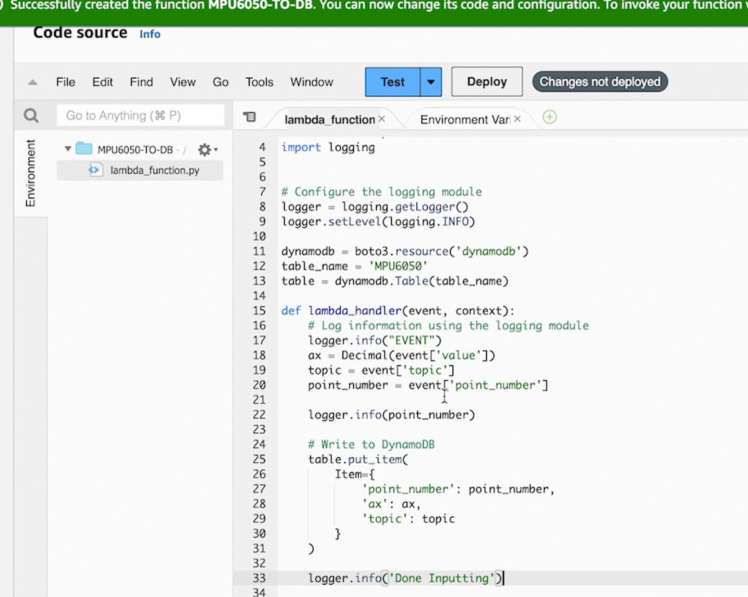
The provided Lambda function is designed to handle events triggered by AWS IoT Core, specifically from an MPU6050 sensor on a Raspberry Pi Pico W. Here's a comprehensive explanation:
The code begins by importing necessary modules: boto3 for AWS interactions, Decimal for precise numeric representation, and logging for generating log messages.
The logging module is configured to use the INFO log level for informational messages.
The DynamoDB resource is initialized to interact with the 'MPU6050' table in AWS DynamoDB.
The lambda_handler function serves as the entry point for the Lambda function, automatically called when an event triggers it.
Informational logging indicates the start of event processing.
Event data, including 'value', 'topic', and 'point_number', is extracted from the incoming event.
The 'point_number' value is logged for reference.
The extracted data is written to DynamoDB using the put_item method.
A final log message signals the completion of the data input process.
In summary, this Lambda function processes IoT Core events, extracts MPU6050 sensor data, and writes it to the 'MPU6050' DynamoDB table, with logging statements aiding in monitoring and debugging.
Note that the names of the fields are dependent on how you pass the event to the Lambda function, this will make more sense once you see the next couple steps, but in todays example we keep it simple, we will only be processing one stream of acceleration data from our sensor. Mind you that this can be made to fit your use case very easily with some simple changes.
Every time you make a change make sure you Deploy your Lambda!
Step 4-) IAM PermissionsAmazon automatically generates a role for your Lambda function. In order to upload to your table that you created, you will have to increase the permissions on this role.
Search IAM in the console and select the appropriate service.

Select the role that was created for your function, in this case it was MPU6050-TO-DB-role.
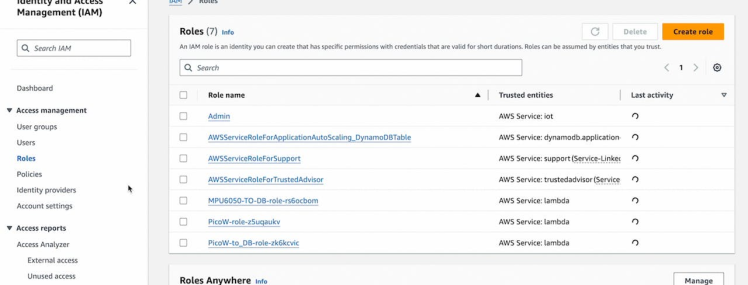
Select add permissions and add the AdministratorAccess policy so that the user has access to anything on AWS. Be cautious with this role in production!

Now that you have this, your lambda function should be set up.
Step 5-) IoT Core SetupFirs thing in IoT Core is to setup policies and create a "Thing" so Amazon can recieve messages straight from you Raspberry Pi. I have another tutorial where I go over this so I copy and paste the instructions here:
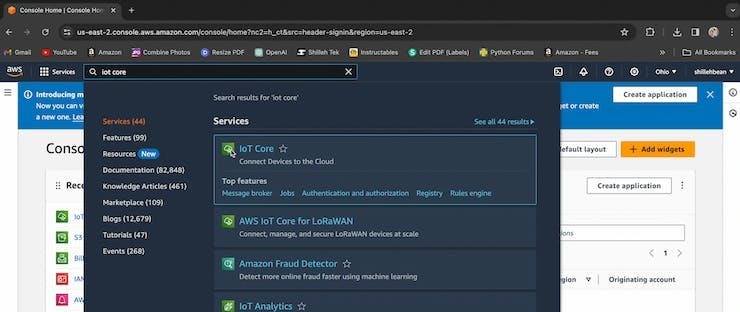
Go to the AWS Console and search IoT Core in the search bar, select IoT Core accordingly to open the service.
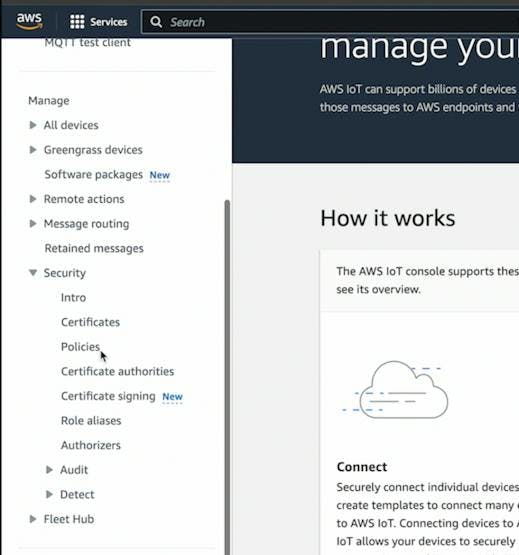
To create a policy scroll down on the left side menu and select Policies under Security.
There are many ways you can customize this policy, for our general purpose we can customize it as follows:
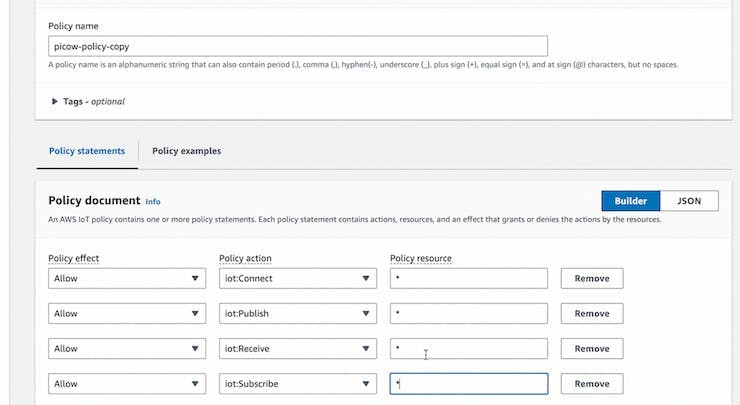
You can name it however you like! For further customization of policies, you can look into their documentation. In general, policies are designed to limit/extend access of a device to the channels of your IoT network.
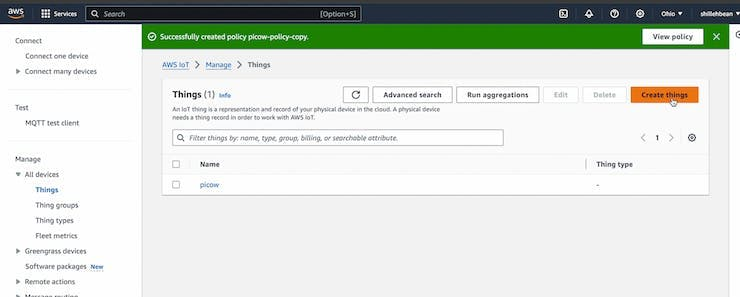
Once you have your policy setup you can create a Thing, go to All Devices in the left bar and select Things > Create Things.
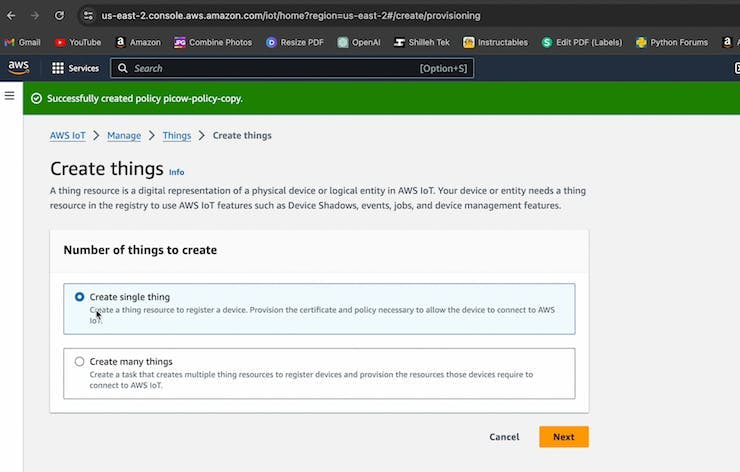
Name it as you like:

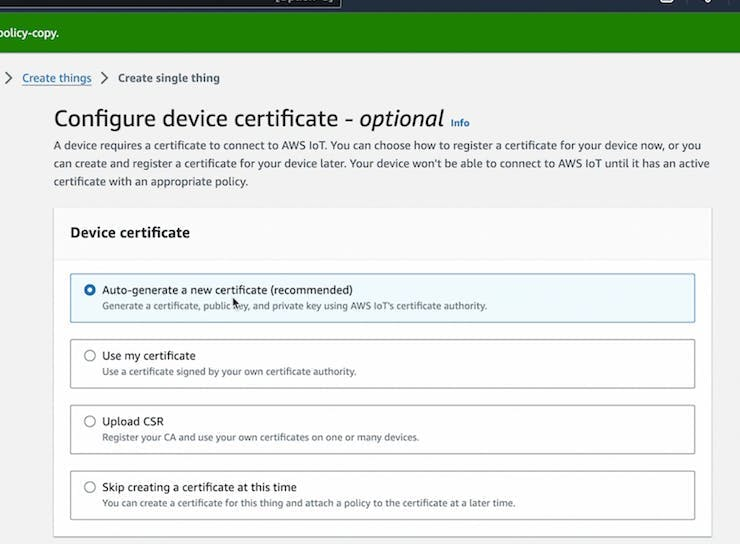
We can auto generate the cert for our purposes:
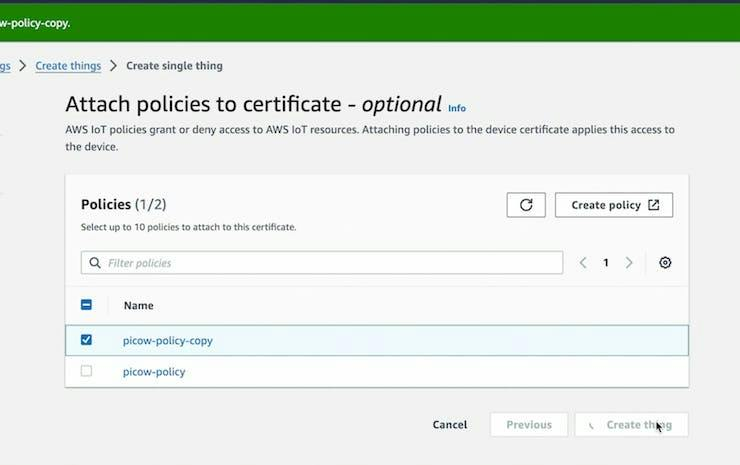
Add the policy you created to your Thing:
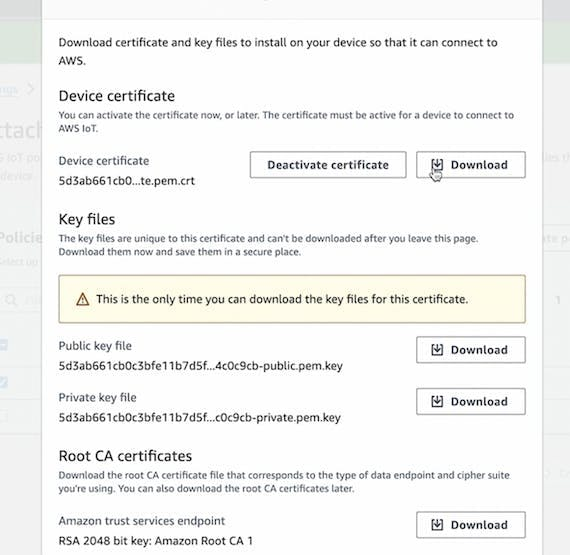
Now you have a Thing, you will need to download 4 files, shown below.
Device Cert, Public and Private Key, and Root CA 2048 file.
You will need to upload these to your Pico W for your MQTT client to work!
Finally, save the endpoint of your AWS IoT Core server, we will also be substituting it in the code. You can find it here by going to the Settings on the left:

Keep this information as private as possible!
Now that you have a Thing with a policy, we want to create an IoT Rule, that will tell AWS to send data from an MQTT channel to the Lambda function, completing the tunneling of information on the AWS side.
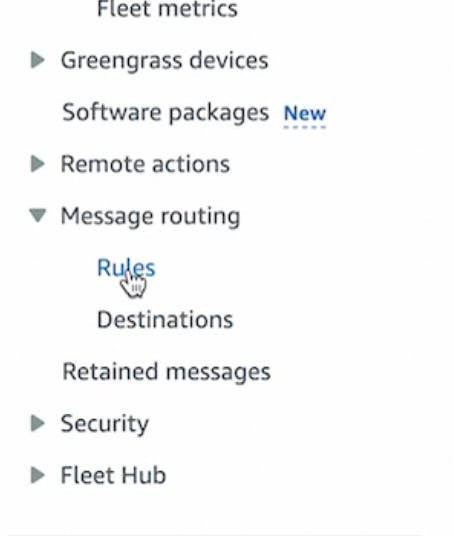
Go to the left panel in Message routing select Rules
Click Create Rule and name it how you like, in this case we name it appropriately for our use case as seen below.

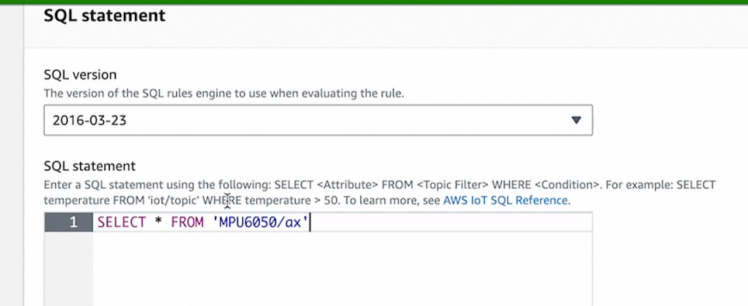
Next we define the selection of the rule, in this case we select all values on the MPU6050/ax topic for our IoT Core. This is telling AWS to take the whole message/attributes from every message on that channel.
Next select the Rule actions, in this case we select a Lambda action and the name of the function we created! AWS makes it easy for us, we can click next and our rule is now done and we can step through and create the rule.

If you got up to this point congrats, you finished connecting the AWS infra together! Now the MicroPython code and you are done.
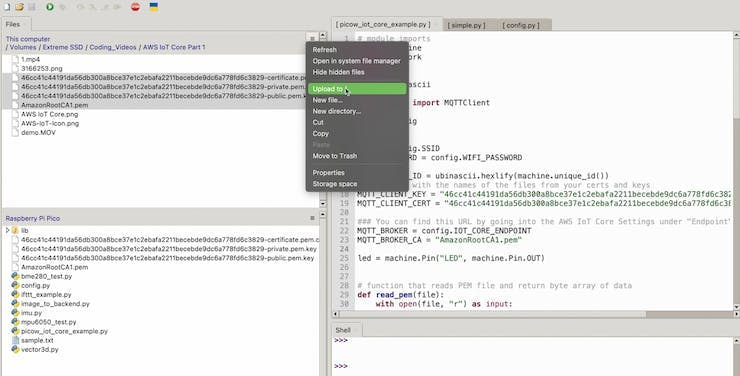
Step 6-) MicroPython and LibraryBefore we start coding the main file we will run, we need to import the 4 files we downloading onto the Pico W and also download the library for MQTT in MicroPython.
Open your MicroPython editor, in this case we are using Thonny to manage files on the Pico W. Upload the 4 files accordingly to the Pico W:
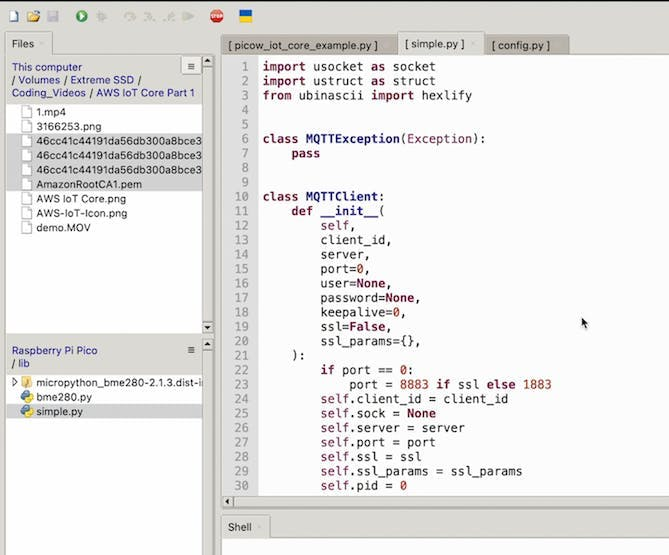
Now download the umqtt library we need to communicate with AWS. You can find the code for this here:
You can copy the contents of this file and substitute it in a file in your lib folder. Create a simple.py file and just copy the code into it. This is all you need for the library.
Now that we have the setup we can create a new file on the Pico W and name it how you like. We will be using the following contents.
This MicroPython code connects a Raspberry Pi Pico W to AWS IoT Core, reads data from an MPU6050 sensor, and publishes the sensor values to an MQTT topic. Let's break down the code and explain its functionality:
import json
import machine
import network
import ssl
import time
import ubinascii
from simple import MQTTClient
from imu import MPU6050
from machine import Pin, I2C
import config
The code imports necessary modules for working with networking, MQTT communication, time, and the MPU6050 sensor. config is a file containing sensitive information like Wi-Fi credentials and IoT Core endpoint, you dont need this file you can just hard code the string in the code.
SSID = config.SSID
WIFI_PASSWORD = config.WIFI_PASSWORD
MQTT_CLIENT_ID = ubinascii.hexlify(machine.unique_id())
MQTT_CLIENT_KEY = "6912b69415aa106cb16c0d8008df840cd4e584f0a273cb66eb98e3941108eb98-private.pem.key"
MQTT_CLIENT_CERT = "6912b69415aa106cb16c0d8008df840cd4e584f0a273cb66eb98e3941108eb98-certificate.pem.crt"
MQTT_BROKER = config.IOT_CORE_ENDPOINT
MQTT_BROKER_CA = "AmazonRootCA1.pem"
This section defines Wi-Fi credentials, MQTT client ID, file paths for SSL/TLS certificates, and the MQTT broker endpoint.
i2c = I2C(0, sda=Pin(0), scl=Pin(1), freq=400000)
imu = MPU6050(i2c)

def read_pem(file):
    with open(file, "r") as input:
        text = input.read().strip()
        split_text = text.split("n")
        base64_text = "".join(split_text[1:-1])
        return ubinascii.a2b_base64(base64_text)

def connect_internet():
    try:
        sta_if = network.WLAN(network.STA_IF)
        sta_if.active(True)
        sta_if.connect(SSID, WIFI_PASSWORD)

        for i in range(0, 10):
            if not sta_if.isconnected():
                time.sleep(1)
        print("Connected to Wi-Fi")
    except Exception as e:
        print('There was an issue connecting to WIFI')
        print(e)


def publish_mpu_values(x):
    ax = round(imu.accel.x, 2)
    payload = {
        "point_number": x,
        "value": str(ax),
        "topic": 'MPU6050/ax'
    }
    mqtt_client.publish('MPU6050/ax', json.dumps(payload))


connect_internet()

key = read_pem(MQTT_CLIENT_KEY)
cert = read_pem(MQTT_CLIENT_CERT)
ca = read_pem(MQTT_BROKER_CA)

mqtt_client = MQTTClient(
    MQTT_CLIENT_ID,
    MQTT_BROKER,
    keepalive=60,
    ssl=True,
    ssl_params={
        "key": key,
        "cert": cert,
        "server_hostname": MQTT_BROKER,
        "cert_reqs": ssl.CERT_REQUIRED,
        "cadata": ca,
    },
)


print(f"Connecting to MQTT broker")
mqtt_client.connect()
print("Done Connecting, sending Values")

for i in range(1, 101):
    print("Publishing point ", i)
    publish_mpu_values(i)
I2C Initialization and MPU6050 Sensor:
The code initializes the I2C (Inter-Integrated Circuit) interface on the Raspberry Pi Pico W, a standard protocol for communication between microcontrollers and peripherals. The I2C interface is set up with a clock (SCL) and data (SDA) line using pins 0 and 1, respectively, at a frequency of 400,000 Hz.
Following the I2C initialization, an MPU6050 sensor is initialized using the I2C interface. The MPU6050 is a 3-axis accelerometer and gyroscope combination sensor. This sensor communicates with the Raspberry Pi Pico W through I2C, providing acceleration data, which is crucial for the IoT application in this code.
SSL/TLS Certificate Configuration and MQTT Initialization:
The code proceeds to configure SSL/TLS certificates required for secure communication with AWS IoT Core. Three files are specified: the private key file (MQTT_CLIENT_KEY), the certificate file (MQTT_CLIENT_CERT), and the root CA file (MQTT_BROKER_CA). The read_pem function is utilized to read and process these PEM-encoded files.
Subsequently, an MQTT client is created using the simple module. The client is configured with the client ID, AWS IoT Core broker endpoint, a keep-alive period of 60 seconds, and SSL/TLS parameters. These parameters include the private key, certificate, CA file, server hostname, certificate requirements, and CA data. The client is then connected to the AWS IoT Core MQTT broker.
In summary, the code initializes the I2C interface for communication with the MPU6050 sensor, reads accelerometer data from the sensor, and publishes this data to AWS IoT Core using MQTT with secure SSL/TLS communication. This setup ensures the integrity and security of the communication between the Raspberry Pi Pico W and AWS IoT Core.
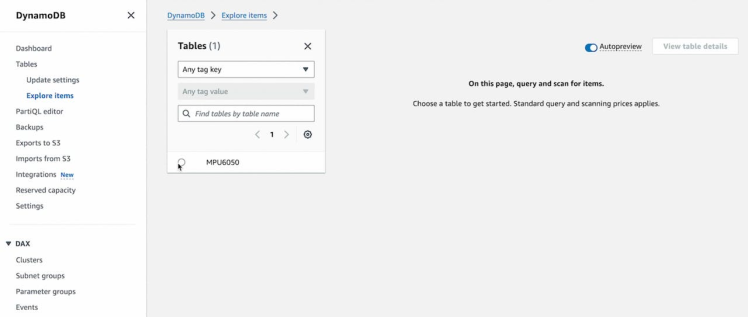
Step 7-) Results and CloudWatch LogsTo prove that the upload worked, go back to the DynamoDb service in AWS and select Explore items and then select your table.
If everything we smoothly and the code ran it is likely you see results in the table:
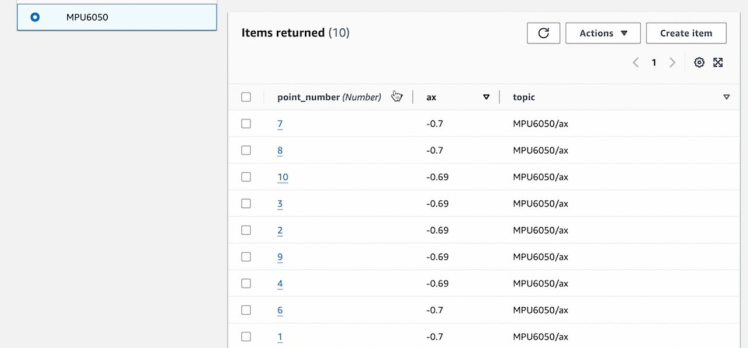
Tada! You just did something awesome.
But also, if you ran the MicroPython code successfully yet you dont see anything in your Table, it is likely you configured something wrong in your Lambda. You can view the logs of your Lambda in CloudWatch
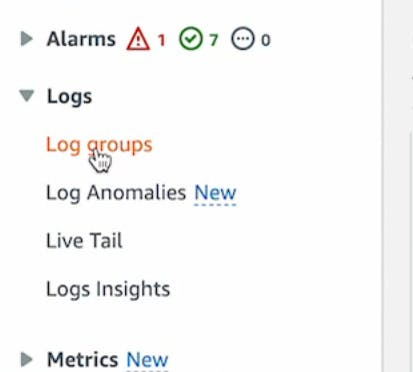
Go the the appropriate Log Group and view the Python logs, it is likely you will see errors and you will have to debug the Lambda function and redeploy if you would like to make changes.
ConclusionYou just learned the complex process of getting data from the Pico W over the internet using MQTT into DynamoDB, this paves the road for some powerful automations you can apply to the data in AWS, pretty cool.
If you enjoyed this tutorial be sure to like, comment, and subscribe to the channel
https://www.youtube.com/@mmshilleh/videos
And if you want to go over this in detail you can book a consulting slot with me on
https://www.buymeacoffee.com/mmshilleh
Let me know what you think; I hope you got it to work and stay tuned for more. Also do not forget you can buy more sensors at ShillehTek on Amazon.
Credits
mahmood-m-shilleh
Mechanical and Software Engineering Background. University at Buffalo 2019 Texas A&M 2021 I make data pipelines for my day job. Outside of work, I participate in online communities regarding Full Stack Engineering, Microelectronics, and more. You can find more details about me on my Youtube Channel. https://www.youtube.com/@mmshilleh Feel free to reach out!
Related products


Leave your feedback...