
How To Find Heading Angle From Mpu9250 With Raspberry Pico W

Made by mahmood-m-shilleh
About the project
Learn how to make a compass by accurately estimating the heading angle from the MPU9250 magnetometer.
Project info
Difficulty: Moderate
Platforms: Raspberry Pi
Estimated time: 1 hour
License: GNU General Public License, version 3 or later (GPL3+)
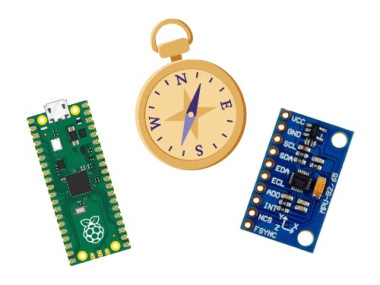
Items used in this project
Hardware components

Story
The MPU9250 is a compact and versatile motion tracking device that combines a 3-axis accelerometer, 3-axis gyroscope, and 3-axis magnetometer into a single package. Its on board magnetometer can be used to estimate the "heading" angle. Heading angle, also known as azimuth, refers to the direction in which an object or person is pointing or facing, relative to a reference direction, typically north. It is usually measured in degrees, with 0 degrees indicating a direction pointing towards true north, and 90 degrees, 180 degrees, and 270 degrees indicating east, south, and west, respectively. The heading angle or azimuth can be determined using readings from a magnetometer with other calibration techniques to accurately estimate which way the north pole is. This can be useful for navigation purposes. We will be showing how to get such a value in this tutorial, which can be translated to a direction (North, South, East, West, etc).
Before getting started, please consider subscribing or supporting channel by donating in the link down below to allow us to produce more content!
Subscribe:
Support:
https://www.buymeacoffee.com/mmshilleh
Step 1-) Understanding Hard-Iron and Soft-Iron BiasesBecause we live in an age where we are surrounded by magnetic material and magnetic fields induced by electronics around us, such as our phone and laptop, we need to be able to remove the fluctuations these variables can cause on our experiment. From our surroundings, there are mainly two biases we need to consider in calibration, that is hard-iron and soft-iron biases.
Hard iron bias refers to a type of systematic error that is caused by the presence of a fixed magnetic field, such as the Earth's magnetic field or nearby ferromagnetic materials, that can distort the magnetometer readings. Hard iron bias can be corrected by subtracting a fixed offset value from the magnetometer readings, which can be determined by calibrating the sensor in a known magnetic field environment.
Soft iron bias, on the other hand, is caused by the presence of a non-uniform magnetic field, such as the distortion of the Earth's magnetic field by nearby objects or materials. Soft iron bias can result in the magnetometer readings being skewed towards a particular direction or axis. Soft iron bias can be corrected by using a calibration process that involves rotating the sensor in a 3D space and collecting magnetometer data, which can be used to calculate correction values that can be applied to the magnetometer readings to compensate for the non-uniform magnetic field.
In our MicroPython code, we will use a MPU9250 library that has a calibration function which accounts for both biases. For more details of the nature of the calibration please see https://www.appelsiini.net/2018/calibrate-magnetometer/
Step 2-) Understanding Low-Pass FilterDespite calibration, we can still get sudden fluctuations, that is, random spikes in magnetic readings in our magnetometer! We do not want sudden fluctuations to deter us from the signal we are trying to look for, which is Earths magnetic field. To deal with spikes of useless data we can implement a low-pass filter in a couple lines of code shown here:
def low_pass_filter(prev_value, new_value):
    return 0.85 * prev_value + 0.15 * new_value
You can see that the weights in the filter add up to 1 (0.85 + 0.15), this has to be the case. The premise of the filter is that we essentially trust the previous value more than we trust a new value. By taking this approach to sensor readings, we can eliminate or reduce this noise and improve the overall quality of our signal measuring.

The video shows an example of how this can be applied to an acceleration signal. You can see in red that the unfiltered raw value for acceleration is susceptible to sudden change while the filtered signal in the blue is much more stable. While this does introduce a bias in our measurements it is okay because the signal always converges to the true signal over a period of time if the stimulus is consistent. This is the filter we will apply on our magnetometer readings to get more accurate heading angle estimation
Step 3-) Physical Setup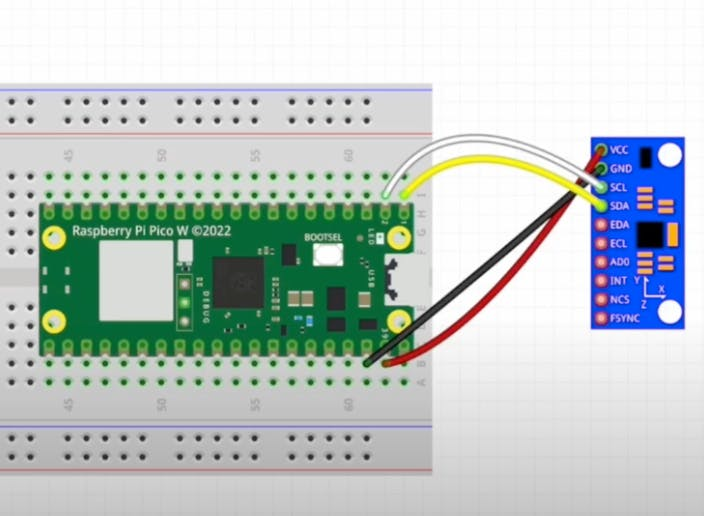
Make connections as shown
Step 4-) Code and LibraryYou will need to add three libraries to your code to get readings, all found here
https://github.com/kevinmcaleer/mpu9250
- MPU9250
- ak8963
- MPU6500
Once you have such libraries saved you can use my example code here to start getting readings
from machine import I2C, Pin
import math
import utime

from mpu9250 import MPU9250

i2c = I2C(0, sda=Pin(0), scl=Pin(1), freq=400000)
sensor = MPU9250(i2c)
filtered_magx, filtered_magy = 0, 0
DECLINATION = -1 * 3.19

# Want to thank Kevin McAleer

def low_pass_filter(prev_value, new_value):
    return 0.85 * prev_value + 0.15 * new_value


def compass(angle):
    if angle > 337 or angle <= 22:
        direction = 'North'
    elif angle > 22 and angle <= 67:
        direction = 'North East'
    elif angle > 67 and angle <= 112:
        direction = "East"
    elif angle > 112 and angle <= 157:
        direction = "South East"
    elif angle > 157 and angle <= 202:
        direction = "South"
    elif angle > 202 and angle <= 247:
        direction = "South West"
    elif angle > 247 and angle <= 292:
        direction = "West"
    elif angle > 292 and angle <= 337:
        direction = "North West"
    return direction


sensor.ak8963.calibrate()

while True:

    # We do not need the z value
    magx_new, magy_new, _ = sensor.magnetic

    filtered_magx = low_pass_filter(filtered_magx, magx_new)
    filtered_magy = low_pass_filter(filtered_magy, magy_new)

    heading_angle_in_degrees = math.atan2(filtered_magx, filtered_magy) * (180 / math.pi)
    heading_angle_in_degrees_plus_declination = heading_angle_in_degrees + DECLINATION

    if heading_angle_in_degrees_plus_declination < 0:
        heading_angle_in_degrees += 360
        heading_angle_in_degrees_plus_declination += 360

    print('###Without Declination###')
    print(heading_angle_in_degrees)
    print(compass(heading_angle_in_degrees))
    print('###Plus Declination###')
    print(heading_angle_in_degrees_plus_declination)
    print(compass(heading_angle_in_degrees_plus_declination))

    utime.sleep_ms(100)
The main thing in this code is the calibration, which you will need to ensure the accelerometer is on a flat horizontal surface. Once calibration begins be sure to move your accelerometer around in a figure 8 fashion (shown in my Youtube video).
Another important thing is the concept of declination. Which will be needed to calculate the direction to the true north pole rather than the magnetic north pole. You can find your declination angle by searching your location online on Google! Everyone's declination can be dramatically different depending on what area you are on the Earth, so be sure to change it in the code...
If you have done everything accurately you will get results on par with the compass app on the iPhone or other apps.
ConclusionHope you learned something awesome in this tutorial and you got great results. For any confusions please watch the Youtube Video as I go into more detail there. Do not forget to like, comment, and subscribe. As always, thanks for reading and stay tuned.
Credits
mahmood-m-shilleh
Mechanical and Software Engineering Background. University at Buffalo 2019 Texas A&M 2021 I make data pipelines for my day job. Outside of work, I participate in online communities regarding Full Stack Engineering, Microelectronics, and more. You can find more details about me on my Youtube Channel. https://www.youtube.com/@mmshilleh Feel free to reach out!
Related products


Leave your feedback...