
How To Connect Mpu9250 And Raspberry Pi (part 1)

Made by mahmood-m-shilleh
About the project
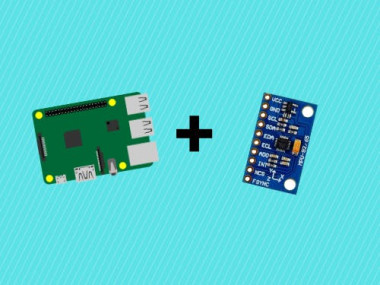
Discover how to capture magnetometer, accelerometer, and gyroscope data from the MPU9250 9-axis sensor using the Raspberry Pi.
Project info
Difficulty: Easy
Platforms: Raspberry Pi
Estimated time: 1 hour
License: GNU Lesser General Public License version 3 or later (LGPL3+)
Items used in this project

Story
Discover how to capture magnetometer, accelerometer, and gyroscope data from the MPU9250 9-axis sensor using the Raspberry Pi. Although I'm utilizing the Raspberry Pi 4B for this guide, you can apply these instructions to any Raspberry Pi model that supports Python. By the end of this tutorial, you'll be proficient in sampling data and establishing a physical connection between the MPU9250 and your Raspberry Pi.
Before reading the remainder, be sure to subscribe and support the channel if you have not!
Subscribe:
Support:
https://www.buymeacoffee.com/mmshilleh
Hire me at UpWork to build your IoT projects:
https://www.upwork.com/freelancers/~017060e77e9d8a1157
Part 1: Physical Setup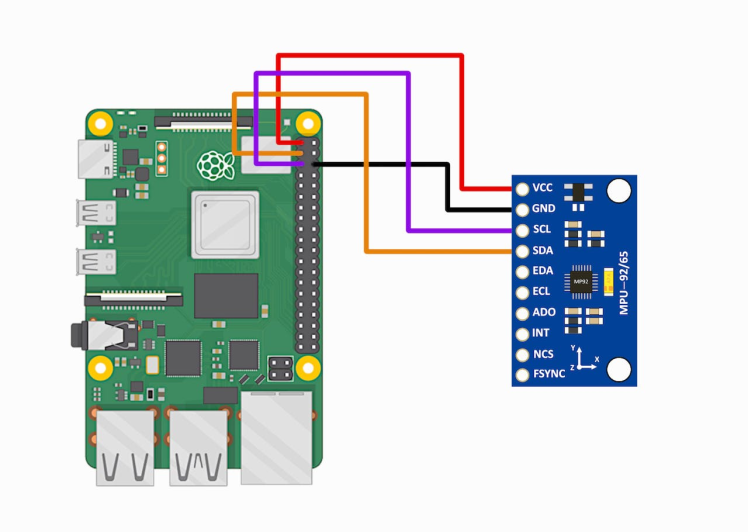
Connect your Jumper Wires to your Raspberry Pi as shown in the diagram above.
You can purchase Jumper Wires here. This is a simple I2C connection with power, you only need four wires to do this. I recommend a breadboard as well for these sorts of projects.
Part 2: Library and System SetupBefore connecting the MPU9250, ensure that I2C is enabled on your Raspberry Pi:
- Open the Raspberry Pi Configuration Tool from the Preferences menu in the desktop environment, or run
sudo raspi-configin the terminal. - Navigate to
Interface Options. - Select
I2Cand enable it. - Reboot your Raspberry Pi.
You'll need some libraries to communicate with the MPU9250. We'll use Python for our example:
- Update your package list:
sudo apt-get update - Install Python's package manager if you haven't:
sudo apt-get install python3-pip - Install the necessary Python libraries for I2C:
sudo pip3 install smbus2 - Install a library specifically for the MPU9250, such as
mpu9250-jmdev:sudo pip3 install mpu9250-jmdev
With our system and hardware now fully prepared, we're ready to dive into the coding aspect of our project. The Python script below demonstrates a straightforward approach to continuously reading and displaying data from all nine degrees of freedom provided by the MPU9250 sensor. This basic example serves as a foundation for more complex applications.
import time
from mpu9250_jmdev.registers import *
from mpu9250_jmdev.mpu_9250 import MPU9250

# Create an MPU9250 instance
mpu = MPU9250(
    address_ak=AK8963_ADDRESS,
    address_mpu_master=MPU9050_ADDRESS_68,  # In case the MPU9250 is connected to another I2C device
    address_mpu_slave=None,
    bus=1,
    gfs=GFS_1000,
    afs=AFS_8G,
    mfs=AK8963_BIT_16,
    mode=AK8963_MODE_C100HZ)

# Configure the MPU9250
mpu.configure()

while True:
    # Read the accelerometer, gyroscope, and magnetometer values
    accel_data = mpu.readAccelerometerMaster()
    gyro_data = mpu.readGyroscopeMaster()
    mag_data = mpu.readMagnetometerMaster()

    # Print the sensor values
    print("Accelerometer:", accel_data)
    print("Gyroscope:", gyro_data)
    print("Magnetometer:", mag_data)

    # Wait for 1 second before the next reading
    time.sleep(1)
In this snippet, we create an instance of the MPU9250 class using specific parameters that define the sensor's configuration. Noteworthy among these are gfs, afs, and mfs, which determine the full-scale ranges for the gyroscope, accelerometer, and magnetometer, respectively. These parameters are crucial as they allow you to tailor the sensitivity and range of the measurements to fit your project's requirements. Adjusting them can significantly impact the precision and nature of the data you collect, making your sensor more adaptable to different scenarios.
For users with a genuine MPU9250 sensor, this script should execute seamlessly. The ease with which we can instantiate and configure the MPU9250 object with this library underscores its versatility. Whether you're looking to capture subtle movements or detect more significant orientations and magnetic fields, adjusting the configuration parameters enables fine-tuning of the device's responsiveness to physical phenomena.
Once you run the provided script, your console will begin displaying a stream of data captured from the MPU9250 sensor, including readings from the accelerometer, gyroscope, and magnetometer. It's important to understand the units and scale of these values to interpret them correctly:
- Accelerometer Values: The acceleration data is presented in units of 'G', where 1 G represents the acceleration due to gravity at the Earth's surface (approximately 9.81 m/s^2). This means if the sensor is lying flat on a stable surface, you can expect the Z-axis to show a value close to ±1 G (depending on its orientation), while the X and Y axes should be near 0 G, indicating no acceleration.
- Gyroscope Values: The gyroscope readings are given in degrees per second (°/s). These values represent the rate of rotation around each of the sensor's three axes. When the sensor is stationary, the gyroscope values should be close to 0, indicating no rotation. As the sensor rotates around any of its axes, the gyroscope detects this movement and outputs the rate of rotation.
- Magnetometer Values: The magnetometer readings are provided in microteslas (µT) and represent the strength and direction of the magnetic field around the sensor. Unlike the accelerometer and gyroscope, the magnetometer measures environmental magnetic fields, which include the Earth's magnetic field. This makes it invaluable for applications like compass navigation or detecting magnetic anomalies.
Finally one thing you will notice is that the resting values for the device may seem off, this is expected and we will discuss a simple calibration process in the next tutorial to correct for this flaw, as all accelerometers come with an inherent inaccuracy that needs to be corrected for. Stay tuned for the next video and let me know if you have any questions!
ConclusionWe showed you how to easily connect to the MPU9250 using a convenient library in Python and how to interprate values with a simple script. In the next videos we will build upon this and calibrate the accelerometer, gyro, and magnetometer to get more accurate values.
Do not forget to subscribe to Shilleh on YouTube for more!
Credits
mahmood-m-shilleh
Mechanical and Software Engineering Background. University at Buffalo 2019 Texas A&M 2021 I make data pipelines for my day job. Outside of work, I participate in online communities regarding Full Stack Engineering, Microelectronics, and more. You can find more details about me on my Youtube Channel. https://www.youtube.com/@mmshilleh Feel free to reach out!
Related products


Leave your feedback...