
Getting Started With Renesas Rx72n Envision Kit

Made by vinayyn
About the project
Renesas RX72N Envision Kit Introduction and Creating a simple Example Using e2 Studio.
Project info
Difficulty: Moderate
Platforms: Renesas
Estimated time: 2 hours
License: GNU General Public License, version 3 or later (GPL3+)
Items used in this project

Story
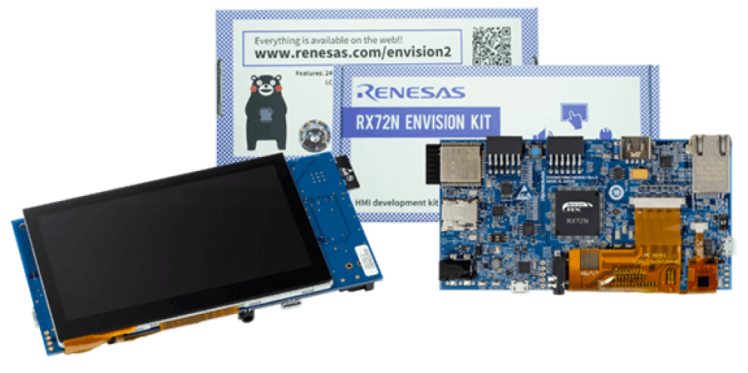
For an HMI development, Renesas RX72N envision kit contains all the requirements to start easily. The developer needs to focus only on the firmware when you select Renesas RX72N envision kit, all the other HMI required components are included in the kit. Let's go through the features and specifications details of the Renesas RX72N Envision kit.
Features
- Renesas RX72N Envision Kit's Microcontroller is 32 -Bit With a Maximum Operating Frequency of 240MHz,4MB Flash memory, and 1MB RAM.
- Supports communications such as Wi-Fi/ BLE communications Using EPS32-WROOM2-32D and Ethernet with RJ45.
- RX72N Envision kit comes with a WQVGA LCD with a capacitive touch panel allowing GUI development using an LCD controller and a 2D drawing engine.
- Two stereo MEMS microphones to support voice input.
- Audio DSP D2Audio, Stereo audio output
- ISL29034ambient and infrared light sensor.
- User Interfacing LED (Blue LED).
- Extended storage is available using Macronix's 32Mbit serial flash with USB and microSD slots.
- The RX72 Envision Kit is Equipped with an onboard E2 Lite emulator.
- USB Host Connector
- One User Button
- Dedicated 5 Volt Power Supply Jack
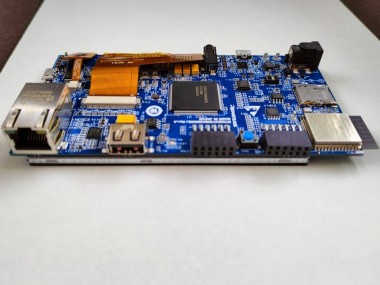
EXTERNAL VIEW OF COMPONENT SIDE
EXTERNAL VIEW OF COMPONENT SIDE

EXTERNAL VIEW OF COMPONENT SIDE
RX72N Envision Kit Advantages over the Other Platform Product
- Large WQVGA LCD with a capacitive touch panel.
- On-Board Emulator.
- On-Board Wi-Fi/ BLE communications Using EPS32-WROOM2-32D
- Two stereo MEMS microphones to support voice input for HMI.
- Multiple GUI Development Options (emWin, Aeropoint GUI
Renesas RX72N Envision kit is Specifically designed for HMI and IoT applications. for HMI application Capacitive Touch panel and Audio Input and outputs is the perfect combo in this board. Developing a Graphical user interface using Aeropoint GUI minimizes the GUI firmware development, This feature helps the firmware developer to concentrate on the other Hardware features. Onboard emulators help to debug easily. Secured WIFI-BLE communications using Onboard ESP32 helps to create Internet of things applications. The large capacitive touch panel will give more space to integrate better GUI. The power management system provides continuous power distribution with less thermal generation.
A Simple Example Creating using e2 Studio
You can easily start with The RX72N Envision Kit By following the below steps.
1. Download and Install The e2 studio from the official website of Renesashttps://www.renesas.com/us/en/software-tool/e-studio. To know how to install the e2 studio please go through the link https://www.renesas.com/us/en/software-tool/e-studio.
2. Download and Install C/C++ Compiler Package for RX Family by followinghttps://www.renesas.com/us/en/software-tool/cc-compiler-package-rx-family.
Note: If you do not install the Compiler package errors will appear as
E0511175:Neither isa nor cpu is specified.
make: *** [src/smc_gen/general/r_smc_interrupt.obj] Error 1 src/smc_gen/general/subdir.mk:26: recipe for target 'src/smc_gen/general/r_smc_interrupt.obj' failed "make -j4 all" terminated with exit code 2. Build might be incomplete.
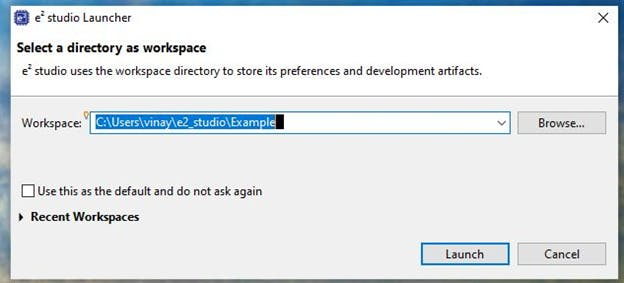
3. After Successful Installation Of e2 studio Open The e2 studio. After a few seconds Workspace Window will pop up Here we need to give a name to Workspace. I have given the Workspace Name as an Example. After entering the workspace name Enter launch.
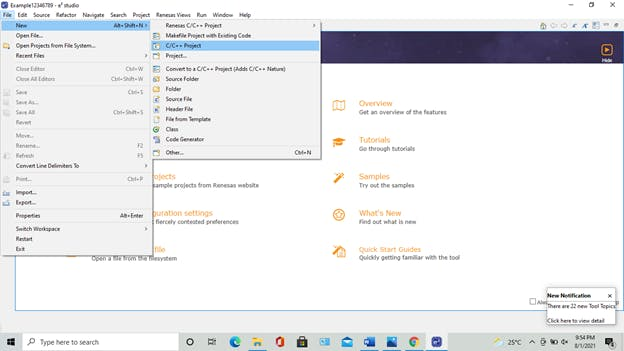
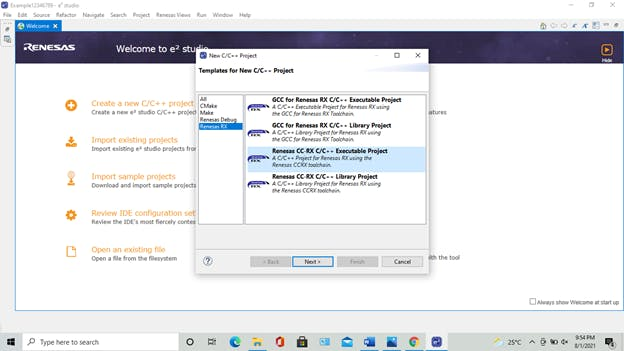
4. Go to file Select C/C++ Project.
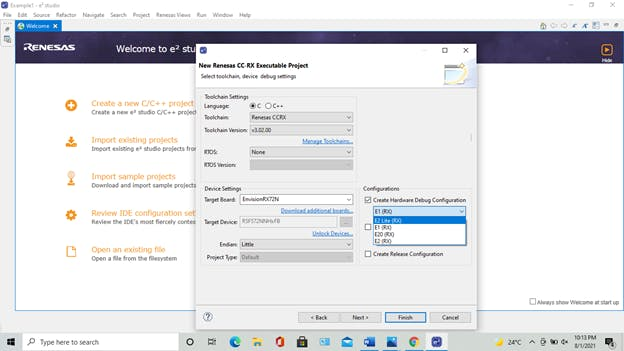
5. Then Select Renesas CC RX C/C++ Executable Project and click Next.
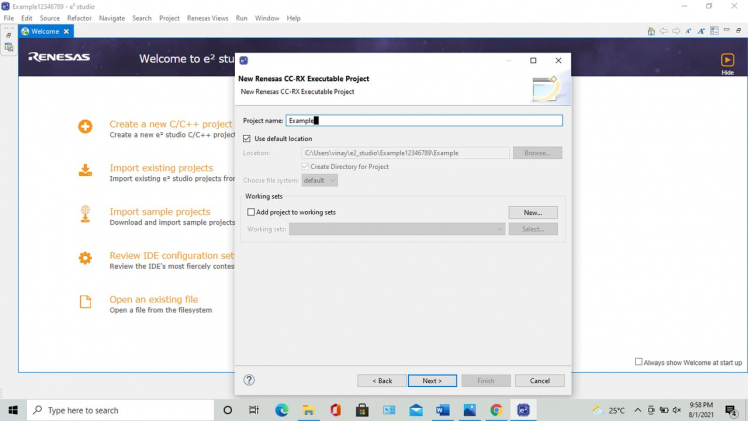
6. Give a Project Name
7. Select Toolchain version V3.02
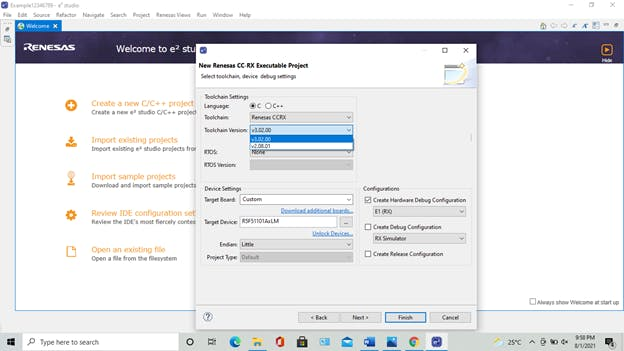
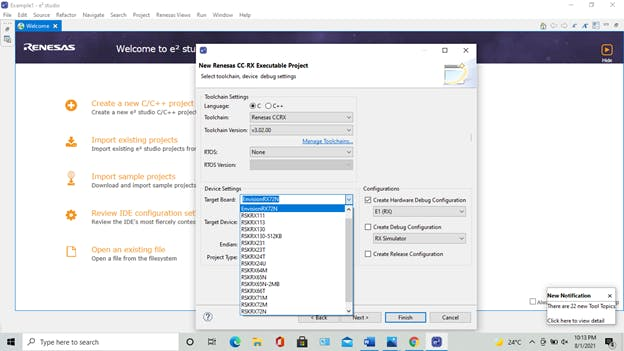
Select Target Board As Envision RX72N
Select Hardware Debug Configuration as E2 Lite RX and Click Next.
Select use Smart Configurator and Select Finish.
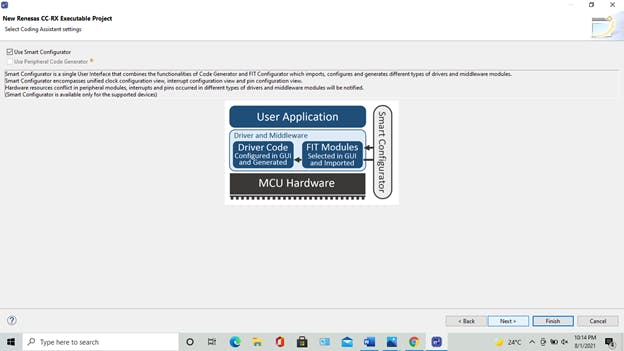
Smart Configuration window will Pop-up
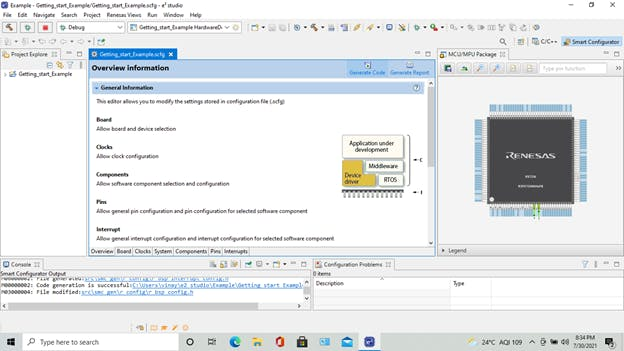
Click On the Board and check the right board is selected.

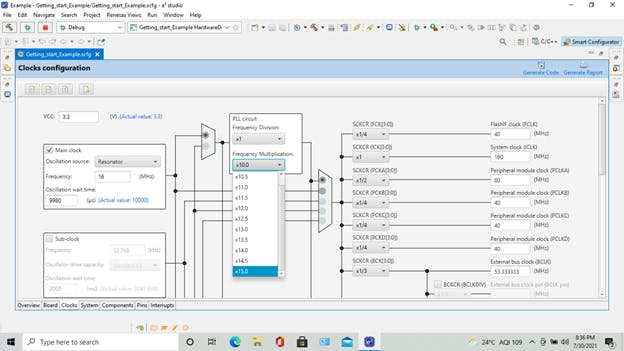
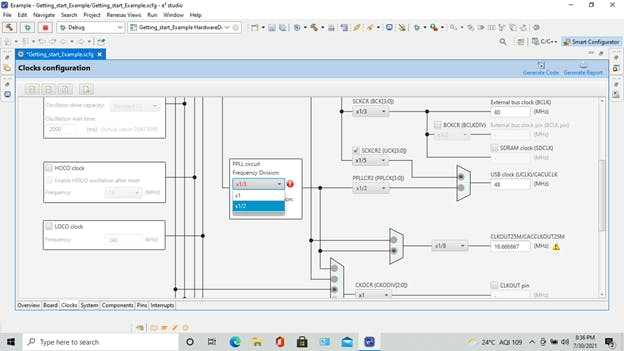
Now Make clock configuration settings from clocks. in the PLL Circuit select Frequency Multiplication 15.
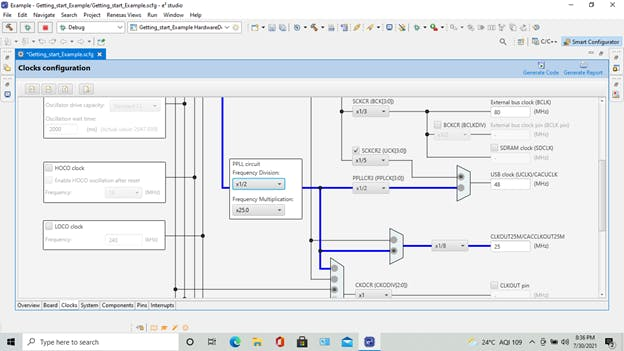
In PPLL Circuit select Frequency Division as 1/2 and Click on Generate Code and Enter Proceed.
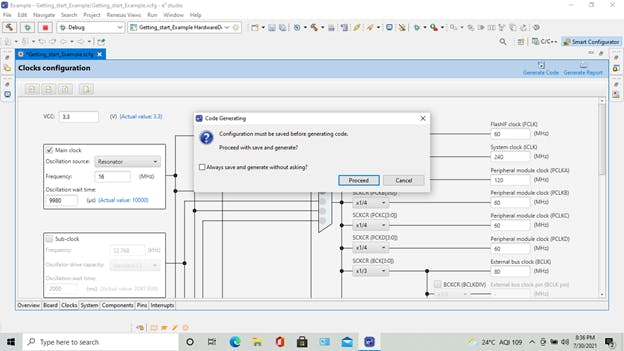
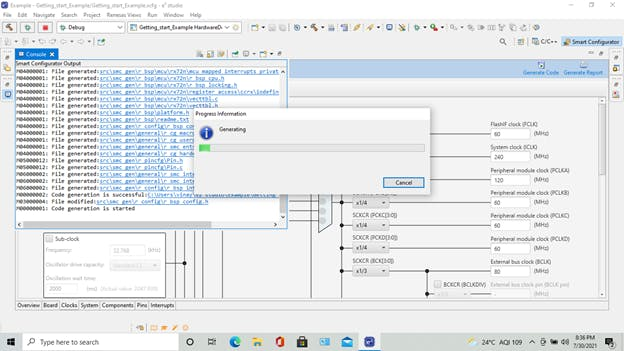
Code will be generated and automatically updated to the Main File.
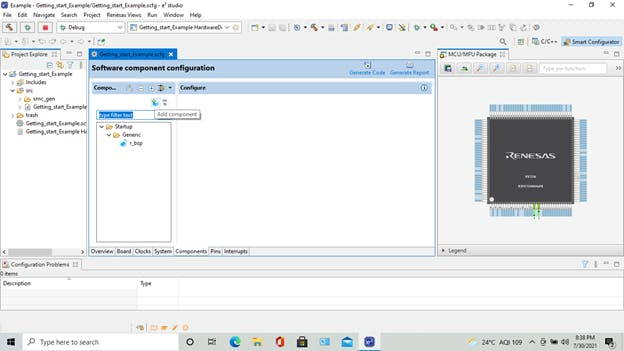
Now we need to add the required software components to The main file click on Components and Click On the Plus Symbol to add the Component.
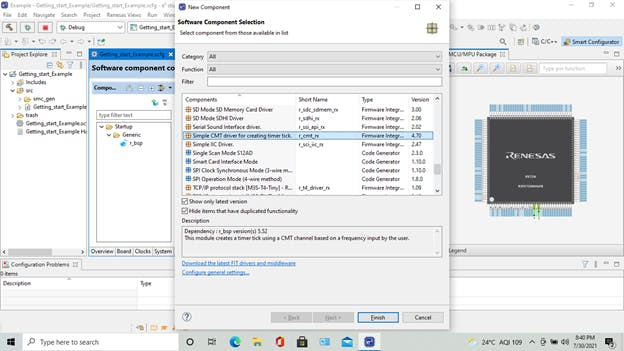
Select Simple CMT Driver for Creating Time tick and Click On Generate Code.

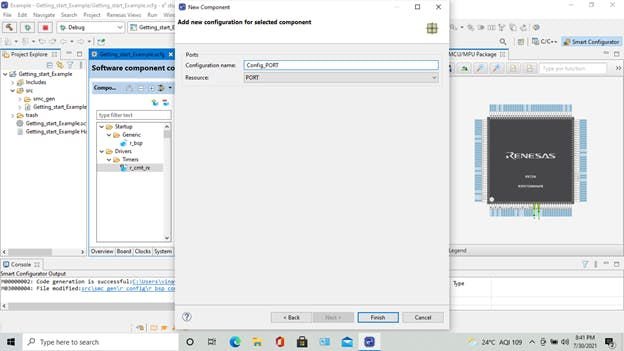
Select Ports From software component configuration and click Finish.

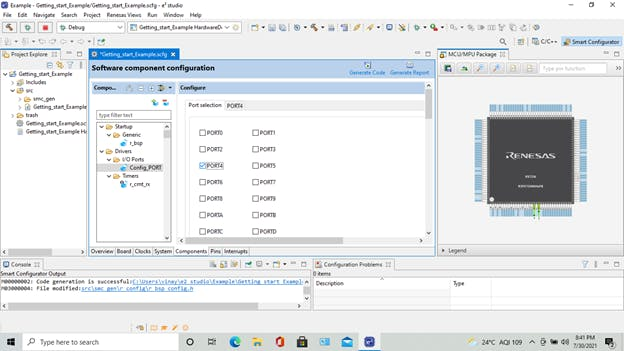
In Port Selection select PORT4 and From Port4 Select P40 as OUT And OUTPUT1 And Generate Code.

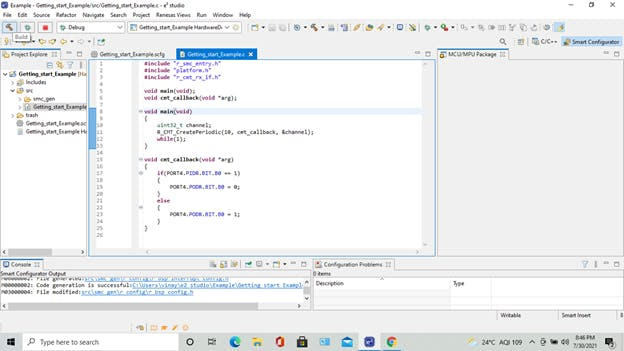
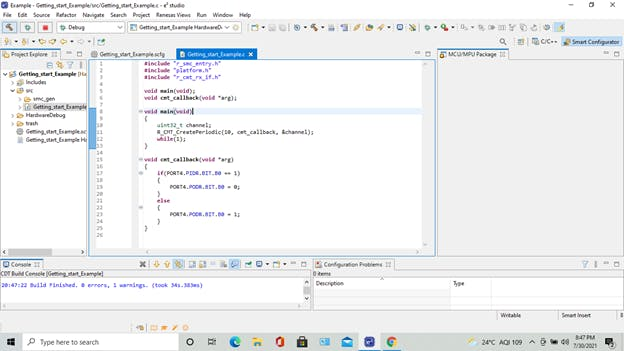
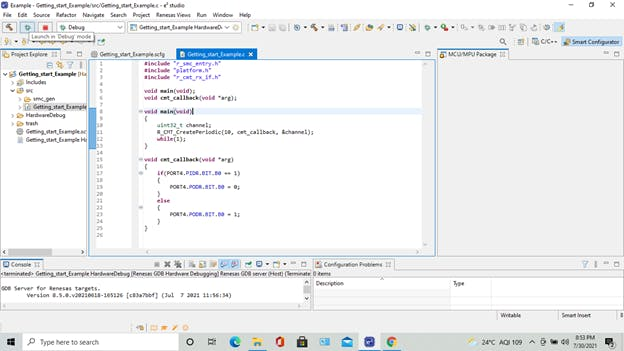
Now we need to add the main code here I am creating a LED Blinking Example. To write the code to blink the LED we need to open ".C " From src folder.
#include "r_smc_entry.h"
#include "platform.h"
#include "r_cmt_rx_if.h"

void main(void);
void cmt_callback(void *arg);

void main(void)
{
	uint32_t channel;
	R_CMT_CreatePeriodic(10, cmt_callback, &channel);
	while(1);
}

void cmt_callback(void *arg)
{
	if(PORT4.PIDR.BIT.B0 == 1)
	{
		PORT4.PODR.BIT.B0 = 0;
	}
	else
	{
		PORT4.PODR.BIT.B0 = 1;
	}
}
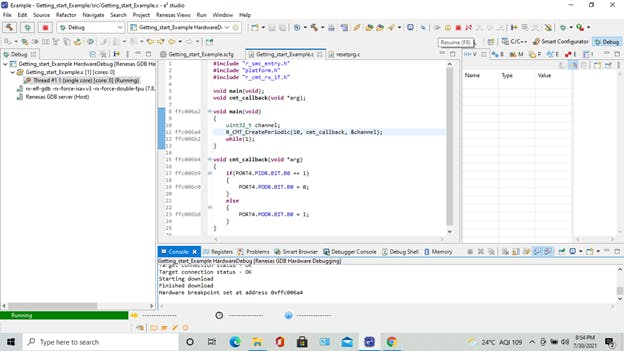
if the Code doesn't contain any error it will display the Zero errors window
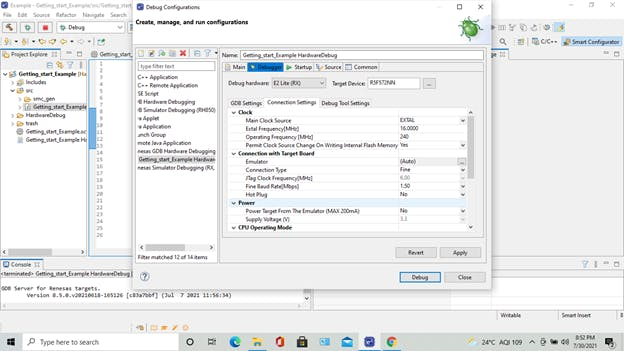
In order to upload the code, we have to set Debug configuration. To make the settings Go to Run Tab and select Debug Configuration, From the Debugger Tab make The Main clock Source as Extal. Extal Frequency As 16 Mhz, Connection Type as Fine, Power Target From The Emulator as NO, And Click Apply.


Click on Launch in Debug Mode, The software starts to upload the code to the RX72N. When the perspective switch window pop-ups select Switch status of uploading code is displayed as Finished Download.

To Run The Code On the RX72N ENVISION KIT Press The PLAY/Resume Tab. If the device is successful The status will be displayed As Running
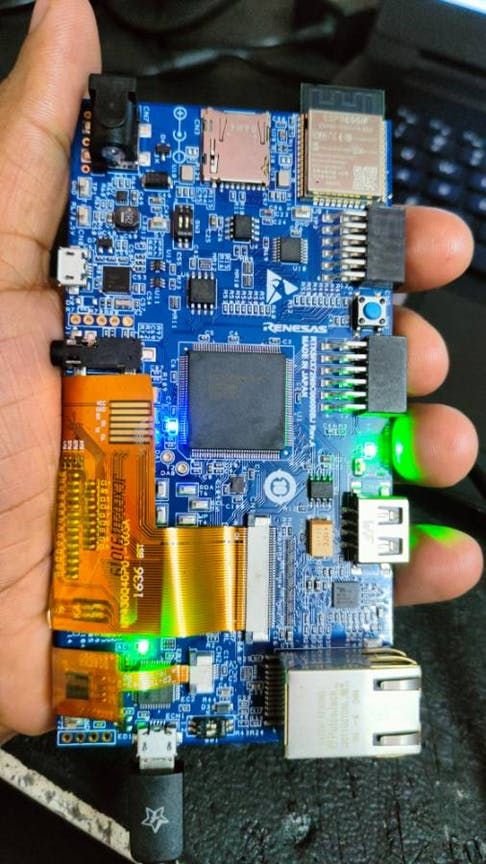
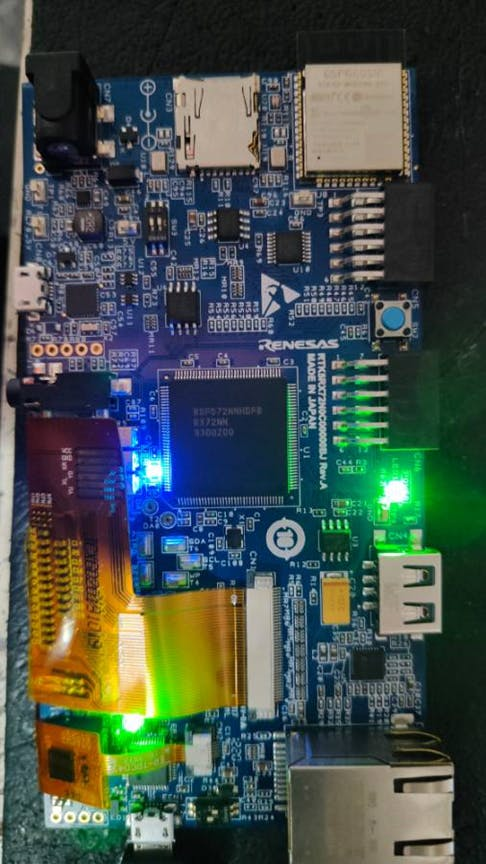
On the Board, You can see The user LED (Blue LED) Will start blinking.
You Can Also find the Instructions and Demo in the Below Video.
Schematics, diagrams and documents
Code
Credits
Related products

Leave your feedback...